Nothing can be more frustrating than 3D model printing with gaps and falling apart. In this post we will talk about the things you can do to prevent your model from printing with gaps or holes.
Firstly, you should know that in order to print a 3D model as a single object, the mesh must be completely manifold or “watertight”.
A “watertight” object means that if you fill the object with water, it will have no leaks. Non-watertight or non-manifold mesh occurs when the dots or edges have not been connected to create a solid object. Or, suppose you have a model with elements that overlap one another. This technique confuses the slicing program that generates the G-code and the model gets printed with errors.
Creating a watertight or manifold model is not simple. It is even more difficult to try to repair a non-manifold object than building it from scratch.
Make your models watertight
Overlapping geometry is your worst nightmare. If you’re not attentive and careful when modeling, it can ruin all your work and you will be forced to waste a lot of time correcting or you might see yourself in the position to start over.
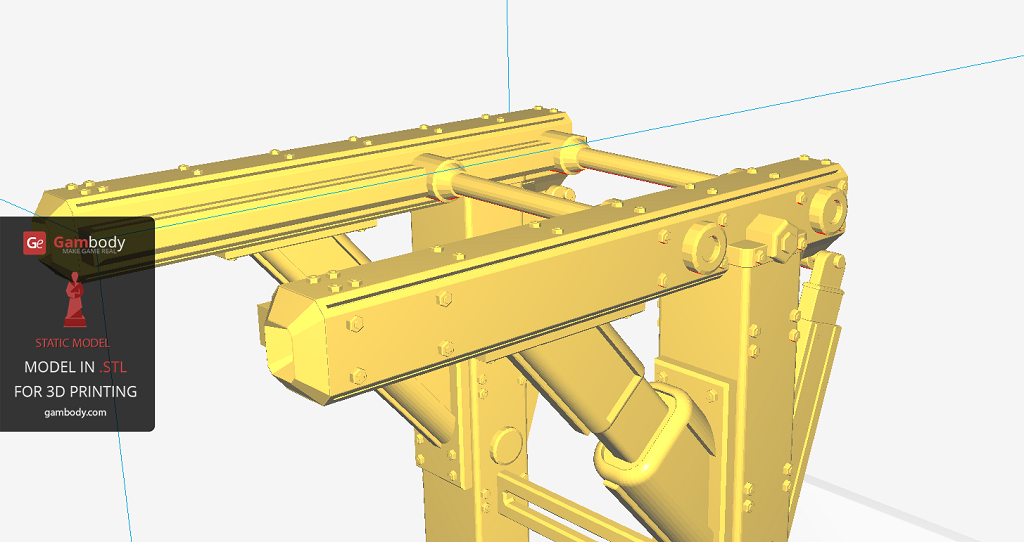
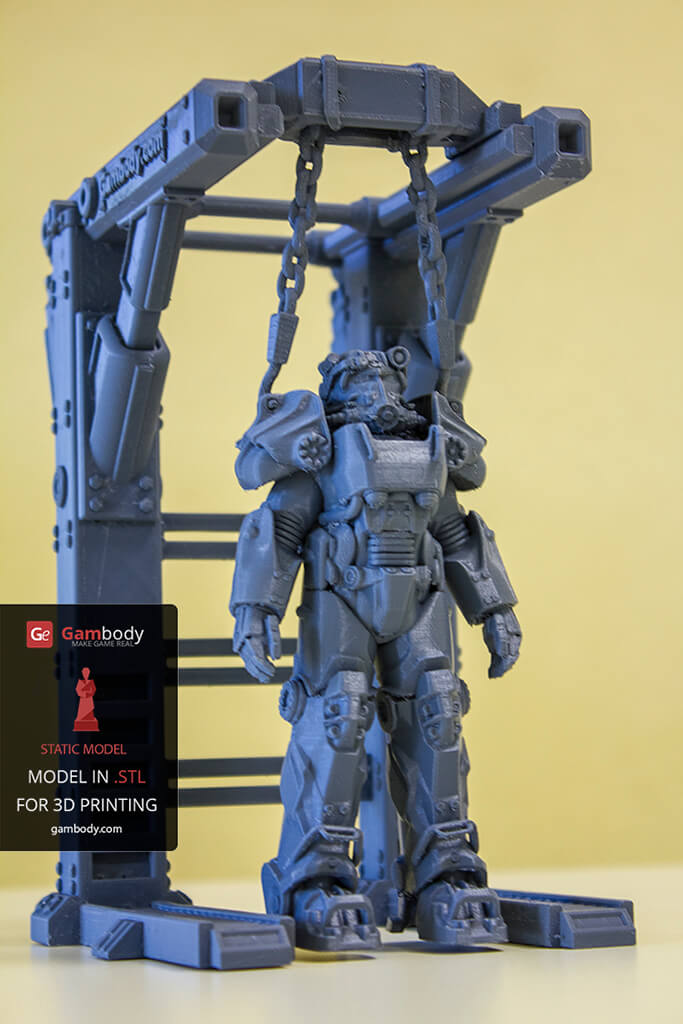
The non-manifold problem occurs most frequently in 3D models with complex geometry. Like the one in the picture below.
This is a complex 3D model of Fallout 4 Power Armor, consisting of thousands of polygons. The entire model (figurine plus support)has been modeled using primitive elements. For an object to be watertight, there should be no spaces or gaps between its intersecting or overlapping inner and outer faces.
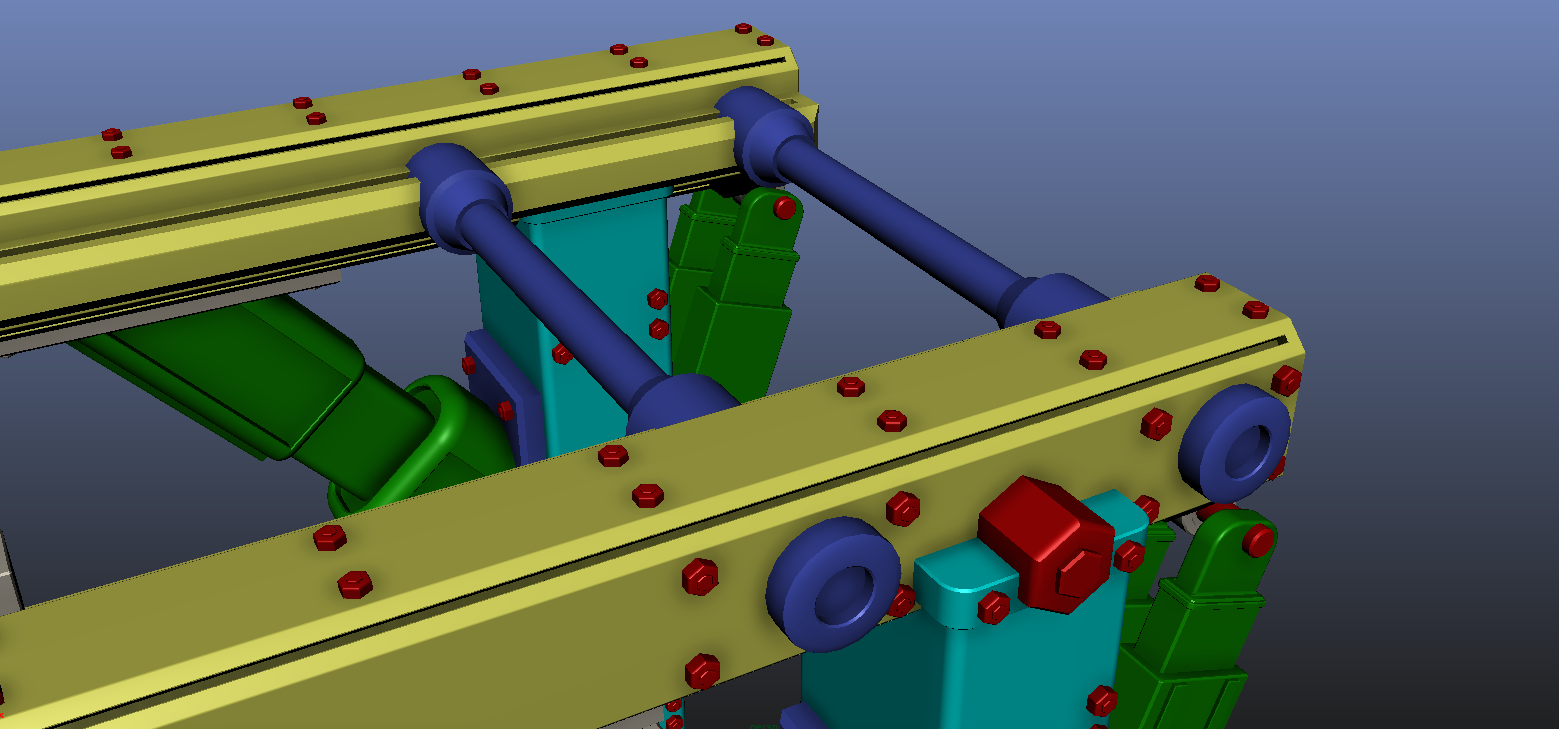
In the picture below you can see all the elements an object is made of. For this purpose, we’ve colored them differently, to make it easier for you to distinguish between different elements. This is how most complex objects for 3D printing are modeled.
This is the X-ray view mode of the object, where you can clearly see how the elements “merge” together.
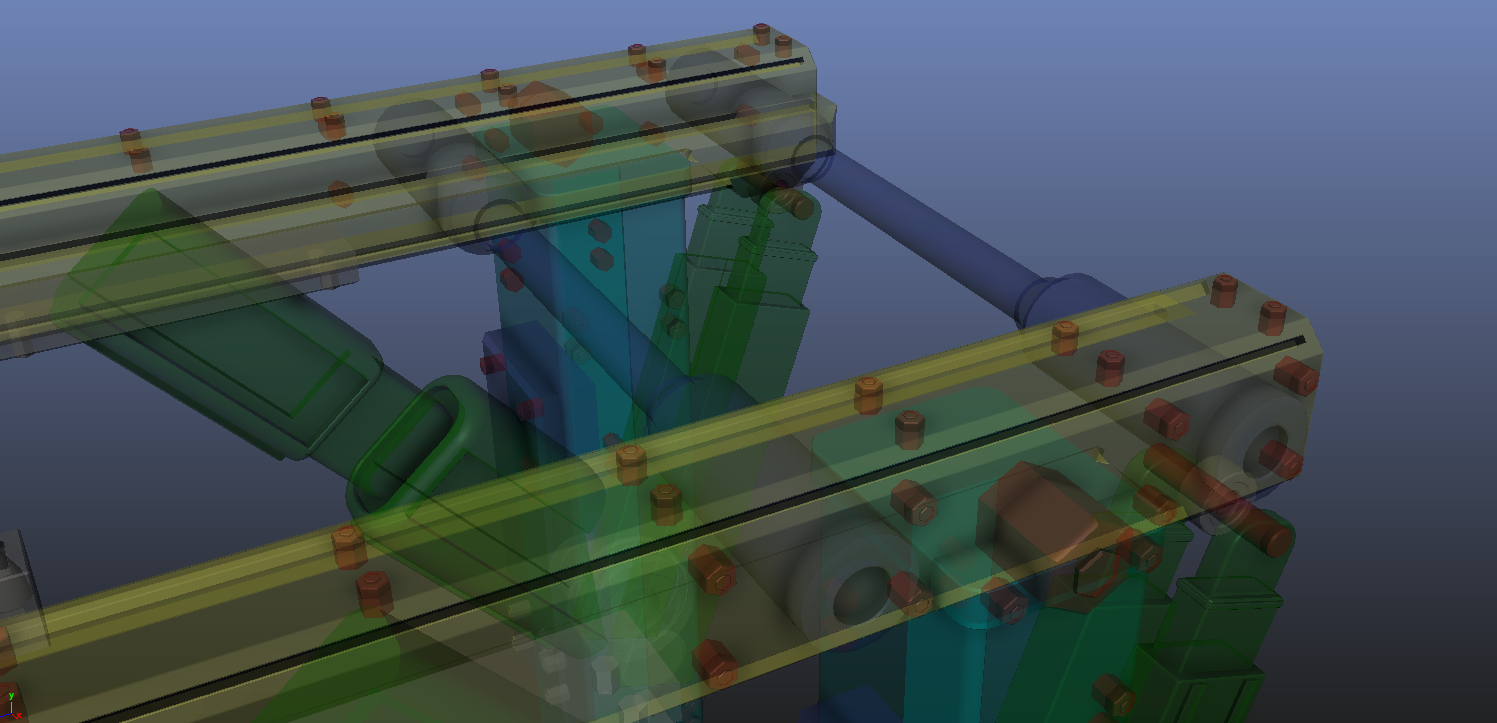
There is no gap or space between the elements and the overlapping faces of the composed element. We managed to build a manifold or watertight object, which will generate accurate print result.
Check and repair 3D models
Even though you are certain that the model is watertight and it lacks errors, we advise you to check it in Netfabb. This tool identifies and repair most common errors in your file.
For a detailed STL file repair in Netffab program, read our Guide on How to Export 3D Models in STL Files and Prepare for 3D Printing.
After you’ve checked and repaired the errors in your STL files, it is time to proceed with the printing.
Sending STL files to print
For an STL file to be printable, it must be uploaded in a slicing program that generates the G-code for the printer to be able to read the correct geometry of the object. Take the repaired file and upload it into the slicing program you use.
We use CURA 15.06 slicer for Ultimaker. Therefore, we will illustrate how this process works with this particular program.
- Open CURA 15.06 software.
2. Drag the repaired STL file in the program’s window.
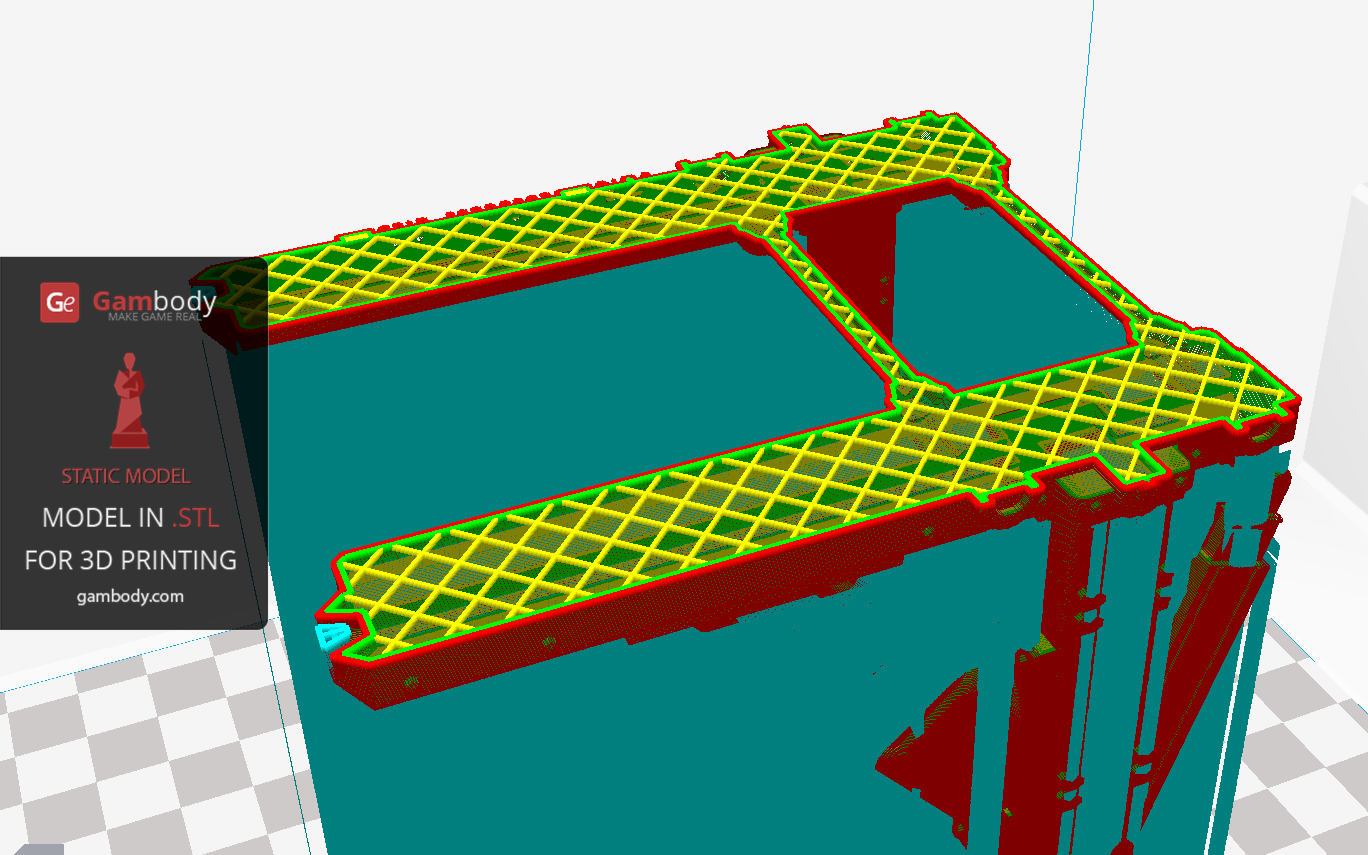
When we import the file in CURA 15.06, it looks as follows:

CURA chops the object in thousands of layers, enabling you to see every single layer the object consists of. To be able to see the layer pattern of the model, rip cut the object. When we do so with our 3D object, we see that the object is seen as being built from several separate parts.

See how you can distinguish every element of the object. They divide the object in several elements, with no joining points among them, which will print separately and fall apart, if the problem is not fixed.
This issue can be avoided if correct settings for CURA 15.06 software are provided.
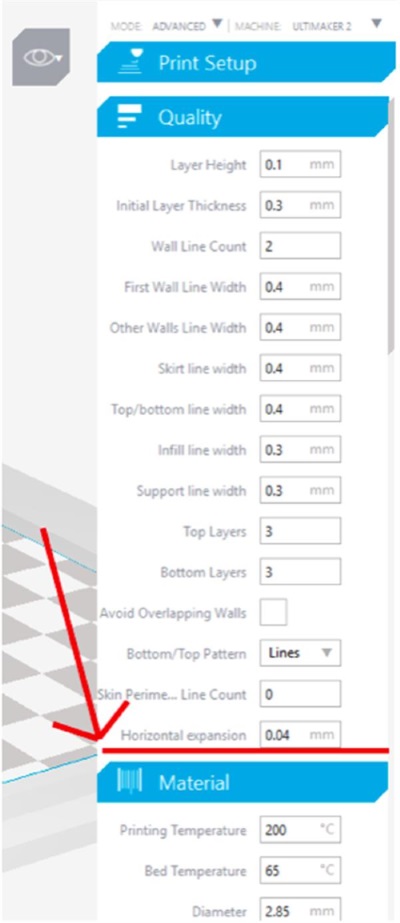
The feature that you need to enter a correct value for is Horizontal expansion. For a watertight model, the value must be 0.04mm. However, avoid entering a bigger value as it results in a thicker layer, which is not recommended.
After having entered the 0.04mm value for Horizontal expansion feature, the object is seen in CURA 15.06 program as watertight and manifold, which is the result we are looking for.
Different software has this feature called differently. It can also be set by default. If the feature is not set by default, take several minutes to set up the software correctly. Don’t let the printing of your 3D model fail, without taking actions first.
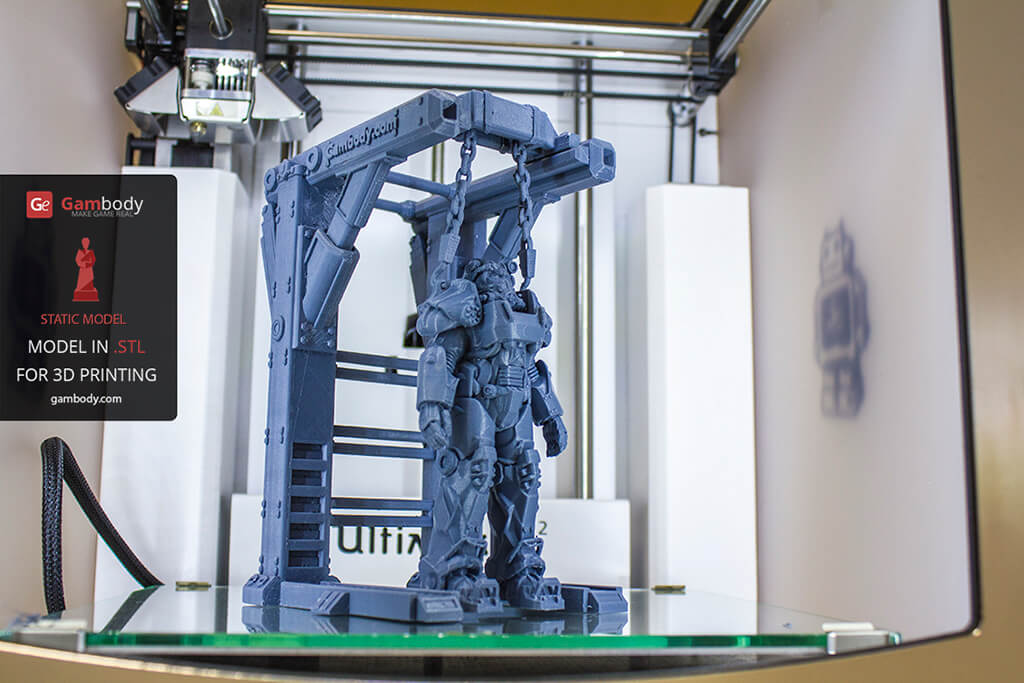
This is how the object we talk about throughout the article printed out:
Gambody cares about the printing experience of its customers and provides correct and tested printing settings for all 3D models that are displayed on the marketplace’s website. Check the Printing Details tab on every 3D model’s page before firing up your 3D printer.
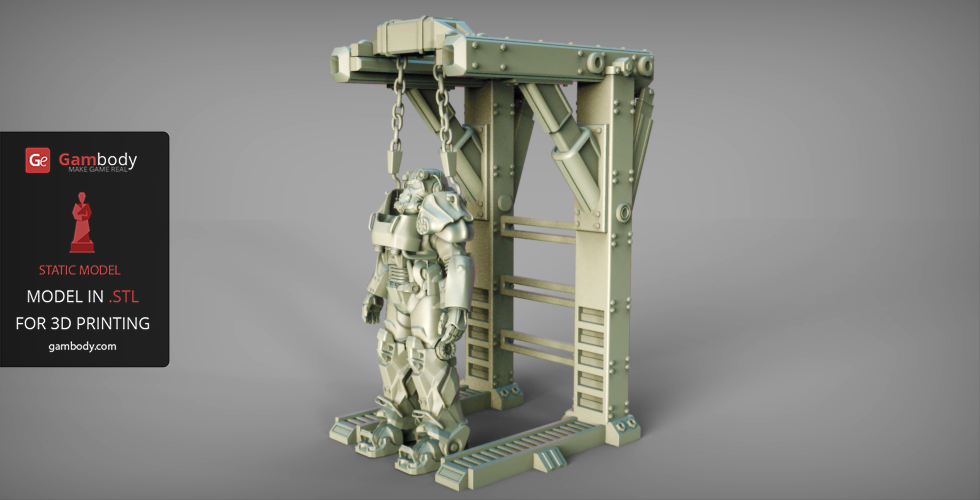
See the 3D printed Fallout 4 T-60 Power Armor model below.
Conclusion
Sometimes, a single setting feature can cause you a headache. Check the model before sending it to print, make sure it is watertight and check printing details or settings that are recommended for a certain 3D model. If printing details are not provided, check and repair STL files of the model before starting printing it. If you have an Ultimaker 3D printer, than the above CURA 15.06 settings will definitely help to to print files hassle-free.

Daring Chaplain 40K Model 3D Printing and Painting Secrets: Interview with Dave English
Read Article
3D printer will take its place in every house
Read Article