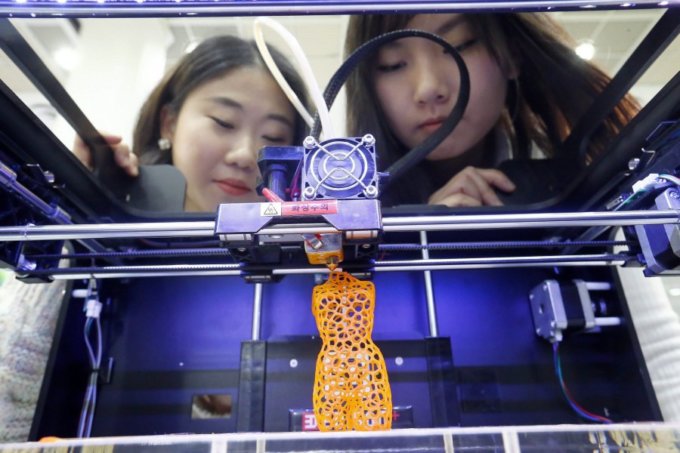
We’ve recently received many messages from our users who complain that the 3D printing of the model they have bought fails. The sections of parts fall apart and are not bonded when printing.
We write this blog post for those who use Simplify3D software and who have faced similar problems of printing one model in several separate elements.
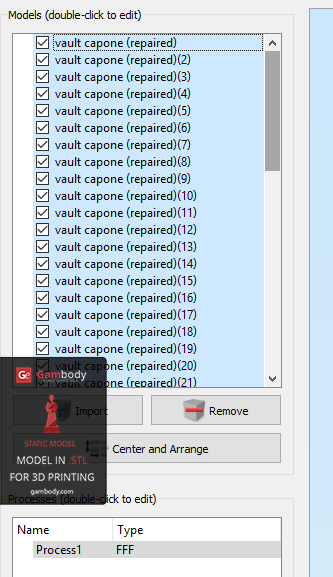
A 3D model consists of one to several thousand elements (primitives, modified primitives).
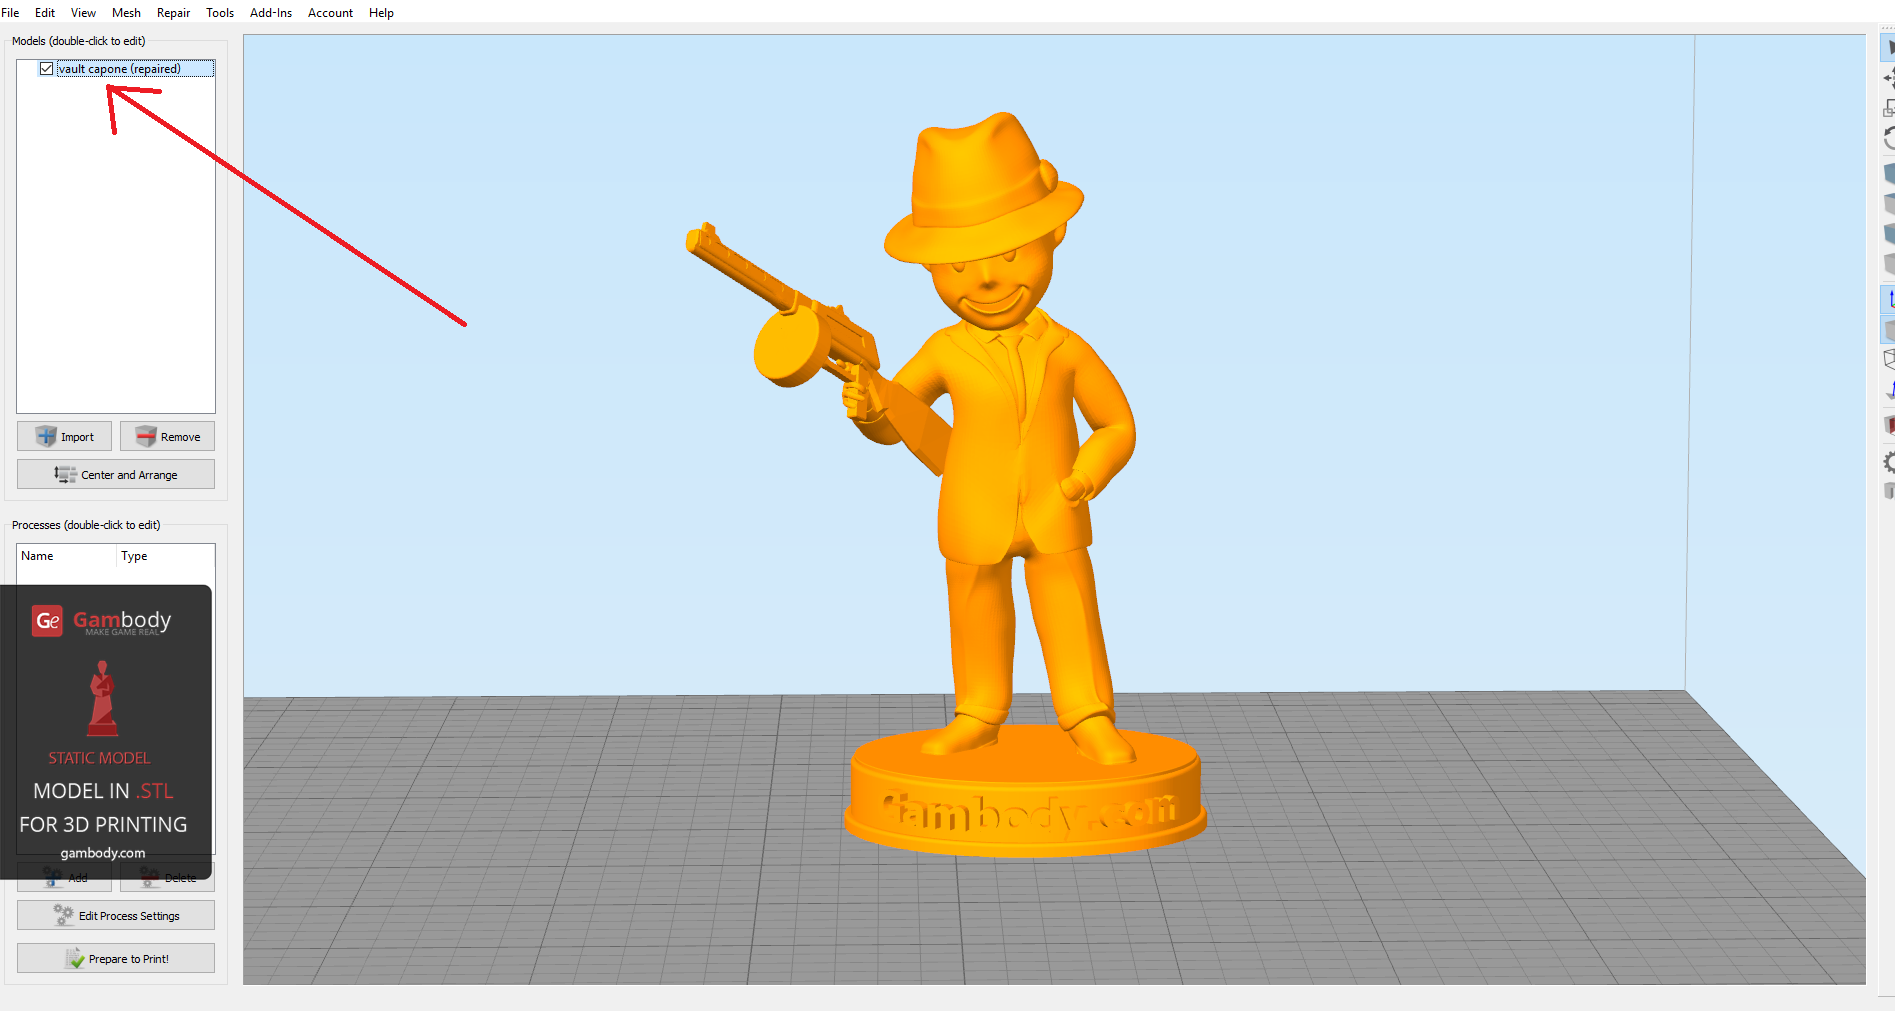
We will take FALLOUT 4 – Vault Boy 3D model as an example to explain in detail what exactly gets wrong when using Simplify3D software to print a 3D model.

The model is made up of more objects or primitives, as any other 3D model that is available for sale or free share in the Internet.


When sending the STL file of the model to be checked for errors in Netfabb software, the software generates an error-free and accurate file, repaired 100%.

We then upload the STL file of the model in Simplify3D.
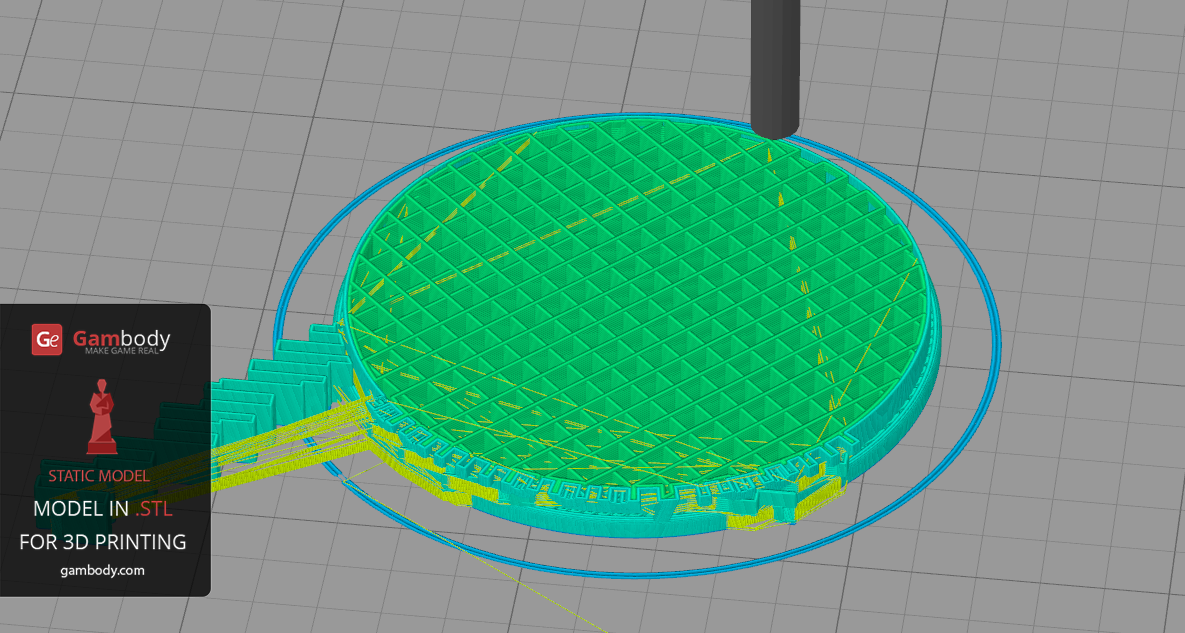
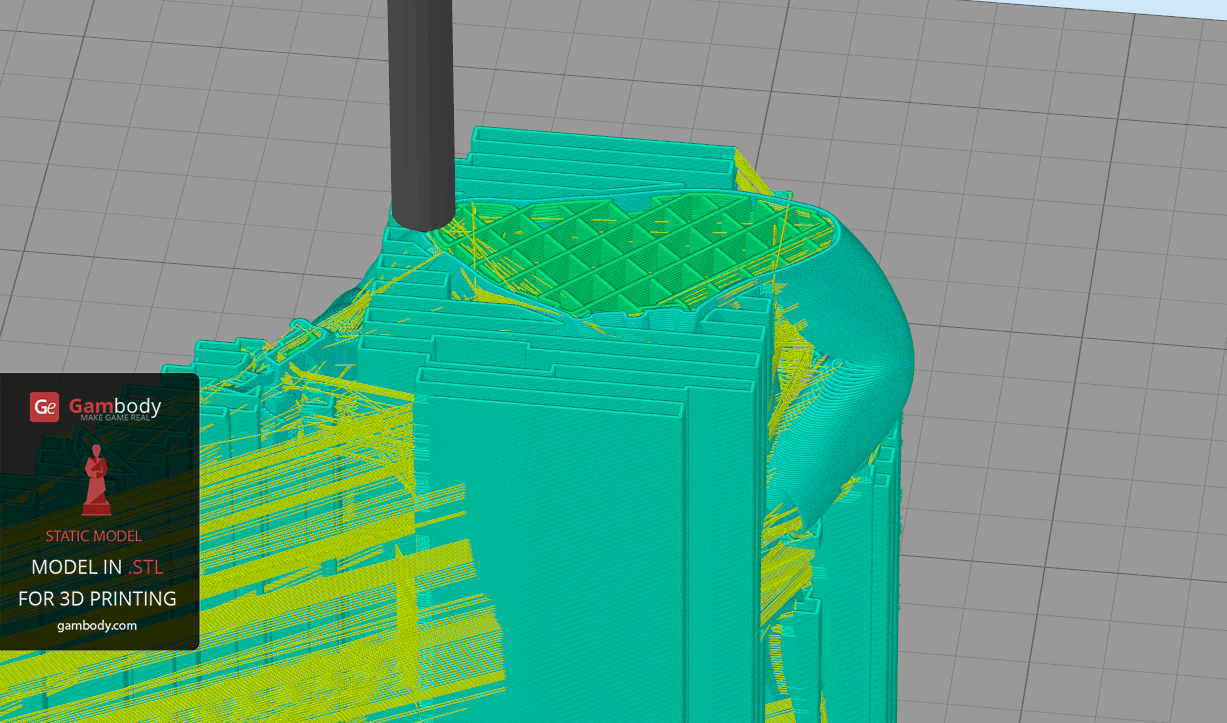
 When clicking “Prepare to Print” button, the software generates the result as in the pictures below:
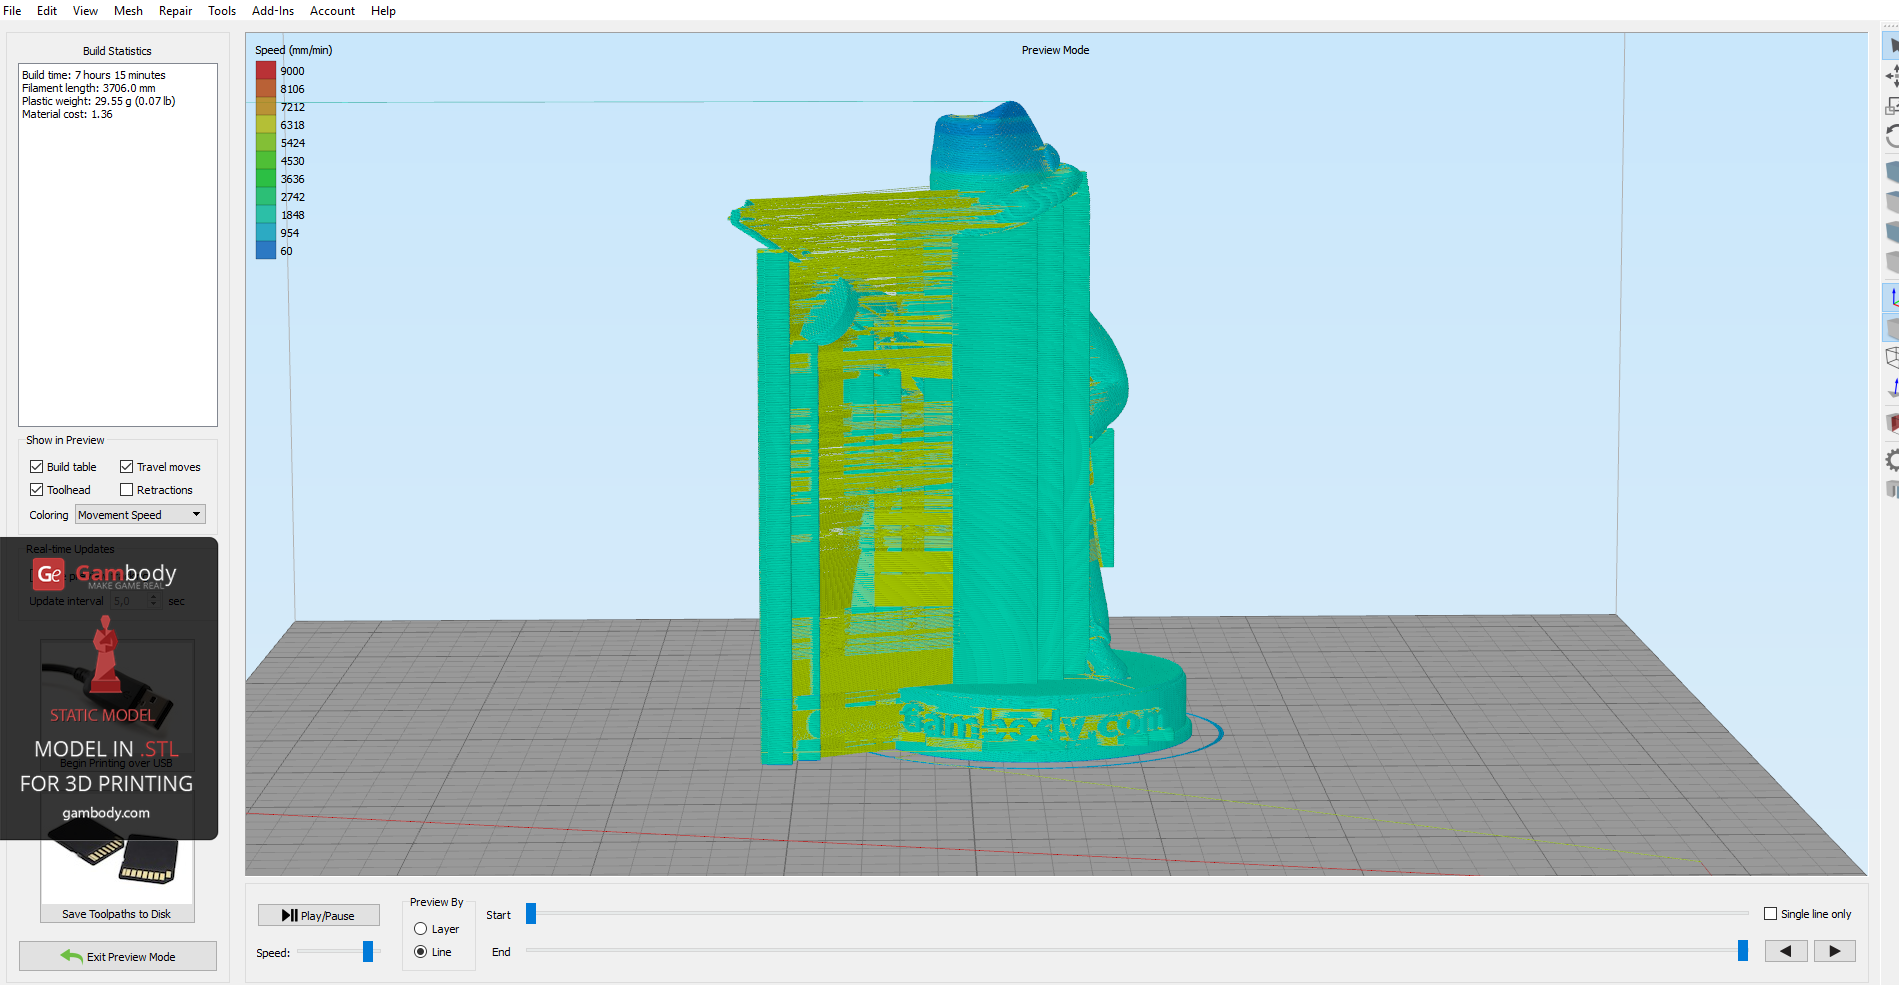
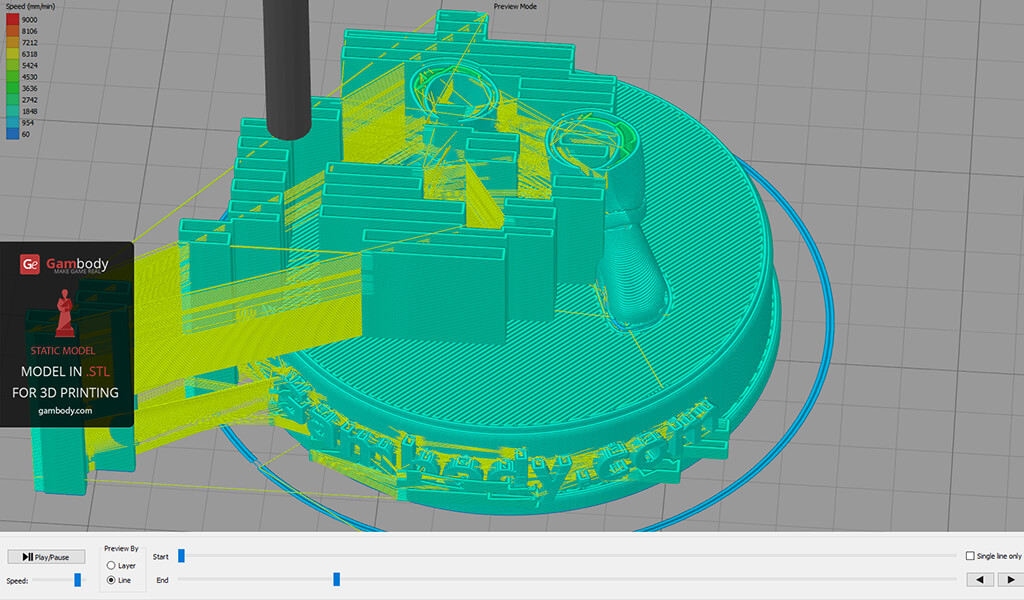
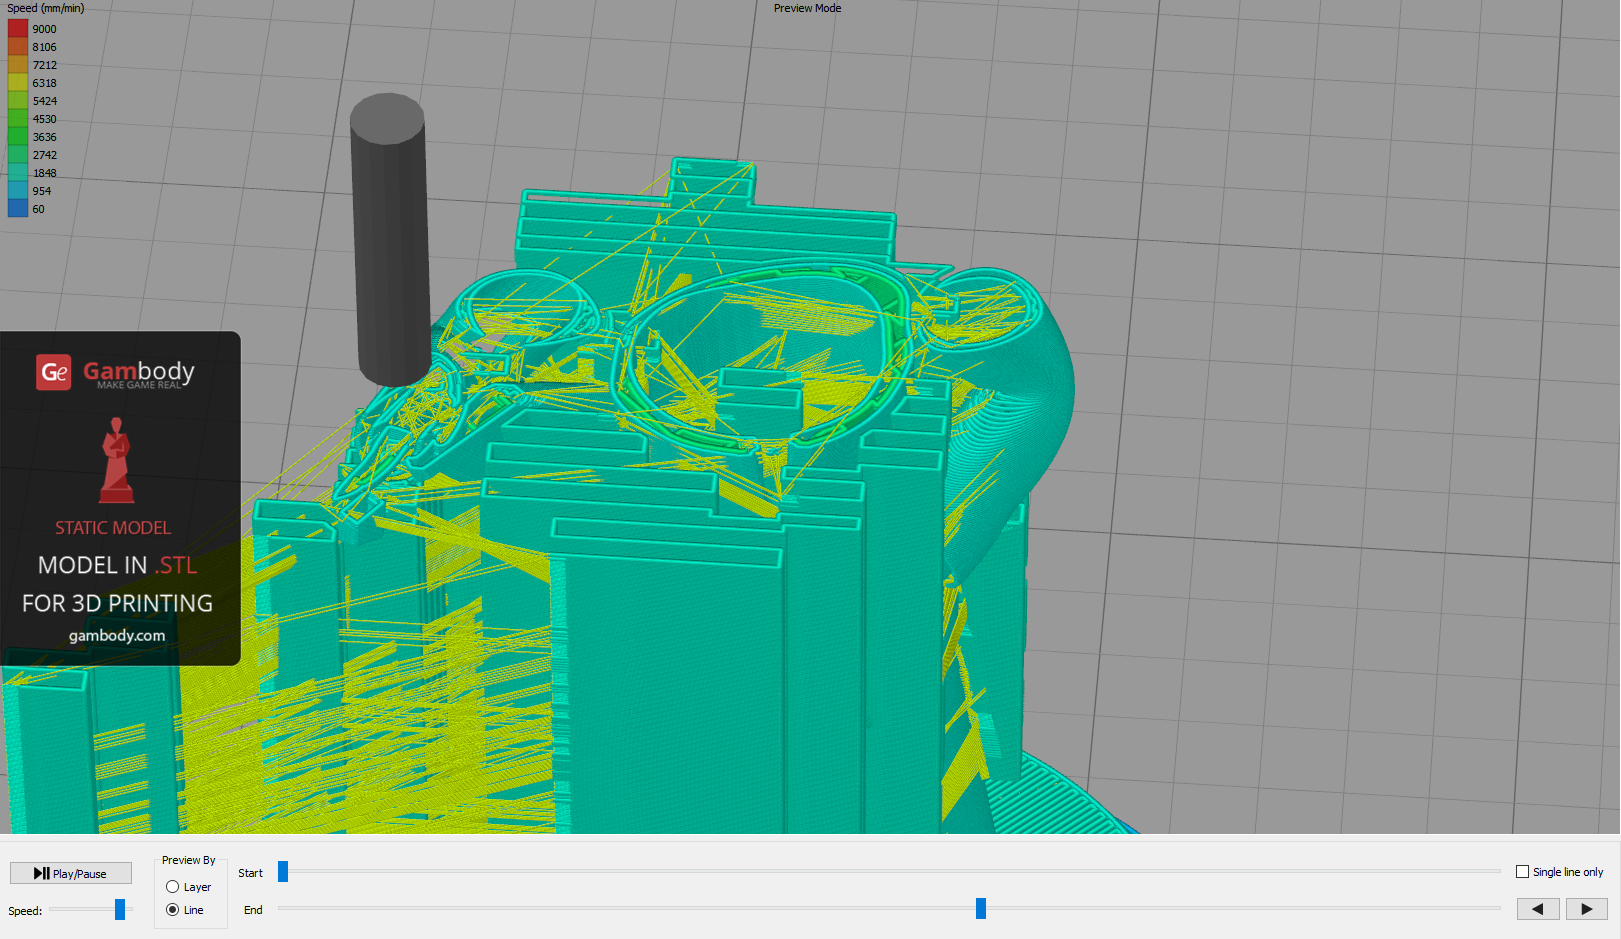
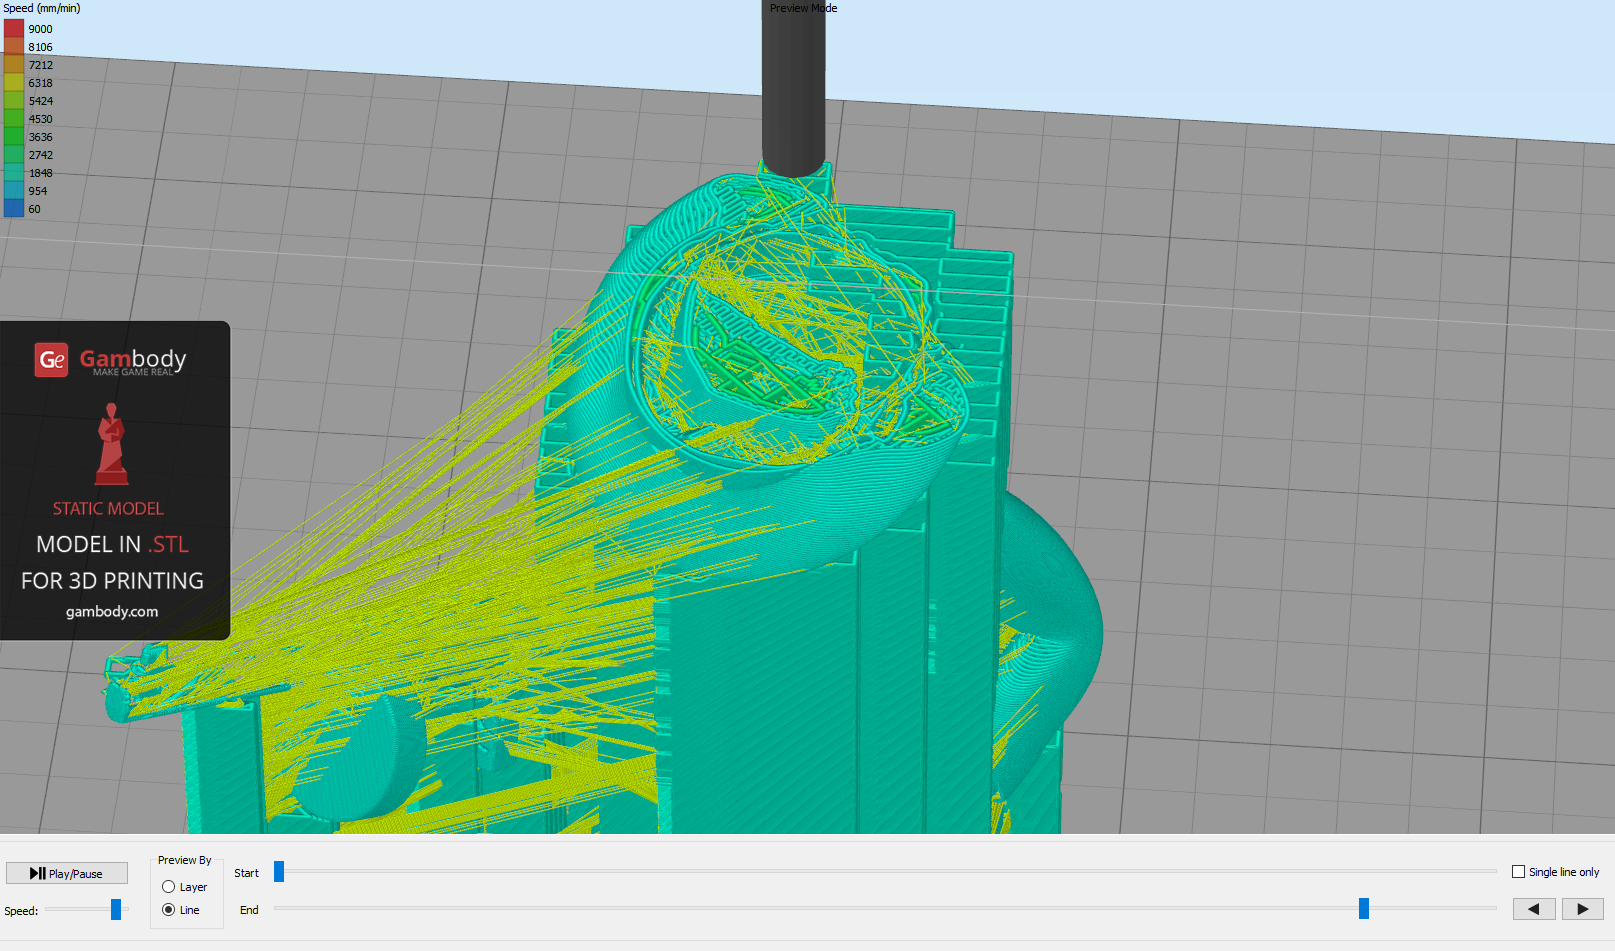 From the pictures we can easily see that after slicing it the model consists of more separate objects which will print separately, even though we know for sure that we have uploaded a single model.
So what is it that we can do next?
Go back by clicking “Exit Preview Mode” button.

At the top, in the menu of the interface, choose “Mesh” and then “Separate Connected Surfaces” feature.
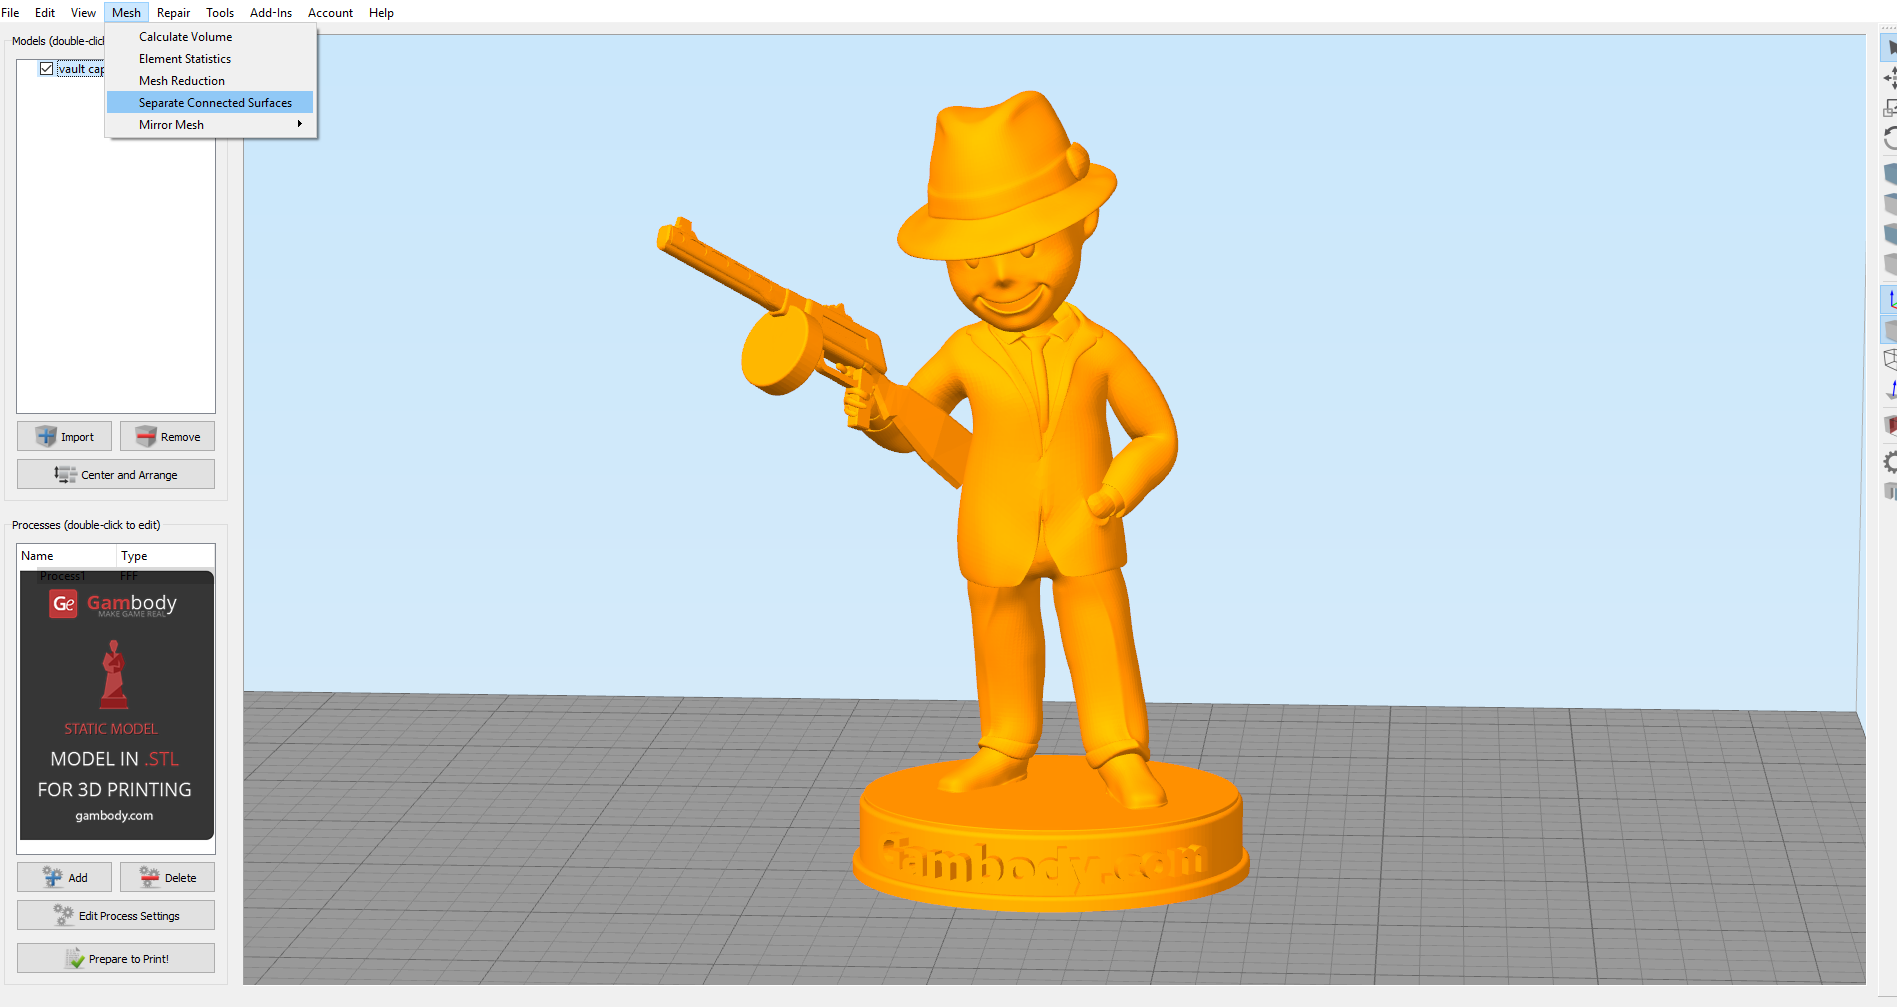

This way, the model is separated in all the elements it is composed of (models built from several thousand elements undergo the same procedure).
Press “Shift” button on your keyboard; check all elements from the list, from the first though the last.
Go back to the top of the software’s interface, click “Edit” and then choose “Align Selected Model Origins” feature.
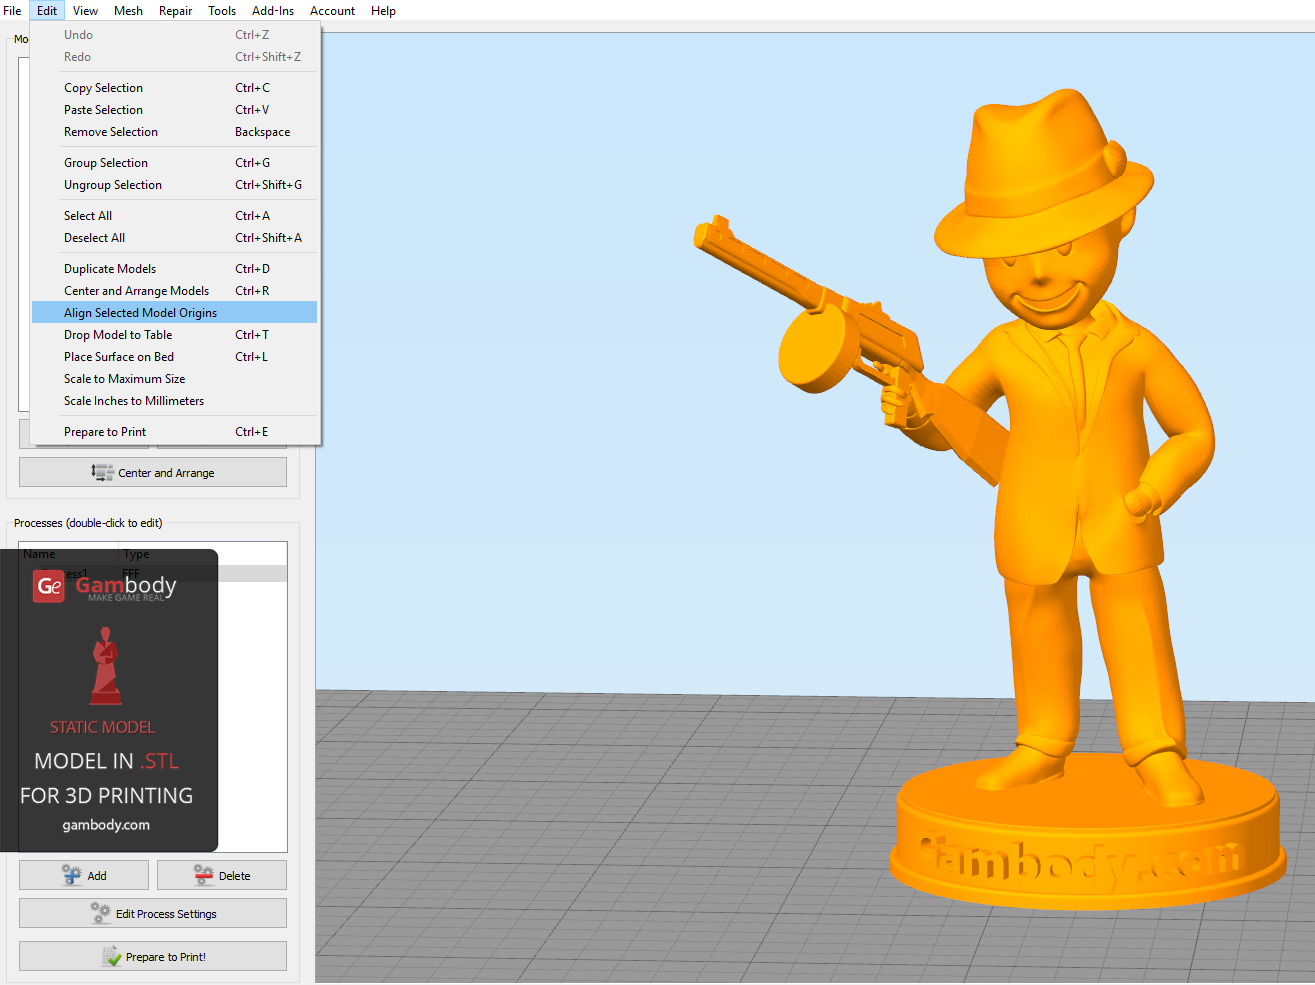
This function will align correctly all elements from the list according to the X, Y, Z axes. Now, we have to indicate to the software that there is a single, bounded 3D model (in practice this function is not mandatory, the model can be printed without using it, however, it is recommended).
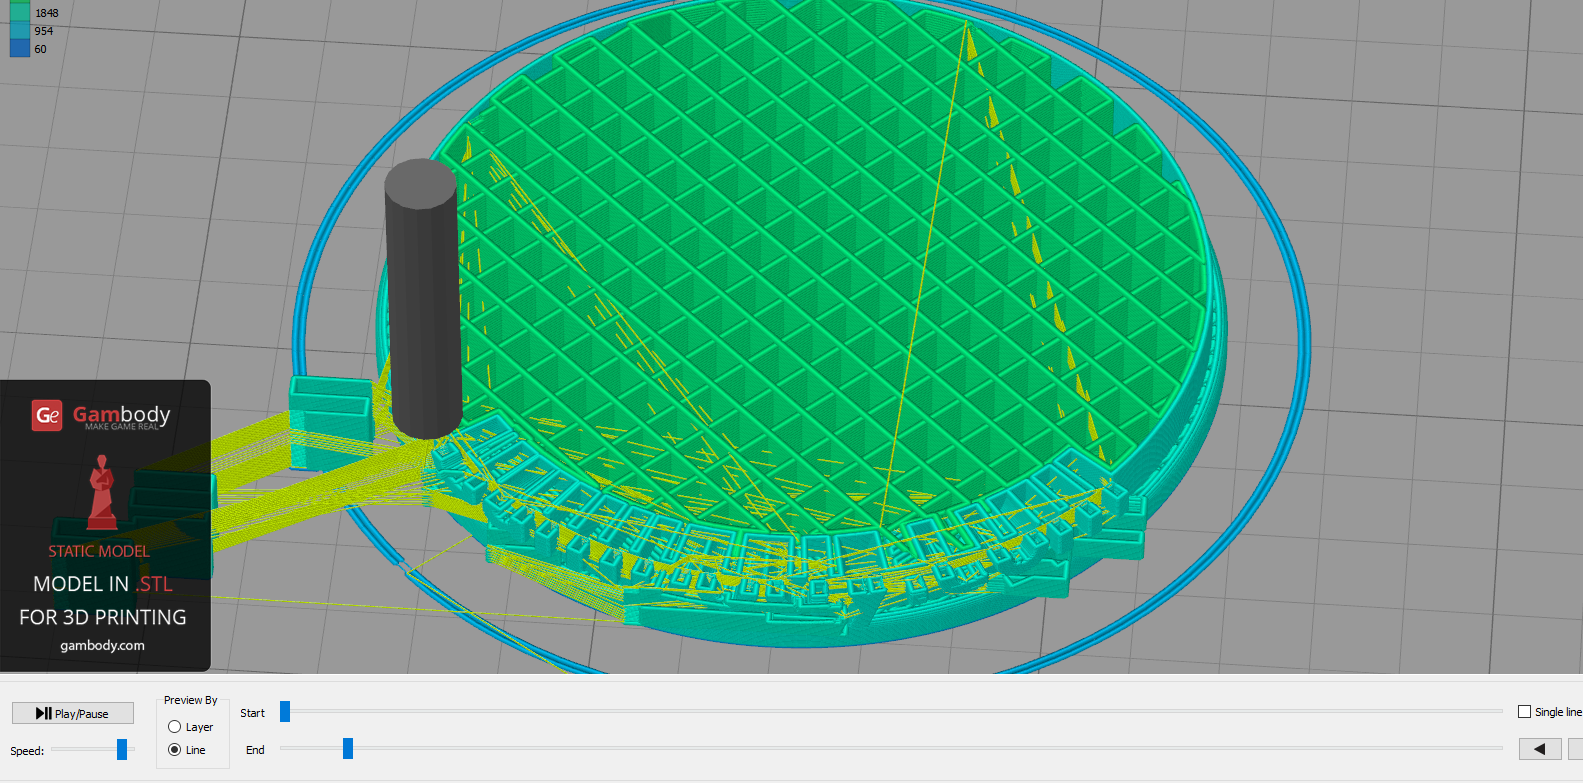
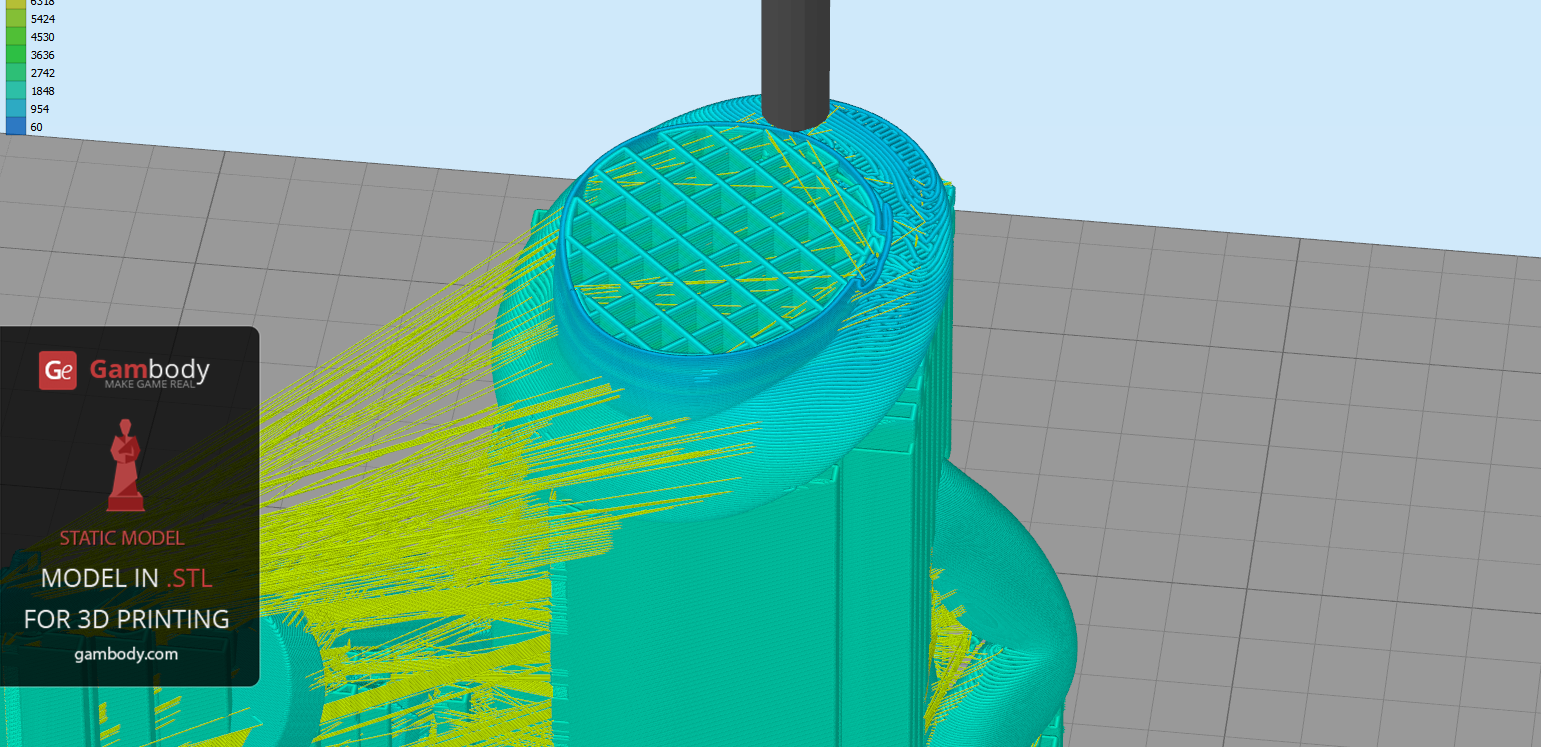
Now you can click “Prepare to Print” button.
You can see in the pictures below the positive results for the 3D model to be sent to print. The software has joined all objects and elements into a single, solid model.
All these functions are configured by default or automatic in other printing software, like CURA (for Ultimaker 3D printers), Repetier-HOST, and etc.

Conclusion
We hope this post will help all those who use Simplify3D software and will facilitate their 3D printing experience. However, don’t forget to check and use printing recommendations that Gambody provides on all its models’ pages in the Printing Details section. Wish all of you happy printing, great 3D models, and accurate results.
This blog post was written at the request of more customers of Gambody
For further details about Simplify3D software, check the company’s official website www.simplify3d.com


Gambody Partners with 3DHubs – Press Release by Gambody
Read Article
Best Free STL Files for 3D Printing: Websites with 3D Models 2022
Read Article