It is important to know that the way the 3D models print bed positioning counts for the result of the 3D printing process. So, what is the best way to position the 3D model on the print bed so that the printing outcome is accurate and the printing material is saved?
To make it clear for all those who use a desktop 3D printer, we will illustrate the entire process based on two of our marketplace’s 3D models:
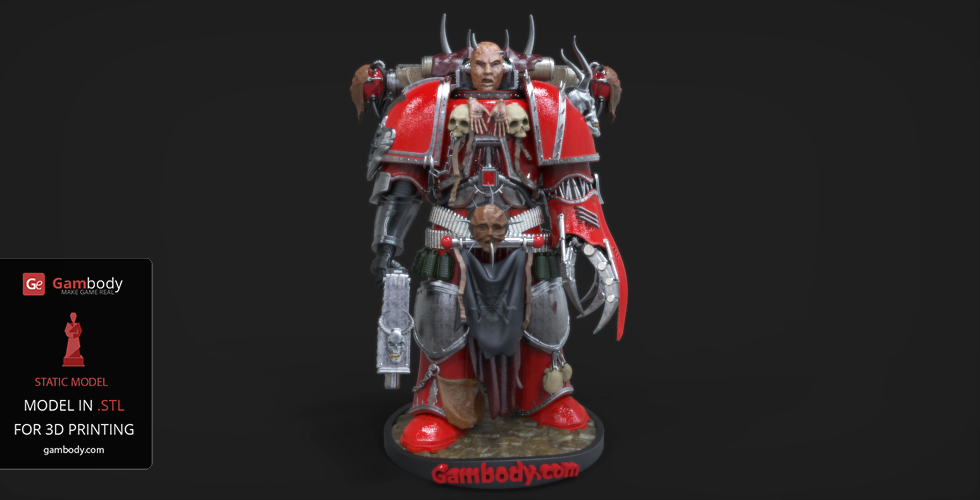
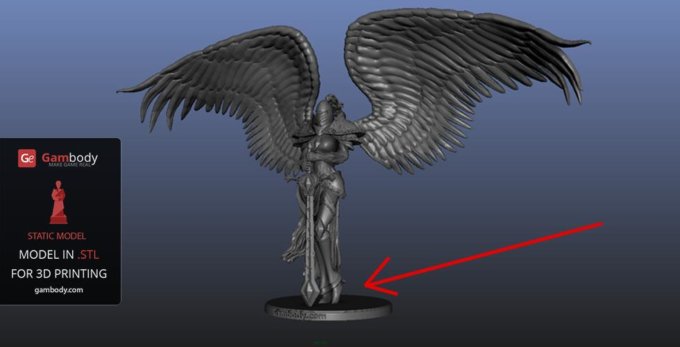
Chaos Space Marine 3D Print Figure
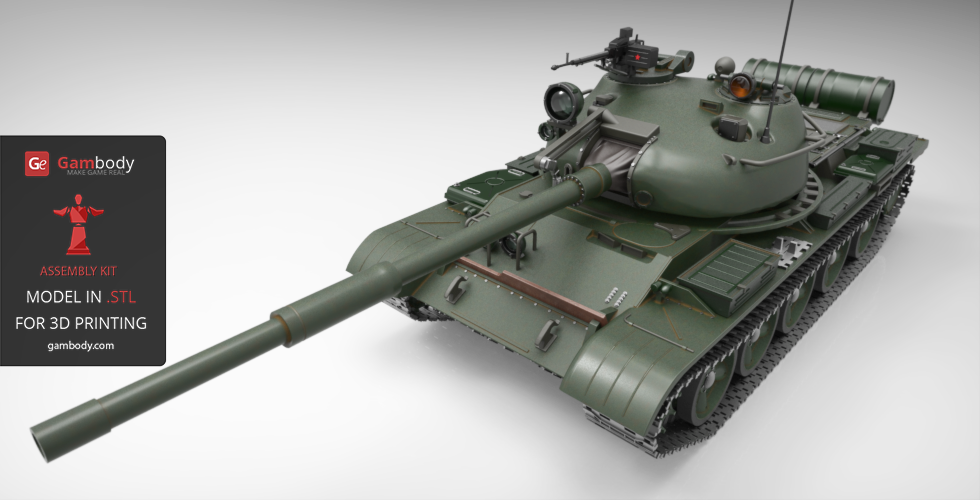
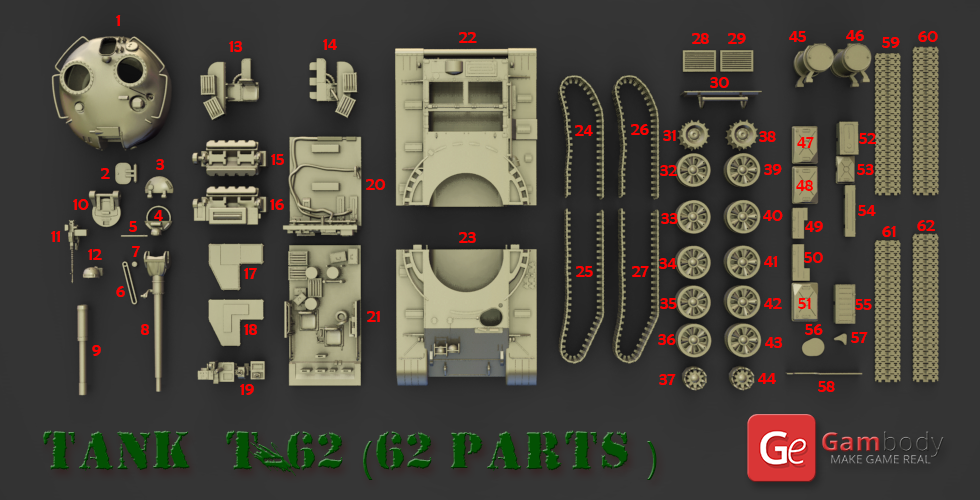
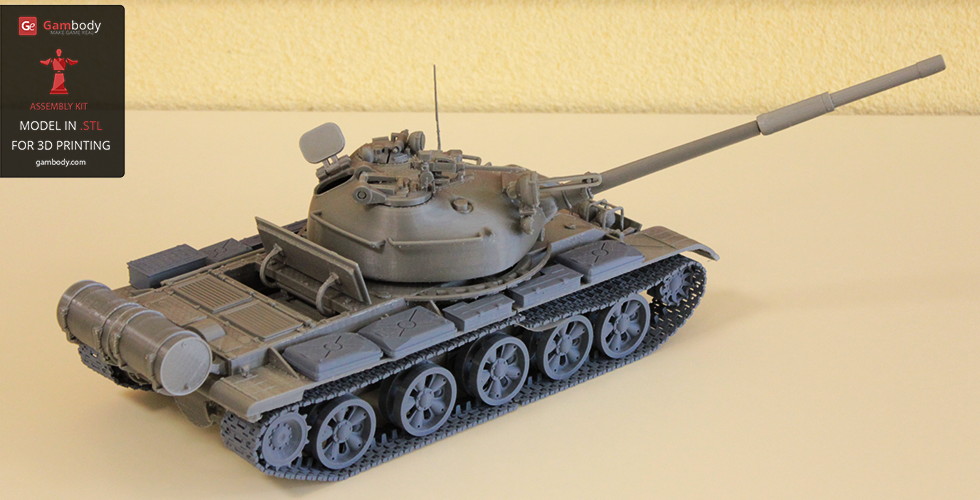
TANK T-62 Assembly Model for 3D Printing
The above models are different, because the Chaos Space Marine is a static 3D figurine, while T-62 model is an assembly print.
Positioning static 3D models on the print bed
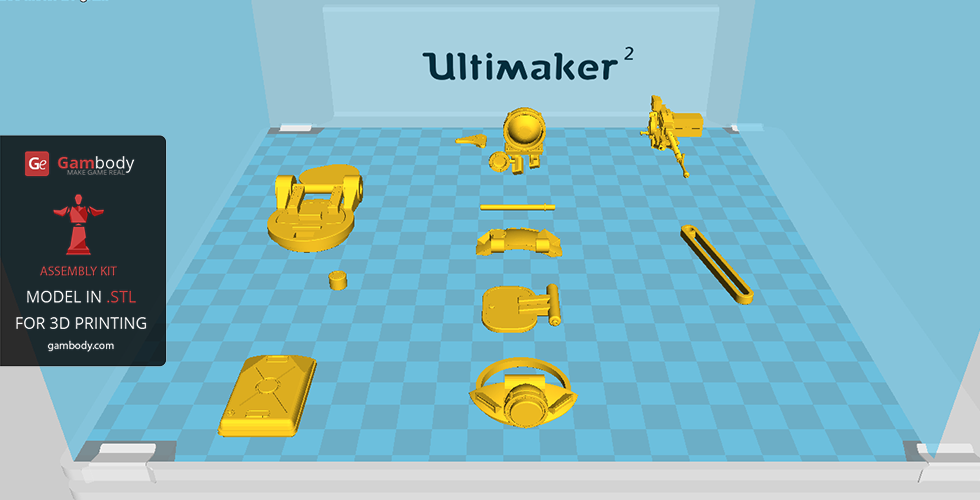
Although Chaos Space Marine is advertised as being a static 3D model, it is nevertheless composed of 6 separate parts. This has been done to make the user’s job easier – i.e. the support material for printing separate parts of the model will be much less than if the model was modeled as a single part object. Thus, the user saves time, which otherwise could have been wasted at support removal and the printing result will be much accurate and clean, with no outer shell defects.
We proceed by handling and testing each separate component of the 3D figurine in the printing software, such as Cura 15.06, Simplify3D and etc.
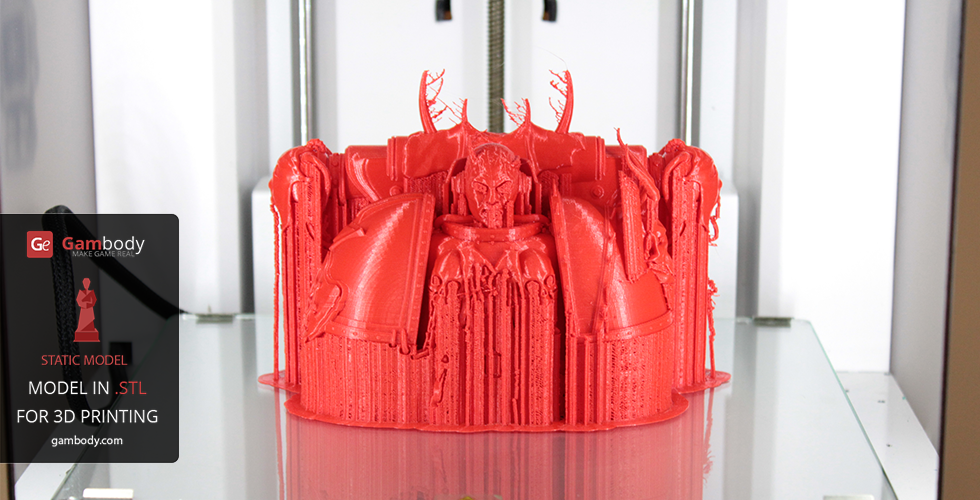
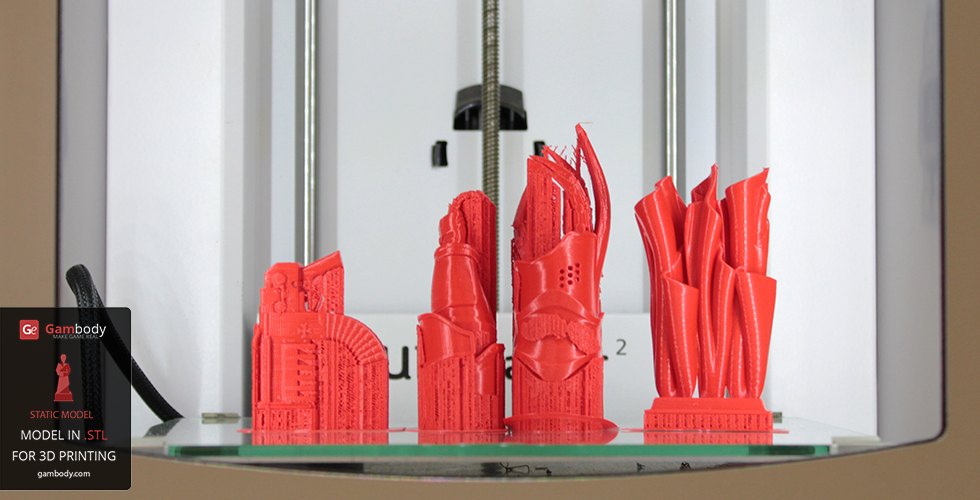
The option for calculating the support angle is a tool that helps us save a lot of printing material. If your 3D model is enhanced with a lot of small details and you want it to print clean, position the 3D model with such details facing up.
Thus, when being printed, there will be no need for support as these elements will be extruded by the printer nozzle perpendicularly. Plus, this means all the details will remain intact post-printing, as there will be no need to clean the support off them, which often results in losing the intended accuracy.
In the picture above you can see that the upper limbs (the two components in the center) of the 3D model are positioned on the print bed perpendicularly, with the shoulder joint resting on the print bed.
These components have been positioned this way because the most fragile and sensitive elements are the blade-fingers. The support angle for these elements is of 45°, which means that only the parts that form an angle from 45° to 90° will print with support. The parts that form a 90° angle with the print bed will not need support.
Read SIMPLIFY3D USER GUIDELINES OFFERED BY GAMBODY
If your 3D design is adorned with small details that make its surface detailing, place the part that will be most visible after printing face up. Take another look at the picture above, and specifically at the components situated on the side. It is the bolt gun and the cloth. The gun is printed with the gunpoint facing down. This is because the gun, after having been 3D printed, will be attached to the 3D figurine with the point facing down and thus the part where support was used will not get into the field of vision.
Read UNDERSTANDING WALL THICKNESS FOR 3D PRINTING TO CREATE DURABLE PRINTS to print strong 3D models.
The cloth forms an angle from 0° to 20°. Therefore, the part to which it is attached to the 3D figurine will be positioned on the print bed.
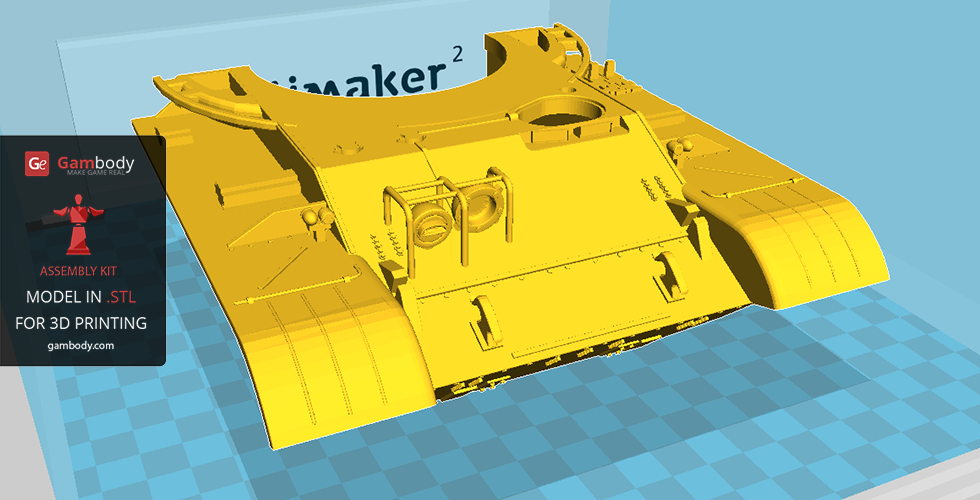
The 3D figurine’s body was cut in two separate components – the torso and the legs – to save printing material and to easily remove support off them.
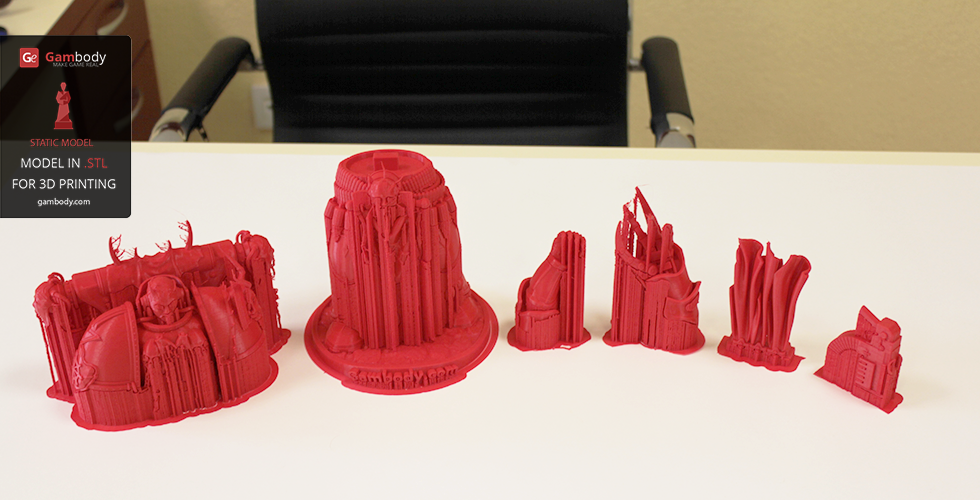

The model is 24cm tall. It was used about 55m of printing material. We would have used about 65-70m of printing material if the 3D model was not cut in separate parts.
Read also EASY STEPS TO ACE THE PAINTING OF 3D PRINTED MODELS to paint realistically looking 3D printed figurines.
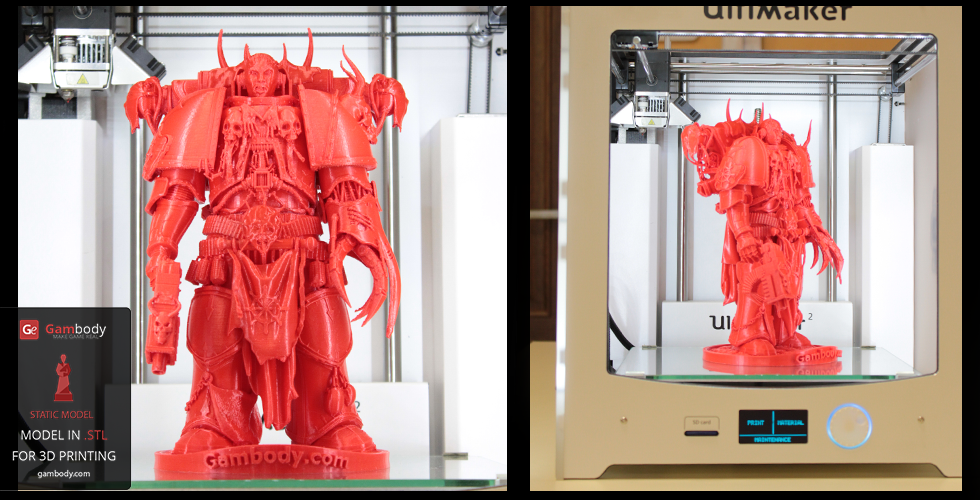
To sum up, if you have 3D printing files of a model that you want to print accurately, pay attention to the components with rich detailing and position them on the print bed facing up. This way you make sure that the detailing will not be affected and the support removal will be easy.
assembly 3D modelS PRINT BED Positioning
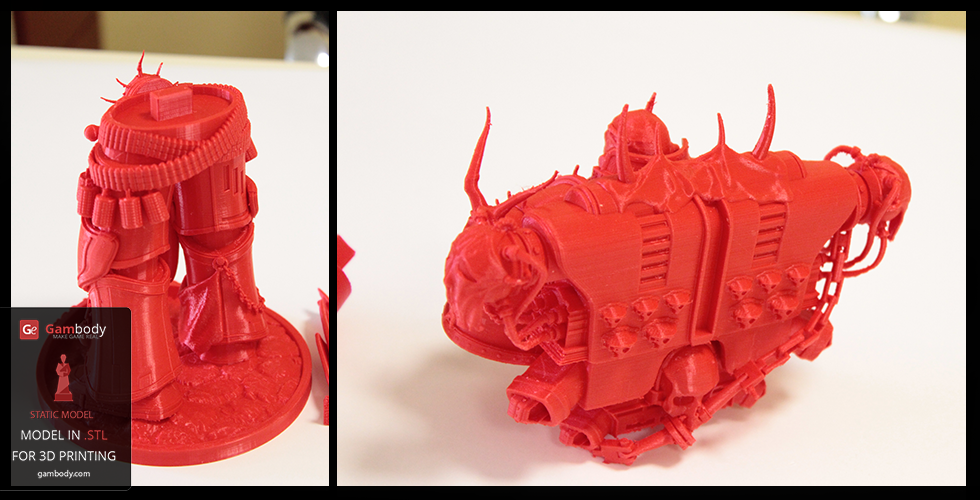
The second 3D model we will take as an example is the T-62 Assembly Model for 3D Printing. This is an assembly model, consisting of 62 separate components that have to be joined together after 3D printing.
In the pictures below you can see all the parts after printing:
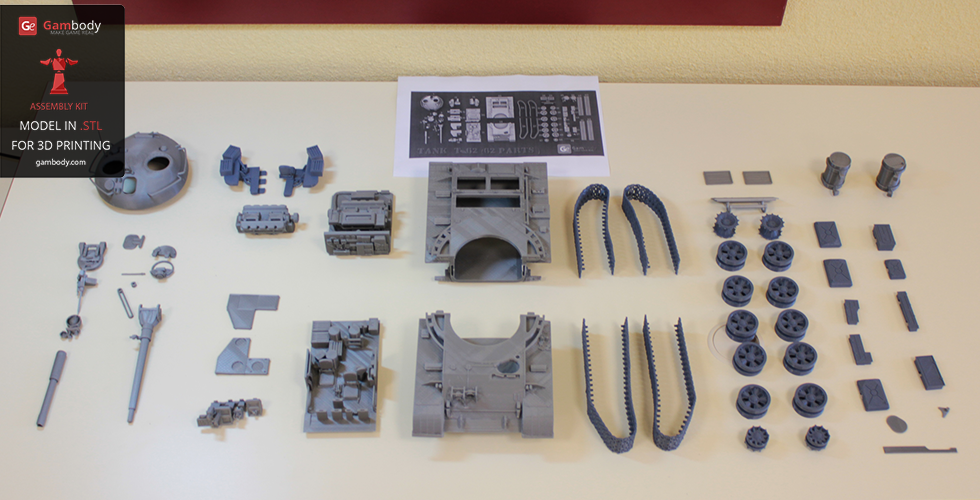
The components are arranged on the desk the way they have been positioned and printed on the print bed. 59 out of 62 parts have been assigned this specific position on the print bed to save printing material and time.
All parts are positioned on the print bed with the parts that showcase surface detailing facing up.
The remaining 3 parts of the 3D model are not printed with the account to save printing material and time, but to have a clean result (with no visible support marks).
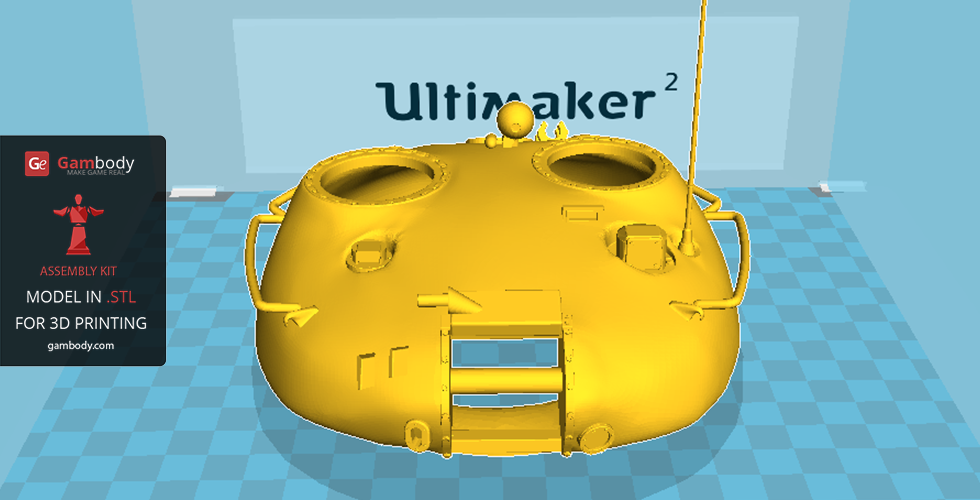
To print these parts, more material and more time was needed. But the outcome is a clean one, with the support mostly positioned in the interior of the components.
And this is how all the parts, after having been assembled, look like:

Conclusion
If your 3D model consists of several separate parts and you want to print them at once (if your 3D printer’s bed allows it), make sure that they are positioned correctly as to save material and to ensure the high quality of the printing (clean outer shell). Rotate and move the part into the 3D printing software, experiment, test, until you are certain that the part will print correctly and accurately. Keep in mind that 3D models print bed positioning is important for accurate results, with less use of support.
As a recommendation for those who own a desktop 3D printer: it is better to print a single clean, no defect part in a row, than to print several parts at once, trying to save printing material and time.

Understanding Wall Thickness for 3D Printing to Create Durable Prints
Read Article
Top 10 Mandalorian Season 2 Model STL Files to Make Epic Figures
Read Article