Have you asked yourself why do your 3D models break when processed after having been 3D printed? Why are there cracks in your 3D print? What is the reason for all these problems and what can you do to prevent them. There is a single answer to all these questions and this is the wall thickness issue that has to be considered before sending your STL files to print.
Factors that wall thickness depends on
First things first: you should know that setting up a right wall thickness for your 3D print designs depends on several factors:
Scale of the model. If you’re about to print a small-scale model, consider making walls thinner. For large-scale models, provide a thicker wall value, to avoid fragility of small details of the model.
Otherwise, all the details present in the digital file will vanish in the physical world because the 3D printer simply will not able to create them. It is good to know that many modeling programs allow designing without any measurement. The scale of the model is decided before sending the file to the 3D printer.
Printing material. Since Gambody is modeling and optimizing 3D models to be printed in plastic, we will base our analysis on plastic material. For plastic material, the minimal wall thickness is usually of 1mm.
However, in order to make sure that your printing process goes according to your plan, it is highly advised to set a thicker wall for your model. A thicker wall will give volume to your 3D model’s part and will ensure that all the detailing are nicely printed.
This way, you can make sure that the details that are too small and fragile after printing will not be damaged when you remove support, clean and paint the model. Therefore, checking material guidelines for recommended minimal wall thickness values is something you need to not overlook.
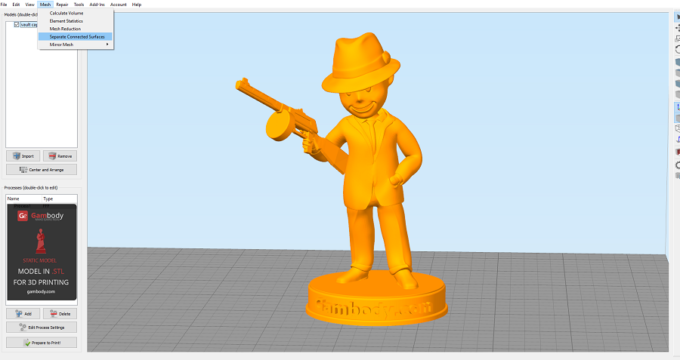
Structure and design of the 3D model. If your 3D model has parts that stretch out and hang out in midair and if they are designed to be printed with a thin wall, adding support to fragile parts, such as an axe, or folding the arms under a certain angle as in the picture below, is a way of making sure that they won’t fall apart.
The same goes with the texture feature for a 3D model. Let’s say you’re modeling a character wearing a cloak. If the printing wall thickness is too thin, the printer will simply fail to print it correctly and the entire model will be ruined. Another point that must be taken into consideration is that too thin surfaces of a 3D model can warp.
All these moments must be considered before sending the model to print, to avoid possible failures and time and material waste.
Read Simplify3D User Guidelines Offered by Gambody
Gravity exists – Ensuring Balance for 3D models with LArger Parts
Even if you have dealt with all the problems mentioned above, there are certain moments that get missed. This is the case with the gravity. When you model a design for 3D printing, don’t forget about it. This means that if your model consists of thin parts that have to support heavier and larger parts, it will definitely break.
To prevent this from happening, make sure that you make the element that supports a larger and heavier element thick enough to hold the stress. Check out the geometry of your 3D model and you will see the parts that need to be thicker.
There is another option to ensure balance for your 3D model with larger parts. For this, we will take as example Kayle the Judicator 3D model.
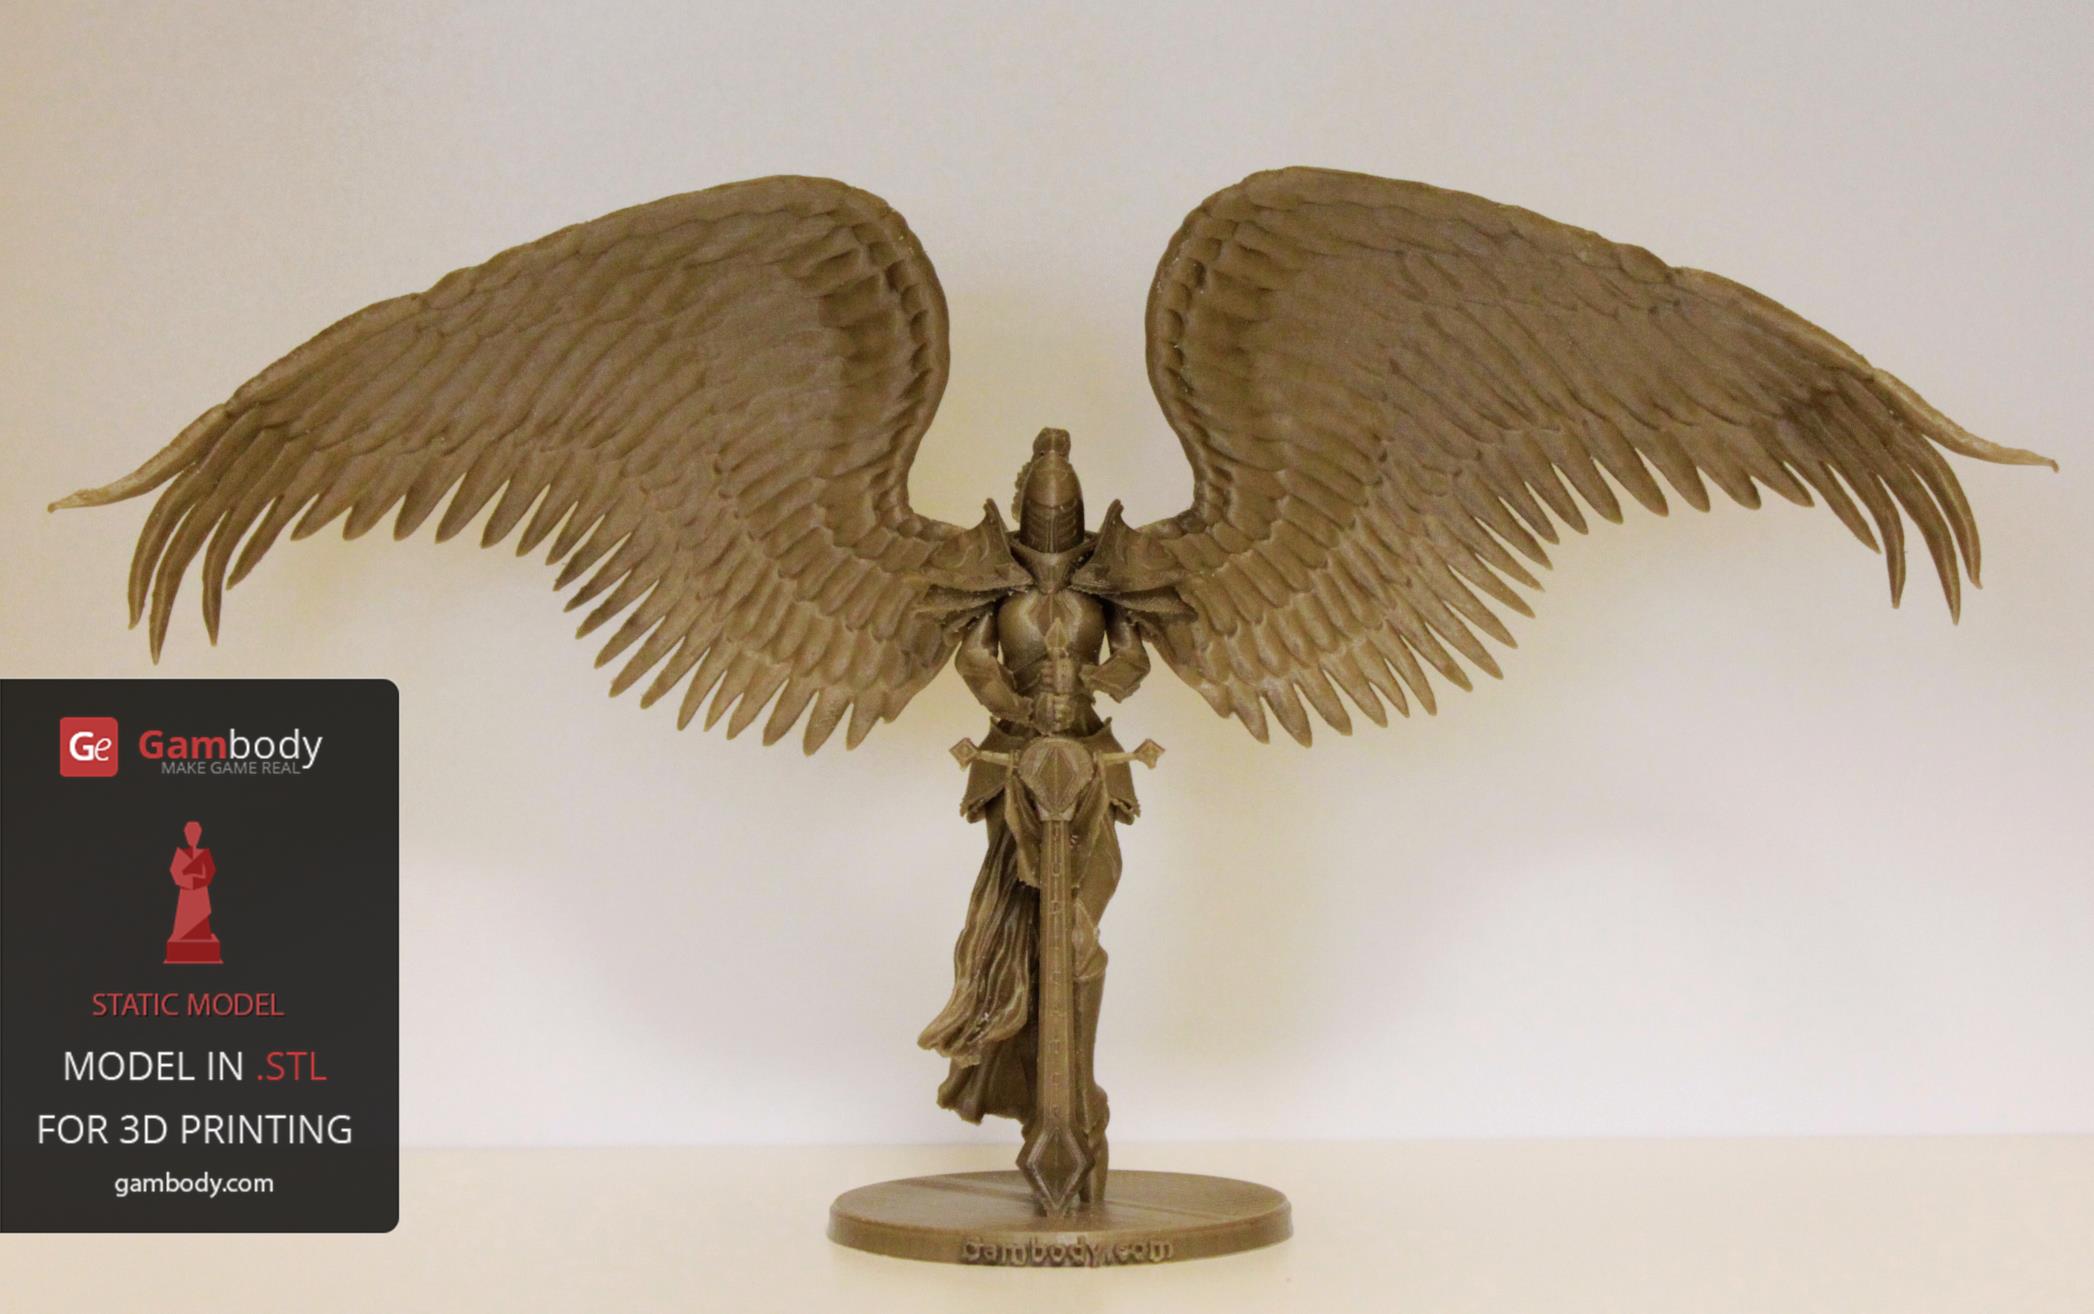
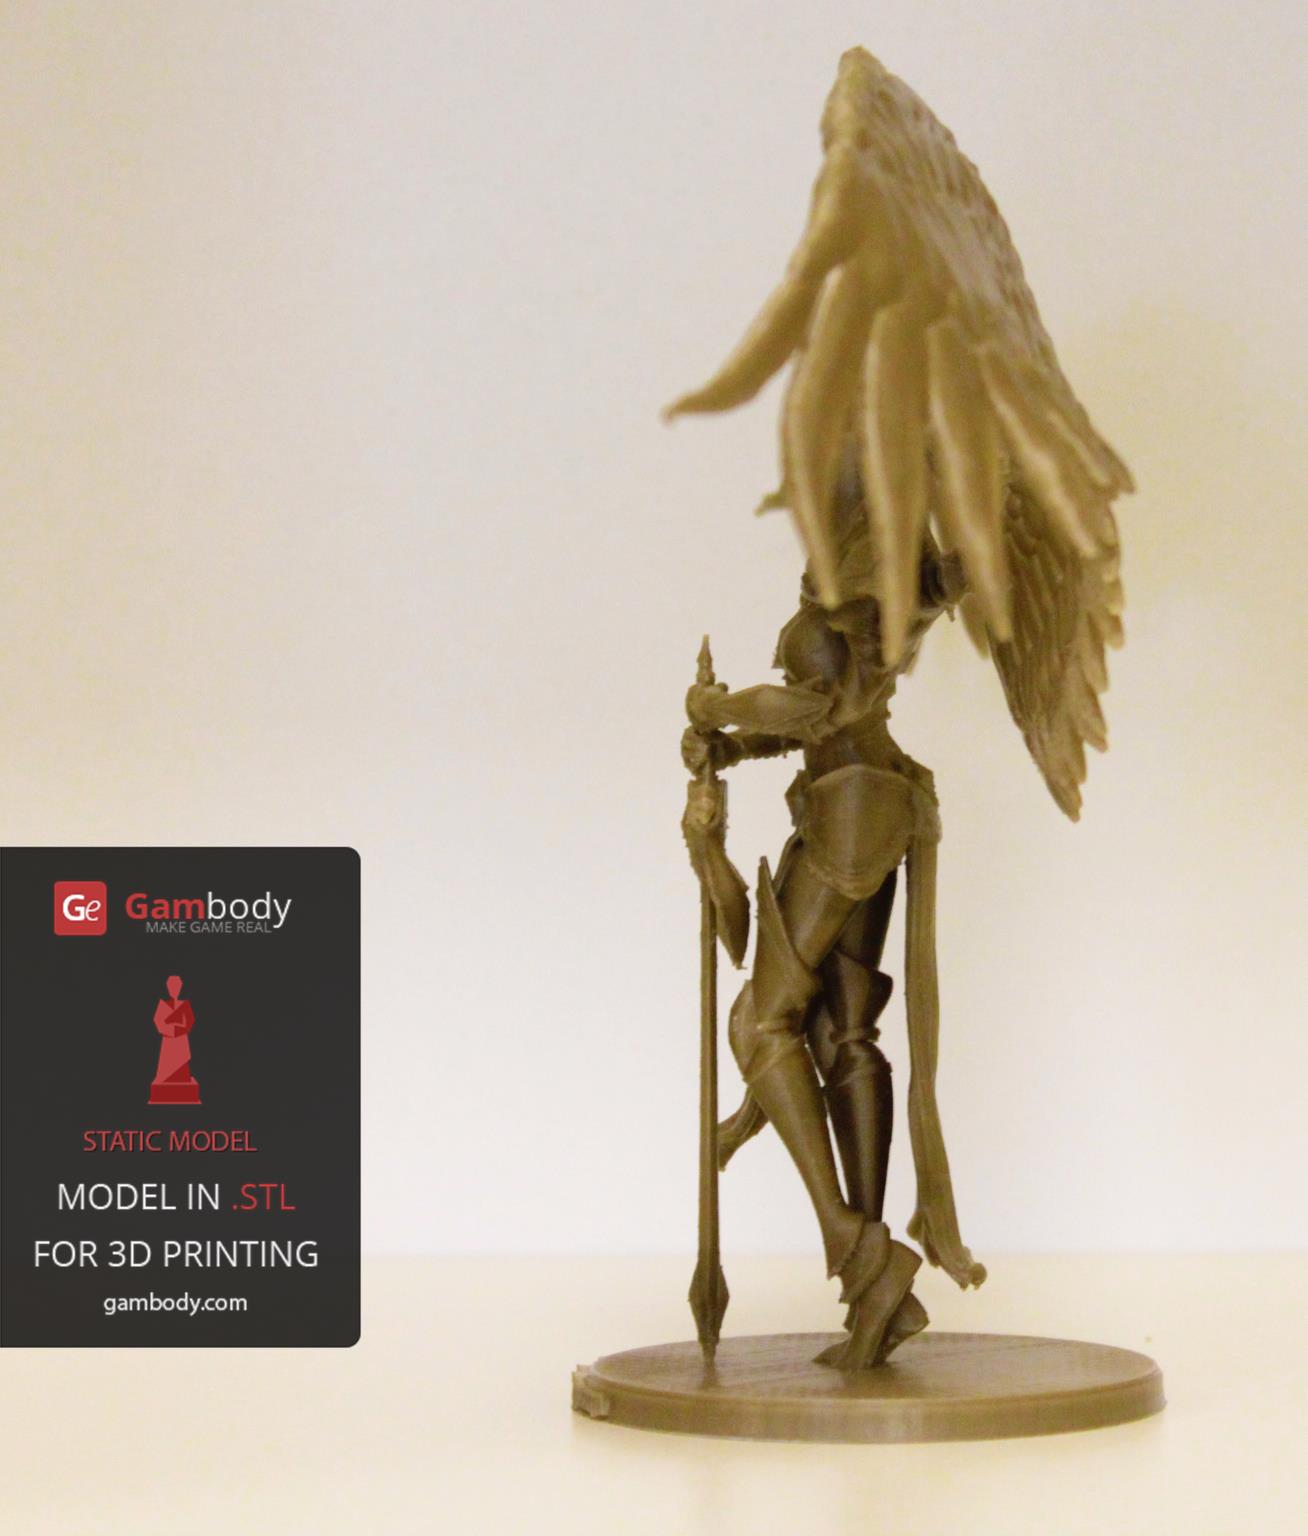
Looking at the model it is not hard to see that it consists of two large elements (the wings) which can get the model lose balance when being displayed on a level surface. However, the model is designed in such a way as to make sure that it keeps balance under its own weight.
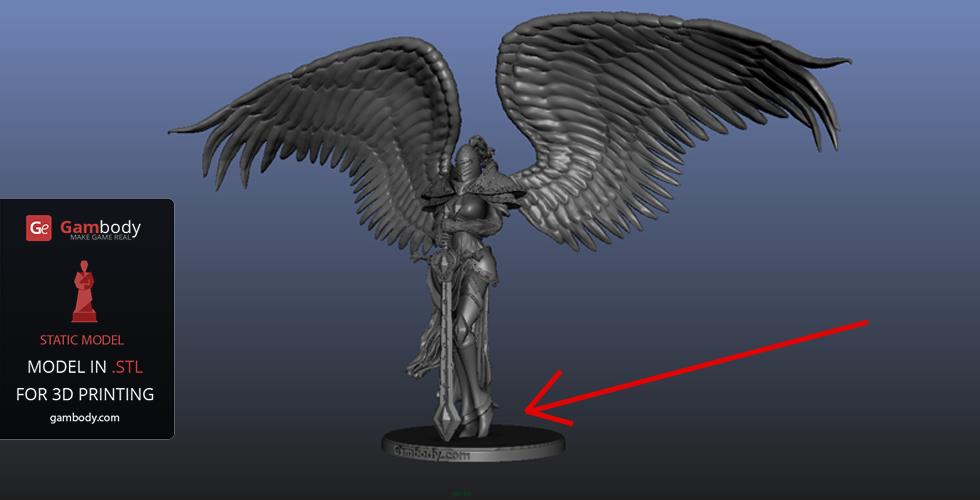
The model is positioned under a 90-degree angle with the support. This allows the model to not fall over to one or another side as opposed to its center of gravity and transverse position.
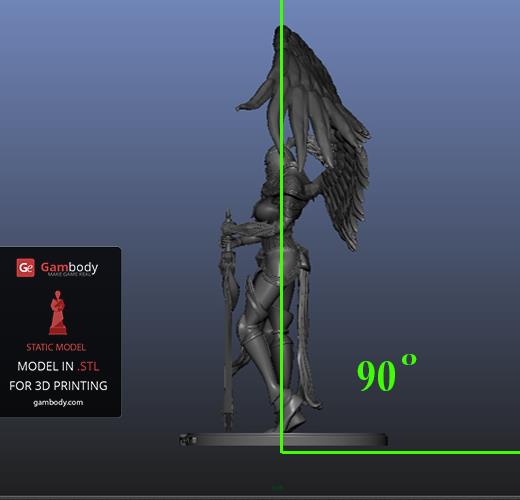
When you create a 3D model for 3D printing and want to make sure that the wall thickness value is right, apply the 90-degree rule opposed to the model’s center of gravity, to avoid the model loosing its balance under its own mass.
Read the Guide on How to Export 3D Models in STL Files and Prepare for 3D Printing
The aforementioned and presented pictures are as example for a model for which the 90-degree rule applies.
Measuring wall thickness in Autodesk Maya
You can measure your 3D model’s wall thickness directly in the CAD you design it. We will illustrate this process for Autodesk Maya, a CAD that our in-house modelers are working in.
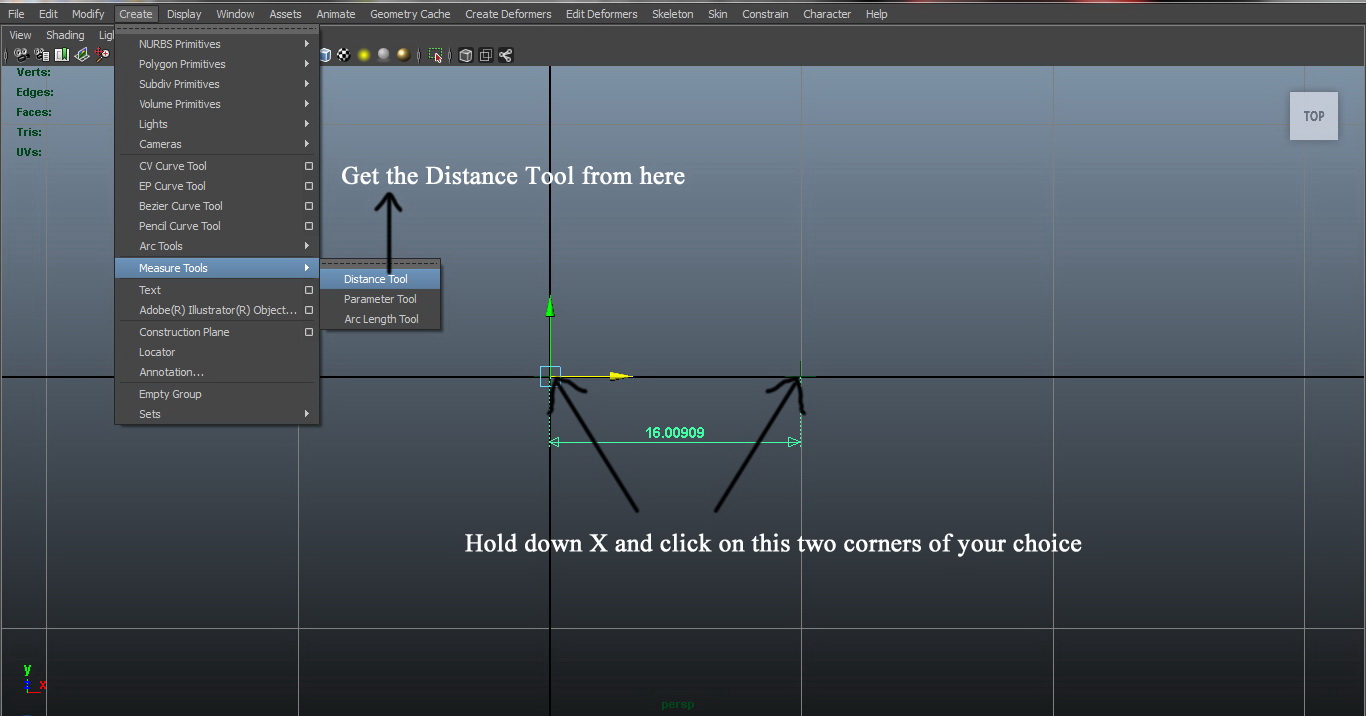
- Click Create in the toolbar
- Select Measure Tools > Distance Tool
- Hold down X and click on two corners of an element you want to measure the thickness
Why is wall thickness important?
As stated above, wall thickness is the value that gives a 3D model durability and strength. Too thin walls for large surfaces of a model can be ruined by the printer simply because it is unable to print it properly. The thinner the wall is, the more fragile and prone to damage and warping the model is.
To avoid the likelihood of your figurine getting damaged, setting up a thicker wall thickness will ensure resistance to the pressure you apply when removing support and processing the model after printing.
One more advantage that complying with the minimal wall thickness requirements brings in is that when you order your 3D print design at a printing service, you avoid the figurine getting damaged and broken during shipping.
Conclusion
Knowing how to assign correct wall thickness to any part of your 3D model in the software you work will ensure that the object is correctly printed. Also, keep in mind that recommended wall thickness strongly depends on the printing material properties.
So, keeping them in mind is crucial as well. And the third thing to consider when deciding on the value of wall thickness is the geometry and design of the 3D model.
If you still need help, you can always request assistance from forums and communities for 3D printing, or you can leave a message in the comments section below and we will gladly help you.


Best 3D Printer Ventilation System for Resin and Filaments
Read Article
Popular 3D Printing Infills: Your Guide to Best Results
Read Article