
Special deals Start selling Blog Community
Partnerships
More
en
USD
Premium Stock
Premium
Information
Search tips:

• Looking for an exact name? Put it in quotes:

Example: "iron man"

• Want models from a specific author? Use @:

Example: @gambody
Cart
<< Back to previous page | Community \ Tutorials \ From print to paint: My Alien Pumpkin

From print to paint: My Alien Pumpkin

Printing the pumpkin base

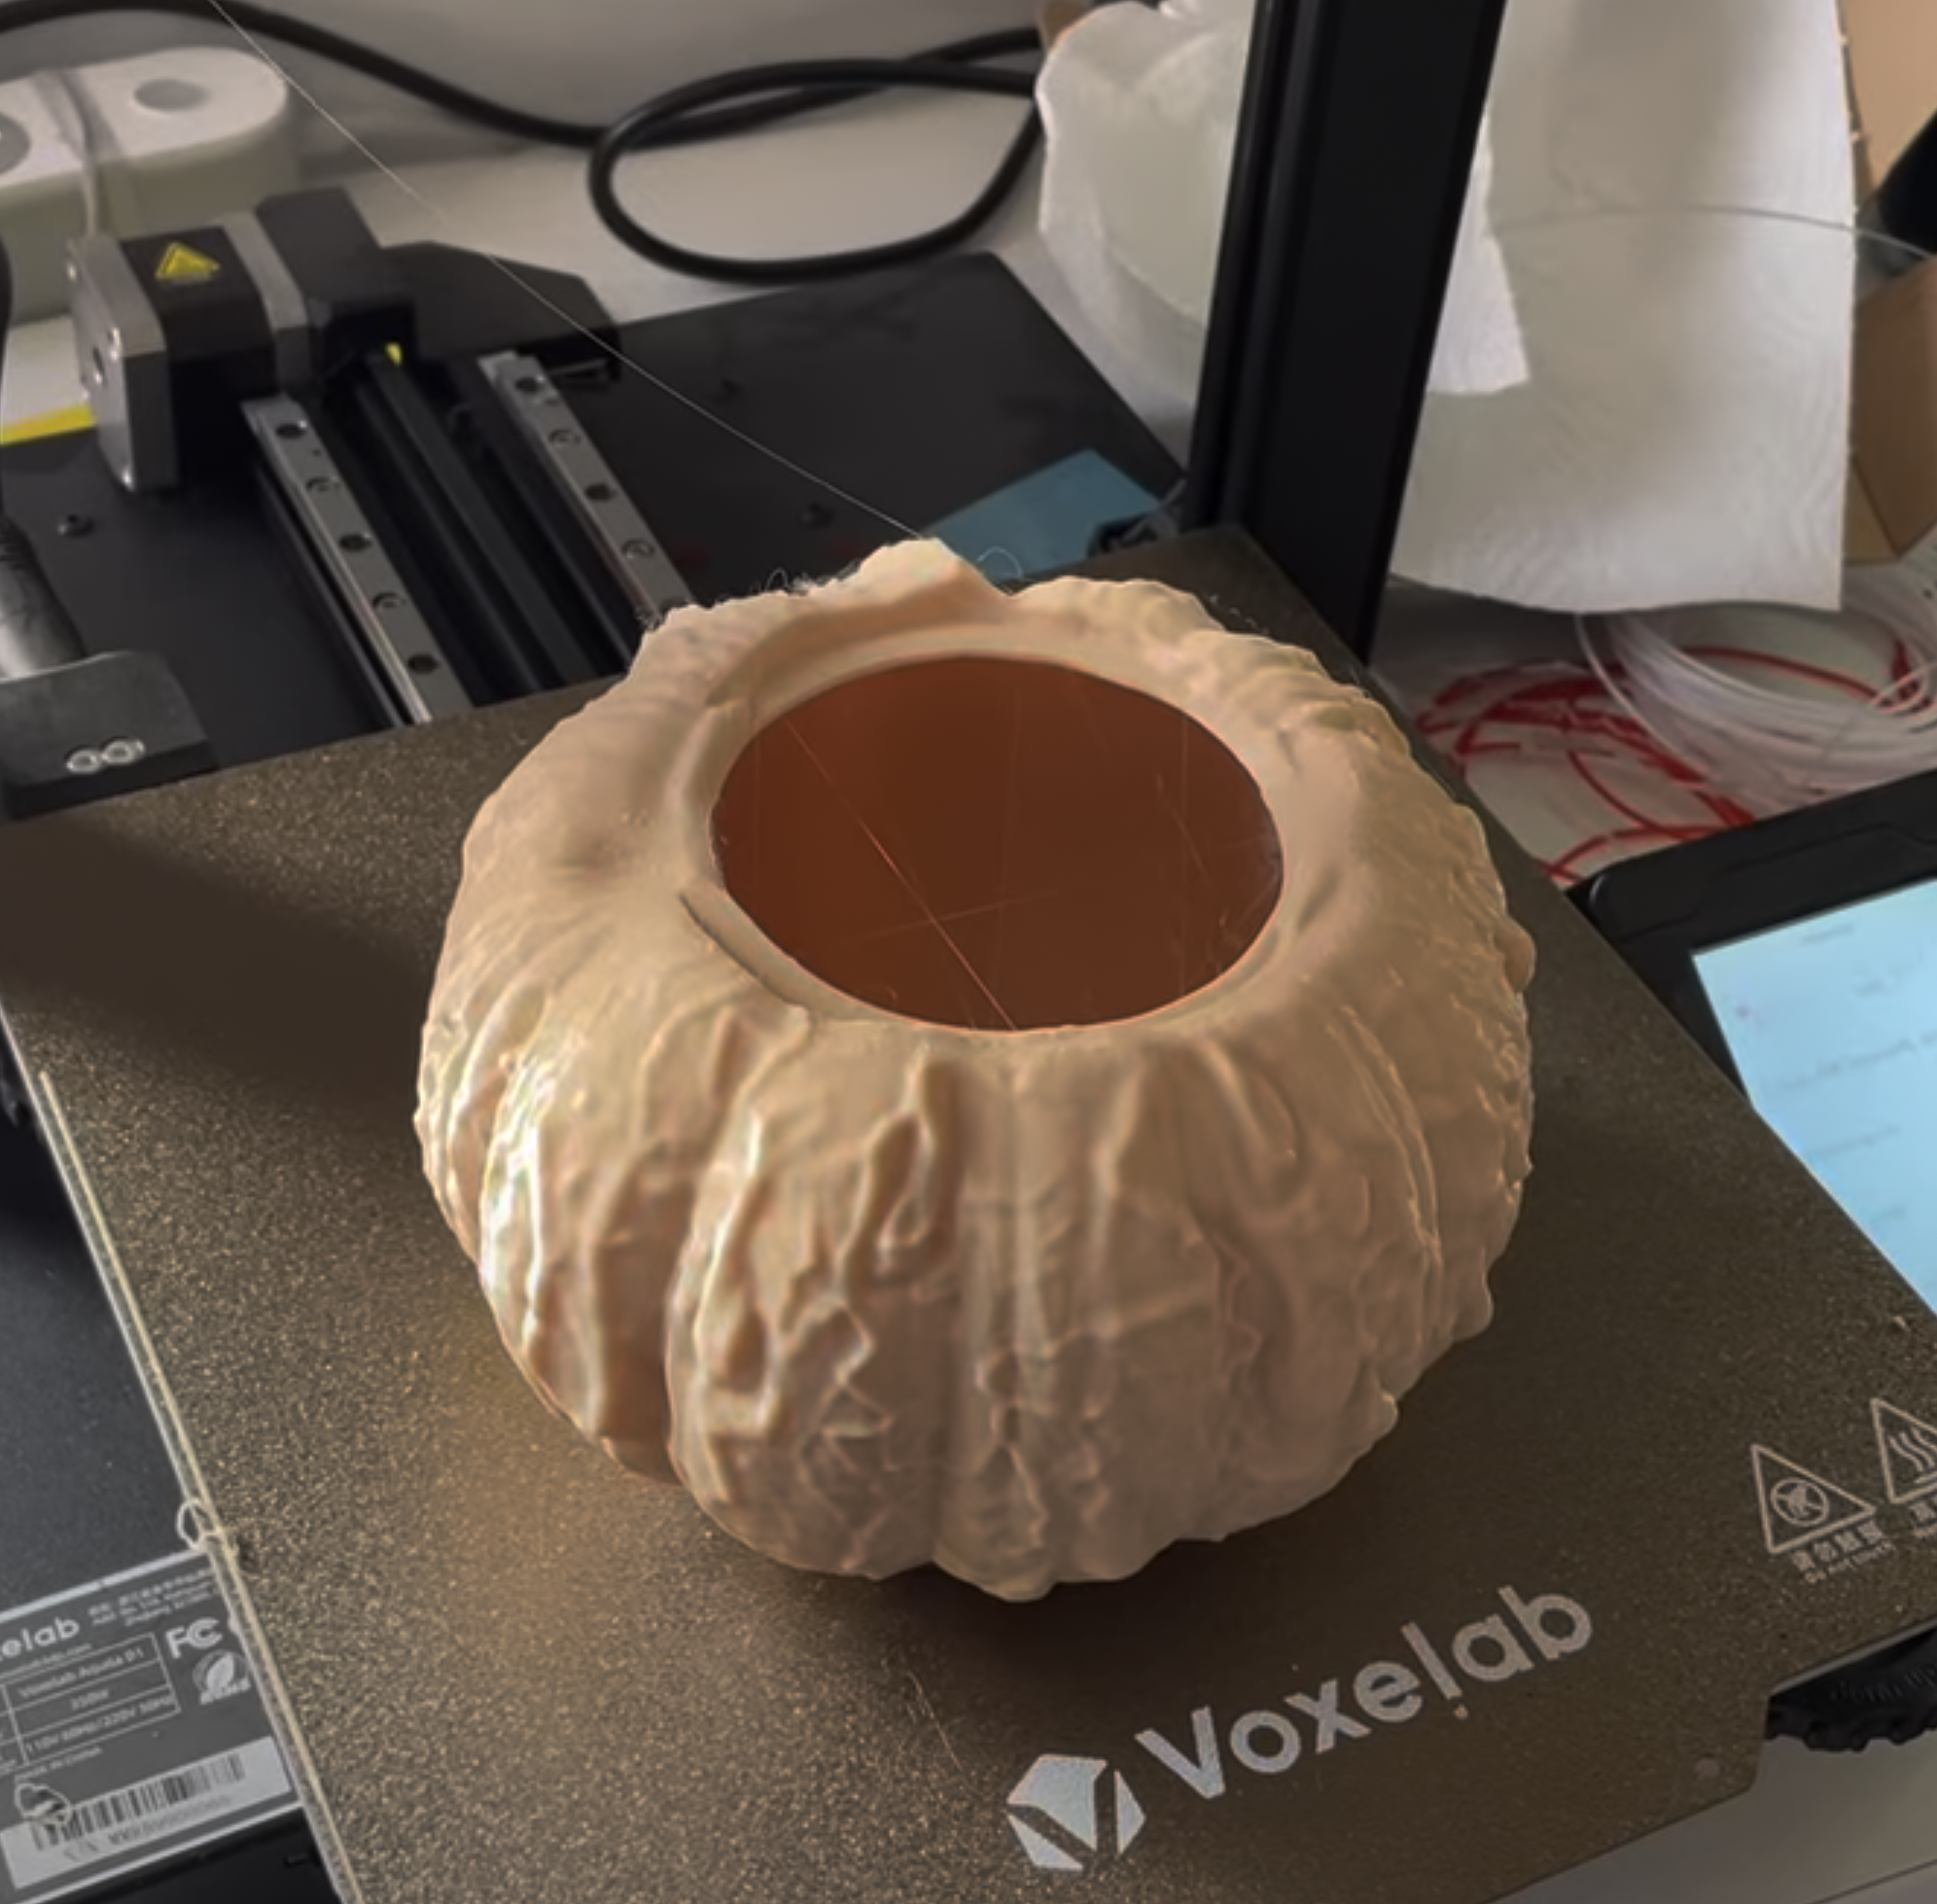
I started by printing the pumpkin in PLA because it’s easy to work with and a good choice for decorative projects. Since I wanted to use the finished model as a candy bowl later, PLA also felt like a practical option for this build.

For the print settings, I used a 0.12 mm layer height as a good balance between detail and print time. I set the model to 2 walls and 5% triangle infill, which was enough because this piece is mostly decorative and doesn’t need to handle any heavy нагрузка. I also used standard tree supports to help with the more complex shapes.

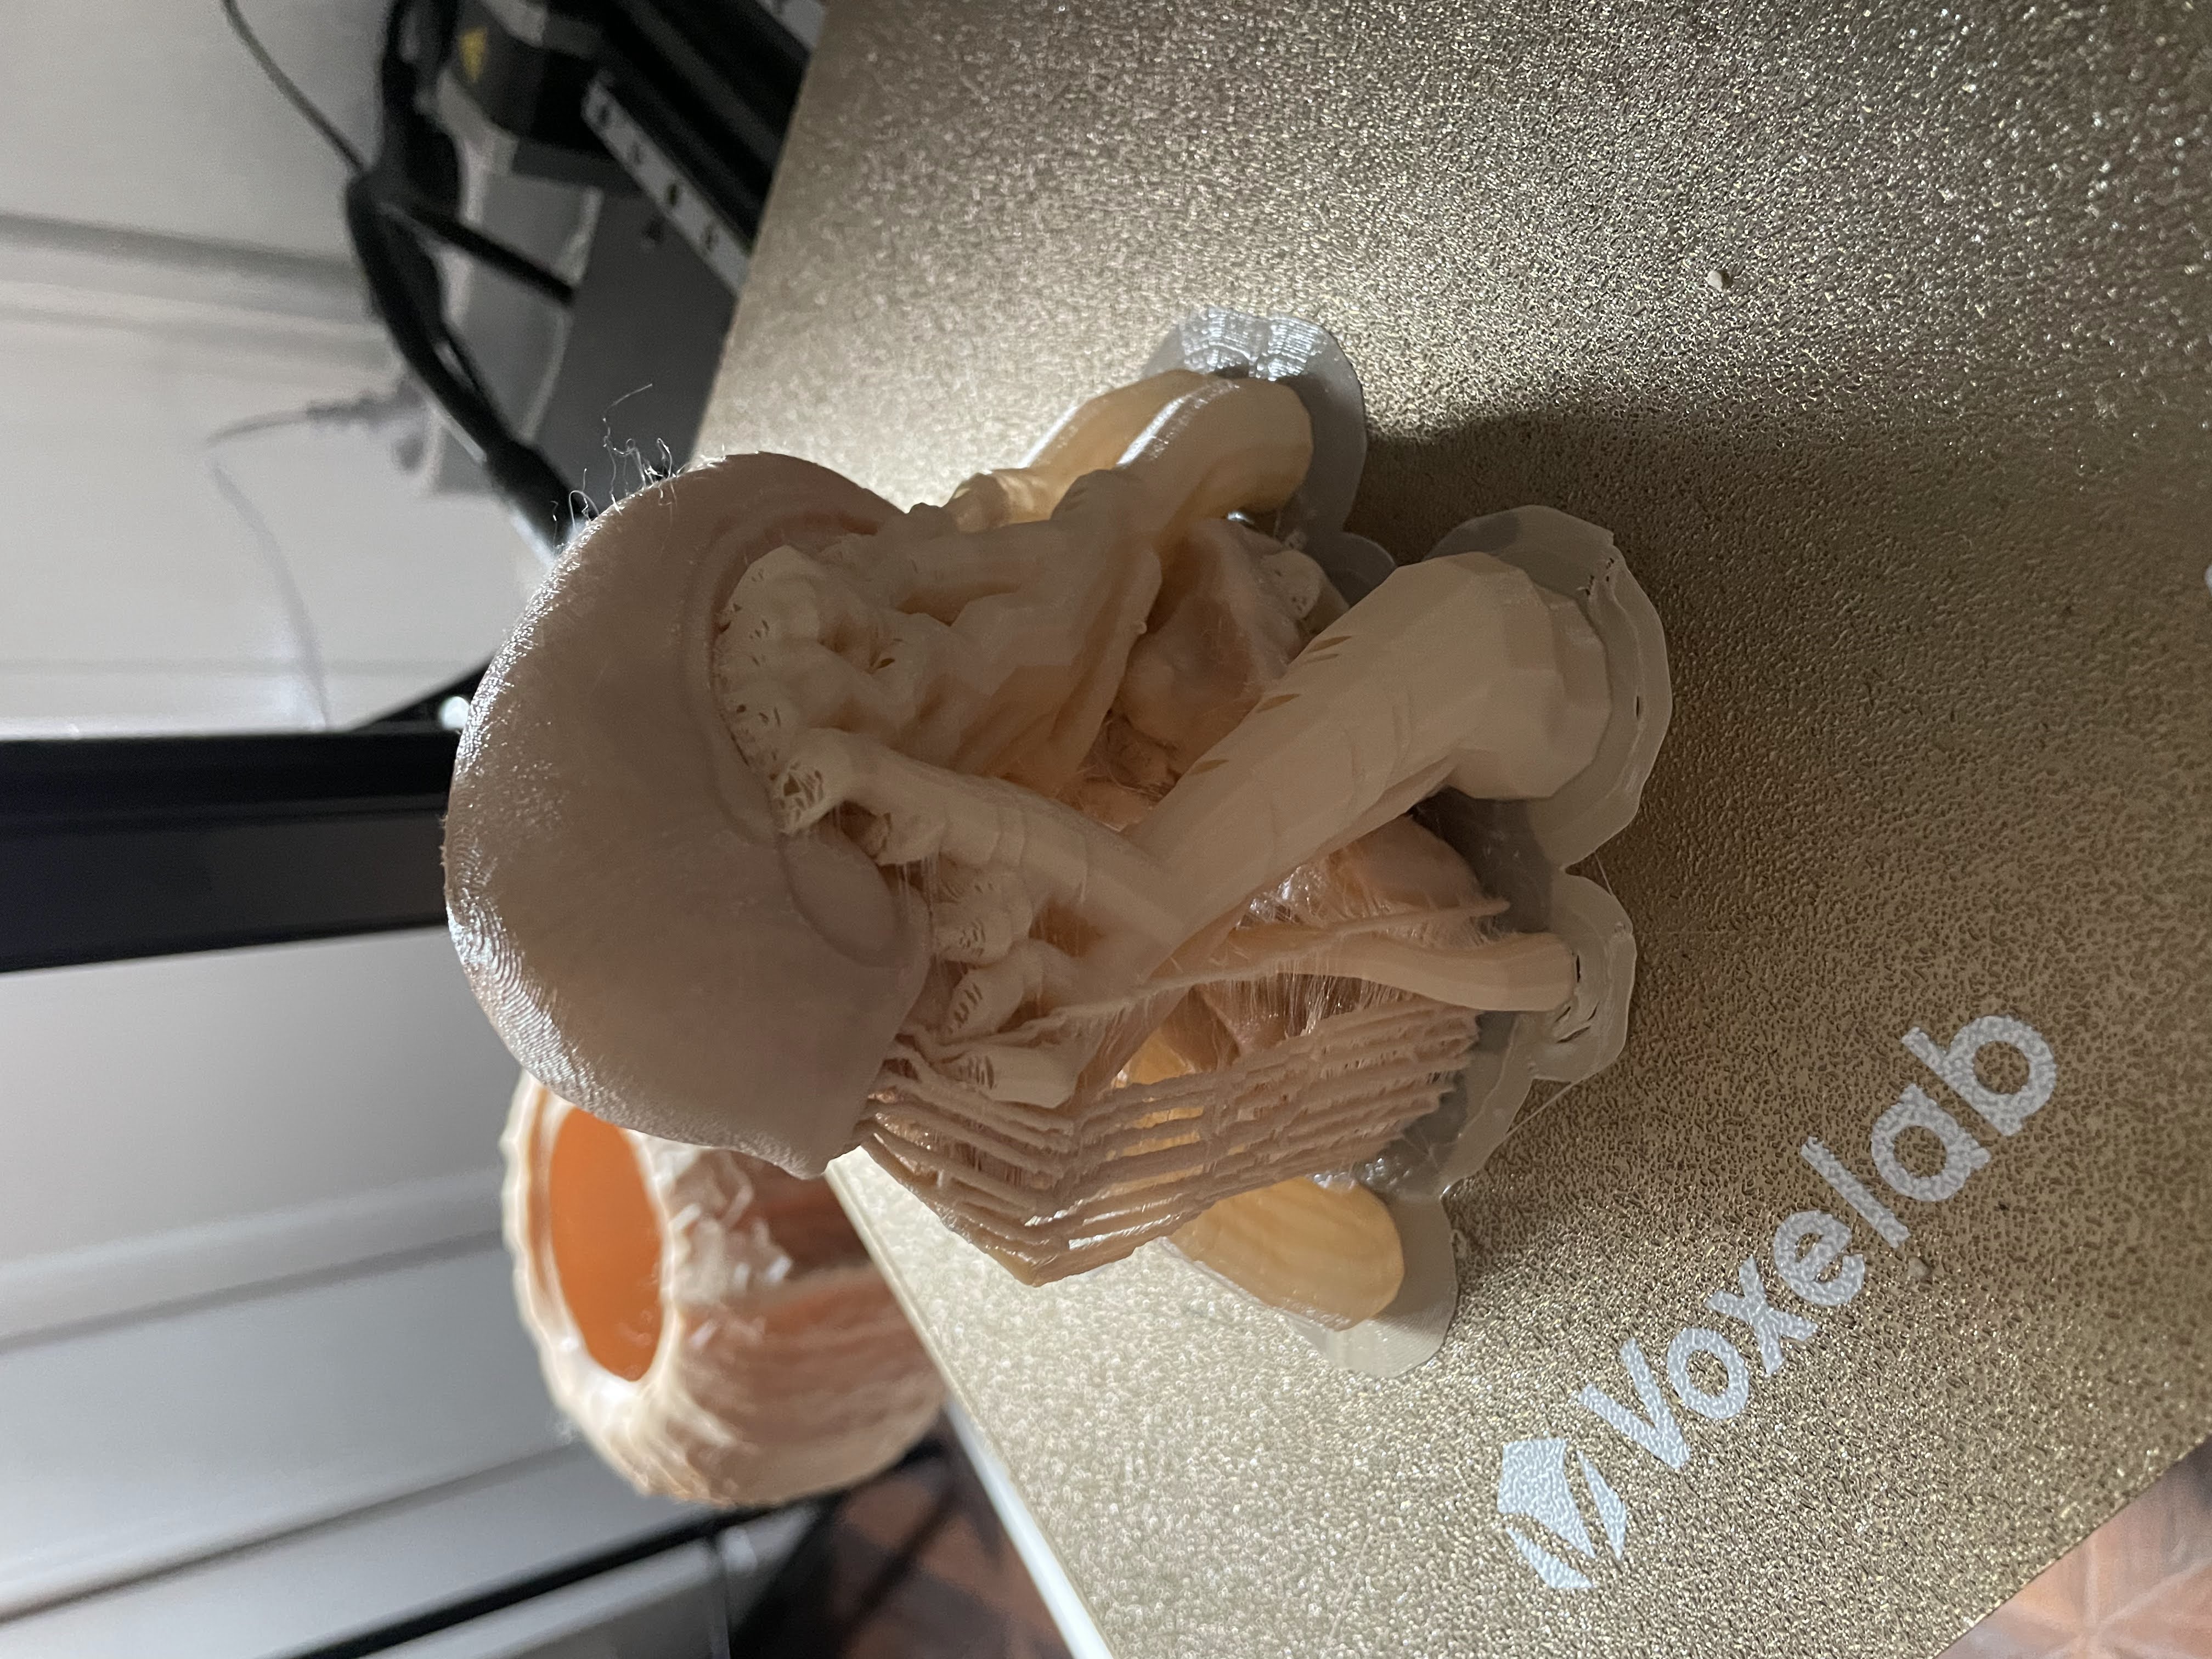
My original plan was to print everything in a skin-toned PLA and finish it with a simple paint job. However, I ran out of filament halfway through the process. Instead of scrapping the idea, I used that problem as an opportunity to change the final concept.
Reworking the head and changing the concept

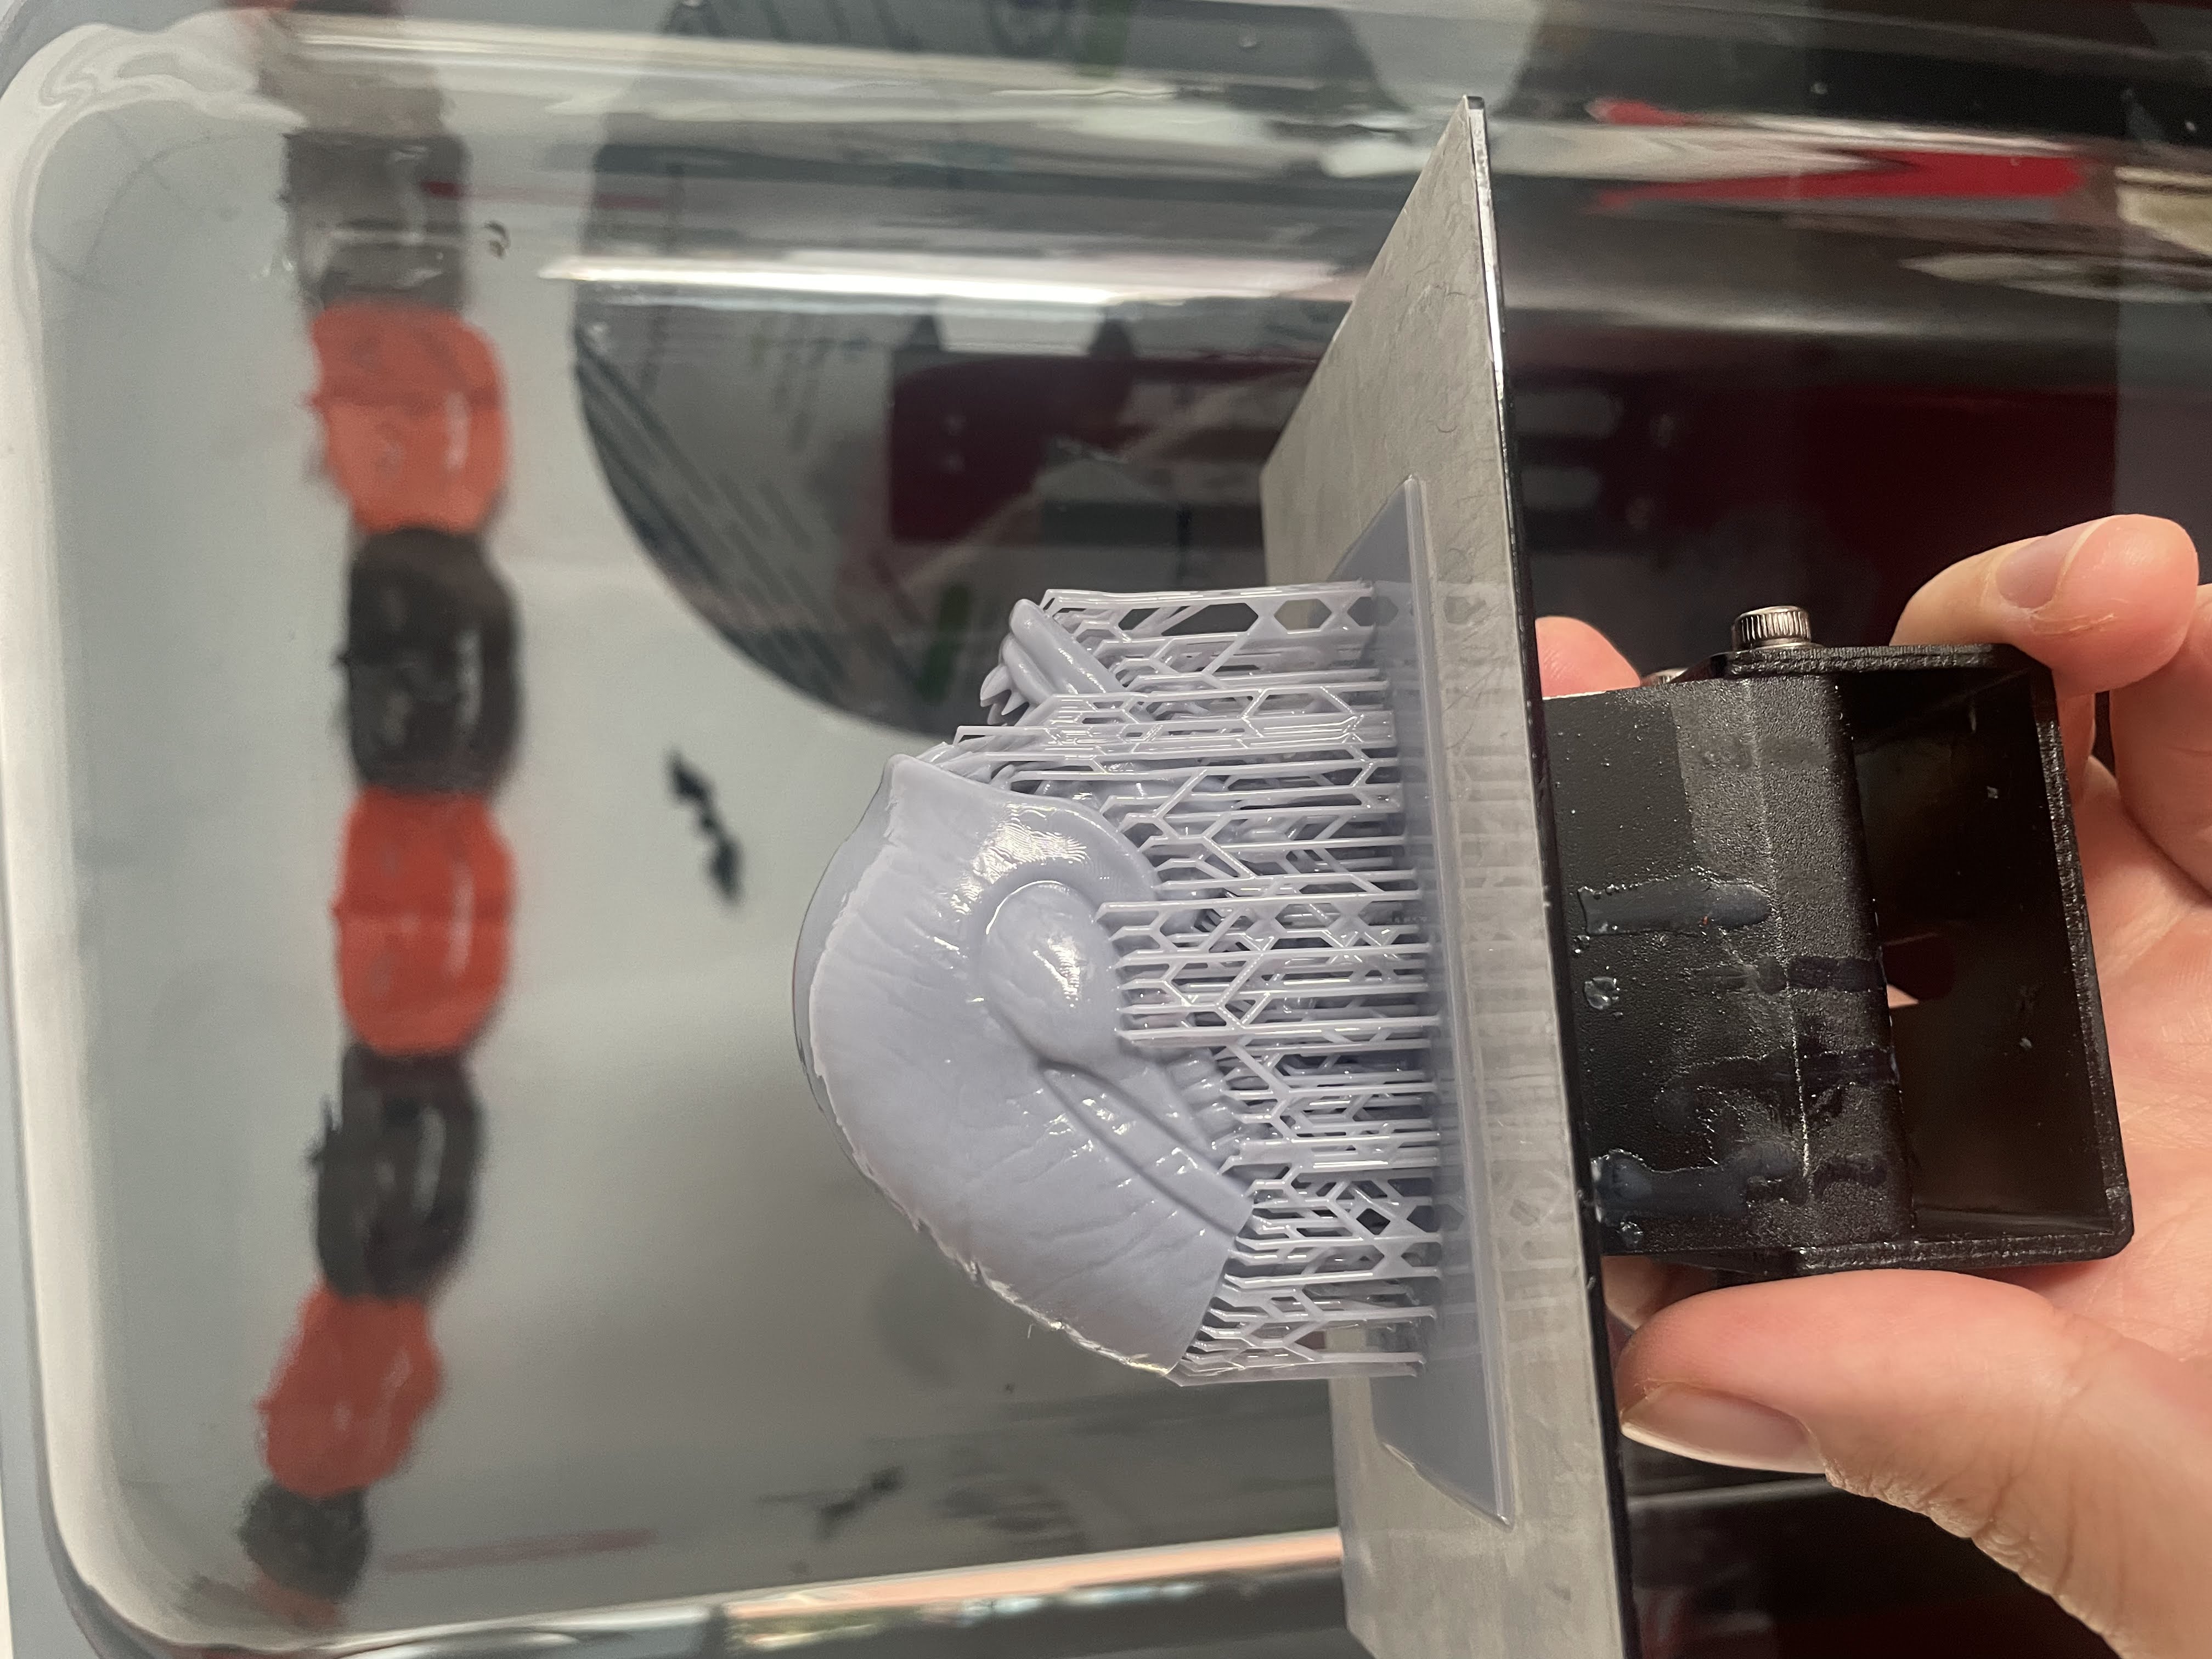
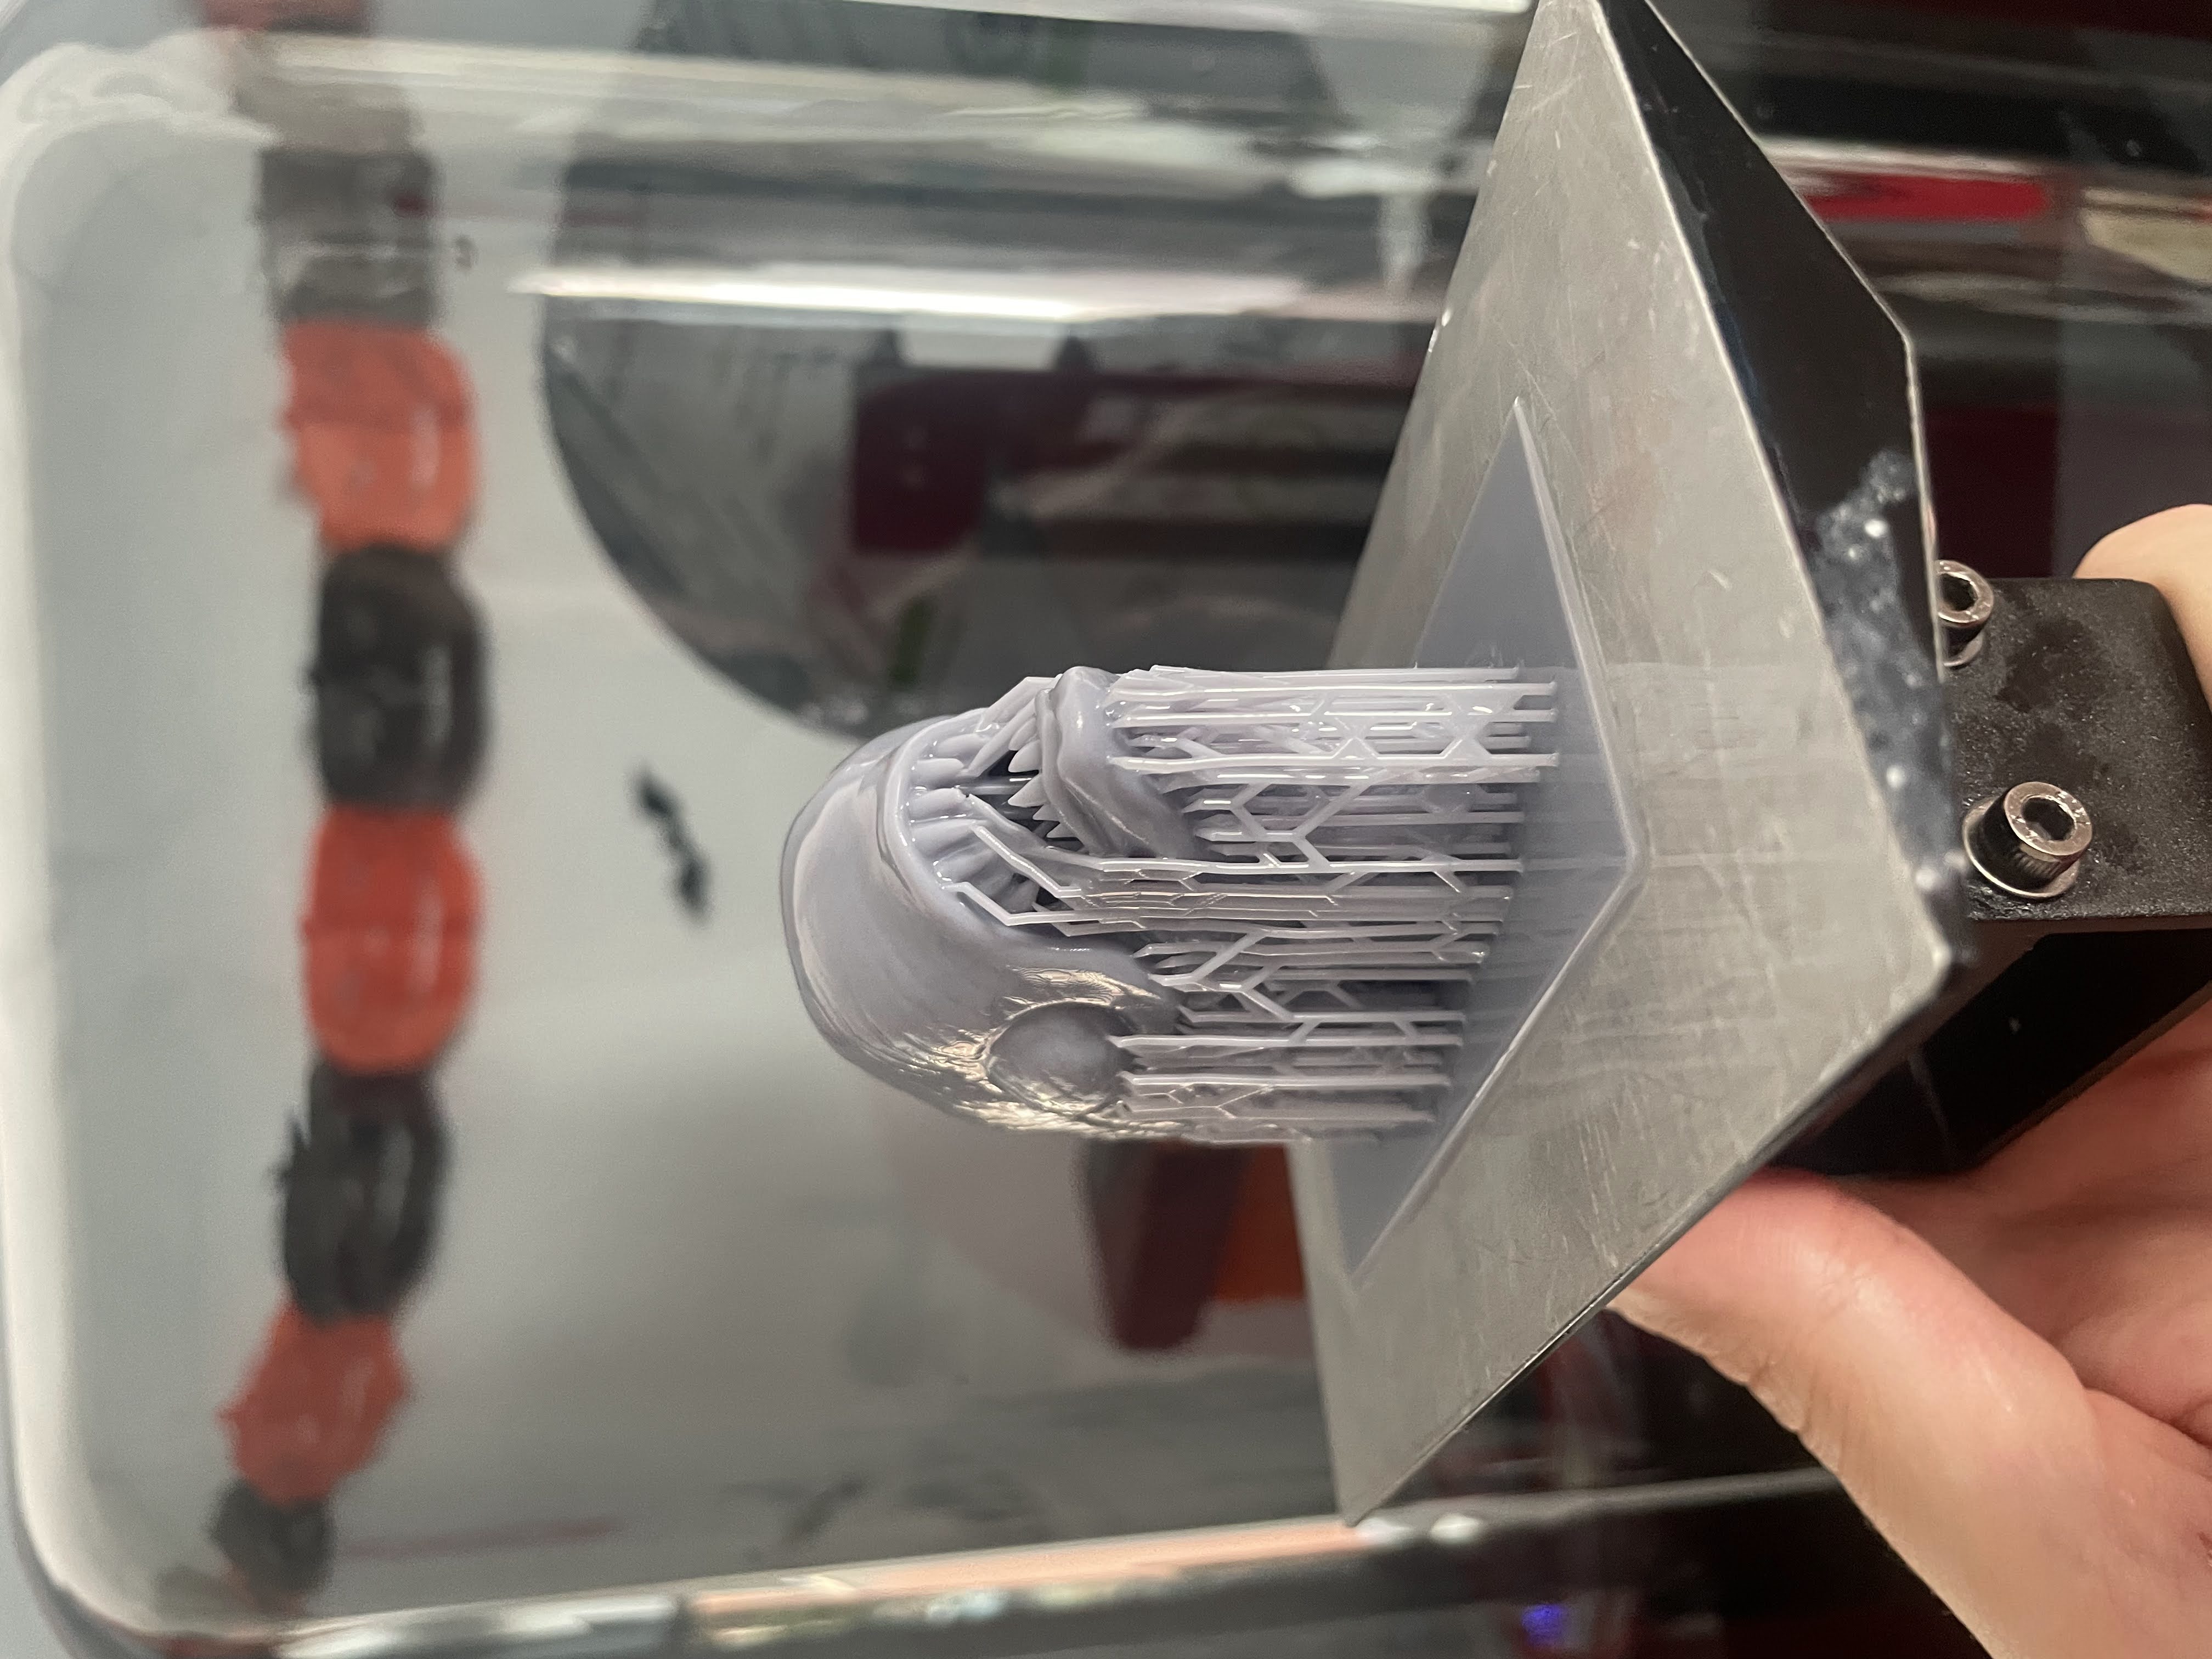
After running out of skin-toned PLA, I decided to rework the top part of the model. My neighbor had an SLA printer available, so I printed the top of the head separately using that machine.

Because I didn’t have enough matching filament left for a consistent color approach, I decided not to chase the original look anymore. Instead, I changed the direction of the project and turned it into a darker, creepier version. This ended up working even better for a Halloween-themed piece.

At this stage, the main goal was to prepare the model for a full repaint and think about how to make the sculpted details stand out more, especially the veins and the slimy organic shapes.
Priming and base painting

To build the new look, I primed the entire model with The Army Painter Colour Primer Matt Black. This gave me a deep, even base and helped set the dark tone for the final result.

Once the primer was dry, I began working on the base painting. Since I wanted the model to look more eerie and organic, I moved away from a clean or realistic palette and started building a darker color scheme instead. My goal was to make the pumpkin look more sinister and to bring more attention to the bulging veins and surface texture.

Shading, highlights, and finishing effects

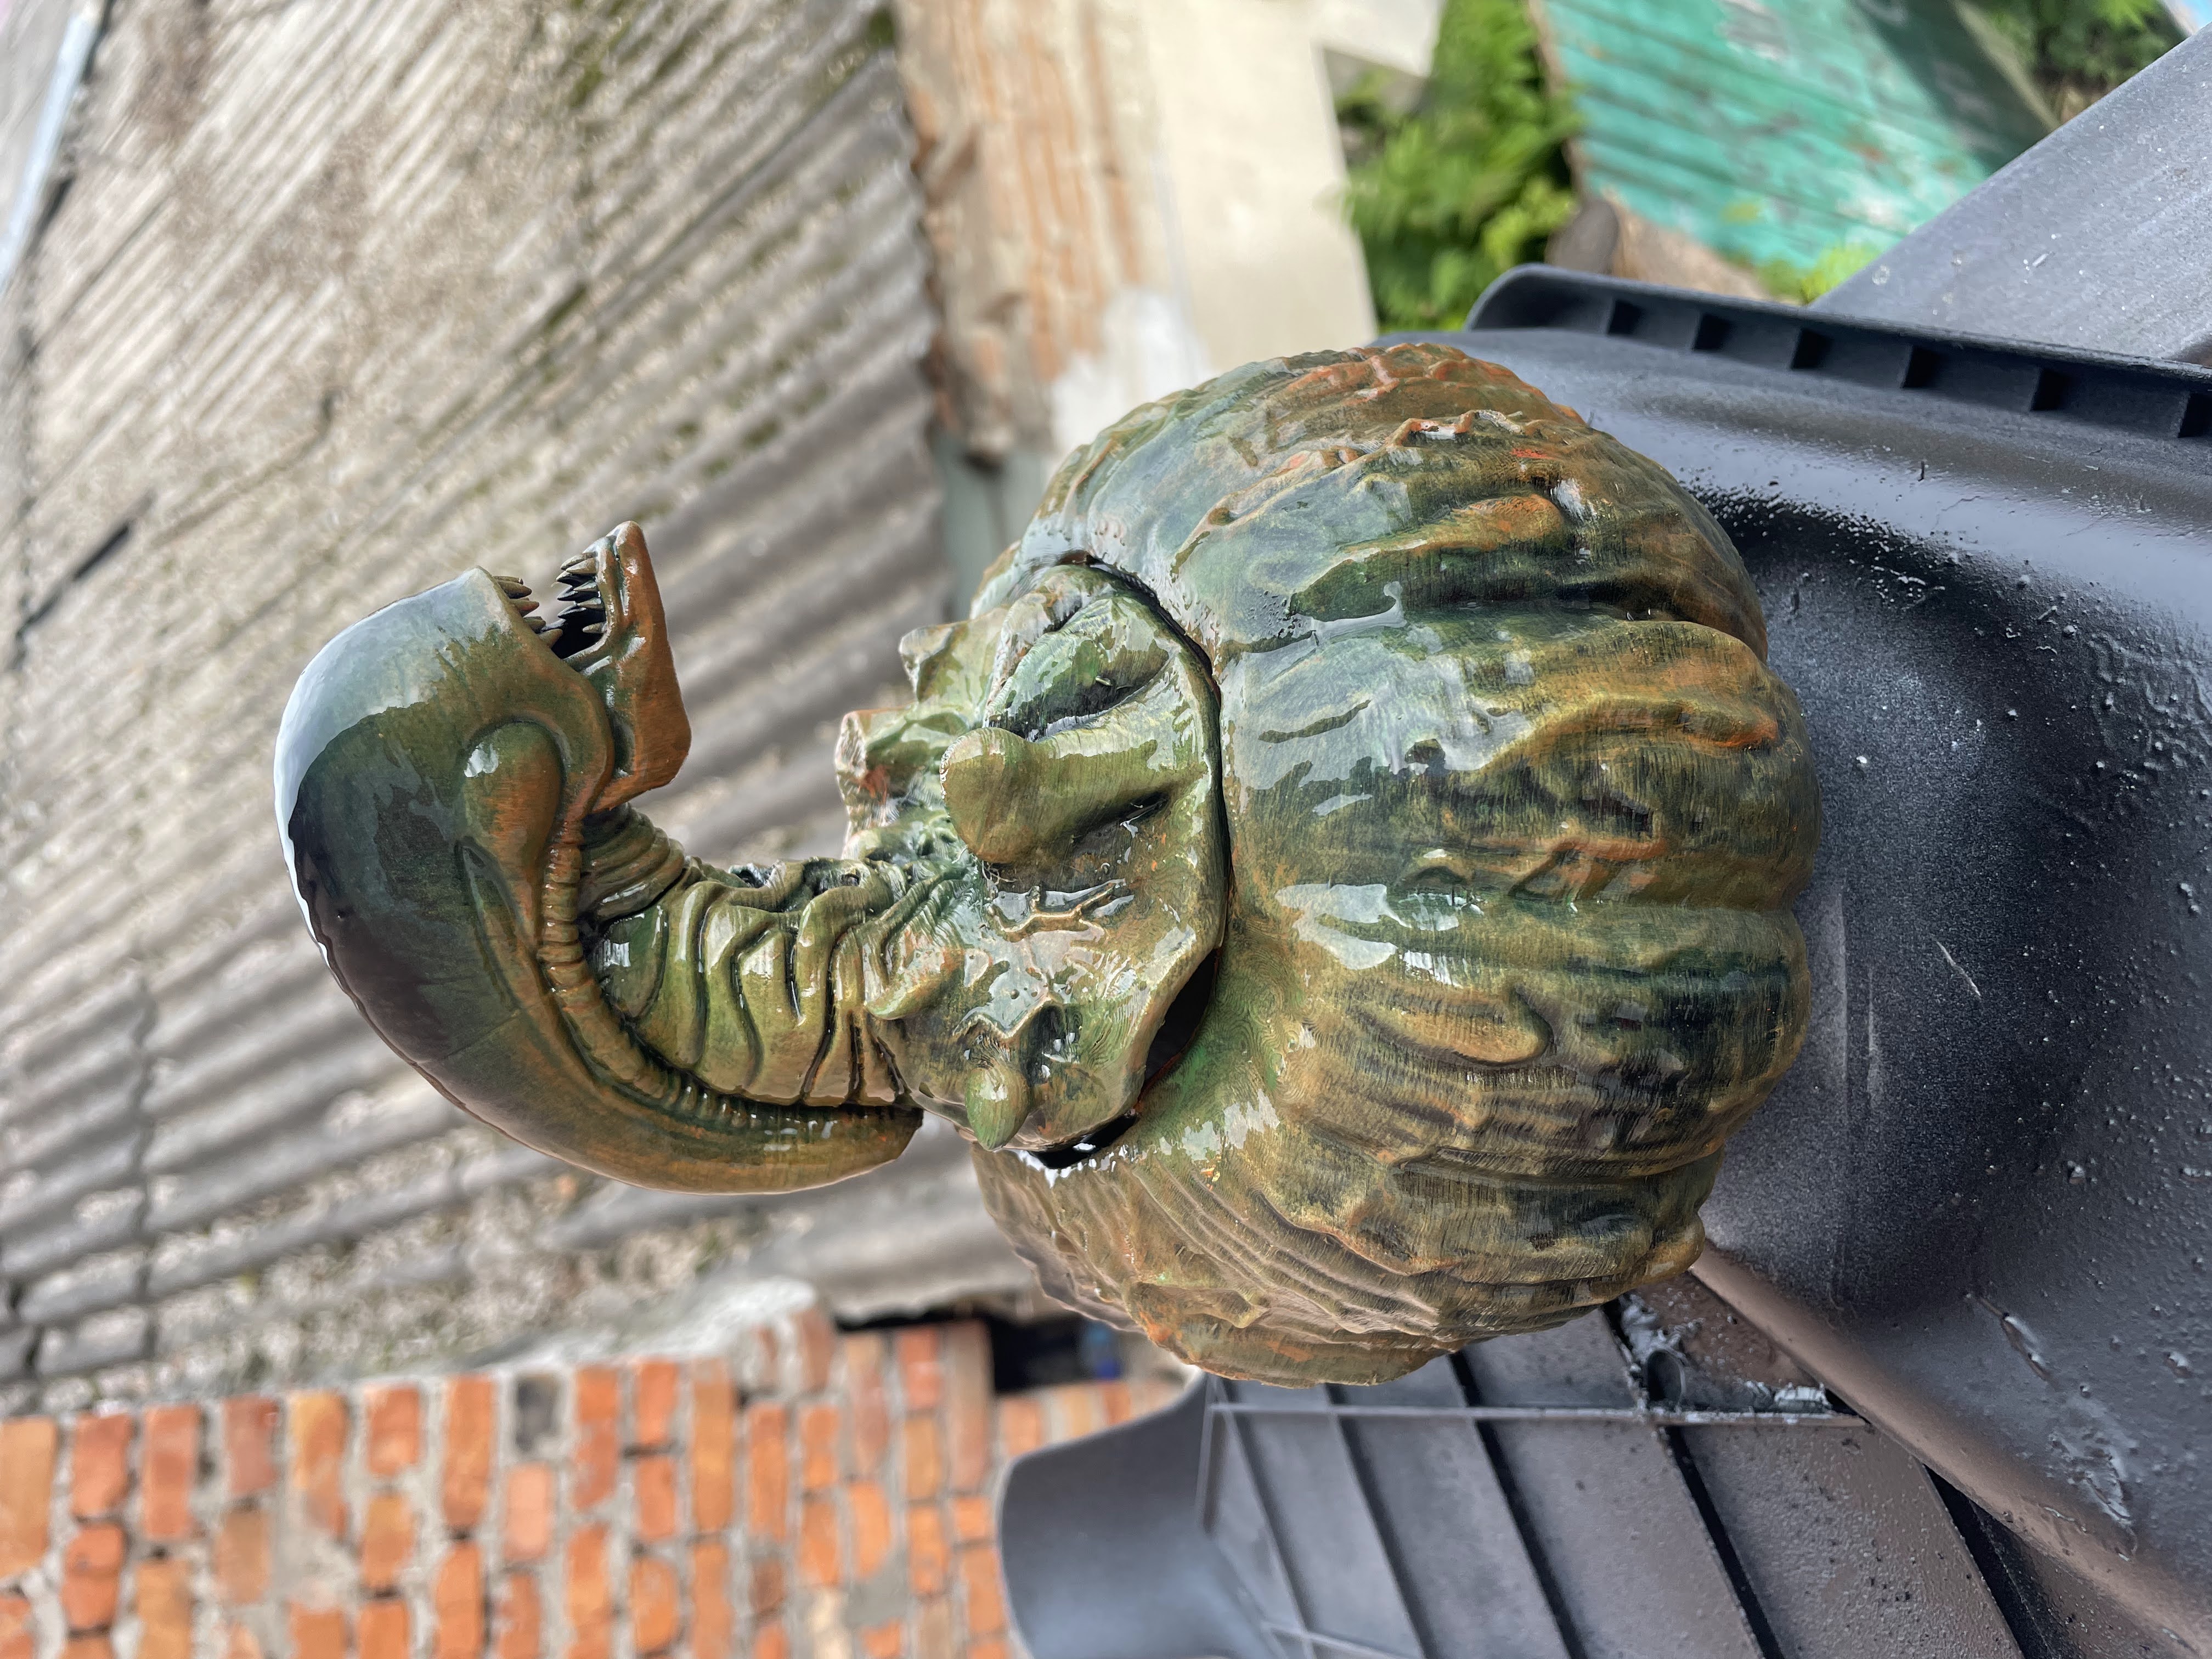
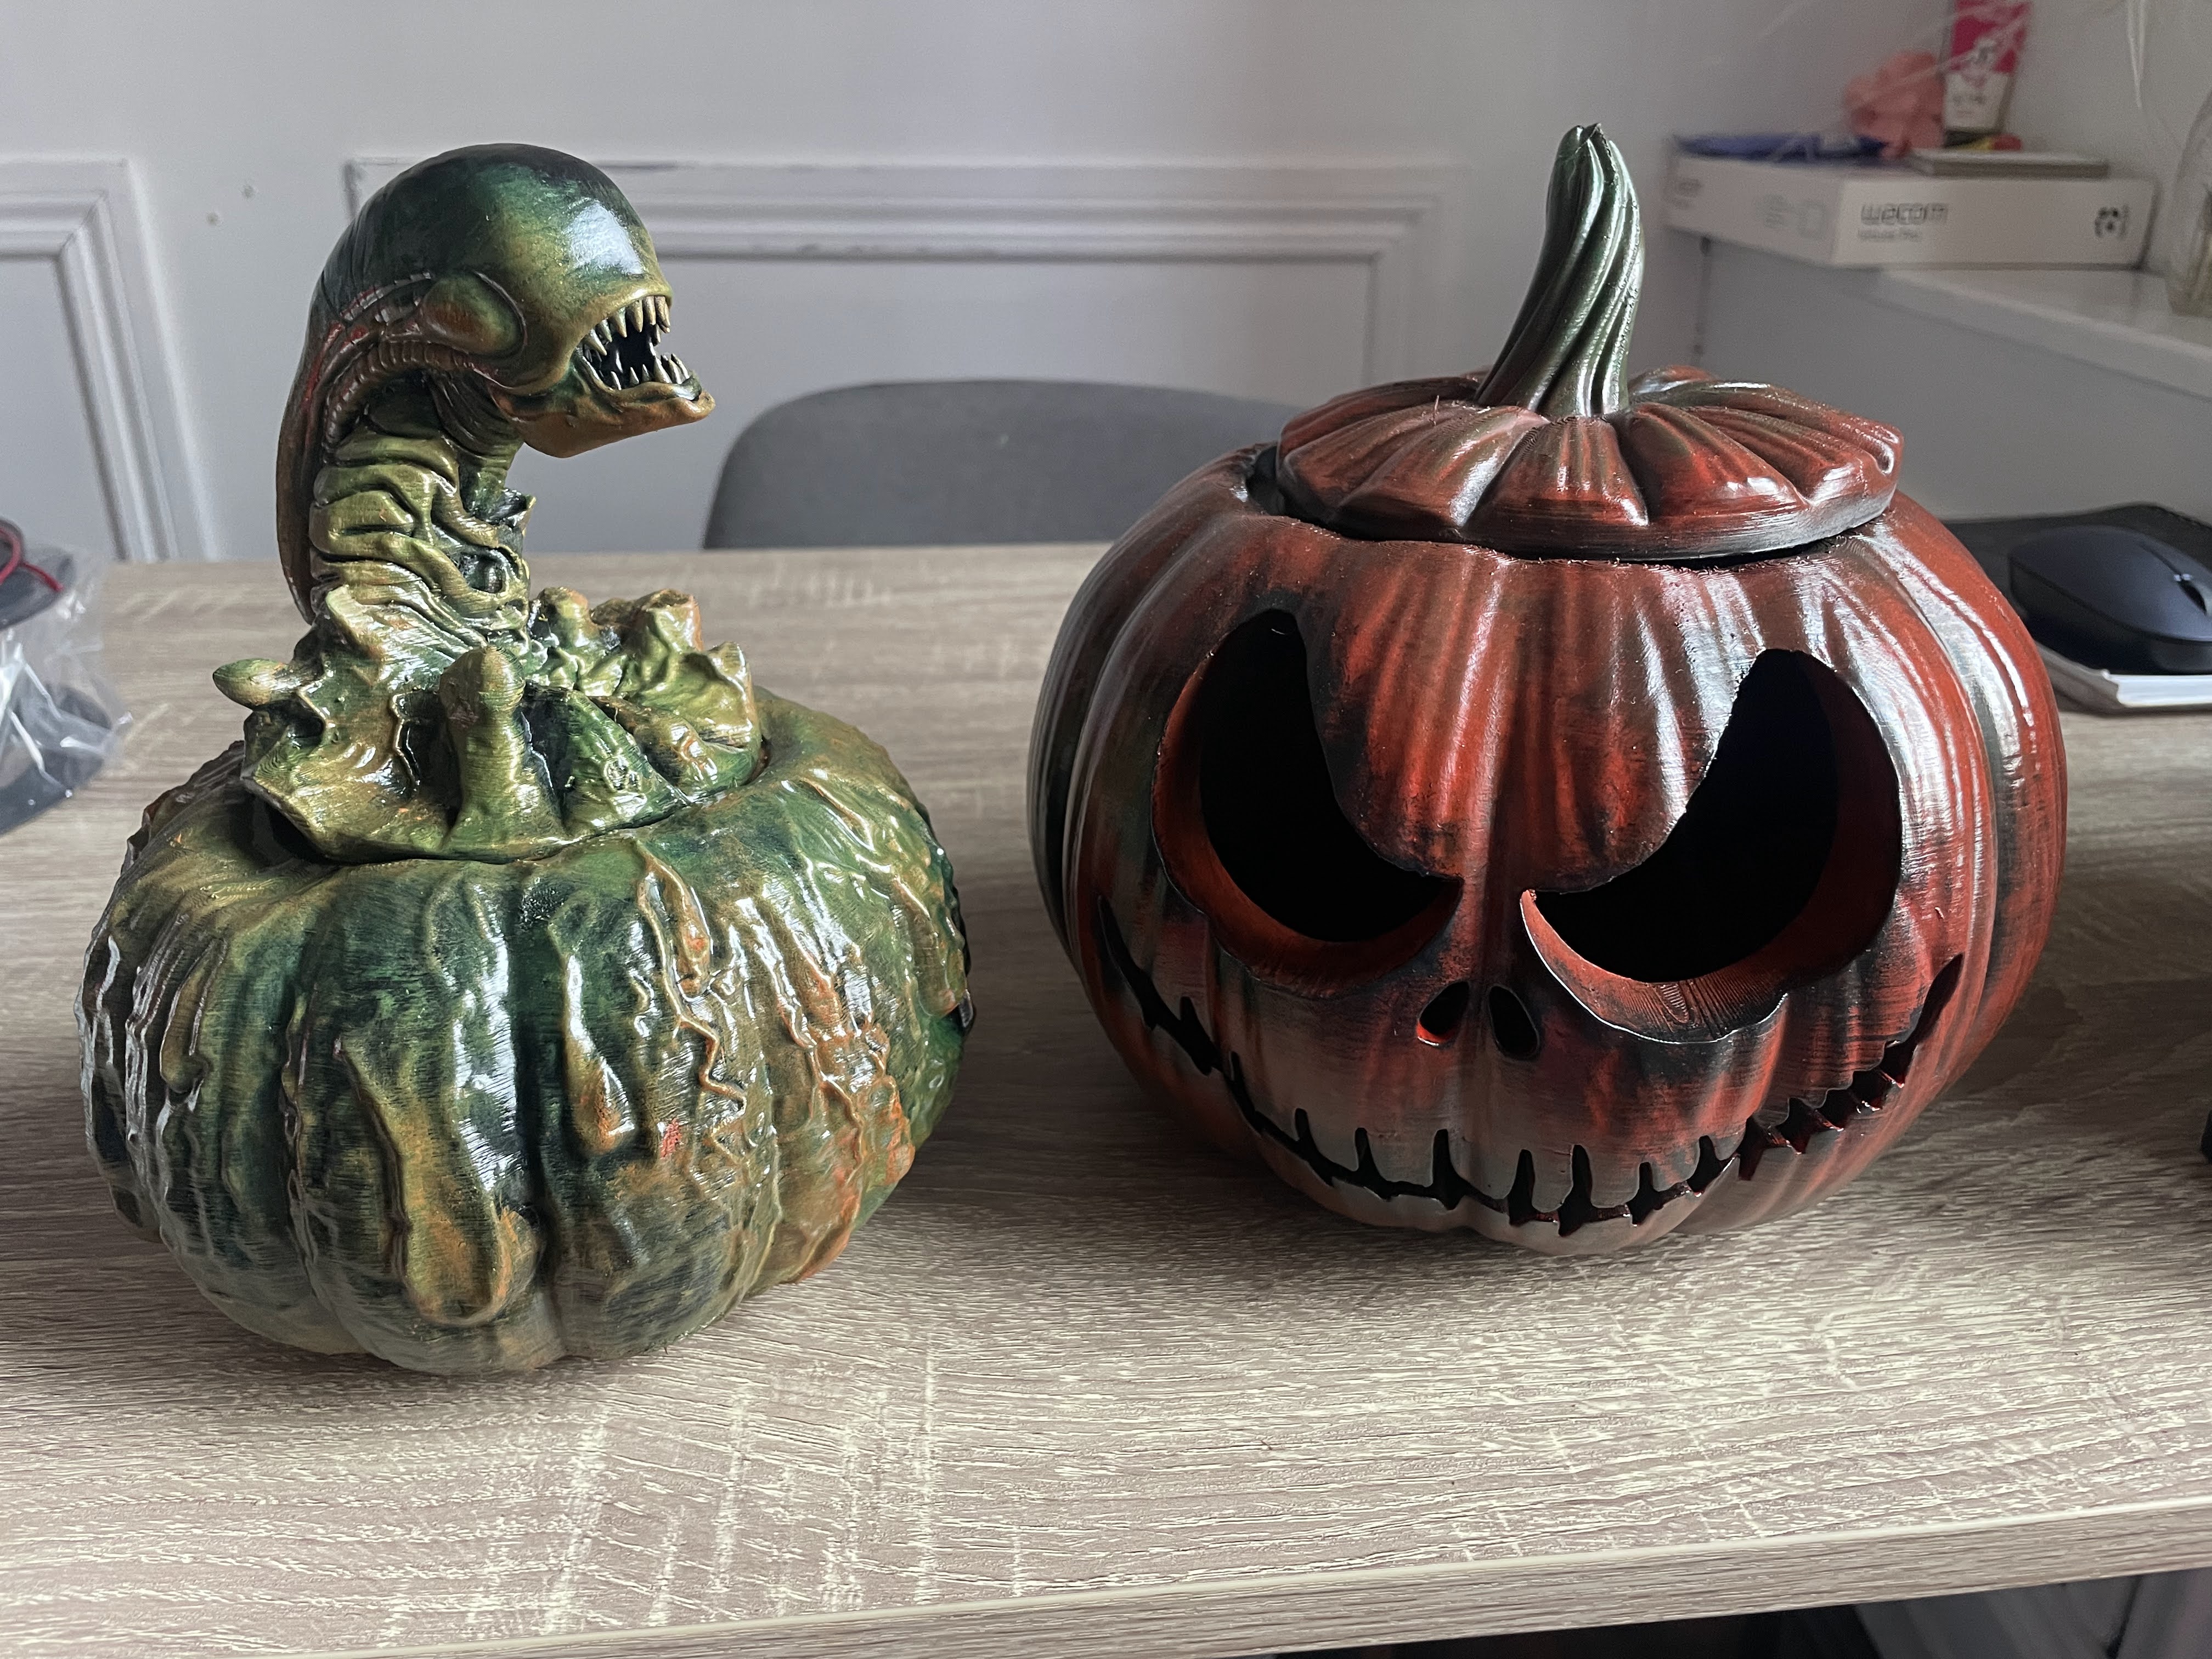
For the main paintwork, I used Vallejo acrylic paints and mixed different shades of green, blue, brown, and red to create a darker, more unsettling finish. Rather than relying on a single flat color, I layered and blended tones to add variation and make the surface feel more alive.

A Green Stuff World wet palette (10183) was especially helpful here because it kept the paints workable for longer and made blending easier. I used the darker tones in the recessed areas and around the details, then added lighter highlights to bring out the sculpted texture and give the model more depth. I used nylon brushes in sizes 8, 10, and 12 for painting the different areas and details.

The finishing stage was all about enhancing the creepy look. I focused on emphasizing the veins and adding slimy, organic-looking effects so the final result felt more dramatic and Halloween-ready. To finish everything off, I applied a coat of clear glossy varnish spray to give the model a shiny, slimy-looking finish.
 PixelToPlastic
CA
Default achievementDefault achievementDefault achievementDefault achievement
Information
Achievements are coming soon - stay tuned for future updates!
Report
Follow this tutorial to print and paint the Halloween Pumpkin Alien and turn it into a creepy Halloween centerpiece. I’ll show the print settings I used, how I adapted the project after running out of filament, and how I created the final dark paint scheme with shading, highlights, and slimy details.
FFF/FDM printing: Voxelab Aquila
PLA (Bambu lab basic refill beige (10201))
DLP/SLA printing: ELEGOO Saturn 4 Ultra
Standard Resin (Anycubic Grey HD)
Printing time: 6 hours
Painting time: 3 hours
CHITUBOX Pro V1.3.0, Ultimaker Cura 5.0
15 October 2026
0
0

Verified

Cookies Consent

We're glad you're here! Before you continue, let's set a few preferences to improve your experience on our marketplace. By clicking "Accept", you agree to our use of cookies to make your visit more enjoyable and personalized. This helps us offer you tailored product recommendations and relevant marketing content. Enjoy your time with Gambody, and thank you for choosing us!

Customise Consent Preferences

When you visit any website, it may collect and store information through cookies. These small data files help understand your preferences and improve your overall experience. While they usually don't identify you directly, they make your web experience more personalized. We value your privacy and are committed to being transparent about the types of cookies we use and how they enhance your experience. Explore the categories below to learn more and make choices about how your data is used, tailoring your web experience to your comfort level. Please note that rejecting some types of cookies may affect your experience on the marketplace and the services we can offer. For more information, please access our Privacy Policy.

Essential Cookies

These cookies are crucial for the proper functioning of our website. They support vital features such as privacy settings, logging in, filling out forms (including those for uploading items to the marketplace), and enabling participation in our affiliate program, which allows you to invite friends and earn rewards. Without these cookies, some parts of the site may not work as intended.

Advertising Cookies

These cookies are used by our advertising partners to build a profile of your interests and show you relevant ads on other websites. They do not store personal information directly but are based on uniquely identifying your browser and internet device. If you do not allow these cookies, you will still see ads, but they will be less tailored to you.

Stay signed in

Stay signed in


By signing in or creating an account, you agree with our Terms of Use and Privacy Policy.