3D printing is also known as additive manufacturing and desktop fabrication by experts. It is a machine which can create prototype models of objects based on their 3-dimensional design. Typically the 3D printer designs are first saved in STL format and send to the printer, whereby the printer then prints the object layer-by-layer.
There are various printing technologies, one of which every 3D printing machine is based on. The main difference in technology is based on the number of layers and the materials used in the process. SLA (Stereolithography), FDM (Fused deposition modeling) and SLS (Selective Laser Sintering) are the most common technologies at use in the 3D printing industry.
The most basic concept of 3D printing is that it is an additive manufacturing process. An additive manufacturing process means that the machine builds up the object by adding layers to the most basic, unit structures. This scale-up process is what differentiates 3D printers from any other traditional manufacturing process.
There are various limitations to traditional manufacturing process, which are typically out routed by the 3D printers. 3D printers are an enabling device encouraging creativity and innovation. We will look into some other key concepts and help you get started with the 3D printing experience in this article.
Get Started
Although expensive, but price is not the main reason why many hesitate to get a 3D printer for their office space or educational institute. Neither the complexity of operating a printer is a restraint. It is the abundance of options available that makes choosing the correct printer for your organization so difficult.
From the technology to the materials at use and modeling software; there are pro-models to beginner’s packages available with a number of combinations from the above. While searching for an easy to use platform or tool, I came across the application Tinkercard.
This application is free for users, operates nearly with any PC or Mac, runs remotely inside a web browser and comes with the right amount of applications and functionalities required to get started. It will not have all the sophisticated functionalities but is easy enough to start with. When you register free to this site, it gives you a blank slate and a pre-set 3D models which you can use for reference.
Other than this there is few other software suggested by experts which can be downloaded for free.
Modeling Software suitable for beginners
Blender – It is an open source for creating 3D content providing all key operating systems under the guidelines of General Public License (GNU). Open source means that you can directly create your design from your browser. It is a rather powerful program, listing features and characteristics of high-end technologies.
OpenSCAD – It is free downloadable software which creates solid 3D CAD objects. The software runs on MS Windows, Linus/Unix and Mac OS X. This software does not cater much to the aesthetic requirements but instead on the CAD aspect.
Google SketchUp – This is one of the most fun tools to use. It is free and it used a very simple interface easy to understand and navigate. To build 3D objects using the Google SketchUp, all you have to do is draw the faces and edges of the object directly on the screen using few simple tools which are easy to learn. Also, the tool works in association with other Google apps, wherein you can just import a picture or a scaled aerial image from Google Earth and you are good to go.
3Dtin – It is the simplest of the free web based software where you can draw directly from your browser.
Check FREE 3D Modeling Software guide for more detailed info on each of them and not only.
Key concepts of 3D printing
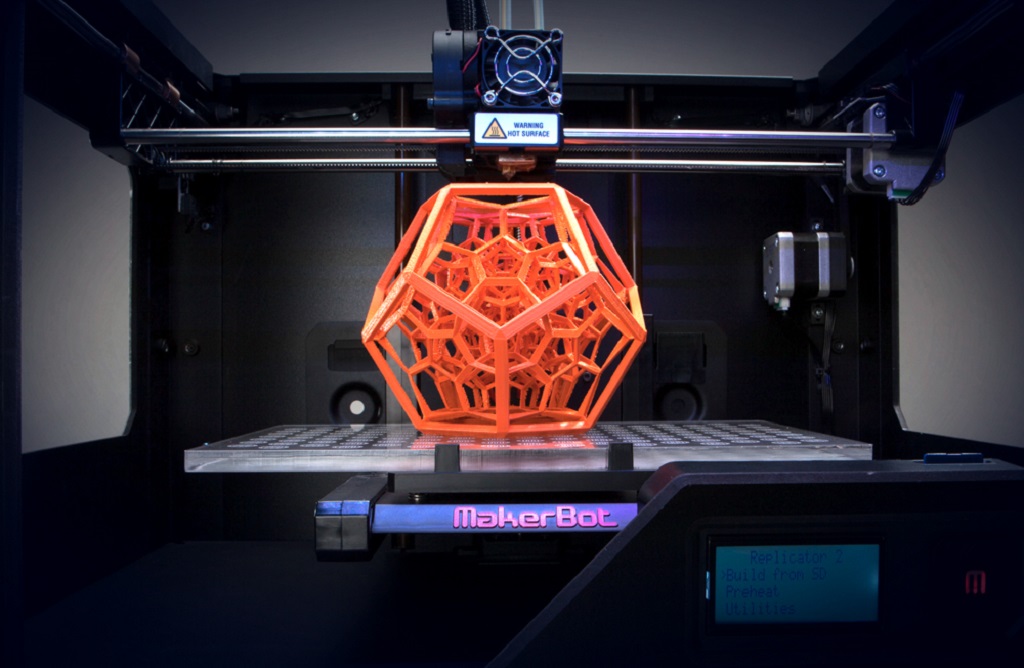
3-Diamentional Coordinates– the visual representation of the X, Y, Z axis is what makes 3D printing unique. The tree coordinates helps determine a point in space that the 3D printer uses as a guide to deposit materials in space, thus creating objects. The Software converts the coordinate locations to a printer readable format (using the STL file instructions).
 Source: Google Images
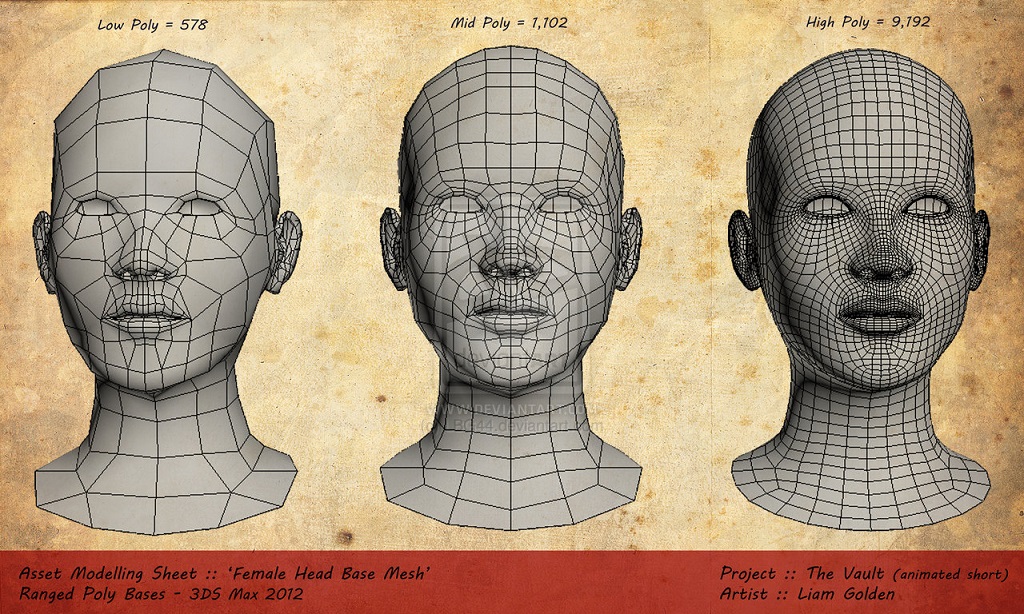
Polygons – This concept routes from the idea of a number of polygons put together to make a shape. A low resolution model with have lesser polygons fitting the space and therefore look more crude.
High resolution objects on the other hand have many more polygons fitting in the space thus the end result is a smother and well defined surface. Low polymer models are popular in art and architecture industries, allowing designers to render recognizable designs.
Source: tplinnovator
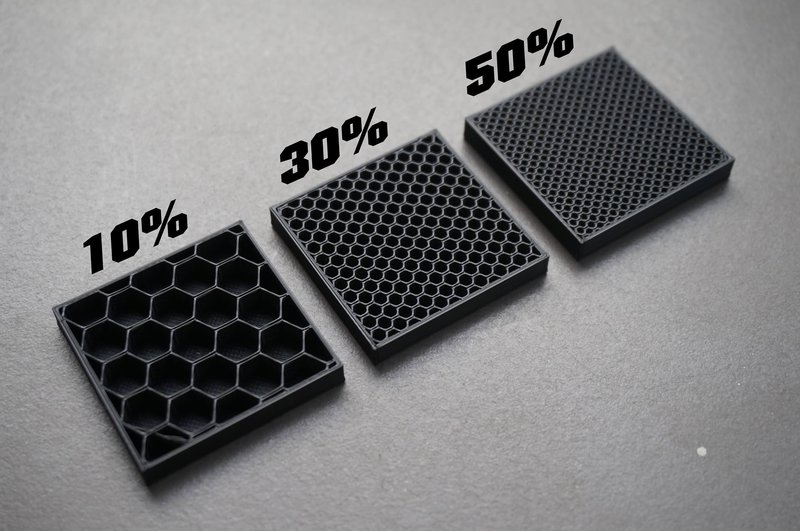
Infill – The concept of infill is for the inside parts of the model which will never be seen from the outside. These spaces need not always be solid, and many times they are honeycomb, hollow structures designed to support the model without making it too bulky. Some software composed the interior structures by default optimizing energy and materials used, but one can change the setting and alter the densities as per their requirements.
Source: Deviantart
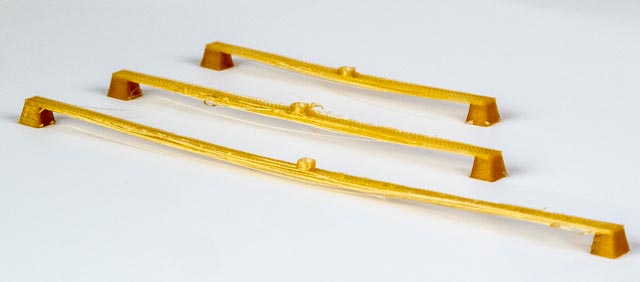
Bridging – As experienced in nature, building a bridge over empty spaces without supporting pillars causes the structure to tilt. The same phenomenon is seen while printing 3D models. The more the distance between the points connected by the bridge, more will be the bending. The best way to avoid bridging is to rethink the special orientation of the model before printing.
For example; you are printing a table and while printing the base you notice bending of the object as the material cools. Now if you print the table upside down as opposed to up-right how you would normally visualize it, the bridging problem will be solved.
Source: 3DGeni
Tolerance– Tolerance talks about the ability of two objects to fit together. It is important to keep the materials tolerance in mind while designing models specially with moving joints.
Colors– like any design colors are crucial to your 3D printing job. It brings out the contours. There are many online guides available from which you can choose a plate best suited for your design. Or you can just print all the basic blocks of color and label them for future reference.
Max size– There is limitation to the maximum size of an object that can be created using a 3D printer. The printer will fail to print your object if it falls beyond the specific dimensions. In that case, try breaking down your model into smaller units which you can then assemble into your working model.
Conclusion
3D printing is one of the most high-end technologies at our disposal today. Even if you do not have the skills to print sophisticated models as of now, you will still print fine objects with the help of very few easy to grasp concepts.
About Author
This article was written by Gaurav Sharma, a Digital Marketing Consultant at CG Trader, a 3D Model Marketplace, Founder of Digital Marketing Blog Attrock and a Technology lover. He has been featured on Tech Crunch, Search Engine Land and other popular Tech and Marketing blogs. He is a traveler and love to explore new ways to enjoy the life at fullest. You can check him out on Instagram, Twitter and Google+.

Top 10 Star Wars 3D Printer Models
Read Article
3D Printing of Video Games Figures/Content
Read Article