Every enthusiast who enjoys making iconic models and figures from resin and filament uses 3D printing slicer software. UltiMaker Cura is one of the most popular slicers, offering numerous great features for both newbies and advanced hobbyists. While every project you create may look similar to the original files on the outside, it’s what’s inside that matters for its stability and long-lasting quality. Let’s discuss the best infill pattern in Cura that can help you create the strongest models or achieve the fastest printing speeds.
Gambody reviewed the most popular infill types in the past, offering you a general idea of the most commonly used patterns. In this post, we would like to focus on UltiMaker Cura settings and how you can benefit from this particular slicer software.

Best Infill Pattern in Cura
Many 3D printing models and characters have hollow parts inside because they save time, material, and overall cost, as well as reduce the weight of your project. This ‘inside’ structure is called infill, and Cura allows you to use multiple infill patterns to make your parts stronger, weaker, more or less solid, and simpler or more complex.
You can manage your Cura infill patterns through the density settings (consider 100% solid and 0% hollow) and structural adjustments (types). Each setting offers unique resilience and specific advantages, which can enhance the benefits of your prints according to the specifications you have chosen.
Before we discuss the fastest and strongest infill pattern, let’s focus on the best infill pattern that Cura offers to hobbyists, considering their expectations. With over 10 standard types and numerous custom options to select from, you can find your ideal setting by experimenting.

Read also: Best Cheap 3D Printer for a Beginner (Affordable Yet with Great Value).
Infill Types
UltiMaker Cura slicer offers standard infill patterns and customized options. The standard types you’ll see are:
- Zigzag;
- Lightning;
- Lines;
- Triangles;
- Grid;
- Tri-hexagon;
- Cubic;
- Octet;
- Quarter cubic;
- Cubic subdivision;
- Gyroid;
- Cross;
- Concentric;
- Cross 3D.
These 14 Cura infill patterns are ideal for various projects, ranging from 3D printing figures to complex spacecraft models and functional parts, and more. While the standard types don’t include the popular Honeycomb option offered by other slicers, you can generate it if you wish, using an external plugin.
Strongest Infill Pattern
Most 3D printing figures and models don’t require strength. Thus, when you recreate your favorite character 3D model, Pirates of the Caribbean ships, spacecraft from Star Trek or Star Wars, and similar projects, you don’t need to use the strongest infill pattern.
However, if you print functional parts that require extra strength (such as shelving brackets or other items that should hold 45-50 pounds), you should select one of the following 3D print infill patterns with an infill density of over 50%: octet, gyroid, or one of the cubic options.

Users who want to build a strong part can choose the cubic infill pattern, which creates a 3D shape of tilted and stacked cubes. If you want to use less material, consider the cubic subdivision option, which is similar to the cubic infill.
Two similar patterns, octet and quarter cubic, are also called tetrahedral infill in Cura. The first one creates pyramid shapes inside the object. The second one is much alike, with half of those shapes shifted in relation to the other half.
Gyroid is another style to use when you need the strongest infill pattern. It reminds hobbyists of waves that provide strength in numerous directions, and is perfect for elements that would experience constant stress.
Fastest Infill Pattern
If cubic infill is one of the strongest patterns offered by Cura slicer, then what is the fastest infill pattern that can save you time and money?
With a density between 0 and 15%, this option is considered the best infill pattern for speed. We are talking about the three settings (zigzag, lightning, and lines), which do not offer a lot of strength or stress-handling capabilities, but do save you time and money.
Gambody enthusiasts can utilize the fastest infill pattern for creating any 3D print project ideas from the premium and stock sections, as all these beautiful 3D printing figures and models are designed for display and don’t require heavy handling or excessive strength.

While you won’t find the rectilinear infill Cura feature in standard patterns (other slicers offer it), you can use lines to achieve a similar 2D-grid effect inside your projects. With lines, you can print one axis per layer.
A similar effect is achieved with a zigzag pattern that creates one line per layer.
The third option you can choose is a lightning infill pattern, which can save you a significant amount of time and material, as it creates a lightning-like inner structure that becomes thicker as it reaches the top of your project. This is the fastest infill pattern in Cura, much faster than lines or zigzag.
How to Reach Better Speed?
Enthusiasts who wish to create stronger 3D prints without choosing the fastest infill pattern can improve printing speeds in several ways. Firstly, you can adjust the UltiMaker Cura settings to increase the thickness of your layer height, which saves time. Secondly, you can install the Valve plugin, which helps achieve faster speeds within the printer’s flow rate.

Besides, you can customize the pattern through Experimental Settings, such as Infill Travel Optimization. When checked, this option minimizes the distance your nozzle moves by changing the order in which the infills are printed. However, it entirely depends on your object geometry and does not guarantee speed improvement.
Other Infill Patterns for 3D Printing
If you don’t need to print faster and your projects are not subjected to much stress, you can choose the standard Cura infill patterns, which have densities ranging from 15 to 50%.

Your options are triangles, grid, and tri hexagon. The triangle infill creates a 2D triangle mesh that can be beneficial if you apply a load perpendicular to your model’s face. Grid also creates a 2D effect, and it’s the fastest and simplest of these three options. The tri hexagon infill incorporates triangles and hexagons to create a well-structured shape that offers sufficient strength compared to grids and triangles.

For bending objects and flexible parts such as wheels and sails, it can be wonderful to use cross and concentric infill patterns offered by Cura. The density can range from 0 to 100%, depending on how flexible you need the parts to be.
The cross and cross 3D infill patterns are similar. However, the first one creates a 2D effect with enough space between crosses to allow the object to twist and bend, and the second one offers a 3D effect with less flexibility. The concentric infill pattern creates 2D circular waves, which are perfect for cylindrical and curved surfaces.
Read also: How to 3D Print Flexible Filament at Home (Tips for Success).
Custom Patterns
If you have the latest Cura version 5.10, you can experiment with infill patterns and add extra features that are not available as standard options. For example, if you enjoy using the Honeycomb in PrusaSlicer, you can create a similar effect using a custom plugin called CuraEngine Tiled Infill Generation. It is continually updated and improved to address any known issues, allowing you to play with its features and see how you can benefit from its use.
Along with Honeycomb, this plugin allows you to add your custom patterns that correspond with your 3D printing needs and requirements.

What is the strongest infill pattern in Cura?
Cubic infill in Cura is considered the strongest infill pattern, suitable for functional parts and details. The other best choices for strength are the cubic subdivision infill, octet infill, gyroid, cubic, and quarter cubic options.
What is the best infill pattern for 3D printing?
The answer to this question depends entirely on the character 3D model, project, or part you are currently 3D printing. Use the cubic infill pattern for functional objects. Select concentric infill or cross 3D infill to create flexible elements, such as vehicle wheels. Use tri hexagon infill for anything besides characters and movie-inspired models, if you don’t need too much strength.
What is the best infill pattern for speed?
Hobbyists who prefer faster 3D printing speeds over strength can opt for a minimum density of up to 15%, which can be achieved with the simplest Cura infill patterns, such as lines, lightning, and zigzag. These choices are perfect for recreating your favorite 3D printing figures from comics, cartoons, movies, and video games.
To find your best infill pattern in Cura and other slicers, it’s ideal to experiment and test different 3D prints. Keep building fantastic 3D printed figures and models, and share the photos and tips with other enthusiasts in Gambody community on Facebook.

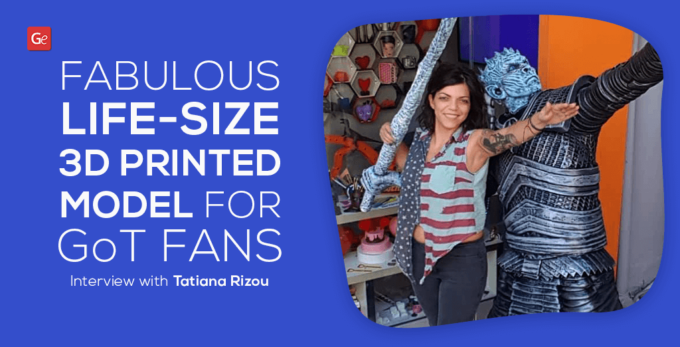
Fabulous Life-Size 3D Printed Model for Game of Thrones Fans: Interview with Tatiana Rizou
Read Article
Helpful Tips for Cleaning Your 3D Printer Bed: PEI, Glass, Magnetic
Read Article