Hello guys!
I would like to make your life easier, that is why I decided to share my experience!
The story is dedicate to all home 3D printers’ owners, who use ABS and PLA materials. Those who have novolescence printers – your model will be cool without any advice, that’s for sure 😉
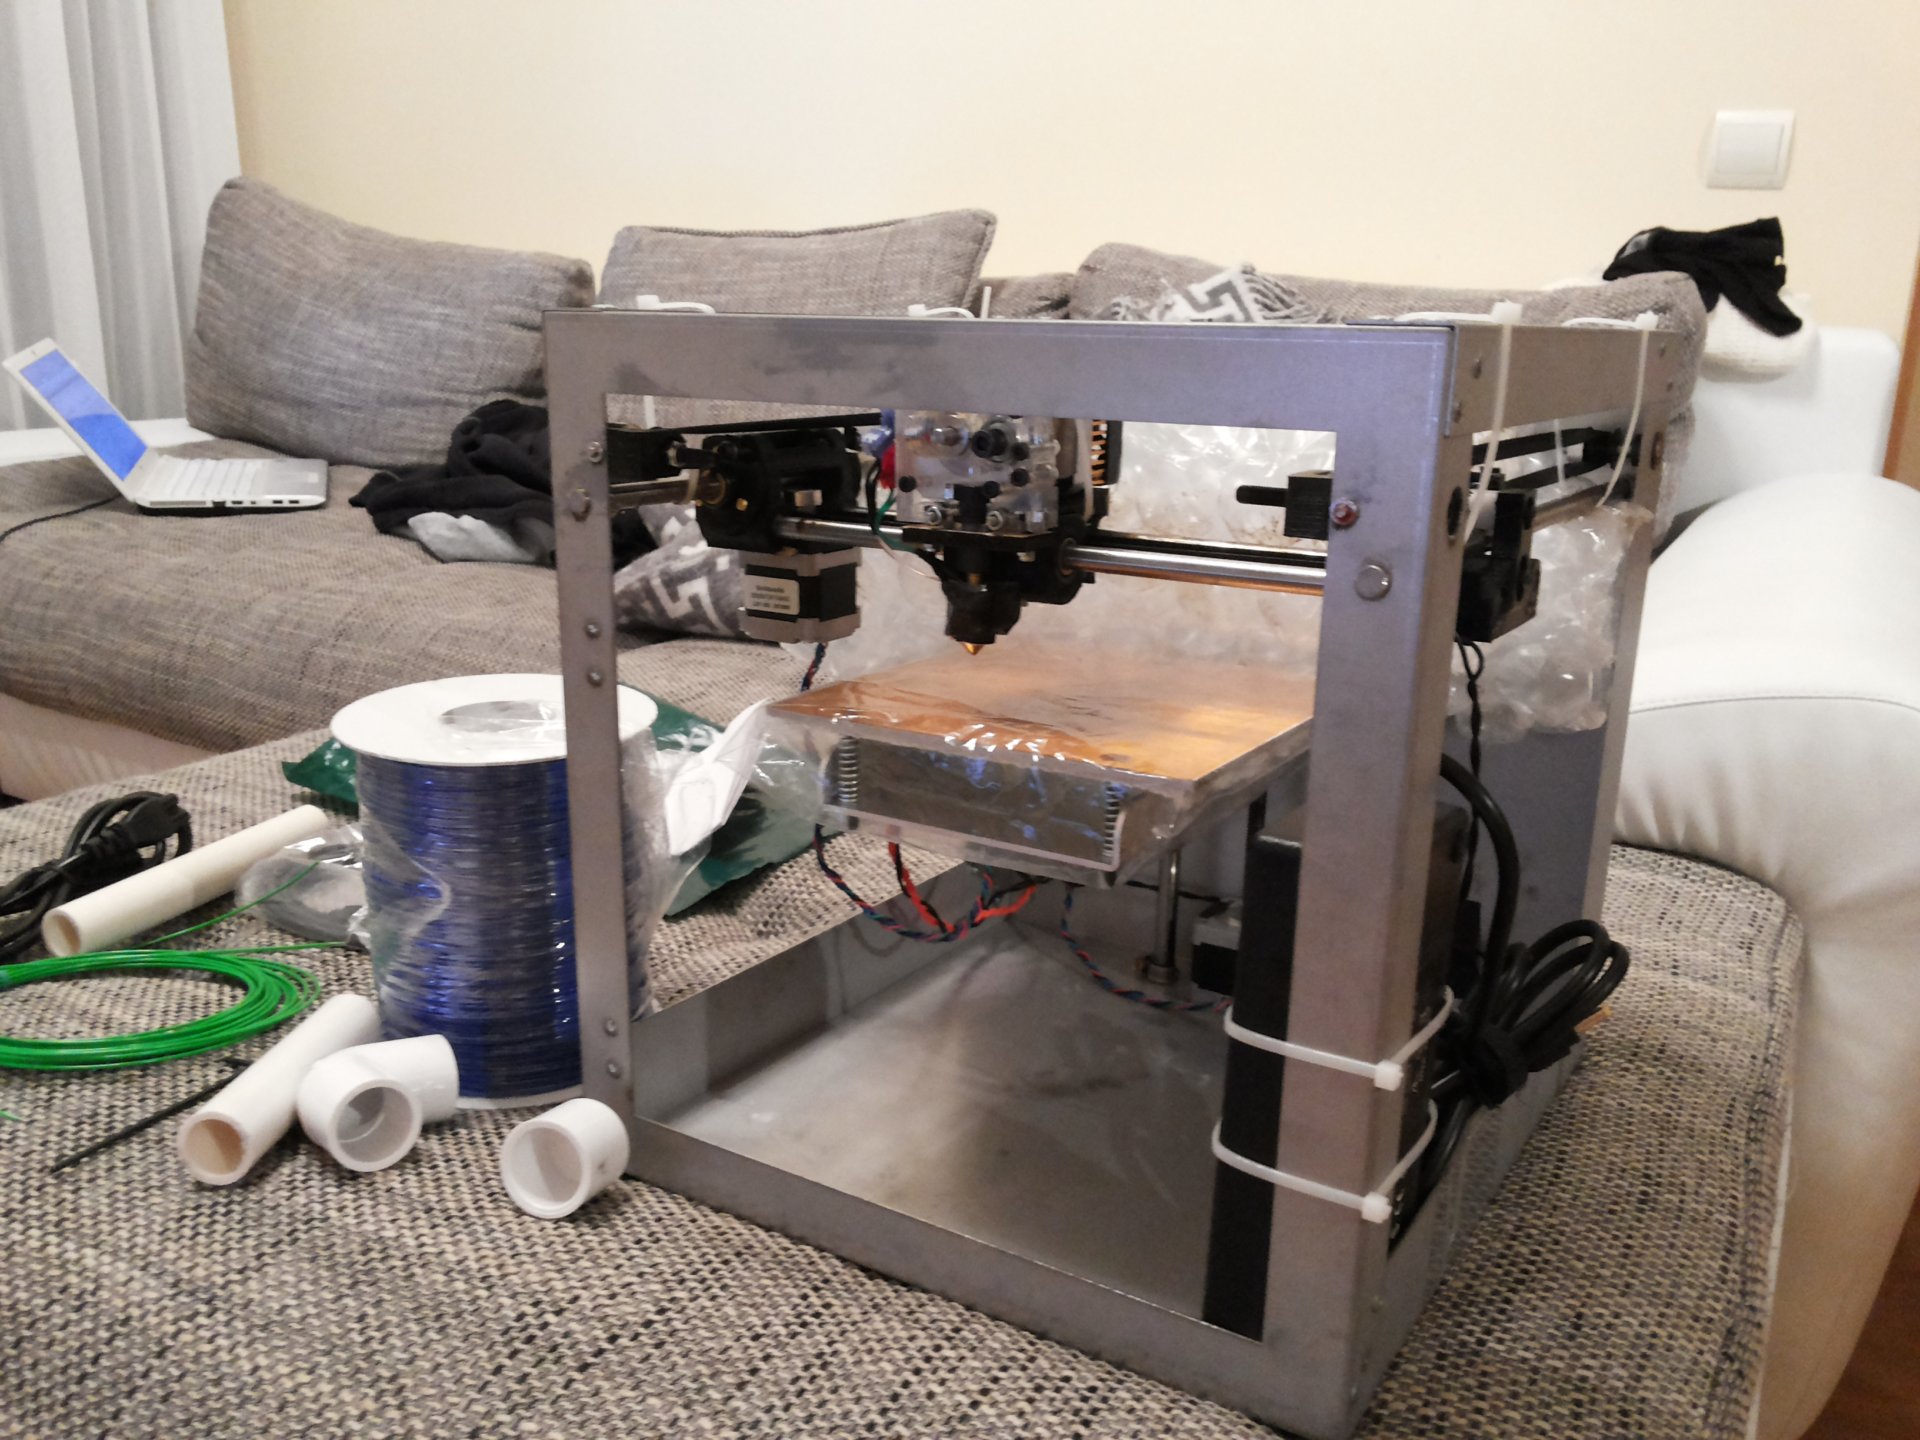
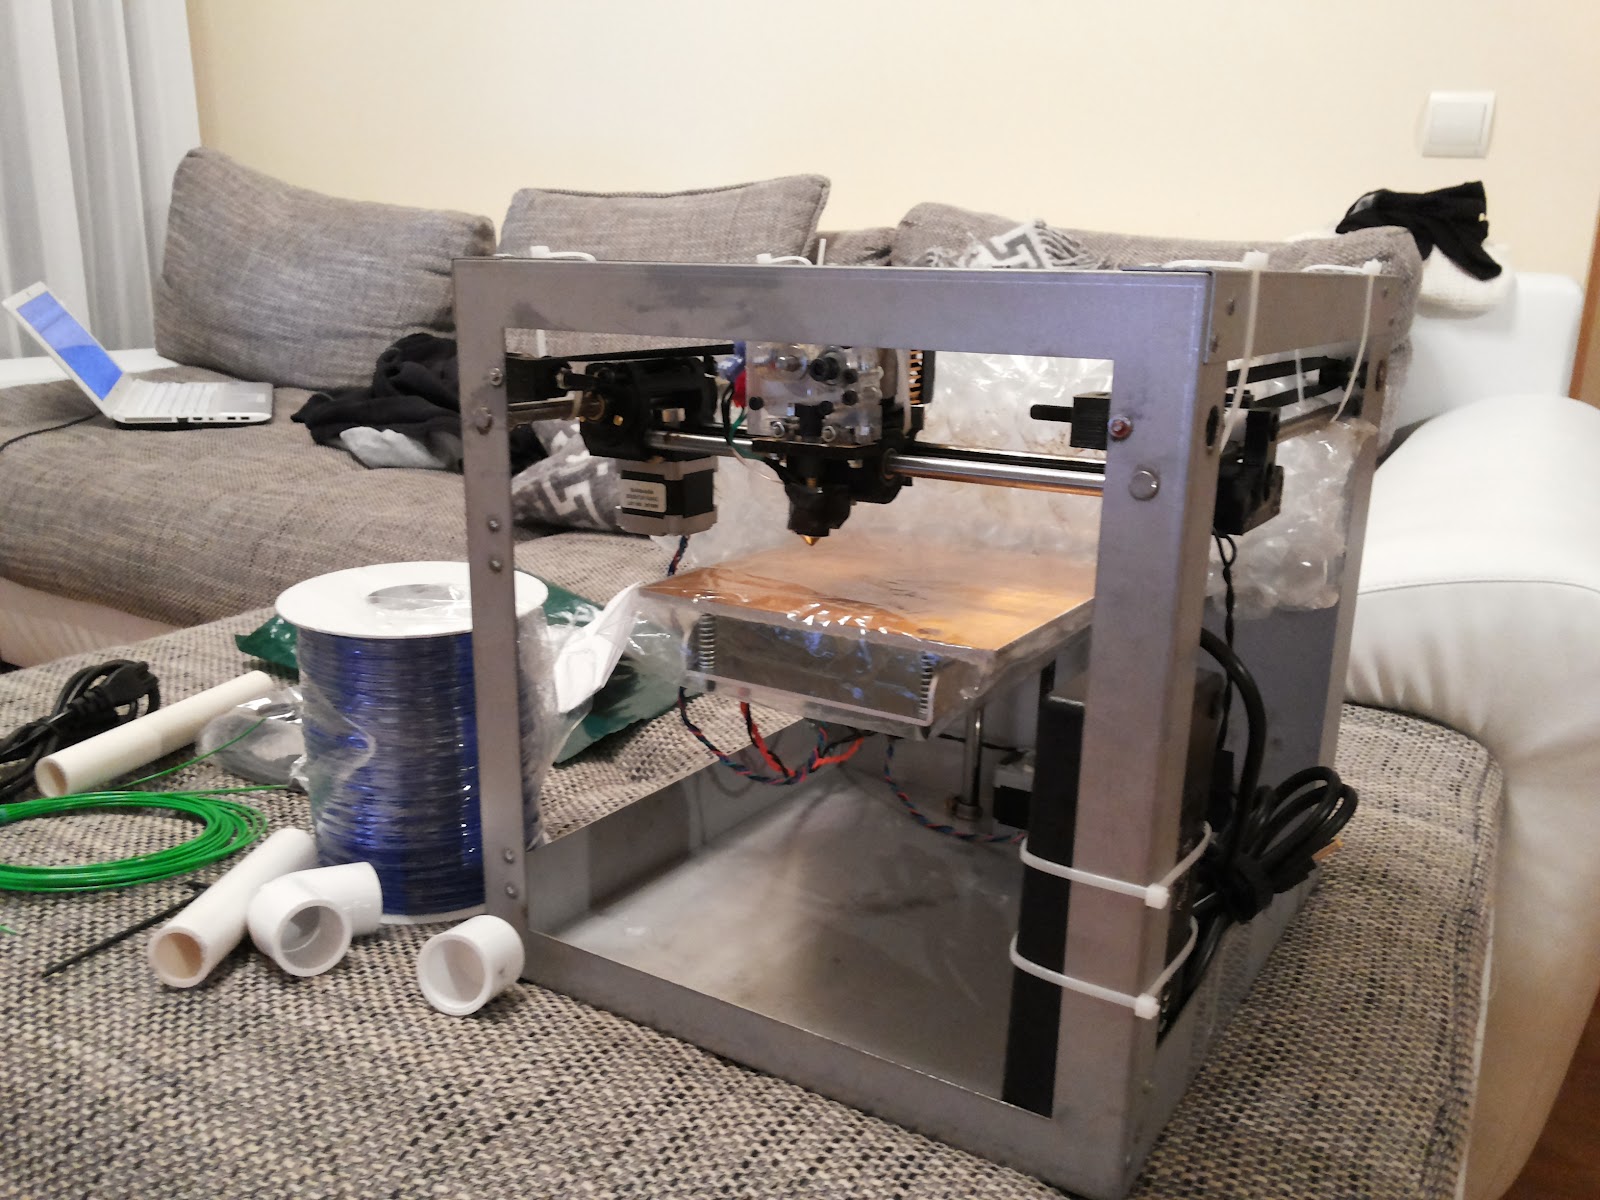
I want to share my first experience in 3D printing, if to be precise it was 3D printable file of Video game scale model, designed by Gambody Team.
Software used was also provided by those guys – Repetier-Host Gambody, and I’m happy to share my thoughts here. I made my fare share of mistakes, but it was all made for the sake of tests, and now I’m ready to save your time 🙂
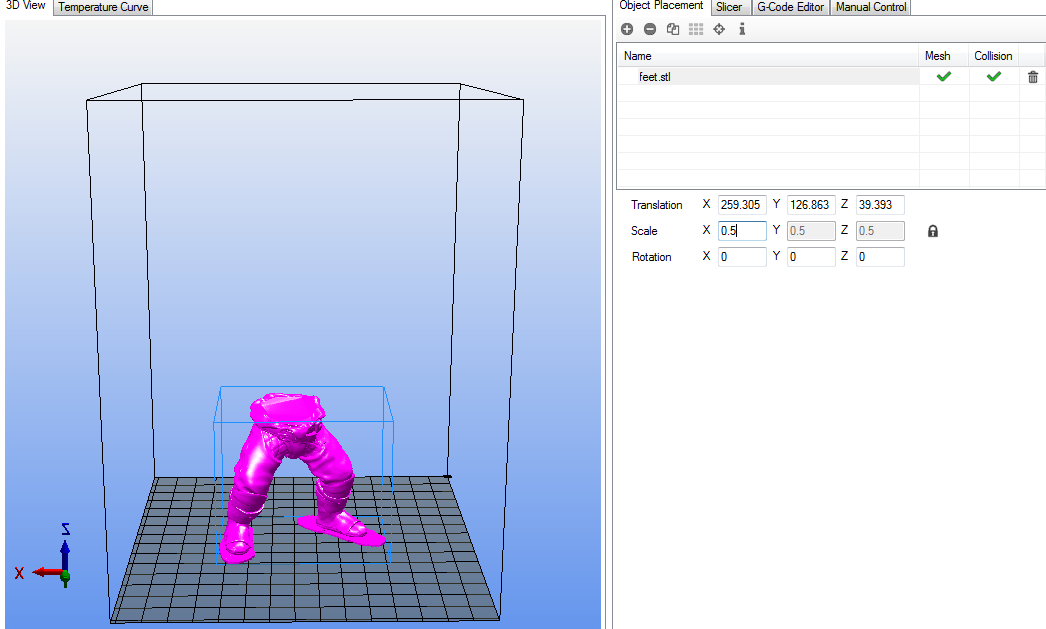
I started from the bottom of the Printable Model – from feet up to waist.
The first step was to download stl file from Gambody website into the program (you can learn more here ).
Want to pay your attention to the scale of models designed by Gambody, initially they are created for 150×150 sized printbed. If you have a 3D printer of this very size of a printbed, note that a downloaded model is already in maximum scale for printing. You can only downscale it by using “scale” option in the section “object placement” by changing the X-axis preliminarily unlocking it.
For example, I need to downscale a model and make it twice smaller – 50%, I can do it by indicating the X-axis value of 0.5 instead of 1. Perfect option, especially for tests, as a model will be of palm-size and, what is not least, it will retain its perspective and all the details which were conceived by 3D designers.
Model Positioning.
A very important thing while printing is the position of your model, which influences:
– Support structures necessity
– Quality of a model’s parts where this support structure is used
– Amount of expendable material.
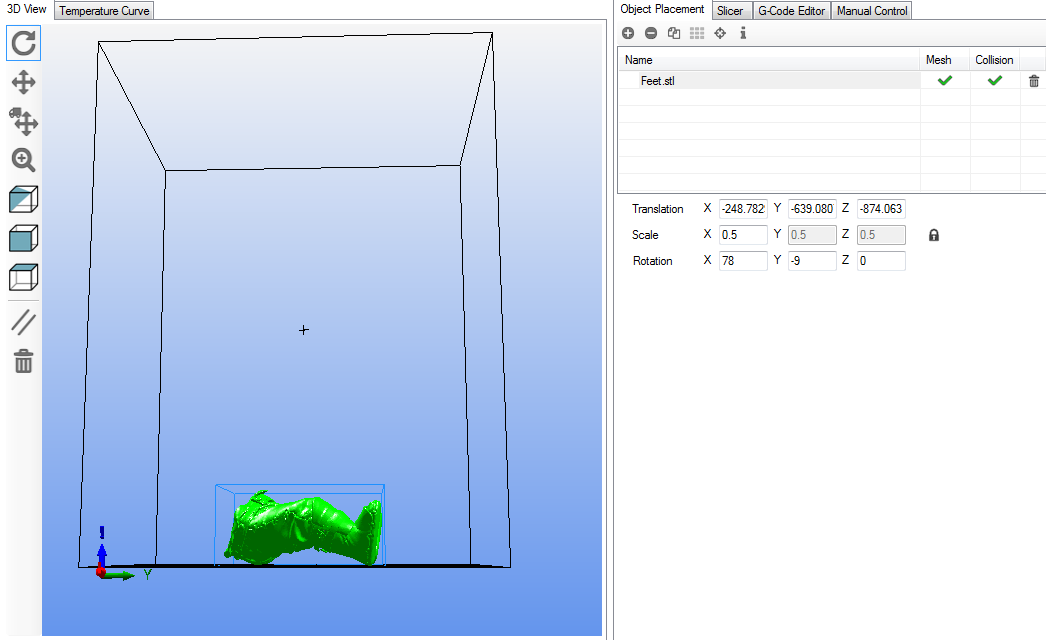
You can use two variants of positioning to print its legs:
1. When lying on its back (if you use an stl file of a model without a raft under its feet), use a rotation in the section “object placement”, indicating the X-axis value of 78, and the Y-axis value of -10.
2. When standing on its feet (you can use an stl file of a model either without a raft or with a raft under its feet). In this case, a model is already in a recommended (optimum) position and no rotation is needed to change values.
I used the second variant. But today, I can advise you to use the first variant as well. I will describe it below when I’ll talk about support structures.
When you are ready with scaling and positioning of the model, you can move to the settings to set up best quality of the printable model.
Let’s move to the “Slicer” section of the “Repetier-Host Gambody” software, which has various useful configurations.
Open “advanced slice settings” (you can learn more here), then enter slicer settings by clicking “Configure” button.
Then you’ll see 3 sections, each containing saved profiles named Solidudle.
We need to enter “Print Settings” section, to set up best quality settings for printing of the model.
I usually use “Solidudle .3mm” profile settings, where I set up desired changes. Do not forget to click “save” button after each change in a field / value / parameter settings, “save” is located the profiles’ list.
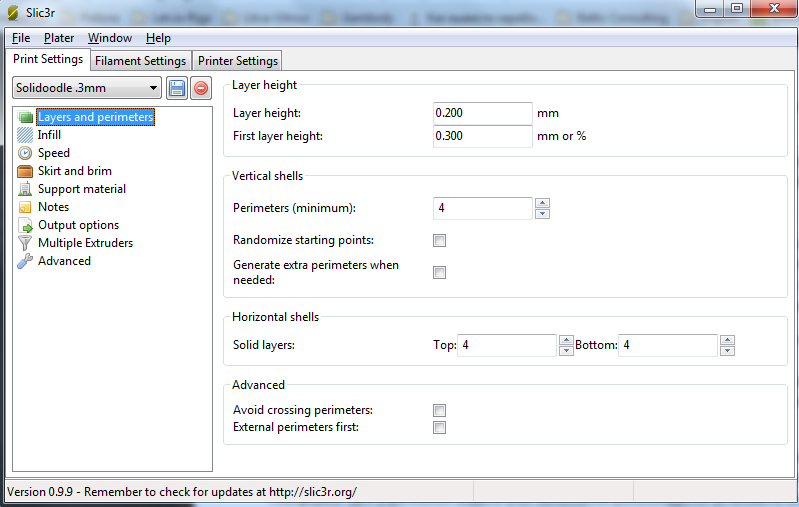
• “Layers and perimeters” window with parameters
The parameter I recommend you to start with is “Layer height”. One of the most important parameters that affects the printing quality. When setting up this parameter, it is necessary to focus on the geometry of the printed model and planned duration (time frame) of printing process. The lower the value of the layer height, the longer printing process. BUT, the lower the value – the smoother model’s shape and the better quality at the output.
I’ll give you 2 examples to compare – one is with the value of 0.3mm and another is 0.2mm layer height.
If you are a real fan of a game, and want to have more realistic favorite game hero of the highest quality, then I recommend 0.2mm layer height, especially for Gambody’s models, as models are really great there – the coolest staff I’ve ever printed. If you have some time to waste, then you can put even lower value of 0.15 or 0.1mm.
The one I used is 0.2mm, but it is up to you to decide;)
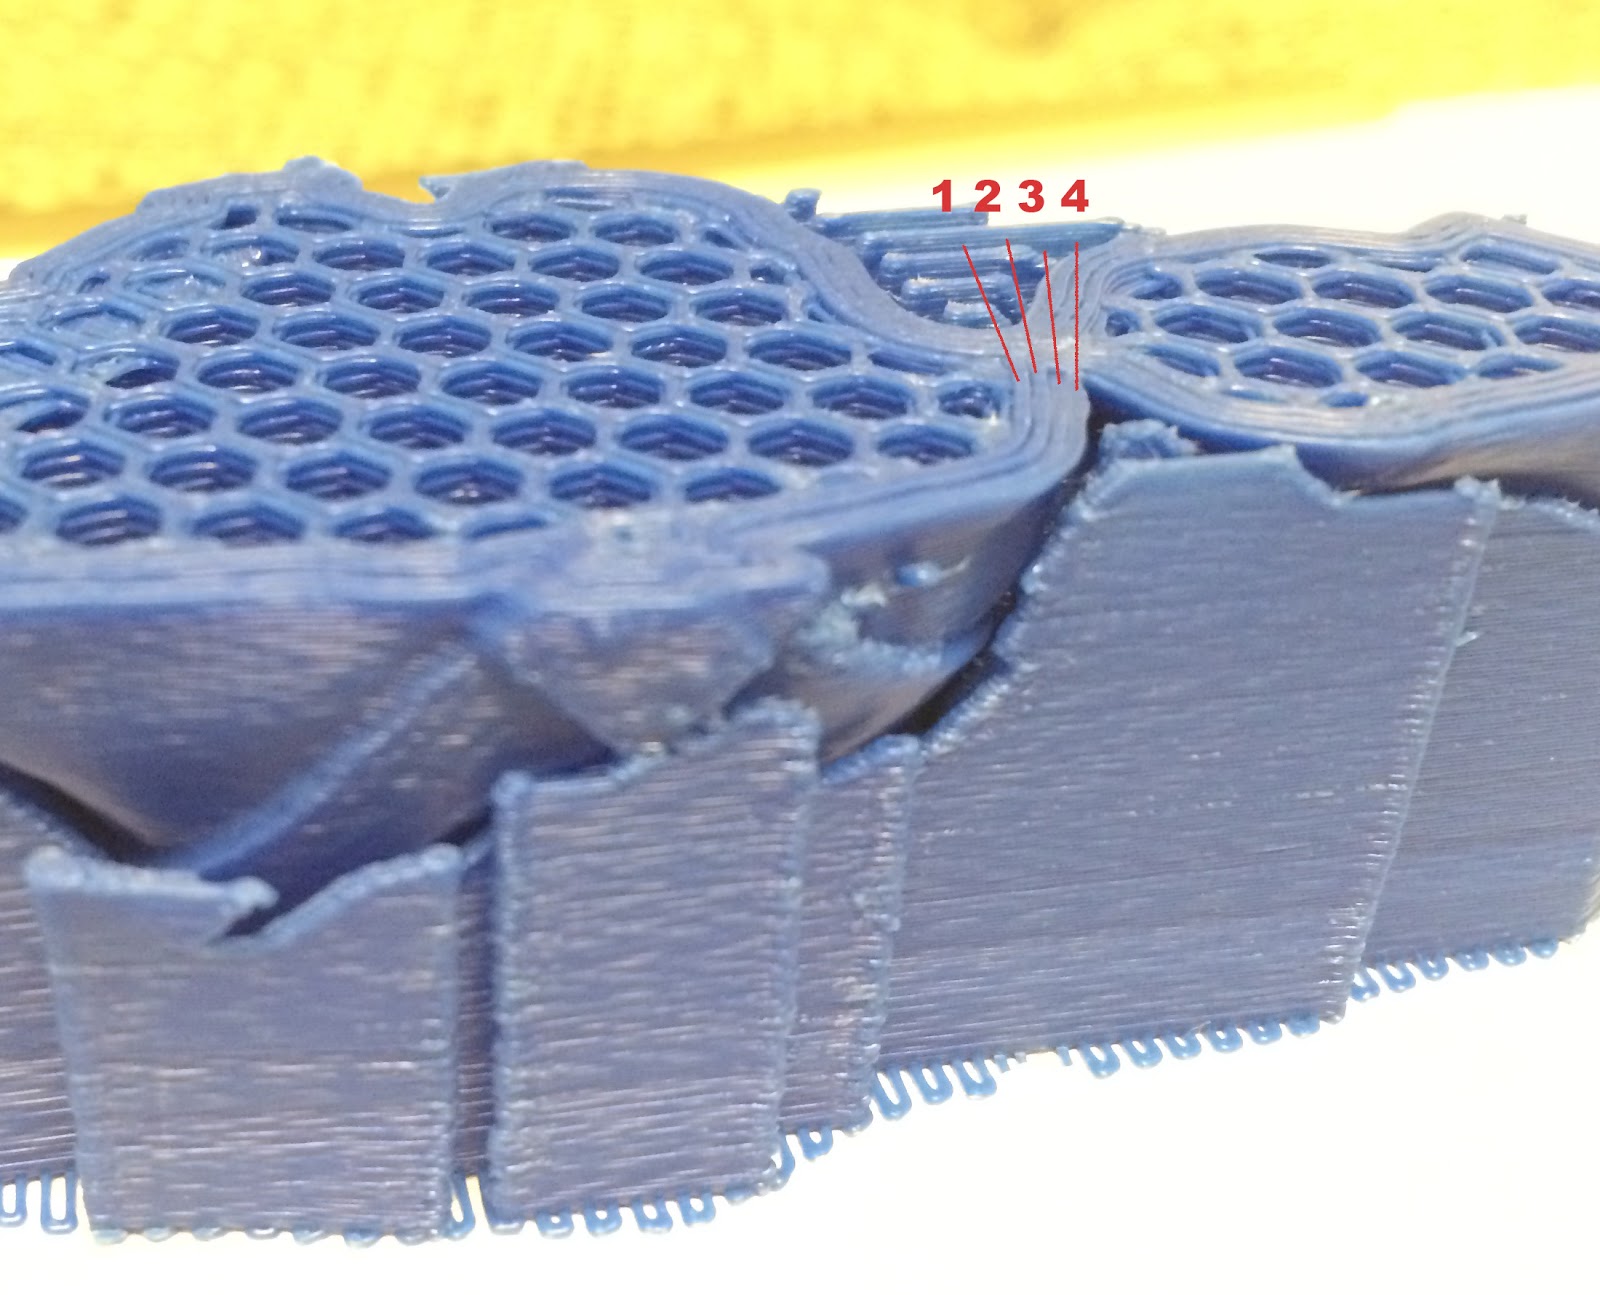
1. FEET – LAYER HEIGHT 0.2ММ 2. FEET – LAYER HEIGHT 0.3ММ

The second parameter to be configured “First layer height”. The first layer is used to form the raft under a model. But note, that if you have a 3D printer with a heated print bed, then this value may ask for more parameters of “Layer height”. If a print bed is without heating, for better model placement and better adhesion to the bed, it is important to specify the same value as set for ” Layer height”, or it may be a little bit lower, this will allow plastic to stick properly to a special shaggy adhesive tape which is important for these types of print beds.
Personally I have a3D printer with a heated print bed, that is why I set up 0.3mm height for the first layer.
The third step to configure is – Perimeters (minimum) – the number of layers of the model’s contour (or the number of layers of the model shape). The smaller the number, the thinner model’s contour will be, which means the model will be brittle. Minimum value is 1, optimum value is 3-4 perimeters.;
I use 4 perimeters, to make my scale model more robust and of course I like when I feel its weight in hands :).
Obviously, the amount of perimeters affects the amount of material used. But do not be greedy, especially when printing a model from Gambody))
As for all the other parameters for Layers and Perimeters, I would recommend you to leave them unchanged, as prefilled initially in Solidudle profile – 0.3mm.
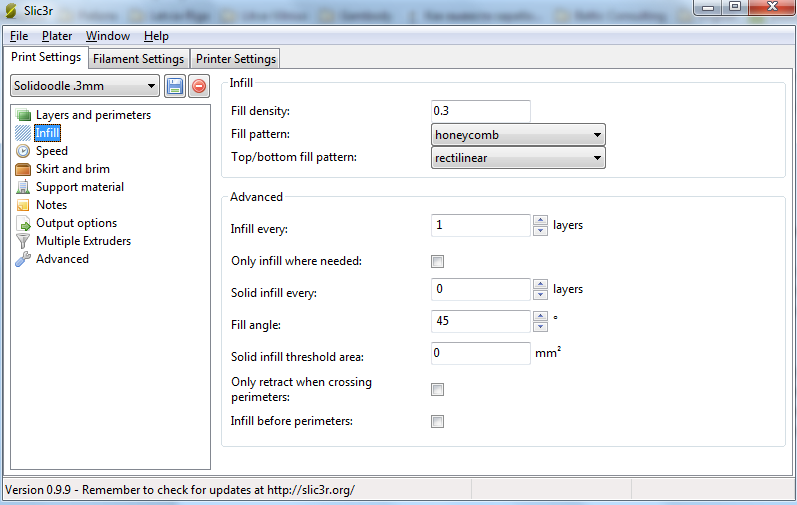
• Let’s move to another setting in “Print Settings” tab – “Infill”.
I would recommend not to change any preset configurations right here, as we use Solidudle profile settings 0.3mm.
I just want to share with you some highlights here.
Infill – is the option to infill the empty space inside the model. The higher the percentage of the fill, the stronger a model will be, but it will take much more time to print it out. For most of the objects the optimum infill is 20-30% (0.2-0.3).
I would insistently recommend to leave two parameters as default, they are “Fill density” parameter – the percentage of the model grid infilling and “Fill pattern” – infill (grid) type of the model. The setting which are preset perfectly work to increase the strength of the model while reducing its weight: honeycomb (honeycomb) and 30% is the best choice for infill!
• The next step is “Speed” parameter
Attention! Excessive high speed significantly affects the print quality and may lead to some unwilling results. Therefore, try to use low speeds to build layers (including support structures) carefully, as this affects models’ look/shape, while the internal details of the model, which are invisible ( inner parts) can be printed with some speed increase.
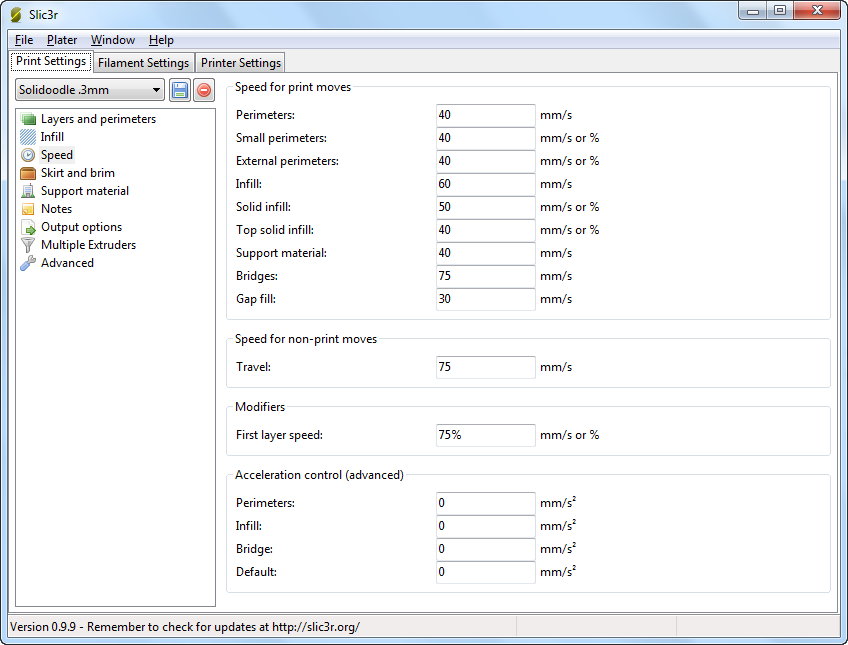
I did some changes to the speed parameter when printing Axe, if you like you can follow my example.
Not to pile up you with all at once, I will describe all the other peculiarities in the next part. You are always welcome to ask your questions, I’m happy to share my practical experience in details.
Your feedback & repost will be highly appreciated!


Most Popular 3D Printing Figures & Models of August
Read Article
Jurassic Park Comes to Life with Other Coolest 3D Prints: January Trends 2020
Read Article