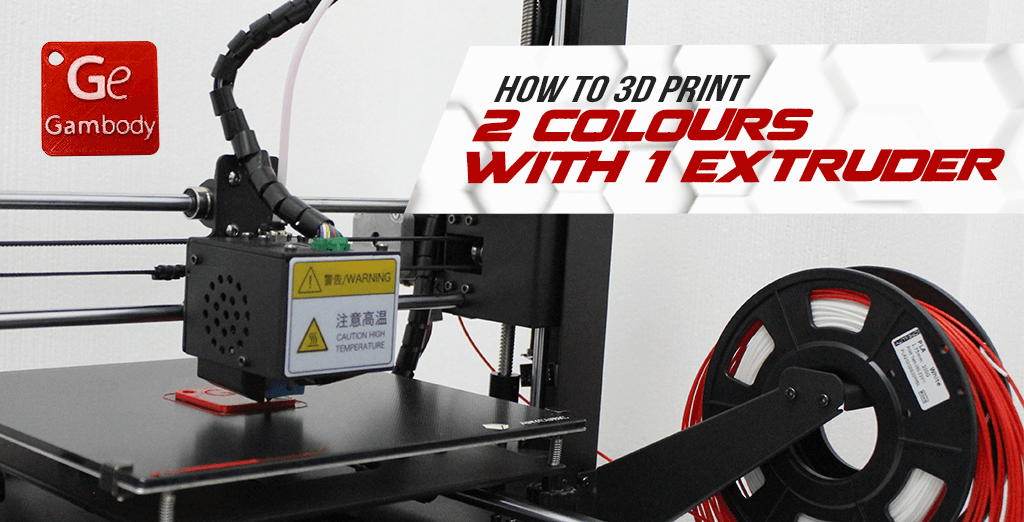
It is so much fun to 3D print with multiple colours, especially when your 3D printer comes with two nozzles. Still, you can learn how to 3D print 2 colours with 1 extruder. You can even practice to 3D print multiple colours with a single extruder and create fantastic models for your collection.
To multicolour with one extruder, you should know the essential tips. It is fantastic to become a professional who can change nozzles on-the-go, pick up different filament for new layers and create colourful masterpieces on a 3D printer with a single extruder.
3D Print with Multiple Colours
In 2020, dual extrusion surprises no one. Many users enjoy working on high-quality beasts with dual extruders as such 3D printers turn multicoloured prints into a straightforward process. Still, users can enjoy many advantages with a single extruder, including the creation of multicolour 3D printed models and figurines.
Besides, a 3D printer with dual extrusion is more expensive than a machine with one nozzle. Thus, saving money can be an excellent idea since you are still able to make your colourful dreams come true without upgrading the printer.

3D Print 2 Colours with Single Extruder: How To
You can 3D print with multiple colours on a single extruder in numerous ways. For example, you can switch filament while printing, cut parts into additional pieces, play with inlay settings, edit G-Code files, etc.
Each method has its advantages and disadvantages. But they all make it possible to 3D print in multicolour with one extruder. Explore every possibility before working on your first colourful model.
Method 1. Switch Filament to 3D Print Multiple Colours with Single Extruder
While this guide on how to 3D print 2 colours with 1 extruder might sound complicated, it is probably the most commonly used solution when you have one nozzle. You can build a 3D printed model or figurine from colourful layers by switching filament on-the-go.
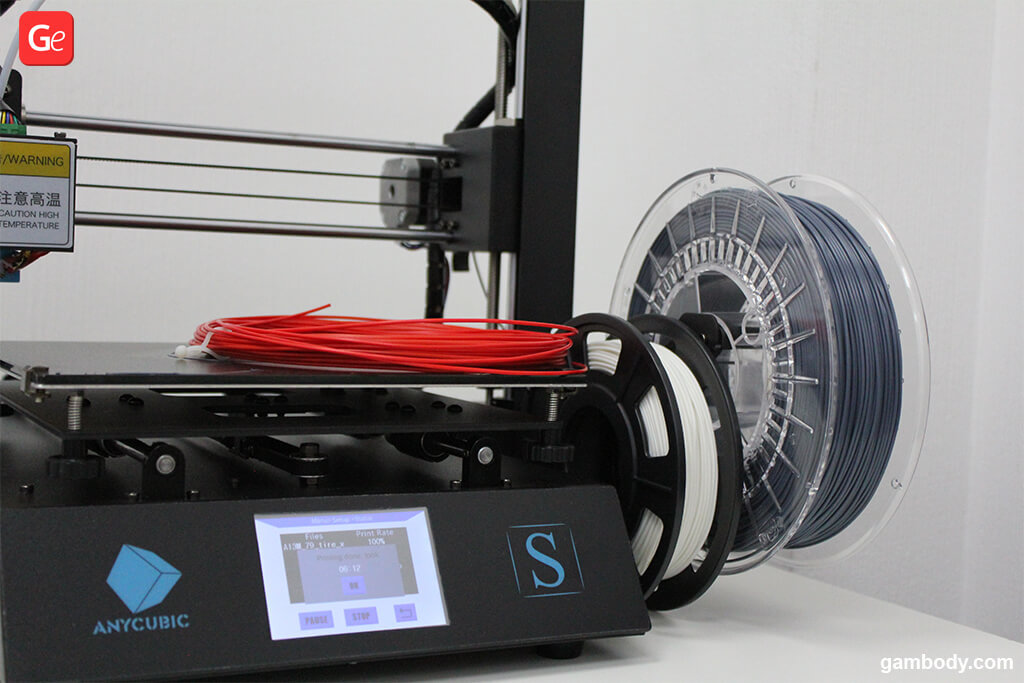
It works just as it sounds. You start a new print and pause when your machine is about to get to a new layer.
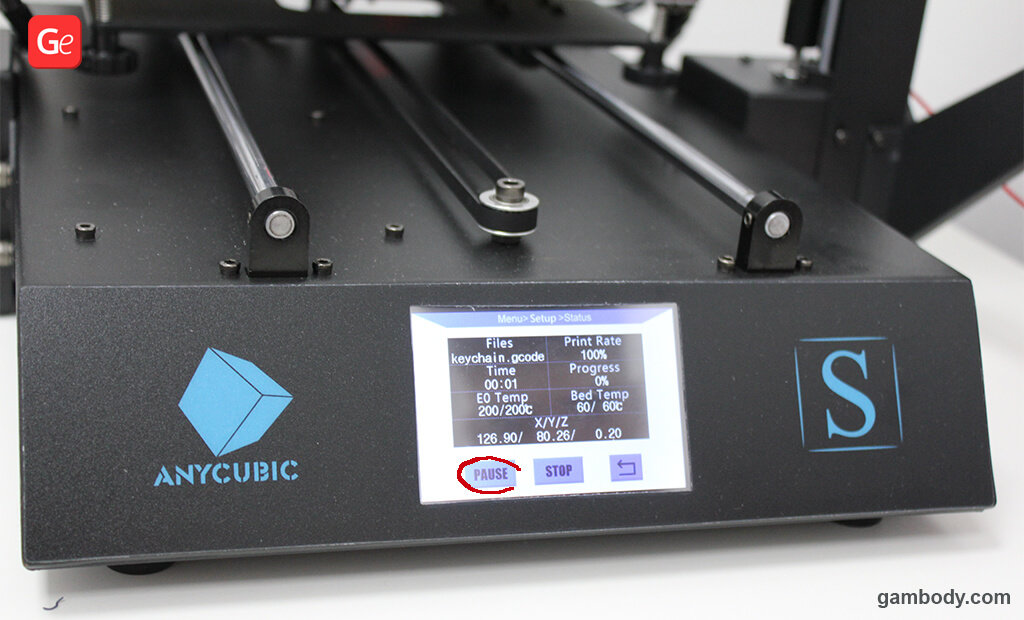
During the pause, you can switch the 3D printing material and proceed with a different colour. It is possible to repeat this step as many times as you wish to make impressive visuals within the same model.
The main complications this method brings are:
- You have to stand by your printer to pause it manually;
- You have to swap filament, and such manipulations require patience and accuracy;
- It is a time-consuming solution.
Method 2. Cut Files to Make Multicolour Print with Single Extruder
Parts of the model with the decoration or clothes pieces might look impressive when printed in two or more different colours.
Suppose you are skilful at editing STL files and can separate a part of the object so that it comfortably slots into the model. In order words, it connects without glue like a puzzle piece or can be glued during assembly. In that case, you might fake the process of 3D printing with multiple colours using a single extruder.
Gambody – Premium 3D printing marketplace offers many highly-detailed models with top-quality cutting to be printed in multiple colours if needed. You can assemble these models without glue and achieve beautiful effects by using one extruder and several filaments.
This beautiful Thanos Infinity Gauntlet was made colourful by Minh Tran using only PLA filaments.
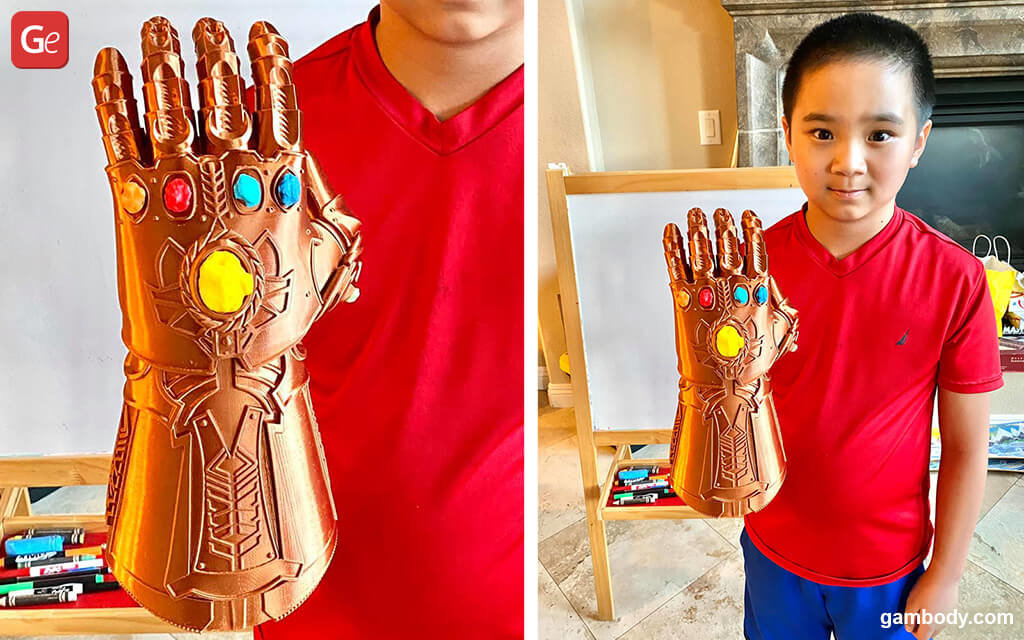
Luckily, you do not even have to cut the Infinity Gauntlet STL files to make the stones in a different colour from the rest of the glove. Gambody has cut the files for you!
Here is a stunning example of Jack Sparrow 3D printed figurine. It consists of several parts made by Sascha Wesler in different filament colours. The satin blue shade along looks fantastic!

You can experiment with the legendary pirate figurine using multiple shades as well after downloading Jack Sparrow STL files for 3D printing on Gambody.
It is a workaround solution for users who prefer making a model or figurine with colourful filament but without painting it afterwards.
Method 3. Adjust Inlay Settings to Print Multicolour with One Extruder
For simple 3D printing objects, which you wish to make colourful with filament, you can create the first layer inlay. You can do everything in your Slicer software.
The first layer has to be flat to melt with the top layers that will be of a different colour. When you are happy with how your first layer aligns with top layers in the slicer, you should remove the rest of the model and leave only the first layer to start printing.
Once this inlay is printed, you need to be sure it is clean on top. It is time to swap filament, make sure it is running clean and return to your slicer software. Undo your previous step, return the rest of the model and now delete that first layer part. Slice, and you are ready to continue 3D printing with a different colour but the same nozzle.
It is best if you can manually extrude some of the new filament. This way, the nozzle will get rid of the previous colour left in the hotend.
If you are doing everything correctly, your inlay layer will melt together with the top layer. The final print will be a beautifully two-coloured one-piece model made with one extruder.
Also, learn more about a similar method known as “Z-Hop:”
Method 4. Edit G-Code to 3D Print 2 Colours with 1 Extruder
This guide on how to 3D print 2 colours with 1 extruder is probably the most complex because you have to deal with the G-Code. Do not think of how hard it could be. Practice does miracles. The new G-Code settings will let you watch your favourite movie or TV series while the printer is pausing itself when it is time to switch the 3D printing material.
You have to deal with Z offset and Layer High settings. Minor editions to the G-Code and your 3D printer will interrupt the printing process automatically to let you know it is now time to change the colour.
Let’s say you are working in Slic3r or Simplify3D software to slice a project. Here is what you need to edit:
Step 1. Look for Z offset number in your Printer Settings – General menu. Remember it.
Step 2. For the Layer High, you need to preview your whole project. Do it by selecting “Plater” and “Preview” on the ribbon (look at upper and lower parts).
Step 3. Use the Z High button to figure out where your first layer is, which will be printed in a different colour. You need to remember this number.
Step 4. Export your G-Code as you usually do.
Step 5. Write down your Z Offset number and Z High number (from Step 3). Sum them, and remember the new number.
Step 6. Use Notepad or similar text editor to open your G-Code file. Click “Edit” and search for Z with your sum number. For example, if your sum is 2.92, you have to find Z2.92 (via “Find” option or through CTRL + F command on Windows PC).

Step 7. Right before the code line with Z2.92 insert the code M600, which means pause or suspend.
For example, your G-Code used to look like this:
G1 Z2.80 F4200.000
G1 Z2.92 F4200.000
G1 Z2.98 F4200.000
After your changes, it looks like this:
G1 Z2.80 F4200.000
M600
G1 Z2.92 F4200.000
G1 Z2.98 F4200.000
Step 8. Save the G-Code file and use it for printing. Now the machine will make sounds when the time comes to switch the filament, and you will not have to control it all the time.

You can watch a video that shows in details the process of changing filament manually:
Method 5. Learn to 3D Print 2 Colours via Single Extruder in Cura
Users with Creality Ender-3 or other printers who use Cura for modifying the G-Code can also edit the file to make the printer pause automatically.
The user can switch the filament during such pause and resume printing when the new colour is set up.
Step 1. You need to load the STL file to Cura and use Extensions menu to select the “Post Processing” option and click “Modify G-Code.”
Step 2. Make your printer pause using Post Processing Scripts called “Pause at height” – Pause at “Layer No.” Here you choose the layer number where the colour will be switched and before which your machine should pause.
Step 3. Use the following settings:
For “Park Print Head X/Y” – 10 or 20 mm (so that you can clear the rest of previous filament);
For “Retraction” – from 0 to 25 mm;
For “Retraction speed” – about 50 mm/s;
For “Extrude amount” – 0;
For “Redo layers” – 0 (if you do not want to redo the last layer) or 1 (if you wish to redo the last layer to merge it well);
For “Standby Temperature” – leave the same numbers as for the print or use 25 °C.
You can repeat the settings for each layer where you are planning to swap the filament colour. Just switch the “Pause Layer” number.
Step 4. Click “Prepare” when you are finished with settings. The file will be resliced, and you can begin to 3D print the first colour and look for the pause.
Step 5. During the pause, you will have to remove the filament leftover and insert another colour to print 2 colours with 1 extruder. It is important not to change the position of the nozzle, Z height and bed.
Step 6. Let the nozzle drain for a few minutes. When another colour is visible, you can clean your single extruder and resume 3D printing.
Method 6. Use Virtual Extruders
Slicing software allows enthusiasts to work with virtual extruders even if their 3D printer comes with a single nozzle.
This method is similar to Method 1. While slicer will believe your machine comes with dual extruders, you will be the one to swap 3D printing material every time the nozzle must be changed.
The good thing is your model will be built as if with two or more nozzles. It will look flat and smooth with nothing sticking out or requiring too much attention afterwards. And you could make two colours, even on the same layer. But it takes much time, patience and accuracy on your side.
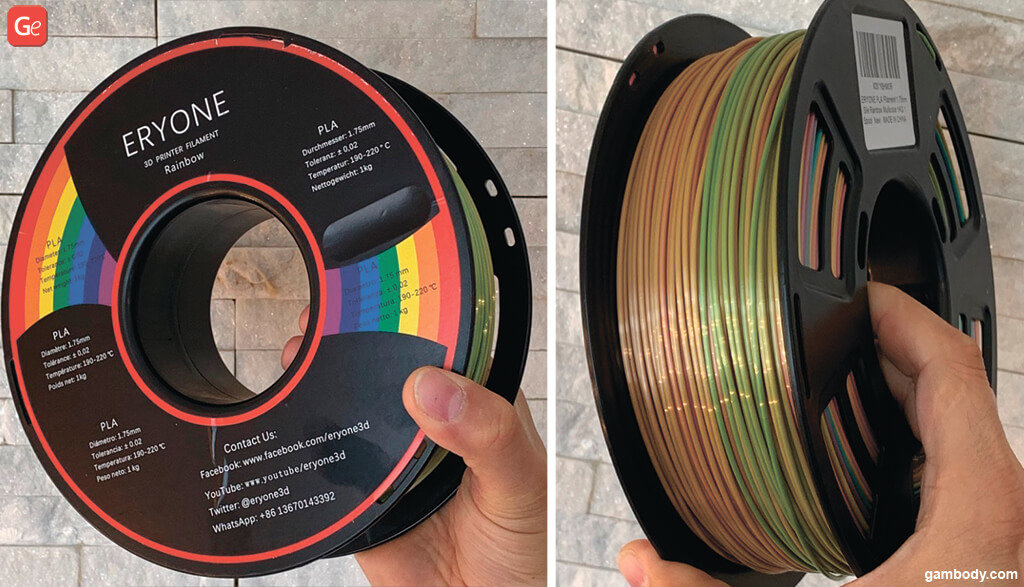
Method 7. Use Multicolour Filament
Suppose you are a fan of colourful 3D prints but do not want to paint your model. In that case, you can experiment with the multicolour filament. The market offers various brands with rainbow filament, beautiful pastel colours, bright mixes, etc.
Take a look at the fantastic colourful print made by Giuseppe Pasquarelli (@crazyfilament). This diorama featuring the Demogorgon looks like a fairy-tale-scene when printed with the rainbow filament:
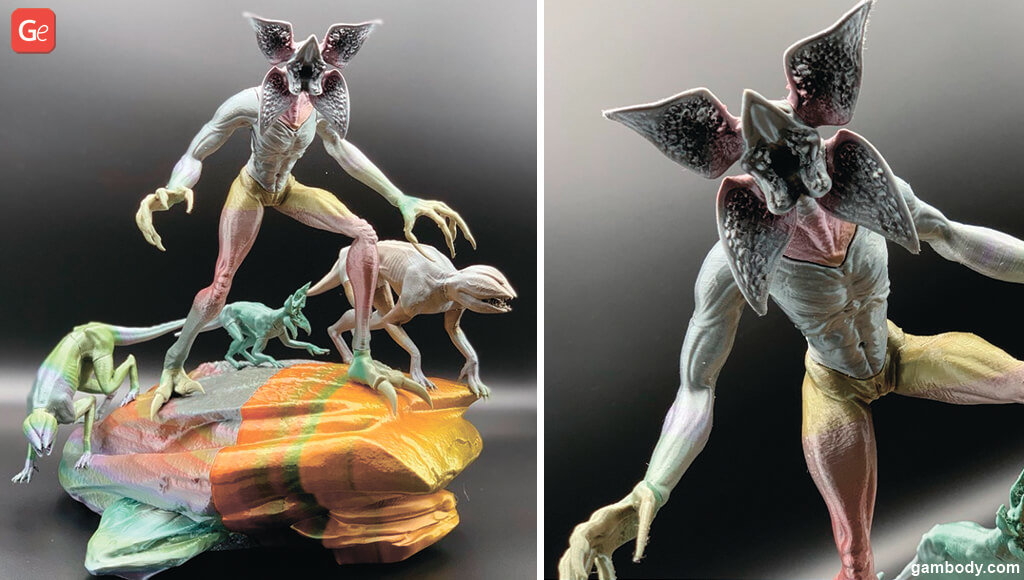
You can also download the STL files for bringing to life the Demogorgon 3D Printing Figurines in Diorama using 2 or more colours and 1 extruder.
Hobbyist Tommy Kong also experimented with rainbow PLA filaments and made two fantastic figurines of Durotan and Illidan.
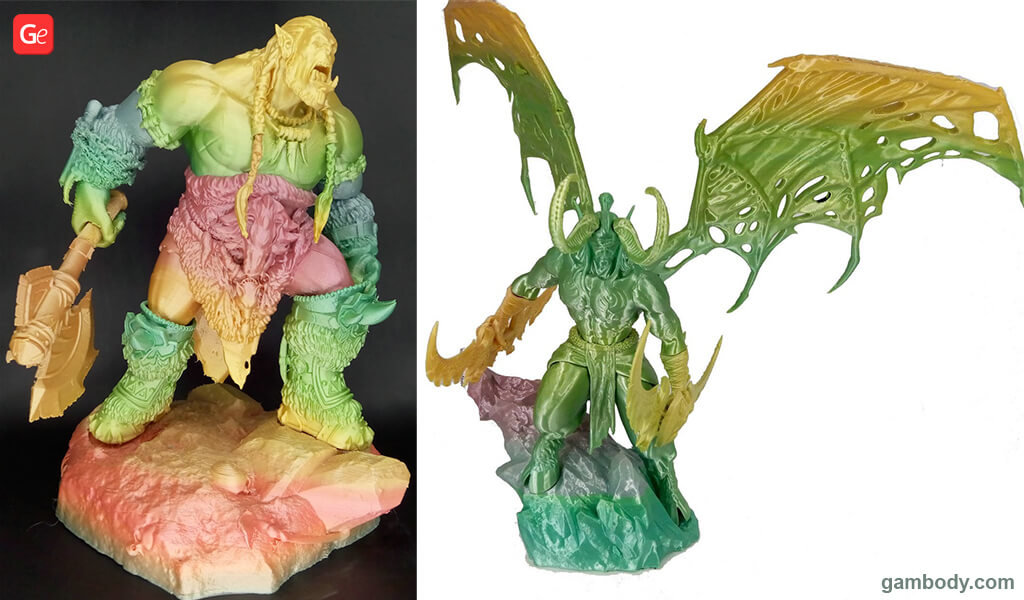
Both models are available on Gambody for downloading:
- Download Durotan STL files for 3D printing;
- Download Illidan STL files for 3D printing.
Choose a spool that offers the multicolour option, and you will not have to switch 3D printing material on-the-go. Create impressive home décor (vases, cups, plates) with gradual colour change, make unusual shade transitions and surprise everyone with your creations. To print 2 colours with 1 extruder is more fun when the filament is multicoloured.
If you wish, you can even try to splice several colours of filament to create your unique spool of particular shades. Use it for making dual-colour or multicolour 3D prints with a single extruder. Of course, you have no control over the placement of colours on the model. Still, at the same time, you must not control the printing process, switch 3D printing material and edit G-Code.
Are you still bored with a single colour 3D print but don’t want to do much post-processing and painting? Use your single nozzle for eye-catching multicolour prints, and create beautiful models to display on your shelf or for home-usage.
We hope that our guide on how to print 2 colours with 1 extruder will help you to succeed. It will be fantastic to see your beautiful multicoloured projects in Gambody 3D printing Community on Facebook.


Best 3D Printed Christmas Ornaments and Gifts for People You Love: Download STL Files
Read Article
Incredible 3D Printed Tank Model Collection: Interview with Carlos Díaz
Read Article