For many newbies, a 3D printer price is essential when choosing an inexpensive machine for home use. Not every buyer is willing to spend a lot of money on a hobby. Thus, it is vital to read reviews of different devices to find your best cheap 3D printer. We offer you a look at the low-cost Voxelab Aquila 3D printer, which specs sound like a more affordable alternative to the famous Creality Ender 3 V2.
Gambody team unboxed and tested the 2020 DIY FDM 3D printer from Voxelab (Flashforge’s sub-brand). The Aquila is one of the many Voxelab machines marketed as easy operation, efficient, reliable and cheap 3D printers. This company aims to be a one-stop shop for all 3D printing needs. Its product line includes FDM and resin machines, filaments and resins, accessories and slicing software.

See also: Creality Halot-One CL-60 Resin 3D Printer Unboxing and Review
Voxelab Aquila Unboxing and Review
In our detailed Voxelab Aquila unboxing and review, we must mention what Aquila is. According to Webster, Aquila is Latin for “eagle.” Also, Aquila is a constellation you can see on the celestial equator. At the same time, it represents a bird that carried thunderbolts thrown down to Earth by Zeus.
The printer’s name has so many meanings, and they all sound so delightful! So, we already know that Aquila name is pleasant to the ear, and we will soon figure out how this machine prints.

Voxelab Aquila 3D Printer Price
We believe that the first thing users pay attention to is the 3D printer cost. The Voxelab Aquila 3D printer price sounds rather pleasant, especially when compared to competitors.
You can find a new Aquila machine for $199, $179 and even $150 when on sale. We must reflect this affordable price in our review because of all the excellent specs this low-cost 3D printer offers.
Voxelab Aquila Specs
The cheap 3D printer comes with standard specs:
- Its build volume is 220x220x250mm (8.66 x 8.66 x 9.84 inches). This bed size is standard for machines of the same class, so this spec is neither good nor bad.
- The nozzle diameter is 0.4mm, a standard size well-familiar to many 3D printing enthusiasts.
- The maximum print speed for the Voxelab Aquila is 180 mm/s. However, it is best not to exceed the value of 50 mm/s.
- The machine is compatible with 1.75mm filament, a standard size known to all manufacturers.

All main Voxelab Aquila specs are of common value and similar to the Creality Ender 3 V2 specifications. But, to be truthful, we did not expect anything outstanding from this cheap 3D printer. It is a sturdy machine built with well-established technologies and offered at an unbeatable price, $100 cheaper than Ender 3 V2.
Voxelab Aquila Assembly
The affordable 3D printer is positioned as a DIY machine. Thus, your Aquila will come disassembled.

Gambody team enjoyed assembling this device. We were lucky to have professional tools at our fingertips, such as a digital calliper and rulers. Also, we quickly found all the necessary bolts and nuts by measuring their diameter and length beforehand and spent about 20 minutes on assembly.

However, we are not sure that every 3D printing enthusiast can easily cope with this task, especially if you have no skills in such assemblies. It could be so much better if Voxelab Aquila 3D printer manufacturers packed all the bolts and nuts into numbered bags and included a video instruction on the flash drive. Such extras could make the assembly process way simpler and faster!

It is worth noting that the cheap 3D printer comes with comprehensive instructions in English. The user manual has many pictures and great descriptions. You must follow each step in the guidelines, tighten all the bolts and guide rollers as indicated in the manual. Only this way you will achieve a good result.
Voxelab Aquila 3D Printer Parts
The Aquila equipment is standard for modern 3D printers yet excellent for the price. Of course, we would be happier to receive more calibration paper, stickers and another free nozzle. Some manufacturers pack two nozzles instead of one extra piece.

Still, we were pleased to get enough fasteners of different types, screwdrivers, other tools needed for Voxelab Aquila assembly, and 50 grams of red PLA filament added to the package. All these 3D printer parts were packed in individual clear bags, which is very cool!

Voxelab Aquila 3D Printer Design
The assembled Voxelab Aquila 3D printer made us happy! We love the sturdy metal frame, a beautiful large screen, pleasant anodized aluminium, nice black colour, superb cover on the extruder.
What we don’t like is the protruding of the screen to the right side. But as we understand, the company has fixed this issue in the next 3D printer version. We also believe that the wires are not connected very harmoniously, but it is our humble opinion.

Pros & Cons
We made our list of the pros and cons of this cheap 3D printer:
What we like
- The machine comes with a belt tensioner! It is incredible because some more expensive 3D printers lack this. We have repeatedly encountered the loose drive belt tensioner problem, so we had to highlight this moment.
- All-metal frame and elements! There are no plastic parts, and you have nothing extra to print. Right after assembly, your cheap 3D printer is ready to work. It looks sturdy and should print well, without dangling or vibrating.
- The printer has a beautiful colour display with a nice shell on top of a standard, reliable Marlin. This screen, being non-touch-sensitive, has a longer mechanical life and is a perfect solution for saving processor resources.
- All axes have end sensors! You might miss the touch probe sensor, but years of experience will show you that the BLTouch sensor has more problems than benefits. So, we are glad it is not available in this DIY 3D printer. Everything is reliable and straightforward.
- The carbon-silicon crystal glass bed surface is similar to the AnyCubic special coating, which offers strong adhesion. Don’t worry; we will test this feature without applying a single drop of glue!
- The adjusting nuts of large diameter have indicated adjustment directions. These parts are super convenient and similar to the ones installed on Creality 3D printers. Even when you 3D print for many years, sometimes you might forget which direction to turn the screw to raise the platform. It is when the directions on the nuts are so convenient!
- The drivers on the board are not just quiet. They are ultra-silent!
- The Voxelab Aquila 3D printer interface is user-friendly and very functional. We will describe its most impressive functions below.
- Fast heating is not just an advertisement on the company’s website. This cheap 3D printer heats up super quickly!

What we don’t like
- The Aquila cooling fans are noisy and hum very loudly. In our 3D printing laboratory, this cheap 3D printer is the noisiest one, and it is a real problem. It could be a great idea to eliminate the noise. Luckily, there are many solutions on the internet and you can replace the fans on a 3D printer yourself.
- The Z-axis stepper motor and the lead screw are connected with a spring coupler. This detail does not look like an essential piece; still, only time and 3D printing tests can tell for sure. Sometimes, the coupling can fix this issue when the lead screw has a bend in it. Although, we were lucky to receive a straight shaft.
- The low-cost 3D printer comes disassembled. Not every 3D printing hobbyist can quickly and correctly assemble it despite the detailed instructions. Please consider this fact!
- Sometimes we experienced an unpleasant glitch. The feeder started to spin at high speed, causing the plastic to fray. At the same time, the printer’s head travelled to the upper right corner or rose along the Z-axis. We performed several dozen tests to figure out that this problem appeared every other time. It upsets and annoys us, but this issue is not related to G-code or Slicer. You can only fix it by restarting the Voxelab Aquila 3D printer.
- The machine requires calibration, and not every enthusiast knows how to do it right. This cheap 3D printer does not come with perfect configurations straight from the factory.
Storage Card
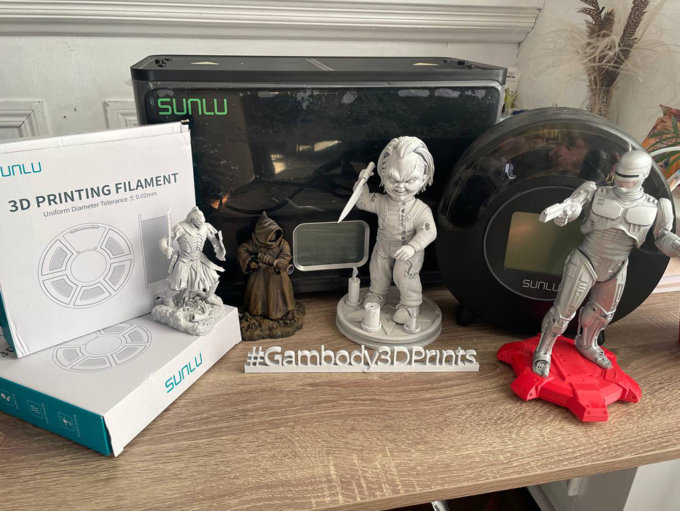
The 8GB storage card comes with a card reader. We love that this card has all the information and files you need to start 3D printing. It stores some test files (G-code and STL), User Manual PDF file, the VoxelMaker Slicer and Cura Slicing software with the Aquila 3D printer profile.
Using the pre-saved files, you can 3D print a toolbox and a new filament spool holder for your comfort. We are delighted with all these options!
VoxelMaker Review
Of course, we must review the VoxelMaker Slicer. We genuinely love its interface because Gambody also uses red and white colours! We will not describe all the features of this software, but we will mention the most important ones.

We can divide the VoxelMaker Slicer into four main parts:
- The top standard menu with duplicate buttons.
- The left menu responsible for positioning 3D printing objects on the platform.
- The top menu accountable for slicing and printing the parts.
- Imitation of a 3D printer bed in the centre of the screen.
Top Menu Buttons
You can see the “File” tab in the top menu with many options:
- Create a new project;
- Load an existing project;
- Save the file;
- Load examples that come with the slicer;
- Look at the recent files;
- Quit using the software.
All these are standard features offered by 3D slicers.
It is easy to set up your preferences, select your preferred language from a list of many supported languages, choose a Basic or Expert Mode, etc.

The “Edit” tab offers standard options for model editing. You can “Undo” and “Redo”, “Select All”, “Duplicate” and “Mirror” objects, and use other essential functions.
The “Print” tab allows 3D printing objects. You can connect your printer to a computer and use the “Print” button to begin the printing process. Also, there are buttons for cutting the 3D printing objects, selecting your printer, choosing the nozzle diameter (0.4mm or 0.6mm), etc.
The “View” allows managing the object’s view. You can select the side for viewing (top, left, home view, etc.) and choose Perspective or Orthographic viewpoints.
The “Tools” and “Help” tabs are not of particular interest to us. For example, “Tools” allows leaving feedback, contacting the company if needed, checking for slicer updates, etc.
Left Menu Buttons
The left menu has all the buttons needed for interacting with objects before 3D printing them.

Let us look at all the features:
- In “View”, you can set the view to top, bottom, left, right, front or back.
- In “Move”, you can set the X, Y, Z position and choose to place the object on the platform or centre it in the middle of the bed.
- In “Rotate”, you can set the X, Y, Z object rotation degrees and preset the model rotation by 90 degrees clockwise or counterclockwise. It is super comfortable!
- In “Scale”, you can tweak X, Y, and Z dimensions in mm or per cent.
- In “Cut”, you can cut the model in half by setting the cut plane. This function is beneficial!
Top Center Menu
This menu contains only three buttons that let you load a file for cutting, configure supports for 3D printing and send the object directly for printing. It is interesting to look at each option closely.
Using “Load” you can upload files of different formats, including .STL, .OBJ, .GCode, .PNG, .JPG, .VFP and others.

The “Supports” button allows setting up supports automatically or arranging them manually. You will love using standard (Linear) and Treelike supports types with different diameters, overhang threshold, height settings.
The “Print” button offers to tweak proper configuration settings that influence the 3D printing result. You can select the type of plastic, layer height, print speed, retraction distance and speed, etc. We are fascinated with all these options because you can achieve the best possible result by tweaking them.
Voxelab Aquila Calibration
At first, we wanted to calibrate the extruder properly. At the setting of 100mm, it only extruded 98mm of filament, which is a good result. However, we ensured the extruder would show the perfect 100mm score.

Our next test was calibrating flow rate. We 3D printed a cube with a wall thickness equal to one layer and measured its walls. They turned out to be 0.41mm instead of 0.4mm. It is also a good result, but not perfect. So, we improved it using the Cura Slicer flow calibration settings.

For the third test, we printed a 20x20x20mm cube and measured its dimensions. This way, we calibrated the stepper motors. The 3D printed cube was 20.04×20.06×19.5mm. But the user-friendly Aquila interface makes the calibration process easy, and it requires no external devices! We can compare this interface to Marlin firmware for non-touch screens, a prevalent and reliable one.
It is necessary to pay attention to 3D printer retraction settings because you need to find your happy medium. As you see in the photo below, the standard retraction settings led to problems.

The extruder did not pull enough length of filament, and we are not sure why it happened. It could be the problems with airflow or retraction itself. Anyways, we reduced the retraction and speed to fix this issue.
Test Prints
The first 3D printing test we did was printing the part stored on the storage card.
Also, we at once tested the cheap 3D printer bed surface by wiping it with alcohol and soapy water, and we spotted no difference. As long as the bed is clean, the object stays well in place. We would still advise you to use glue for printing tiny, large, complex or critical models.

When the printing takes a day or more, it will upset you to see a damaged 3D print in the end because the first layers did not adhere well. Thus, we turned the glass bed upside down and used glue to achieve a reliable result. And our test print was of excellent quality. Our settings were 0.2mm layer height and 50 mm/s speed, and we had no retraction issues except for some strings. The object adhered well, yet nothing stuck.
The next test was printing the famous Benchy boat loved by so many people. We used different settings and slicers to compare the results. The boat 3D printing model comes with complex parts, and such a test can help you observe all possible flaws at once.

For the first 3D printed boat, we used the standard settings offered by the VoxelMaker Slicer, and the result looks pretty good.
For the second print, we used the Cura Slicing with slight tweaks to the main settings. If comparing VoxelMaker and standard Cura settings, we liked the first one better.

Still, Cura requires some additional tweaks to deliver a great result as well. Don’t print at a speed higher than 60 mm/s, and make sure the first layers are printed slowly to help the filament adhere well to the bed.
3D Printing Robby the Robot
We continued testing the affordable Voxelab Aquila DIY 3D printer for this review. For the next project, we chose one of the latest and super popular 3D printing models offered on Gambody marketplace, Robby the Robot. Why this particular model, you might wonder? Well, the answer is simple.

Firstly, this project is easy to print. Secondly, it has excellent smooth surfaces, transparent elements and a significant number of small parts. It is a great 3D printing robot you can also make after downloading Robby the Robot model STL files.

What can we say? The parts print well. We noticed some minor issues with retraction, which were fixed by increasing the values a little bit. We also spotted some Z-wobble, and since it is a common problem, we will surely solve it in the future by tightening the belts or lubricating the Z-axis lead screw.

After printing all the parts, we can say that the 2020 Voxelab Aquila 3D printer performs great and easily copes with the task. We set up the retraction, positioned small objects at a distance from each other to let the filament dry out sufficiently. It was easy to remove the supports, and although we did notice some Z-wobbles, overall, we are happy.
Please enjoy the photos of a 3D printed robot! The super adorable Robby the Robot is a great 3D printing model that will look stunning on your shelf!
Summary
The cheap Aquila 3D printer costs similar to Creality Ender 3, but its specs are identical to a more expensive Creality Ender 3 V2 ($250) and AnyCubic Viper ($350). In other words, you can get a reliable yet straightforward Voxelab Aquila machine for a terrific price, but do not expect it to work like $700 printers.
Of course, there could be issues and glitches. You might notice wobbling while printing layers under 1.4mm in height, cooling fans working too loud, etc. And the assembly process might look complicated for newbies and users who are not familiar with DIY 3D printers. It is essential to configure many settings properly to achieve excellent results. Still, Aquila is ready to print right after assembly. It is probably not the best option for printing highly detailed miniatures. But you can have so many great moments while recreating statues and large scale models of your favourite movie, video game and comics characters.
Anyways, this is one of the best cheap 3D printers under $200 you can find in the market today. The Voxelab Aquila 3D printer could introduce you to the adventurous and exciting world of 3D printing and become your first machine. As you see in our review, its low cost covers many problems, which are not that serious, to be truthful. You can always low the speed, print the airflow, replace the coolers, adjust the settings and share your stunning 3D printed results with Gambody 3D Printing Community on Facebook.

Anycubic Vyper 3D Printer with Auto-Levelling: Review, Specs, Price, Tests
Read Article
Spinners: 2017th Most Popular Toy That Can Be 3D Printed
Read Article