Files
3D model format
Stereolithography (.stl)
Total files
Slicer settings
Mesh error check
Netfabb
Support
Lifetime support from Gambody team
Update requests
Available to verified buyers
Model versions
FFF/FDM
Assembly method
Ge-Locks, Glue
Features
- Assembly kit includes lock 30_Ge_lock_10H_x58 to attach the model's parts securely without glue that needs to be printed 58 times;
- Two versions of the turbines with an alternative lettering;
- This version is cut into more assembly parts to fit the smaller 3D printers' build plates or to be used in large-scale projects.
FFF/FDM
Assembly method
Ge-Locks, Glue
Features
- Assembly kit includes lock 15_Ge_lock_10H_x16 to attach the model's parts securely without glue that needs to be printed 16 times;
- Tunnels throughout the battleship's body are provided for LED wiring to light up the mainhull, six sublight engines, and flight pods;
- All 22 batteries mounted all over the battleship’s body are movable;
- Comes with a two-piece stand for you to conveniently display the long space battleship;
DLP/SLA
Assembly method
Glue
Features
- Tunnels throughout the battleship's body are provided for LED wiring to light up the mainhull, two sublight engines, and flight pods;
- Comes with a two-piece stand for you to conveniently display the long space battleship;
- All 22 batteries mounted all over the battleship’s body are movable;
- Two versions of the turbines with an alternative lettering;
SLS
Assembly method
not specified
Features
- Made as a solid one-piece ship.
Additional details
Part of diorama
No
Special pack included
No
You will get instant access to the STL files of Battlestar Galactica 3D Printing Model | Assembly after completing your purchase. Simply add the model to your cart and check out using PayPal, credit or debit card, Apple Pay, Google Pay, Alipay, or other available payment methods.
Watch the assembly video for Battlestar Galactica 3D Printing Model | Assembly, and explore more tutorials, behind-the-scenes content, 3D printing timelapses, and painting guides on the official Gambody YouTube channel.
This 3D Model consists of files in StereoLithography (.Stl) format that is optimized for 3D printing.
Before printing the files, we strongly recommend reading the PRINTING DETAILS section.
Battlestar Galactica 3D Printing Model comes in 4 versions for FFF/FDM, DLP/SLA and SLS 3D printers. STL files of both versions are available for download after the purchase.
Detailed information about this 3D printing model is available in the DESCRIPTION section.
Before printing, take a look at Printing Details for recommended settings and tips to achieve better results.
ABOUT THIS 3D MODEL
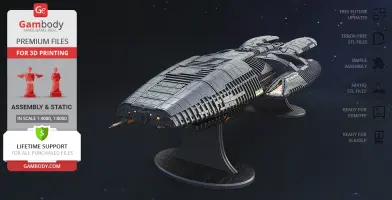
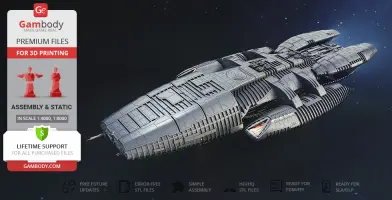
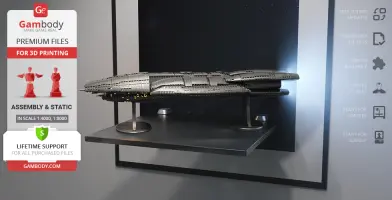
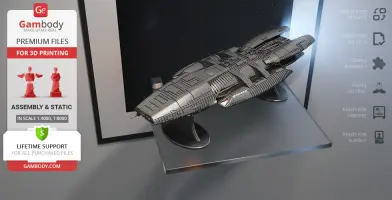
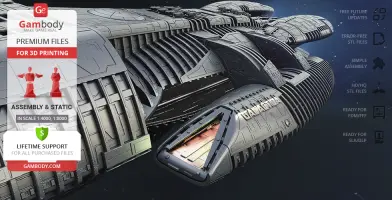
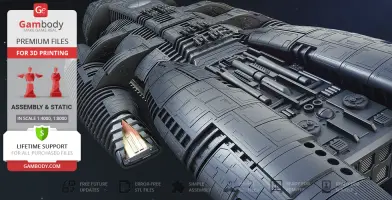
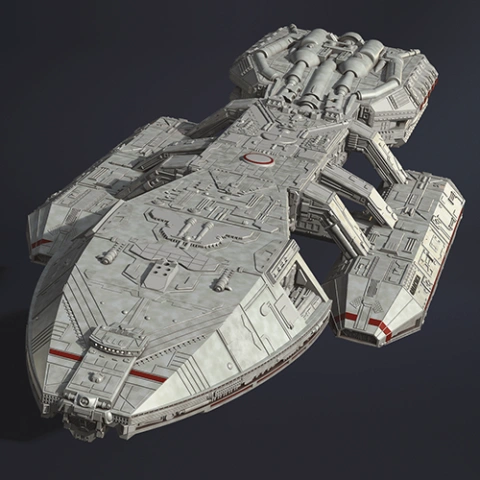
The Galactica is the oldest capital Battlestar in the service of the Colonial Fleet and easily one fo the most iconic sci-fi ship designs ever. Part spacecraft carrier, part maneuverable battleship was one of twelve Battlestars built during the thousand-year Cylon Wars and served as a home to a large human crew in search of Earth. Being particularly inspired by the reimagined sci-fi television series Battlestar Galactica, our contributing 3D artist reportedly spent 162 hours in total in order to bring to life the incredible Galactica 3D printing model. The author of the beautiful and sleek 3D printing Battlestar paid utmost attention to the fine details that adorn the long body of the legendary vessel. The fore section of Galactica’s massive main hull (that is also known as the "alligator head”) comprises a vast amount of intricate details, wires, cannons, arrays etc. that guarantee an unsurpassed 3D printing experience. The midsection of the 3D printing Galactica model features the static flight pod retraction mechanisms and a pair of see-through flight pods themselves, that are known to hold up to a thousand Vipers! The author of the model also didn’t forget to include the beautiful “Galactica” logo on the sides of both pods, as well as the round hatch on top of the hull that is waiting to have the yellow Colonial Fleet logo painted on it. The stern section of the Battlestar Galactica model for 3D printing depicts the ship’s six sublight engines, as well as cooling units and engine access hatches. Last but not least, the huge hull of the Colonial Fleet centerpiece for 3D printing comprises 22 anti-ship gun turrets mounted 2 guns apiece on the dorsal and ventral surfaces of the body. The mighty and renowned Battlestar Galactica ship can unlikely leave any sci-fi enthusiast indifferent and will certainly become a masterpiece among anyone’s 3D printed fleet.
ADAPTATION FOR 3D PRINTING
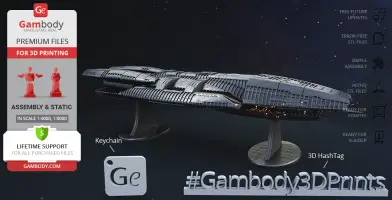
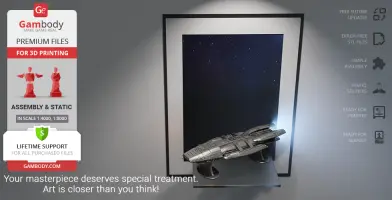
Battlestar Galactica for 3D printing is a static assembly model and its moderation and adaptation for different types of 3D printers took Gambody team 42 hours in total. The huge battleship model was divided into as many assembly parts as needed to fit even the smallest 3D printers' build plates and for you to nevertheless receive a giant 3D printed ship after assembly. The cutting of the Battlestar Galactica model was chosen by our team to minimize the amount of filament needed for generated support and for you to receive the cleanest 3D printing result possible. For the same purpose, Galactica’s flight pod access arms, flight pods themselves, sublight drives, etc. are provided as separate STL files. The model’s 22 anti-ship gun turrets (batteries) that are to be mounted all over the battleship’s body are also provided as a separate file. This file needs to be printed 22 times and once assembled the turrets will be movable for you to display the ship in any fight mode you prefer. There can also be found special tunnels throughout the hollow body of the starship model that were designed by our team for you to easily introduce LED wiring for illumination of the main hull, six sublight engines, and flight pods. For you to display the Battlestar Galactica model among your spaceship collection there is a two-piece stand provided. All assembly parts come in STL files in recommended positions that were worked out in order to ensure the smoothness of the details’ surfaces after printing and that the 3D printing beginners won't face difficulties when placing the parts on a build plate. When downloading any model's file you will also receive "Assembly Manual" for FFF/FDM 1.0 and DLP/SLA/SLS 1.0 versions in PDF format.
The model is saved in STL files, a format supported by most 3D printers. All STL files for 3D printing have been checked in Netfabb and no errors were shown.
The model's scale was calculated from the actual length of the Battlestar Galactica that is 1438000 mm. The 3D printing model's chosen scale is 1/4000 for FFF/FDM version and 1/8000 for DLP/SLA/SLS versions.
VERSIONS' SPECIFICATIONS
FFF/FDM 1.0 version features:
- Contains 15 parts;
- A printed model is 95 mm tall, 139 mm wide, 366 mm deep;
- Assembly kit includes lock 15_Ge_lock_10H_x16 to attach the model's parts securely without glue that needs to be printed 16 times;
- Tunnels throughout the battleship's body are provided for LED wiring to light up the mainhull, six sublight engines, and flight pods;
- All 22 batteries mounted all over the battleship’s body are movable;
- Comes with a two-piece stand for you to conveniently display the long space battleship;
- All parts are divided in such a way that you will print them with the smallest number of support structures.
FFF/FDM 1.1 version features:
- Contains 32 parts;
- A printed model is 95 mm tall, 139 mm wide, 366 mm deep;
- Assembly kit includes lock 30_Ge_lock_10H_x58 to attach the model's parts securely without glue that needs to be printed 58 times;
- Two versions of the turbines with an alternative lettering;
- This version is cut into more assembly parts to fit the smaller 3D printers' build plates or to be used in large-scale projects.
DLP/SLA 1.0 version features:
- Contains 12 parts;
- A printed model is 48 mm tall, 70 mm wide, 183 mm deep;
- Tunnels throughout the battleship's body are provided for LED wiring to light up the mainhull, two sublight engines, and flight pods;
- Comes with a two-piece stand for you to conveniently display the long space battleship;
- All 22 batteries mounted all over the battleship’s body are movable;
- Two versions of the turbines with an alternative lettering;
- All parts are divided in such a way to fit the build plates and to ensure that support structures are generated where needed.
SLS 1.0 version features:
- Contains 3 parts;
- A printed model is 48 mm tall, 70 mm wide, 183 mm deep;
- Made as a solid one-piece ship.
WHAT WILL YOU GET AFTER PURCHASE?
- STL files of Battlestar Galactica Model for 3D printing which consist of 62 parts;
- 4 versions of files for this model for FFF/FDM and DLP/SLA/SLS printers;
- High-poly detailed model of Battlestar Galactica;
- Assembly Manual for FFF/FDM 1.0 and DLP/SLA/SLS 1.0 versions in PDF format;
- Detailed settings that we provide as a recommendation for Cura , Simplify3D and Slic3r for the best print;
- Full technical support from the Gambody Support Team.
You can get the model of Battlestar Galactica for 3D Printing immediately after the purchase! Just click the green Buy button in the top-right corner of the model’s page. You can pay with PayPal or your credit card.
Watch the tutorial on how to assemble Battlestar Galactica 3D Printing Model at Gambody YouTube channel.
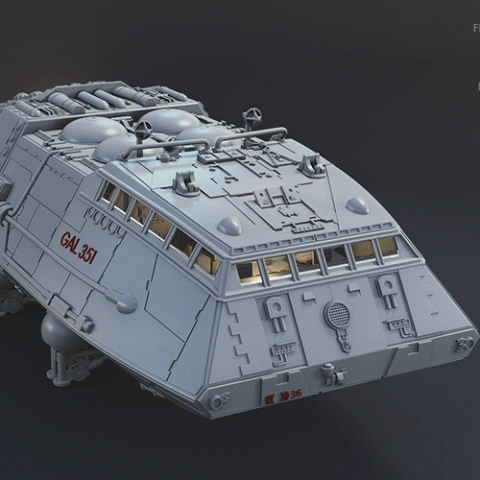
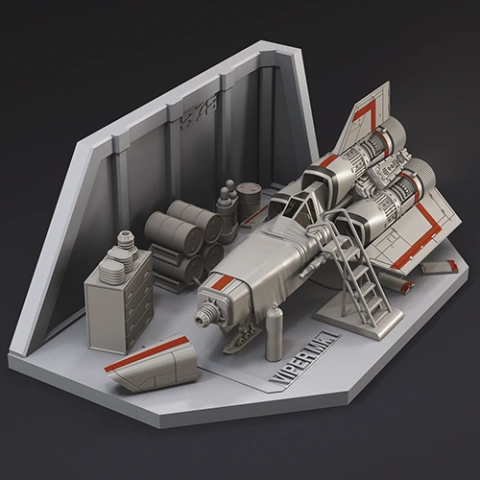
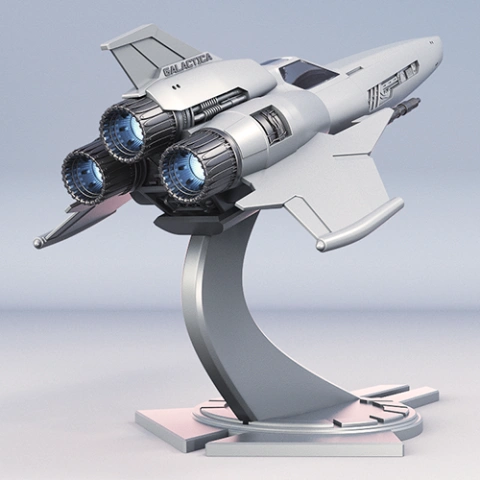
Also, you may like the Viper Mk II 3D Printing Model, as well as other Space Ships 3D Printing Models.
_______
FAQ:
Average customer rating (24 reviews)
3.8
Ratings breakdown
Click a star rating to filter reviews
Overall experience
Level of detail in the model
3.9
Model cut quality and assembly guide
3.8
Clarity and accuracy of the model page
3.9
Level of detail in the model
4.6
Model cut quality and assembly guide
3.8
Clarity and accuracy of the model page
4.6
Will try to print it (and paint), but im impressed with your work - beautifull!!!
Whats the sugested print settings to use with it, please? Orca?
Thanks
First of all, we’d like to point out that on the model page, in the Printing Details tab, you’ll find recommended settings for a wide range of slicers. These parameters were tested by the designer and are intended to provide a reliable balance between detail, strength, and print success.
For Creality printers, the slicer closest to Creality Print is OrcaSlicer. Creality Print is heavily based on OrcaSlicer’s core, offering very similar features with Creality-specific interface tweaks and optimizations. Ultimaker Cura is another solid option — it was the original base for Creality Slicer and provides deeper manual control. Both are excellent choices, depending on whether you prefer a streamlined workflow or more advanced customization.
Once the settings are loaded into slicer, you can fine-tune them slightly if needed to better match your filament and your specific printer behavior.
As a beginner, we highly recommend starting with calibration models first: https://www.gambody.com/offers/printers/3d-printer-test-models
This will help you confirm that your settings, supports, and bed adhesion are working well before moving on to larger or more detailed parts.
We’re always happy to help and are glad to welcome a new 3D printing enthusiast into our community. If you have any additional questions about setting up your first printer or printing files from our marketplace, feel free to reach out anytime.
We also have a blog section on our website, where you can find tons of useful information for those new to the 3D printing hobby: https://www.gambody.com/blog/
Level of detail in the model
5
Model cut quality and assembly guide
2.7
Clarity and accuracy of the model page
0.3
All file versions with their specifications included with a model at the time of purchase are always listed on the product page to ensure full transparency. The Battlestar Galactica 3D model was never marked as one that included a pre-supported version for DLP/SLA 3D printers.
We always strive to maintain a high level of quality across all models. For each product, we provide multiple high-resolution renders from different angles, an assembly video, visuals of assembly parts, and a detailed description of each version available.
However, you can generate your own supports using guidance from our Moderation Team if needed. As a general suggestion for SLA printing, we recommend orienting flat surfaces at an incline of up to 45 degrees. Printing models at an angle reduces layer surface area and tank contact, helping to prevent warping. It is also best to avoid placing large flat surfaces parallel or perpendicular to the build plate.
For parts requiring precise fitting, please pay close attention to technical cut sides and connecting surfaces. The most important angled sides should be positioned upwards (towards the tank bottom rather than the build plate) at a steep angle to keep edges sharp and prevent deformation. We also recommend using many small supports evenly distributed across sharp angles rather than fewer thick supports, as this helps maintain shape integrity.
To achieve great results without pre-supported files, we also recommend reviewing our detailed article on resin model orientation and support generation:
https://www.gambody.com/blog/best-resin-printing-tips-for-orienting-models-on-sla-dlp-lcd-3d-printers/
For more efficient resin use, we suggest hollowing out assembly parts while ensuring a minimum wall thickness of 2.2 mm and adding drainage holes so excess resin can easily escape.
If you need any additional assistance with your BSG 3D print, please feel free to contact us — we are always happy to help.
Level of detail in the model
5
Model cut quality and assembly guide
5
Clarity and accuracy of the model page
5
Level of detail in the model
1
Model cut quality and assembly guide
1
Clarity and accuracy of the model page
1
Level of detail in the model
4
Model cut quality and assembly guide
4
Clarity and accuracy of the model page
4
Level of detail in the model
5
Model cut quality and assembly guide
5
Clarity and accuracy of the model page
5
Level of detail in the model
5
Model cut quality and assembly guide
5
Clarity and accuracy of the model page
5
Level of detail in the model
5
Model cut quality and assembly guide
5
Clarity and accuracy of the model page
5
Level of detail in the model
1
Model cut quality and assembly guide
1
Clarity and accuracy of the model page
1
Level of detail in the model
4
Model cut quality and assembly guide
4
Clarity and accuracy of the model page
4
Level of detail in the model
3
Model cut quality and assembly guide
3
Clarity and accuracy of the model page
3
Level of detail in the model
5
Model cut quality and assembly guide
5
Clarity and accuracy of the model page
5
Level of detail in the model
3
Model cut quality and assembly guide
3
Clarity and accuracy of the model page
3
Level of detail in the model
1
Model cut quality and assembly guide
1
Clarity and accuracy of the model page
1
Level of detail in the model
5
Model cut quality and assembly guide
5
Clarity and accuracy of the model page
5
Level of detail in the model
3
Model cut quality and assembly guide
3
Clarity and accuracy of the model page
3
Level of detail in the model
3
Model cut quality and assembly guide
3
Clarity and accuracy of the model page
3
Level of detail in the model
4
Model cut quality and assembly guide
4
Clarity and accuracy of the model page
4
Level of detail in the model
5
Model cut quality and assembly guide
5
Clarity and accuracy of the model page
5
Level of detail in the model
2
Model cut quality and assembly guide
2
Clarity and accuracy of the model page
2
Below you'll find detailed slicing settings for Bambu Studio 2.0+, Orca Slicer 2.0+, UltiMaker Cura 5.0+, PrusaSlicer 2.0+, Slic3r 1.3+, Simplify3D 5.0+ to help you get the best results when printing this model. These settings are optimized specifically for this 3D model, but please note they may need slight adjustments depending on your printer or filament. When in doubt, refer to your printer's user manual.
To avoid printing issues and achieve the best quality, we highly recommend applying the following settings:
For better quality use 0.12 mm layer height, for fast printing use 0.2 mm layer height. For pins and the Ge connectors, use 0.2 layer height.
120-150% of your Layer Height
But you can paint the seam if you want.
You have to calibrate this parameter
You have to calibrate this parameter
You have to calibrate this parameter
For pins and power elements of the structure, such as the vehicle frame, use 3 loop
Disabled for vehicles and enabled for characters
For 0,2 Layer Height
The parameters in this tab vary greatly, it all depends on the quality of your printer. For example, if you have a classic Ender3, stick to the minimum parameters, but if you have a newer printer, for example Anycubic cobra 3 v2, you can select the maximum recommended values
Settings for advanced users, change these parameters only if you have sufficient 3D printing expertise
Enable this parameter if your model requires supports
We also recommend placing and removing supports manually in some places using special button
1-2 loops for more thick support
Top Z distance = 1-1.3 layer Height. If the supports are hard to remove, try increasing this setting by 0.1-0,4 mm
Bottom Z distance = 1-1.3 layer Height. If the supports are hard to remove, try increasing this setting by 0.1-0,4 mm
You have to calibrate this parameter which one is better for your filament
Increase this parameter if the supports are hard to remove from walls
For PLA and PETG filament types
5-8 mm is optional for small prints that have bad adhesion to the build plate
You have to calibrate this parameter
Read the description on your filament roll
Read the description on your filament roll and increase this parameter for fast printers
Read the description on your filament roll and increase this parameter for fast printers
For better quality use 0.12 mm layer height, for fast printing use 0.2 mm layer height. For pins and the Ge connectors, use 0.2 layer height.
120-150% of your Layer Height
But you can paint the seam if you want.
0.01-0.05 You have to calibrate this parameter
0.01-0.05 You have to calibrate this parameter
0.1-0.2 You have to calibrate this parameter
For pins and power elements of the structure, such as the vehicle frame, use 3 loop
Disabled for vehicles and ships, enabled for characters
For 0,2 Layer Height
For 0,2 Layer Height
The parameters in this tab vary greatly, it all depends on the quality of your printer. For example, if you have a classic Ender3, stick to the minimum parameters, but if you have a newer printer, for example, Anycubic Kobra 3 Or Bambulab A1, you can select the maximum recommended values.
Settings for advanced users, change these parameters only if you have sufficient 3D printing expertise
Enable this parameter if your model requires supports
We also recommend placing and removing supports manually in some places using special button
Top Z distance = 1-1.3 layer Height. If the supports are hard to remove, try increasing this setting by 0.1-0,4 mm
Bottom Z distance = 1-1.3 layer Height. If the supports are hard to remove, try increasing this setting by 0.1-0,4 mm
Increase this parameter if the supports are hard to remove from walls
For PLA and PETG filament types
5-8 mm is optional for small prints that have bad adhesion to the build plate
Read the description on your filament roll
Read the description on your filament roll and increase this parameter for fast printers
You have to calibrate this parameter
Read the description on your filament roll and increase this parameter for fast printers
Read the description on your filament roll
This field is filled in according to your printer specifications when you add it to the slicer.
You can add custom G-code here for the start and end of the print. However, be careful - this is for advanced users only!
You have to calibrate your printer using Ge retraction test models
Retraction Length: For direct-drive setups use 0.5 mm to 2.5 mm; for Bowden extruders use 5 to 7 mm
This is how fast the filament is pulled back—40-60 mm/s for direct drive and 30-50 mm/s for Bowden setups.
You have to calibrate this parameter: Reduce it until the printer starts to hit the parts with the nozzle during printing, then increase it by 0.2.
For better quality use 0.12 mm layer height, for fast printing use 0.2 mm layer height. For pins and the Ge connectors, use 0.2 layer height.
120-150% of your Layer Height
To increase the strength of the print parts, use wall line count: 3
For pins and connectors use 50% Infill
These parameters are for standard PLA plastic. If you are using a different type of plastic, check the printing temperature recommended by the manufacturer. Also, read the description on your filament spool. For fast printers, add +30 °C to the current parameters.
The parameters in this tab vary greatly, it all depends on the quality of your printer. For example, if you have a classic Ender3, stick to the minimum parameters, but if you have a newer printer, for example Anycubic cobra 3 v3, you can select the maximum recommended values
Settings for advanced users, change these parameters only if you have sufficient 3D printing expertise.
You need to calibrate this parameter using Gambody test models. These values are average values for a Direct Drive extruder; for a Bowden extruder, the values should be increased.
You need to calibrate this parameter using Gambody test models. These values are average values for a Direct Drive extruder; for a Bowden extruder, the values should be increased.
Use this value other than 0 if your nozzle catches on the internal infill during travel moves. Try to keep this value as low as possible in height.
Use normal supports to support large, straight surfaces (most mechanical or technical parts).
You have to calibrate this parameter according to the capabilities of your printer and your filament, using a Gambody test models.
Use 1 instead of 0 if your supports are thin and tall. They will be harder to remove, but much stronger.
Top Z distance = 1-1.3 layer Height. If the supports are hard to remove, try increasing this setting by 0.1-0,4 mm
Increase this parameter if the supports are hard to remove from walls
Use tree supports to support complex objects, such as characters.
You have to calibrate this parameter according to the capabilities of your printer and your filament, using a Gambody test models.
Top Z distance = 1-1.3 layer Height. If the supports are hard to remove, try increasing this setting by 0.1-0,4 mm
Increase this parameter if the supports are hard to remove from walls
Use a skirt for all parts when printing on outdated printers.
Use a brim when printing thin but tall parts, as well as parts with a small bed adhesion area.
For better quality use 0.12 mm layer height, for fast printing use 0.2 mm layer height. For pins and the Ge connectors, use 0.2 layer height.
120-150% of your Layer Height
for 0.2 Layer Height
But you can paint the seam if you want.
(for PLA and PETG)
(5-8 mm is optional for small prints that have bad adhesion to the build plate)
Enable this parameter if your model requires supports
(45-50 degree)You have to calibrate this parameter according to the capabilities of your printer
and your filament, using a Gambody test models.
Top contact Z distance = 1-1.3 layer Height. If the supports are hard to remove, try
increasing this setting by 0.1-0,4 mm
Top contact Z distance = 1-1.3 layer Height. If the supports are hard to remove, try
increasing this setting by 0.1-0,4 mm
Increase this parameter if the supports are hard to remove from walls
The parameters in this tab vary greatly, it all depends on the quality of your printer. For example, if you have a classic Ender3, stick to the minimum parameters, but if you have a newer printer, for example Anycubic cobra 3 v3, you can select the maximum recommended values
Settings for advanced users, change these parameters only if you have sufficient 3D printing expertise. Use the minimum value for outdated printers without acceleration calibration, and the maximum value for modern printers if you need it.
These settings only work for 3D printers with multiple extruders
You can try setting all parameters in this section, except the First layer, to values between 0.75% of your nozzle diameter and 1.25% of your nozzle diameter. Adjusting them will help you work out the optimal parameters for the best quality for your print. As for the First layer, you can set it to 150% of the diameter of your nozzle for better adhesion to the build plate (for a nozzle with a diameter of 0.4 mm, the First layer extrusion width can be from 0.3 mm to 0.5 mm)
For better printing quality you have to calibrate this parameter using Gambody test model.
Check your filament manufacturer's temperature recommendations on the spool.
Cooling parameters depends on the material you use for printing.
*for PLA
For better quality use 0.12 mm layer height, for fast printing use 0.2 mm layer height. For pins and the Ge connectors, use 0.2 layer height.
120-150% of your Layer Height
For 0.12 Layer Height
For 0.12 Layer Height
For pins and connectors use 50% Infill
Use skirt for outdated 3d printers
(5-8 mm is optional for small prints that have bad adhesion to the build plate)
Enable this parameter if your model requires supports
(45-60 degree)You have to calibrate this parameter according to the capabilities of your printer and your filament, using a Gambody test models
Contact Z distance = 1-1.3 layer Height. If the supports are hard to remove, try increasing this setting by 0.1-0,4 mm
The parameters in this tab vary greatly, it all depends on the quality of your printer. For example, if you have a classic Ender3, stick to the minimum parameters, but if you have a newer printer, for example Anycubic cobra 3 v3, you can select the maximum recommended values
Settings for advanced users, change these parameters only if you have sufficient 3D printing expertise. Use the minimum value for outdated printers without acceleration calibration, and the maximum value for modern printers if you need it.
You have to calibrate this parameter from 0.9 to 1.1 according to the capabilities of your printer and your filament, using a Gambody test models.
Check your filament manufacturer's temperature recommendations on the spool.
Cooling parameters depends on the material you use for printing.
Calibrate this value if you need to reduce or improve the adhesion between the plastic and the heat bed
Your current nozzle diameter
You need to calibrate this parameter using Gambody test models. These values are average values for a Direct Drive extruder; for a Bowden extruder, the values should be increased.
Your current nozzle diameter
You have to calibrate this parameter using Gambody test models.
You need to calibrate this parameter using Gambody test models. These values are average values for a Direct Drive extruder; for a Bowden extruder, the values should be increased.
For better quality use 0.12 mm layer height, for fast printing use 0.2 mm layer height. For pins and the Ge connectors, use 0.2 layer height.
For 0,2 Layer Height
For 0,2 Layer Height
To increase the strength of the print parts, use Outline Perimeters: 3
You can enable this parameter to print rounded or spherical models, as well as character models.
Use this option only if your parts are too tight. but better calibrate your printer extrusion
Use this option only if your parts are too tight. but better calibrate your printer extrusion
Use 2 and more if you want to create skirt instead brim
1-2 for skirt and 10-20 for brim
Use for wipe nozzle if you need
Use For ABS filament
For pins and connectors use 50% Infill
Top Z distance = 1-1.3 layer Height. If the supports are hard to remove, try increasing this setting by 0.1-0,4 mm
Calibrate your filament and detect optimal temperature for it
Average temperature for PLA filament
The parameters in this tab vary greatly, it all depends on the quality of your printer. For example, if you have a classic Ender3, stick to the minimum parameters, but if you have a newer printer, for example Anycubic cobra 3 v3, you can select the maximum recommended values
Settings for advanced users, change these parameters only if you have sufficient 3D printing expertise.
SLS
- Made as a solid one-piece ship.
FFF/FDM
- Assembly kit includes lock 30_Ge_lock_10H_x58 to attach the model's parts securely without glue that needs to be printed 58 times;
- Two versions of the turbines with an alternative lettering;
- This version is cut into more assembly parts to fit the smaller 3D printers' build plates or to be used in large-scale projects.
DLP/SLA
- Tunnels throughout the battleship's body are provided for LED wiring to light up the mainhull, two sublight engines, and flight pods;
- Comes with a two-piece stand for you to conveniently display the long space battleship;
- All 22 batteries mounted all over the battleship’s body are movable;
- Two versions of the turbines with an alternative lettering;
FFF/FDM
- Assembly kit includes lock 15_Ge_lock_10H_x16 to attach the model's parts securely without glue that needs to be printed 16 times;
- Tunnels throughout the battleship's body are provided for LED wiring to light up the mainhull, six sublight engines, and flight pods;
- All 22 batteries mounted all over the battleship’s body are movable;
- Comes with a two-piece stand for you to conveniently display the long space battleship;
