


Files
3D model format
Stereolithography (.stl)
Total files
Slicer settings
Mesh error check
Netfabb
Support
Lifetime support from Gambody team
Update requests
Available to verified buyers
Model complexity
Advanced: may require tuning print settings or support placement, plus precise fitting, gluing, or sanding.
Model versions
FFF/FDM
Assembly method
Connectors, Ge-Locks, Glue, Filament pieces
Features
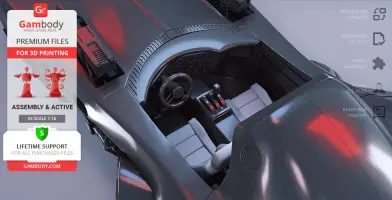
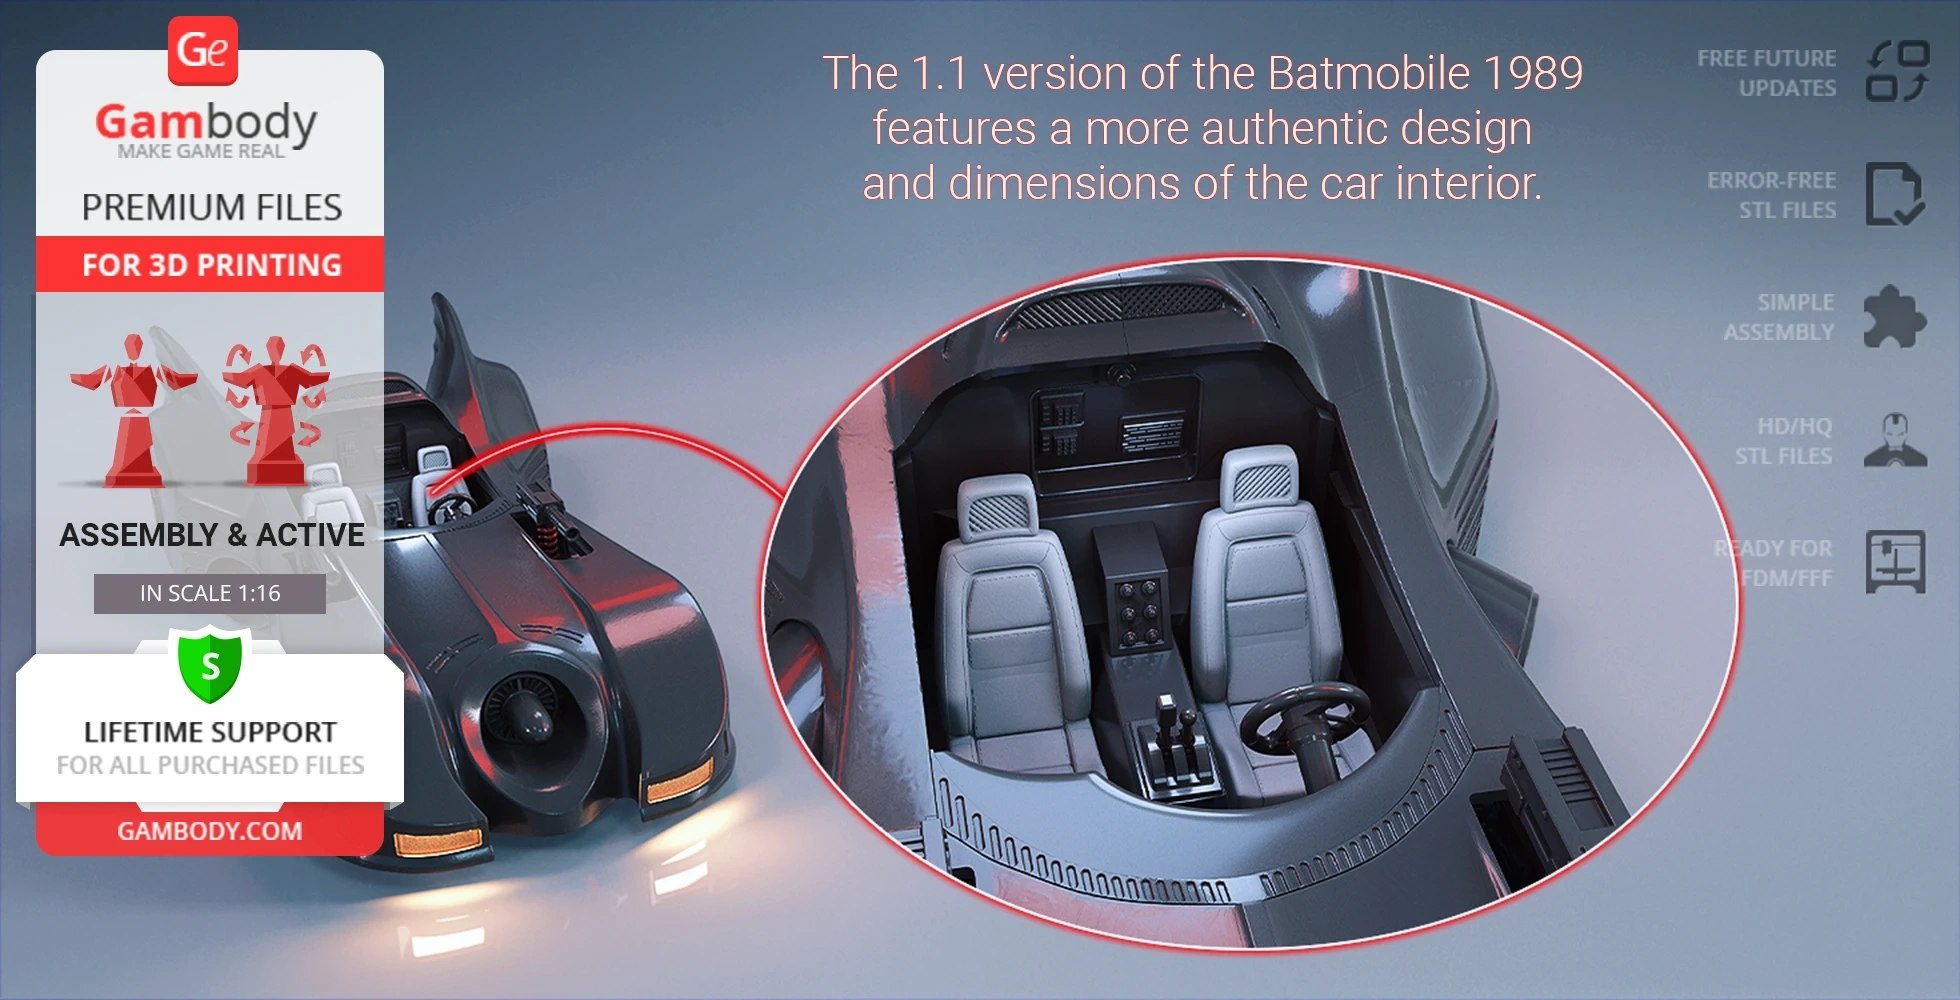
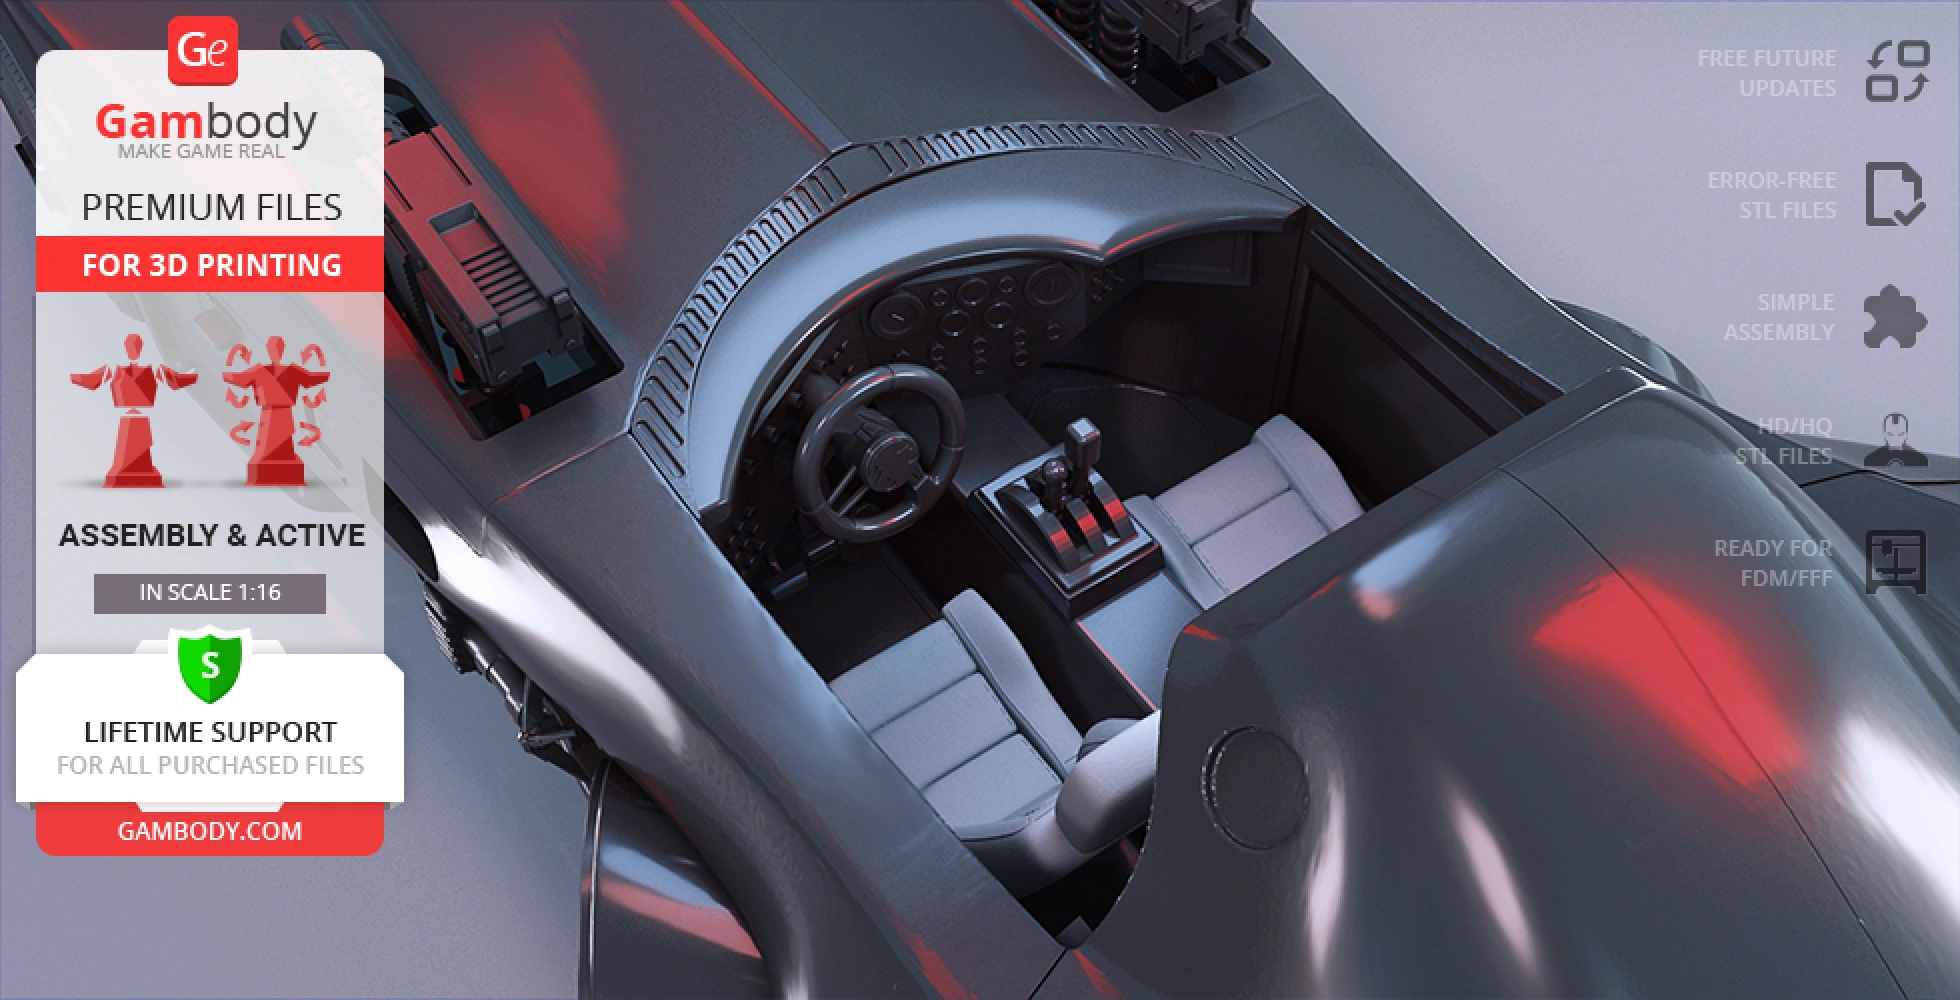
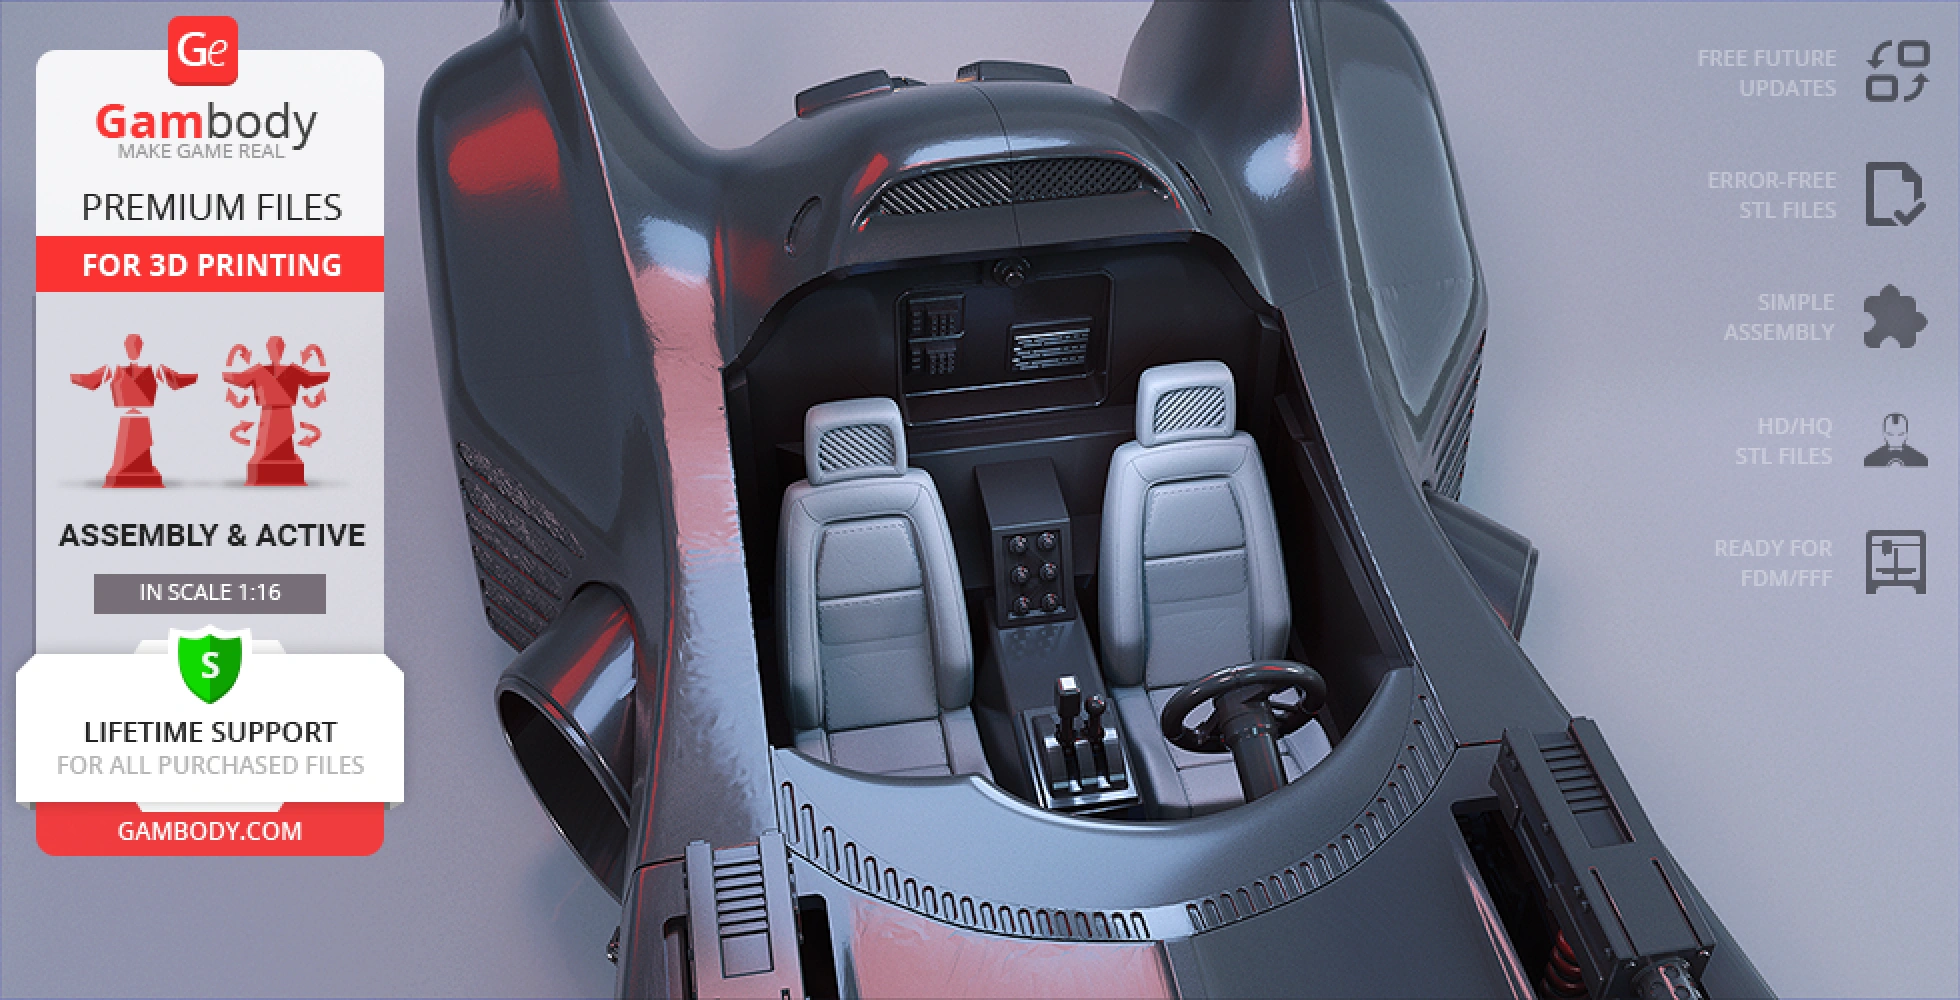
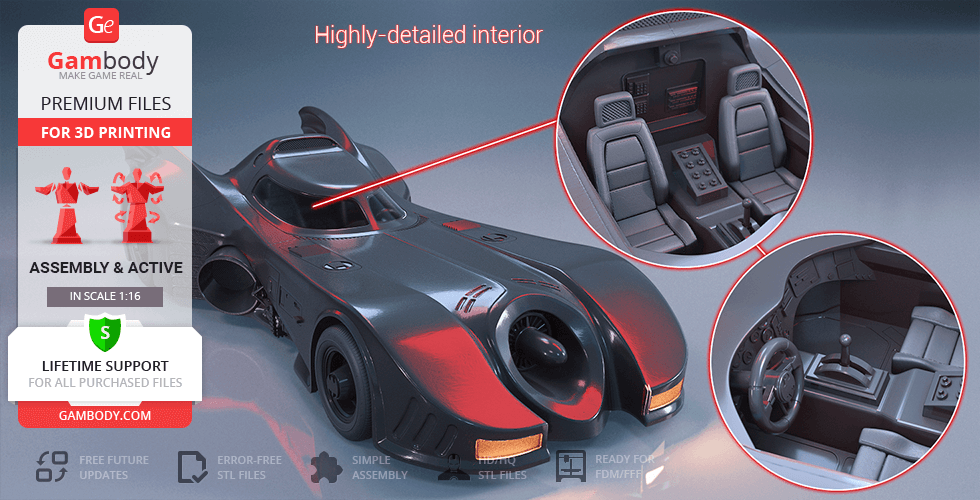
- Upgraded version featuring a fully redesigned cockpit and seats for improved proportional accuracy.
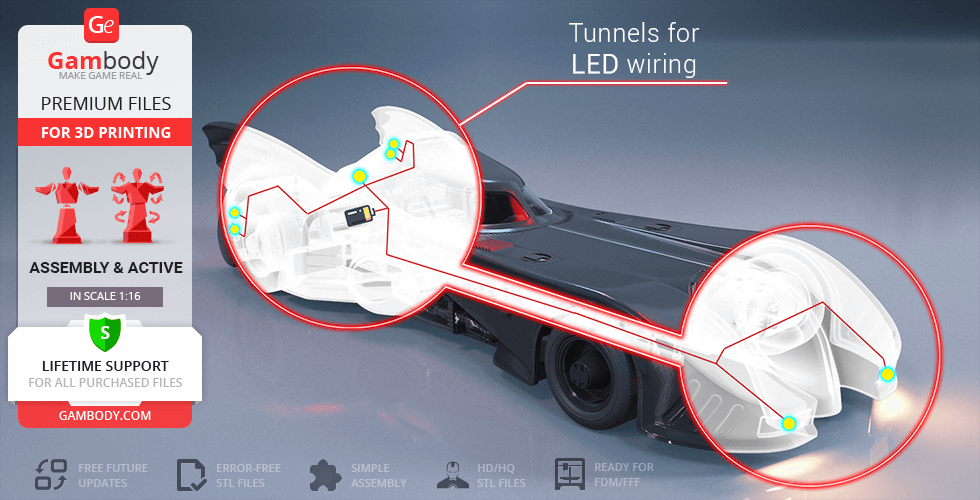
- Refined internal frame and turbine components to increase space for electronics and LED wiring.
- Features improved bearings for smoother mechanical operation.
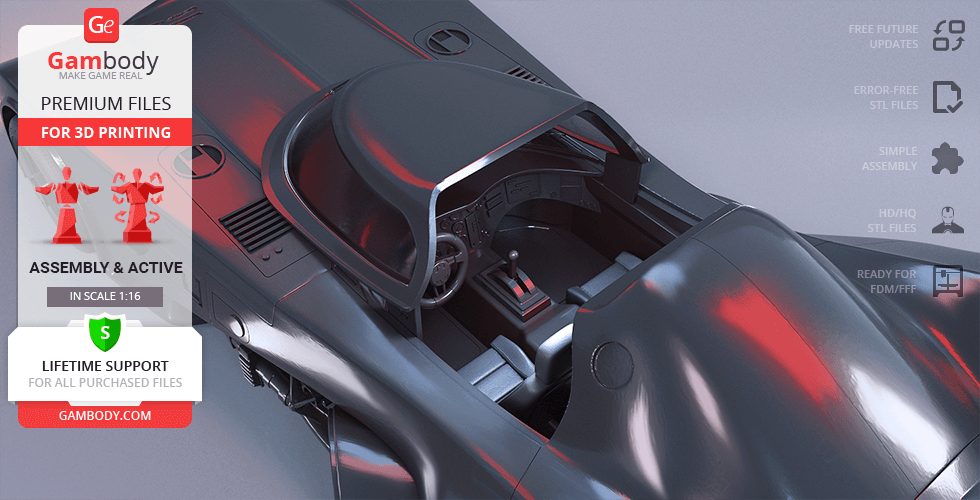
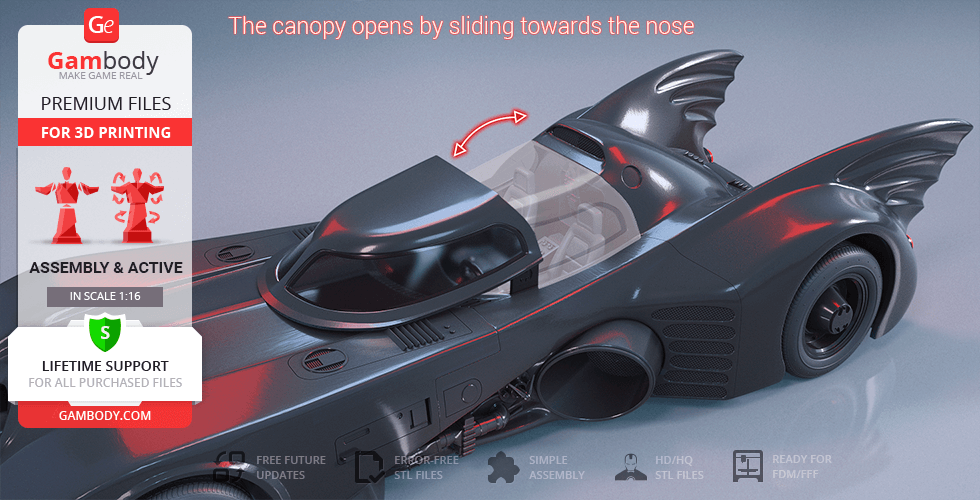
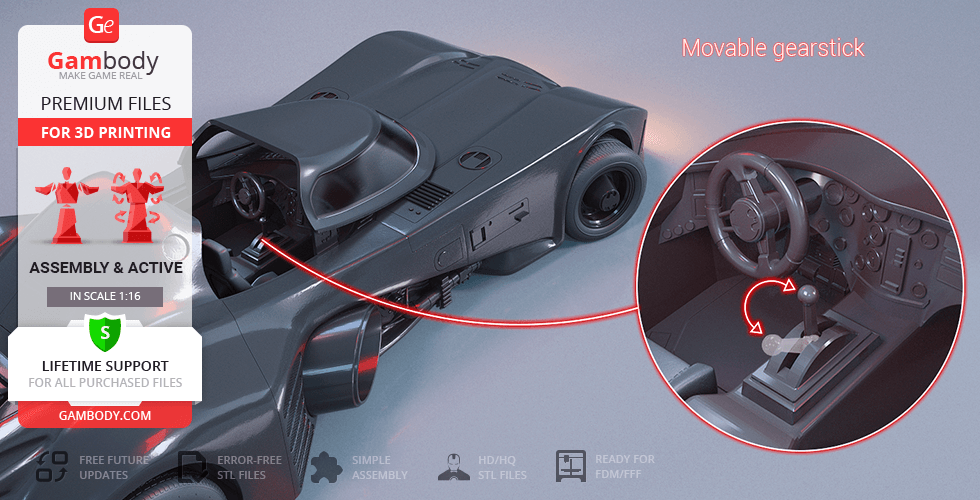
- Sliding canopy and movable gearstick.
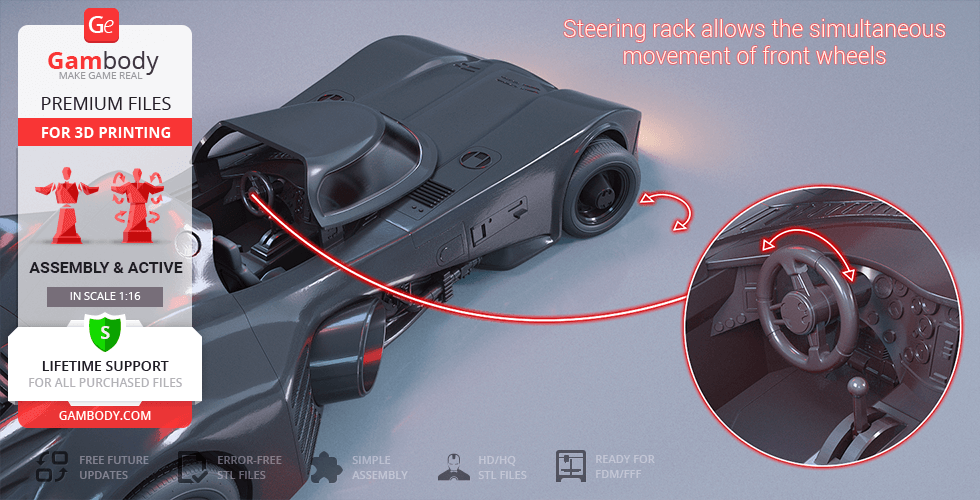
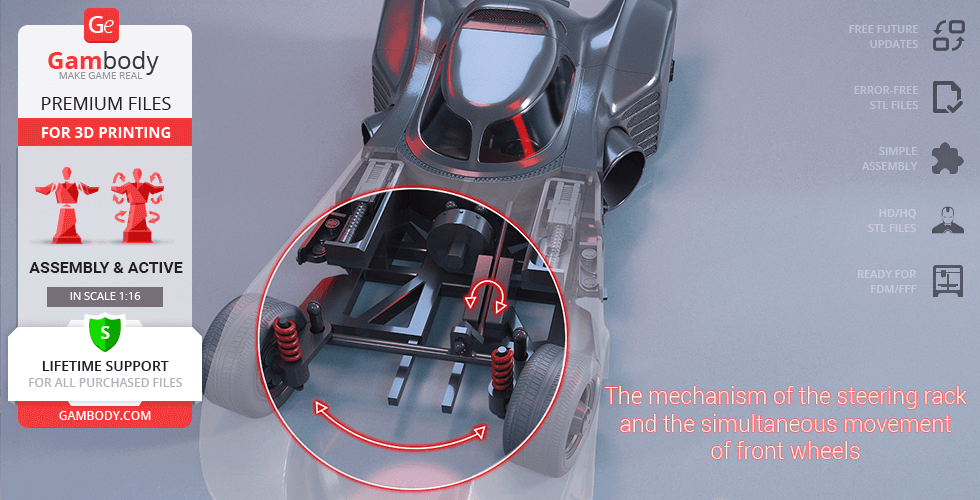
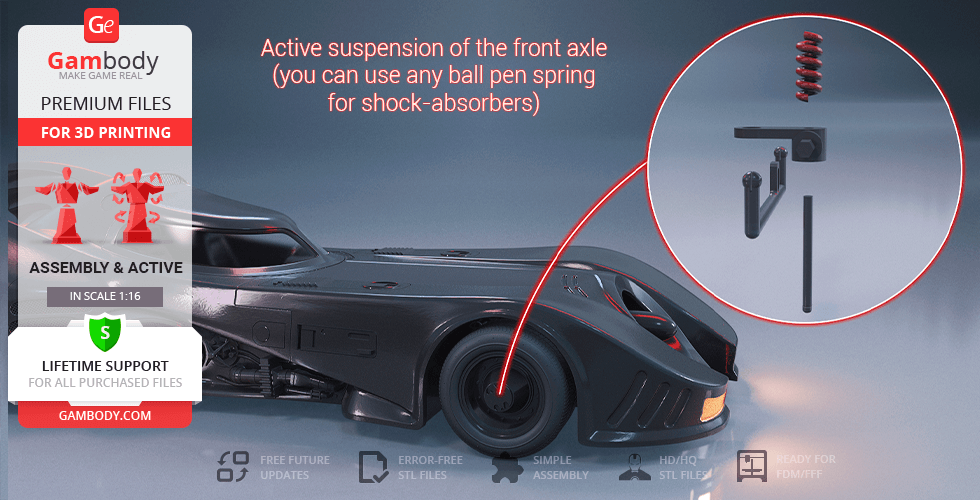
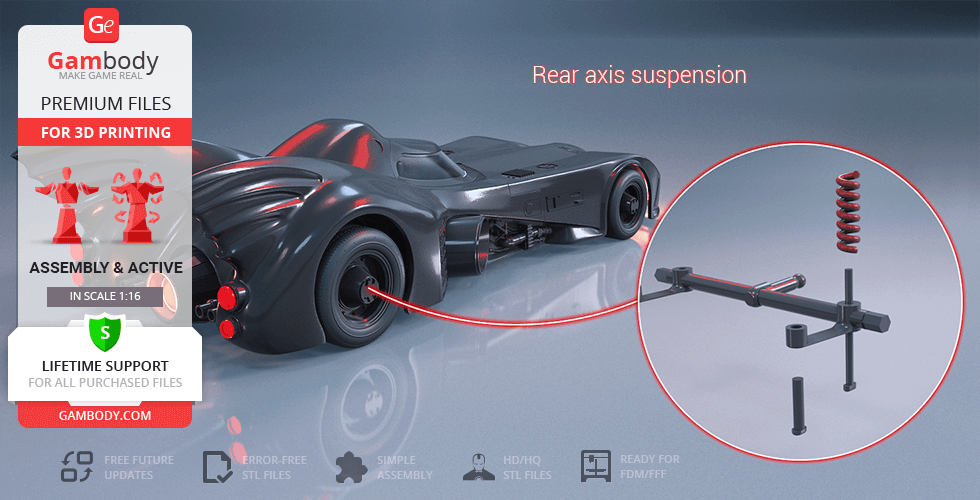
- Functioning steering rack and active suspension.
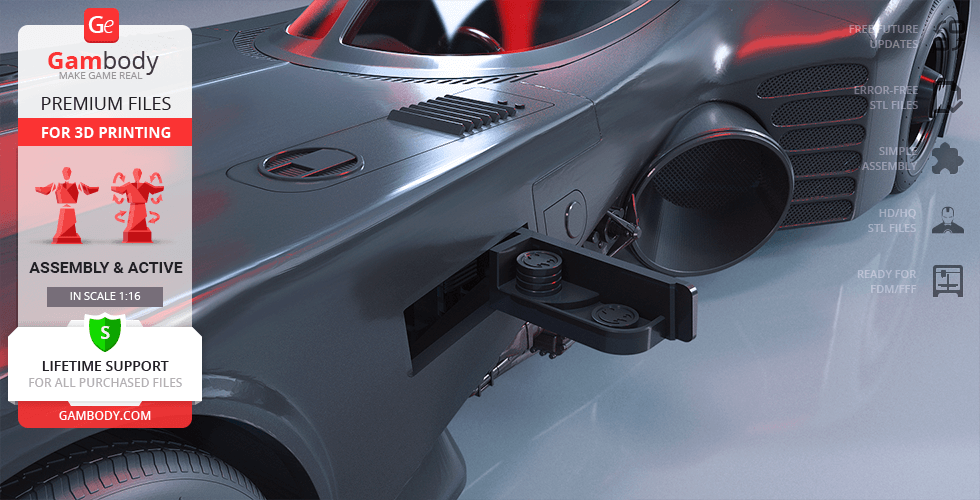
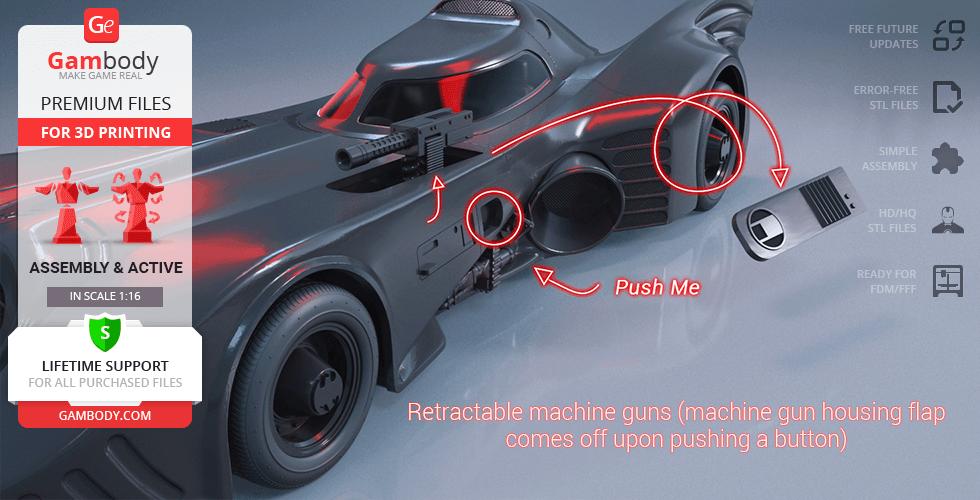
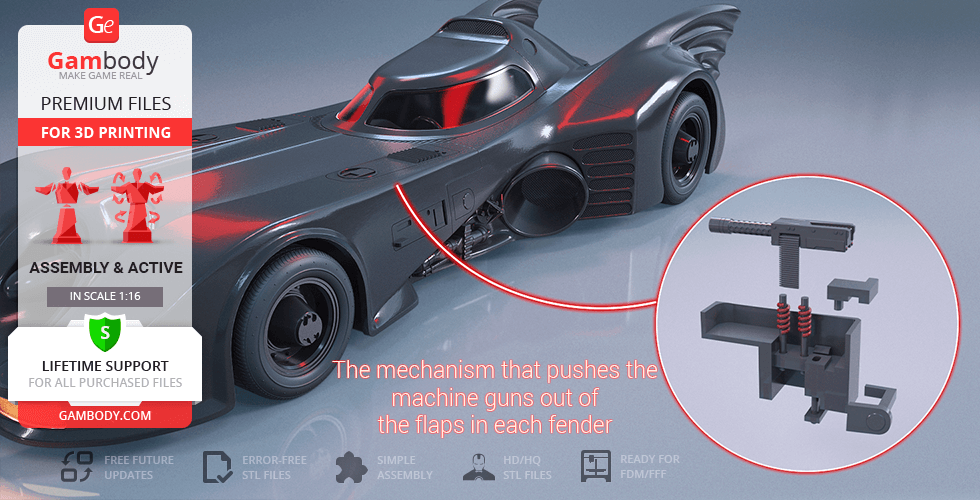
- Spring-loaded machine gun mechanism with retracted and deployed modes.
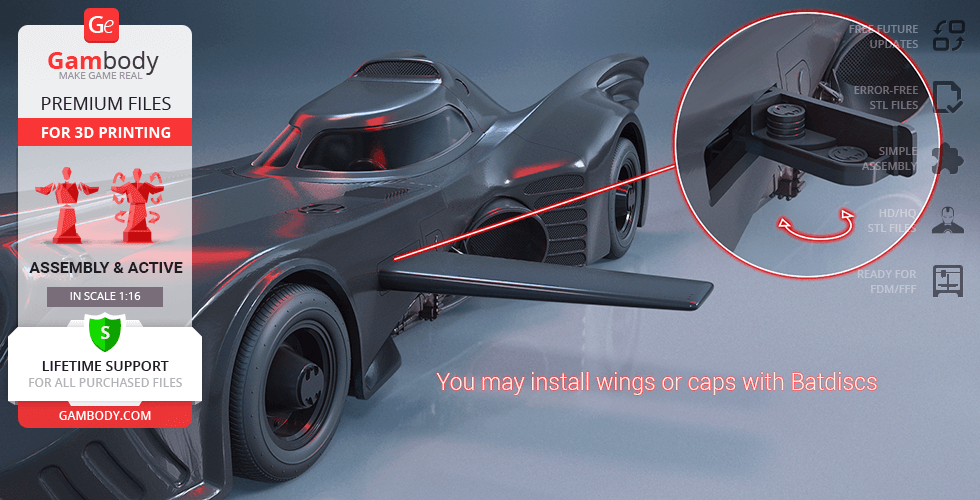
- Interchangeable wings and Batdisc ejectors.
- LED-ready design with hidden battery compartment.
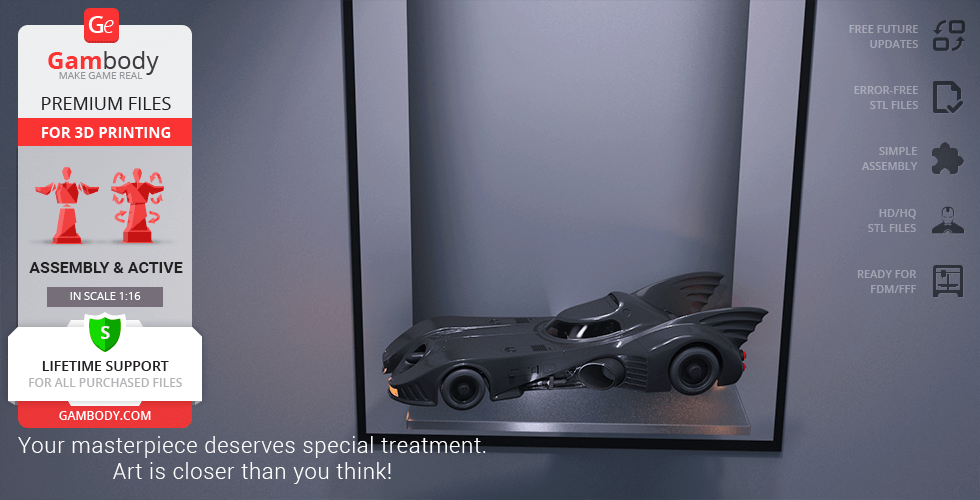
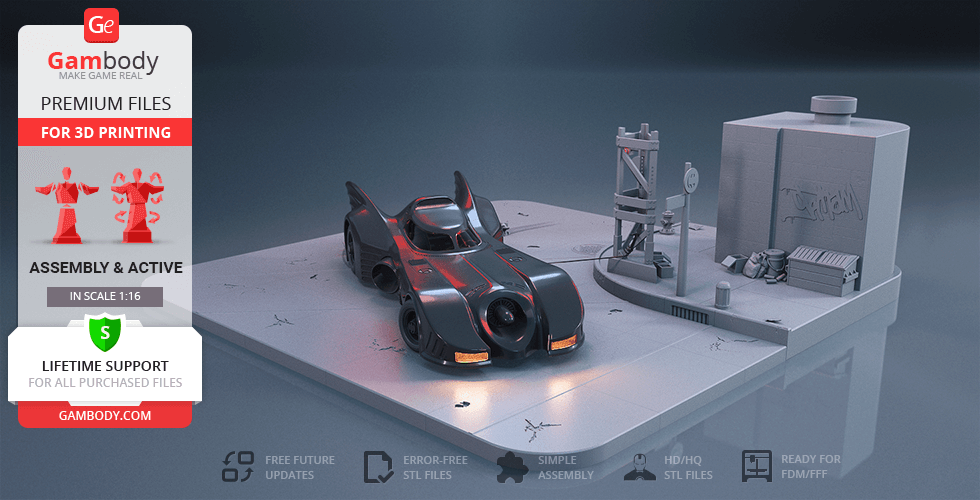
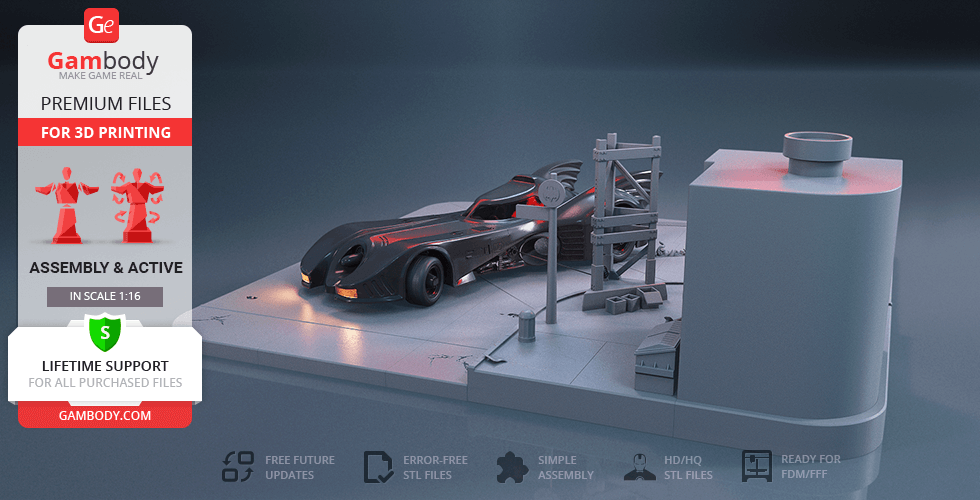
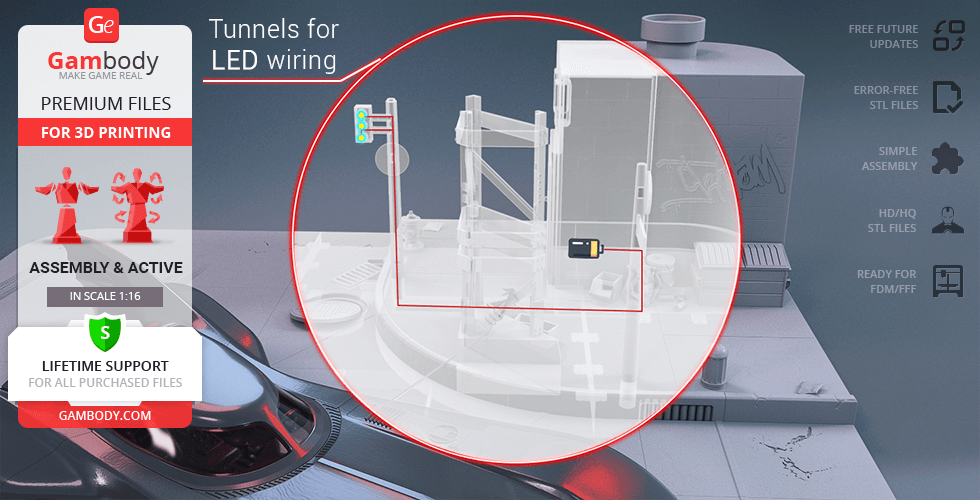
- Gotham-inspired display platform included.
- The assembly parts are connected using specially designed integrated connectors that fit securely into the corresponding slots. Optionally, for added strength and rigidity, the static connections can be glued together. Some model parts use separate connectors (part "_169_Ge_lock_x104", requires 104 copies).
- The assembly requires additional "pins" to secure the parts of the 3D printed vehicle. These pins do not come in STL files but can be made out of short pieces of regular 1.75 mm filament.
DLP/SLA
Eco parts
Assembly method
Connectors, Glue, Paper Clip
Features
- High-resolution resin version featuring a fully redesigned cockpit and seats for improved proportional accuracy.
- Refined internal frame and turbine components to increase space for electronics and LED wiring.
- Sliding canopy and movable gearstick.
- Functioning steering rack for synchronized wheel movement.
- Two machine gun options: open and closed (removable).
- Interchangeable wings and Batdisc ejectors.
- LED-ready design with hidden battery compartment.
- Separate transparent parts for windshield, lights, and turbine glass.
- Gotham-inspired display platform included.
- The assembly parts are connected using specially designed integrated connectors that fit securely into the corresponding slots. Optionally, for added strength and rigidity, the static connections can be glued together.
- The assembly requires additional "pins" to secure the parts of the 3D printed vehicle. These pins do not come in STL files but can be made out of short pieces of 1 mm wire.
FFF/FDM
Assembly method
Connectors, Ge-Locks, Glue, Filament pieces
Features
- Initial version of the Batmobile 1989 model.
- Active front and rear suspension using ball pen springs.
- Functional steering rack synchronized with the steering wheel.
- Retractable spring-loaded machine guns activated by a side button.
- Sliding canopy to access the detailed interior.
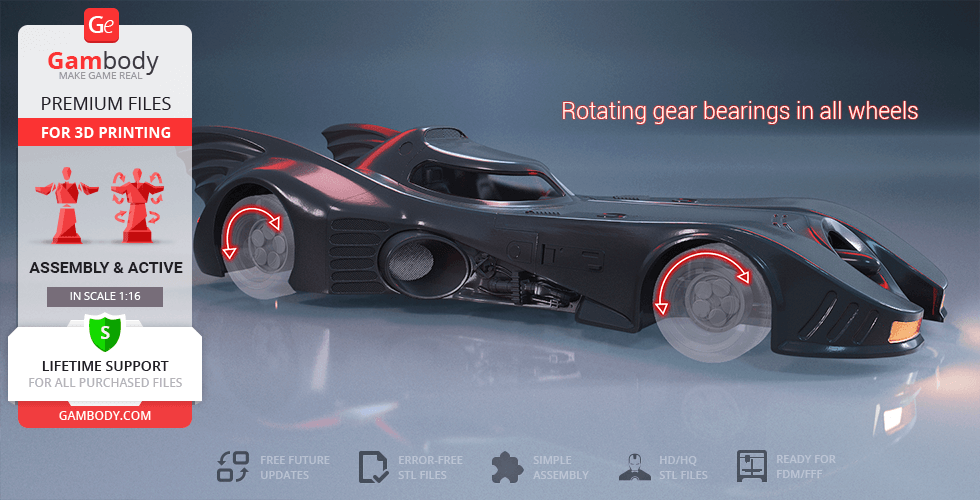
- Rotating gear bearings in all wheels.
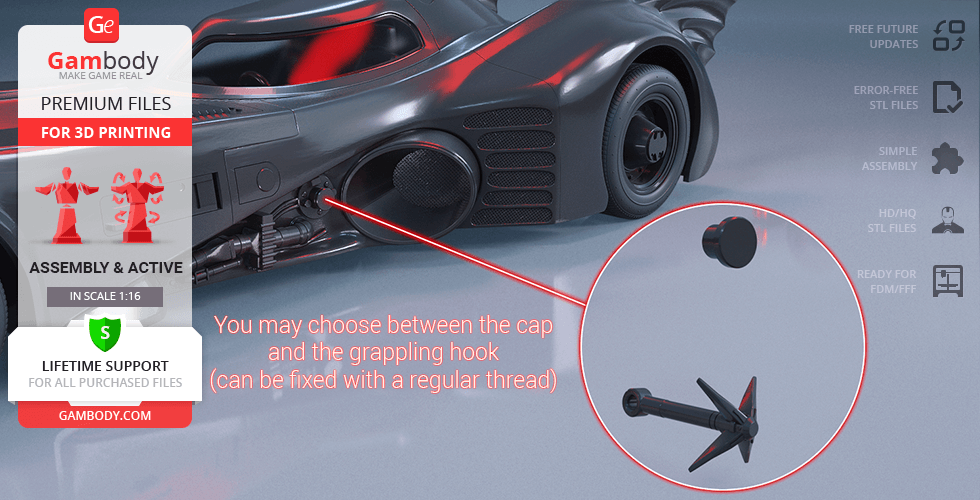
- Side-mounted grappling hook and Batdisc ejectors.
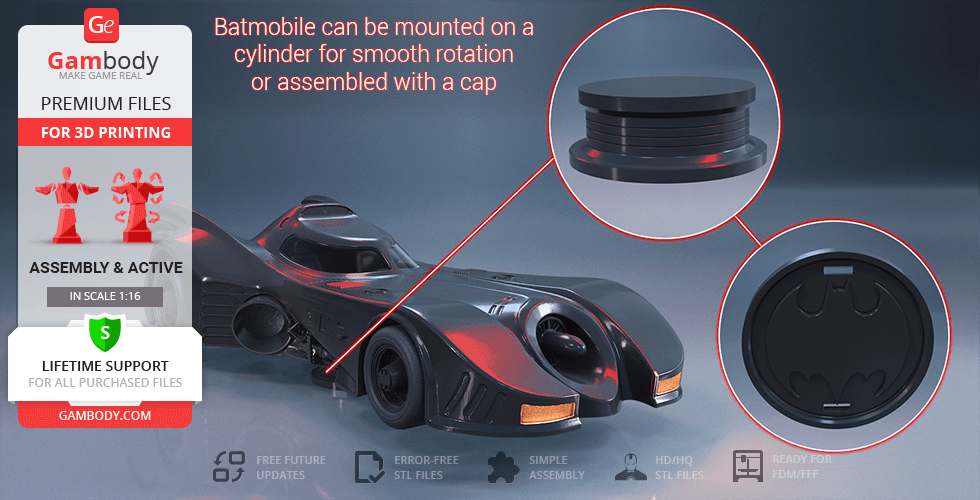
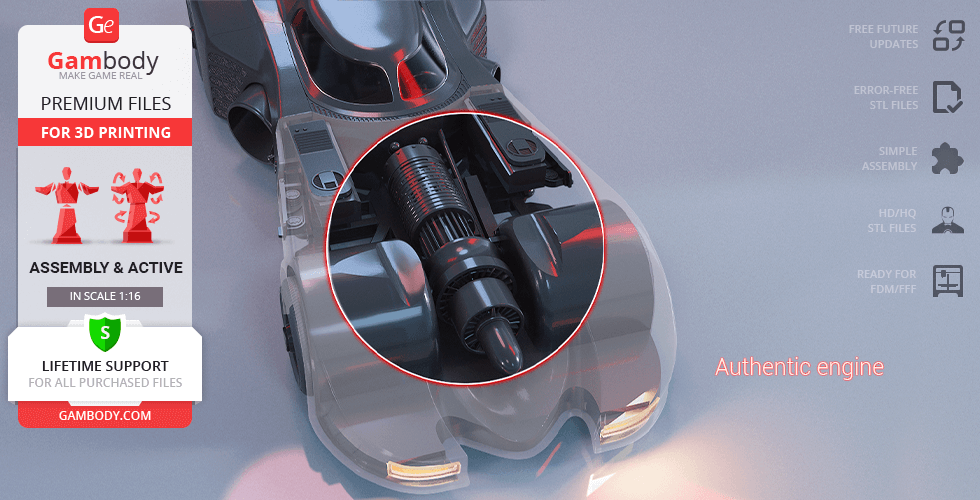
- Authentic turboshaft engine and rotating chassis cylinder.
- Includes Gotham-style display platform.
- The assembly parts are connected using specially designed integrated connectors that fit securely into the corresponding slots. Optionally, for added strength and rigidity, the static connections can be glued together. Some model parts use separate connectors (part "169_Ge_lock_x104", requires 104 copies).
- The assembly requires additional "pins" to secure the parts of the 3D printed vehicle. These pins do not come in STL files but can be made out of short pieces of regular 1.75 mm filament.
Additional details
Part of diorama
No
Special pack included
No
You will get instant access to the STL files of Batmobile 1989 3D Printer Files | Assembly + Action after completing your purchase. Simply add the model to your cart and check out using PayPal, credit or debit card, Apple Pay, Google Pay, Alipay, or other available payment methods.
Watch the assembly video for Batmobile 1989 3D Printer Files | Assembly + Action, and explore more tutorials, behind-the-scenes content, 3D printing timelapses, and painting guides on the official Gambody YouTube channel.
This 3D model comes with StereoLithography (.STL) files optimized for 3D printing. You'll get digital files, not a physical product
Before printing, take a look at Printing Details for recommended settings and tips to achieve better results.
Batmobile 1989 3D Printer Files | Assembly + Action includes 2 version(s) for the supported 3D printer type(s): FFF/FDM, DLP/SLA. Files are available for download after purchase.
See the Description and Specifications sections for more details about this model.
3D model history
“Batman has two primary modes of transportation: swinging from Gothic clock towers on his Batline, and cruising around Gotham in the Batmobile.”
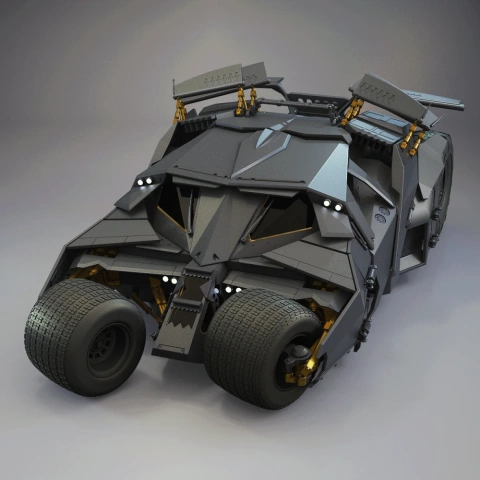
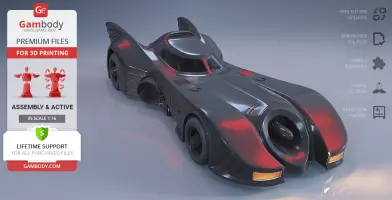
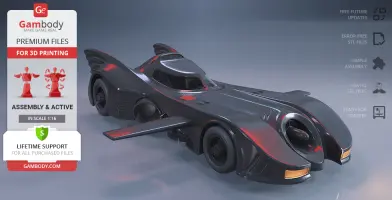
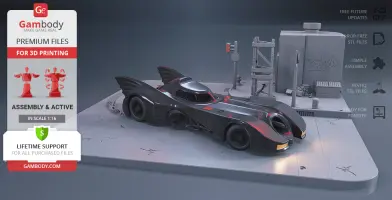
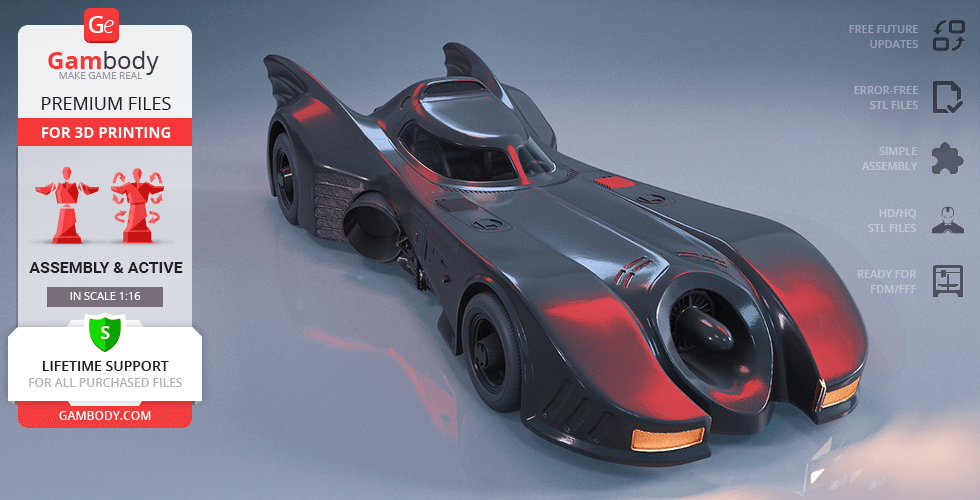
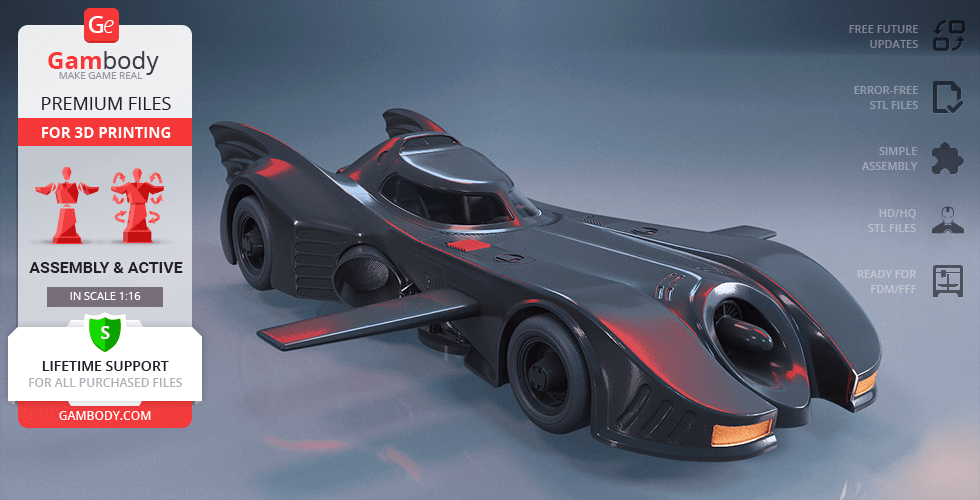
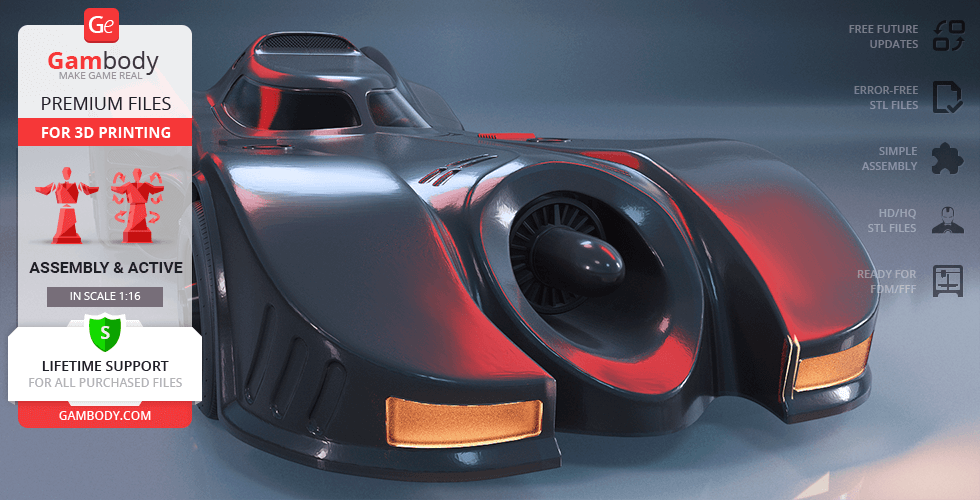
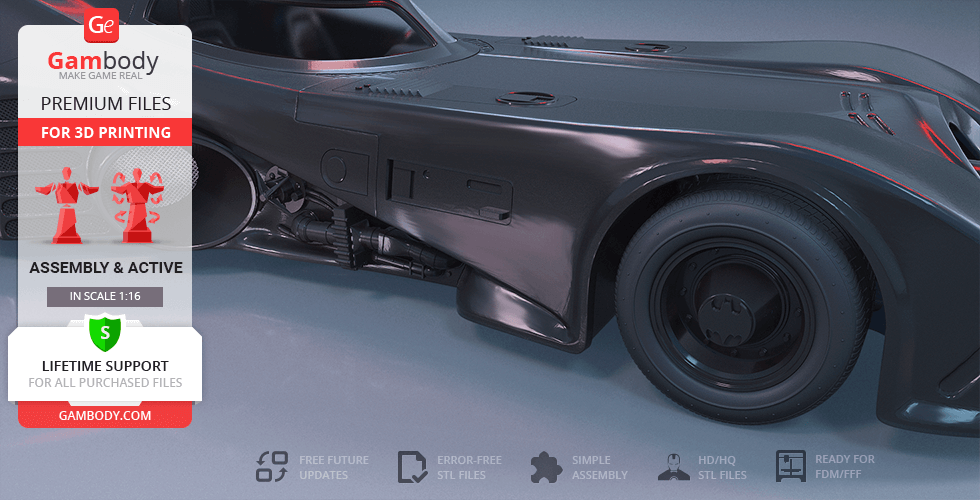
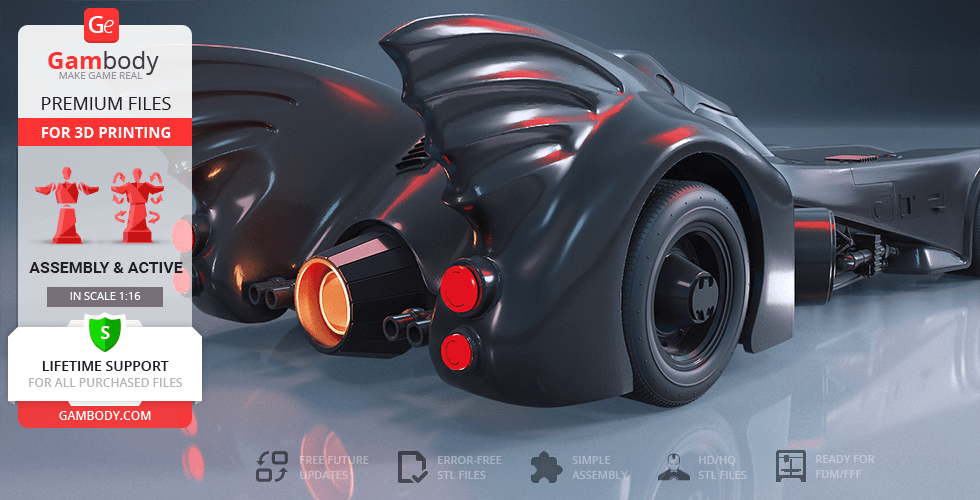
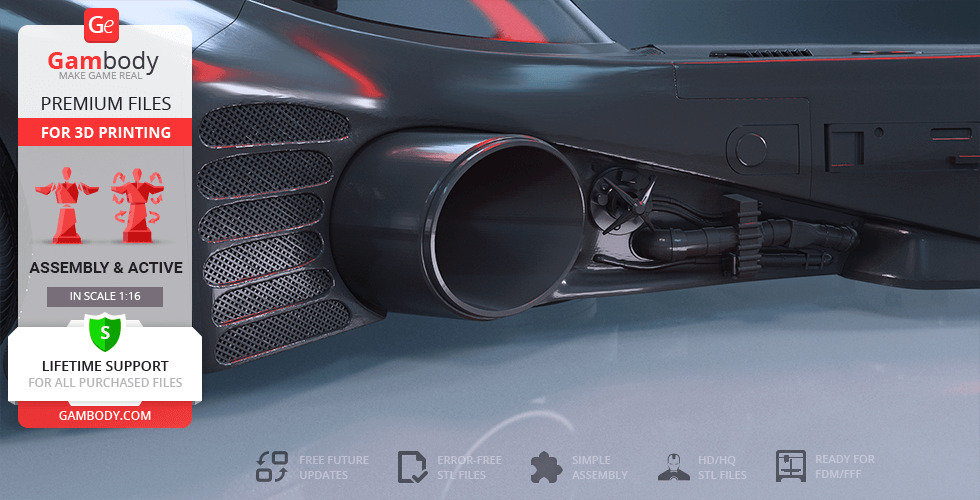
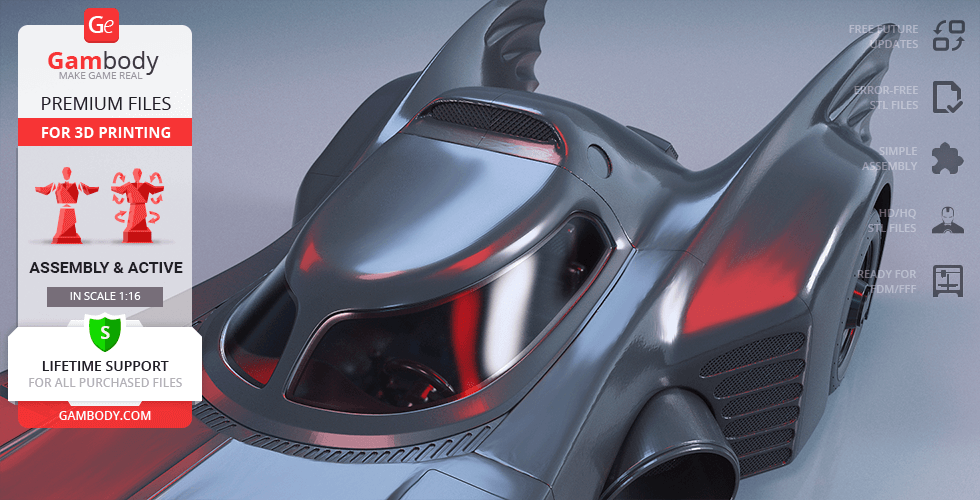
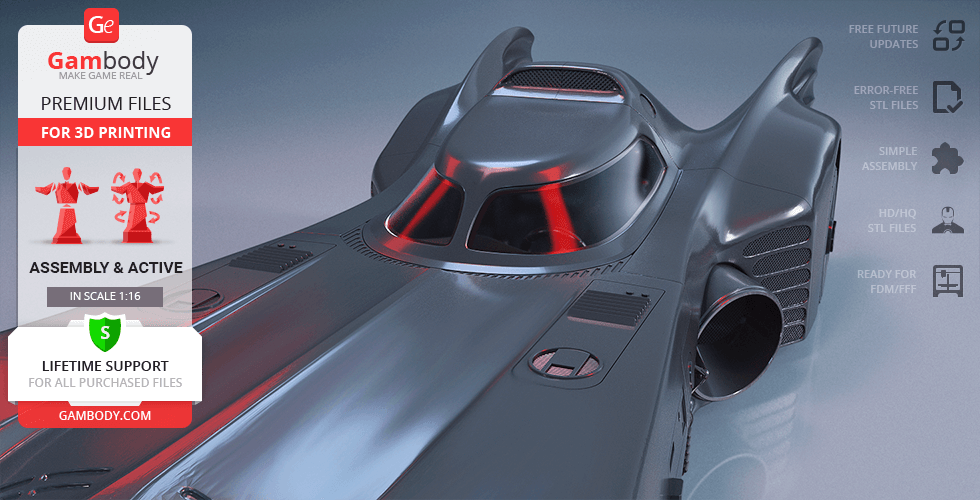
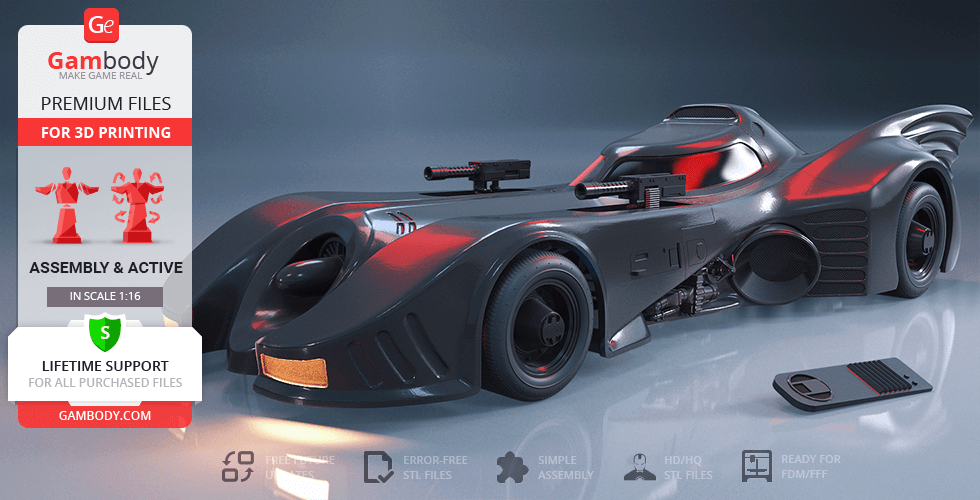
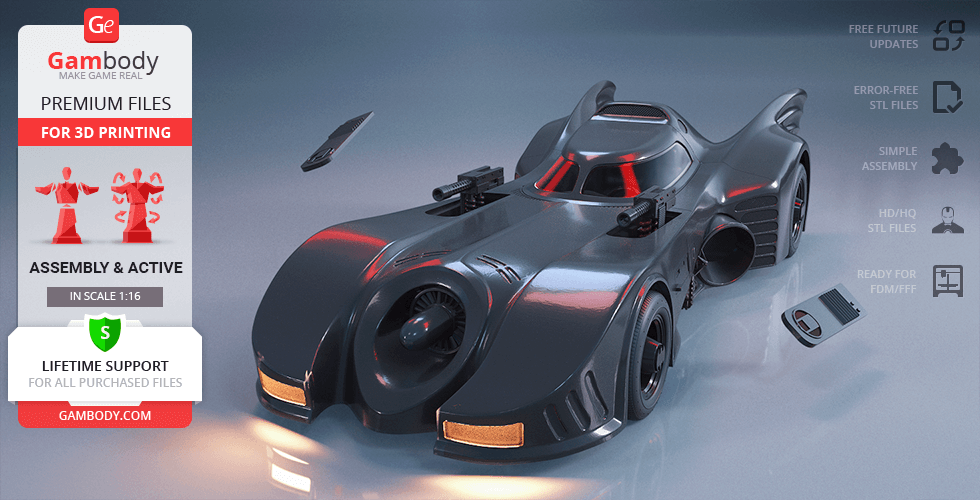
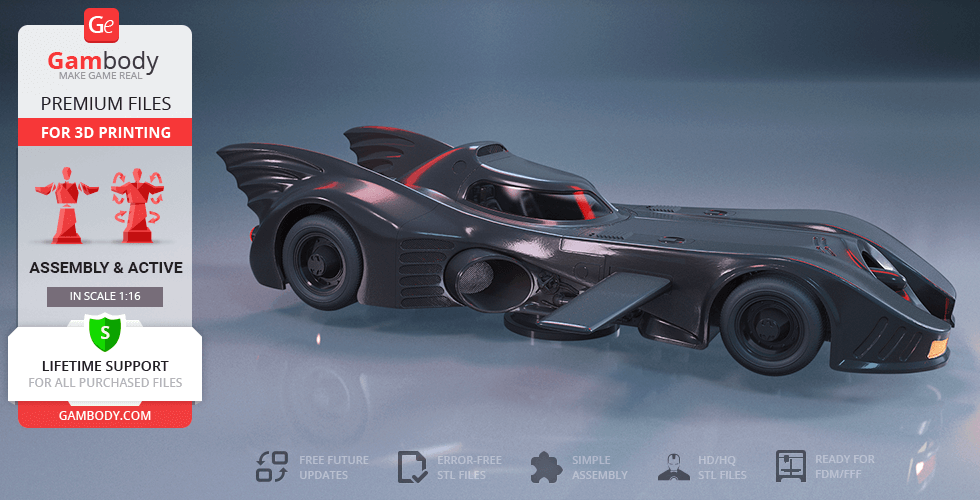
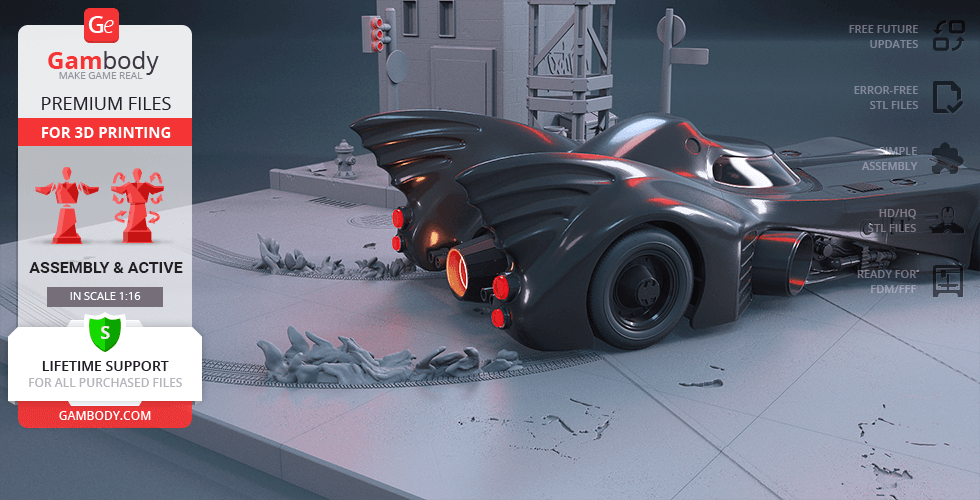
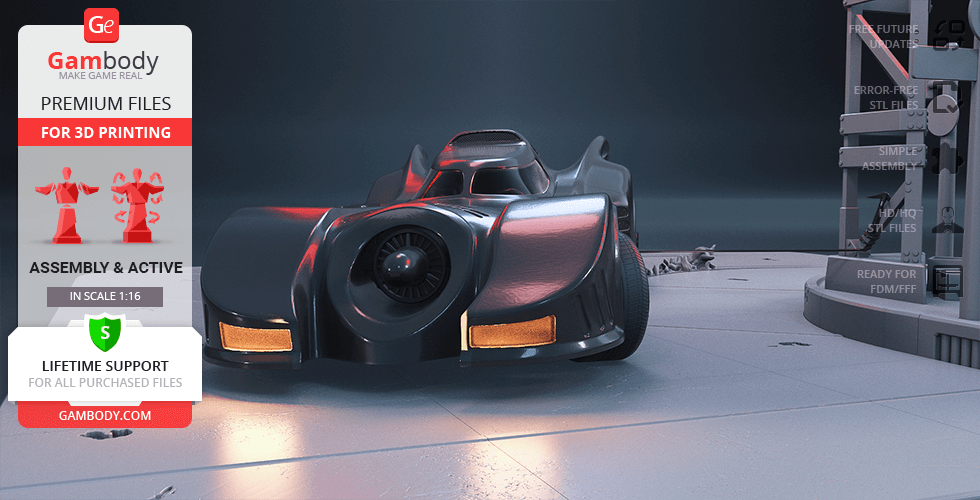
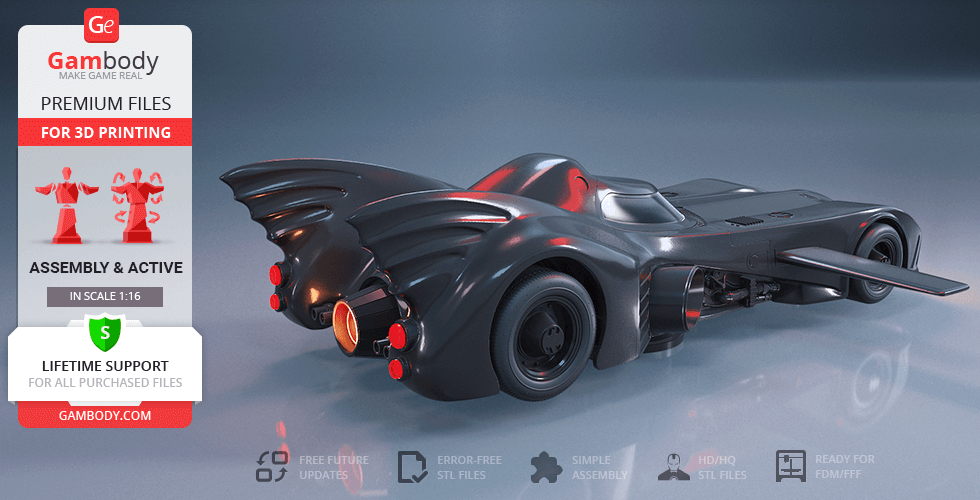
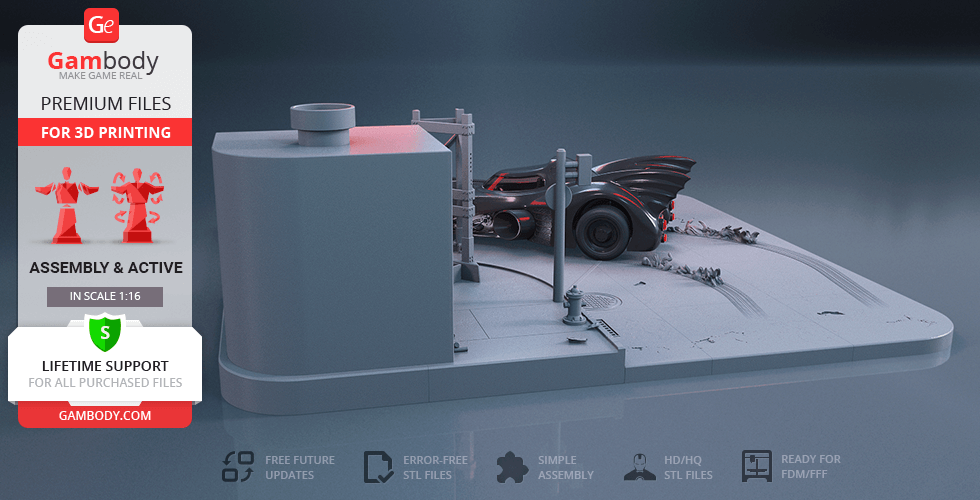
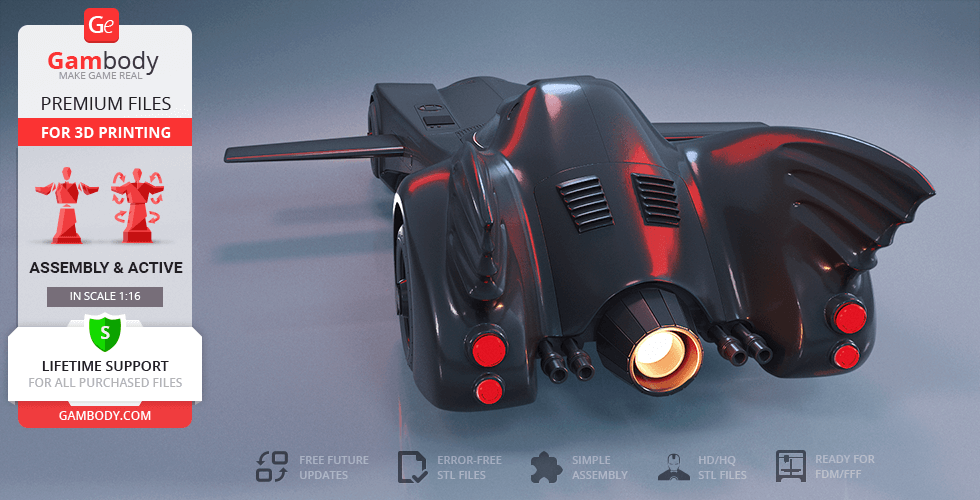
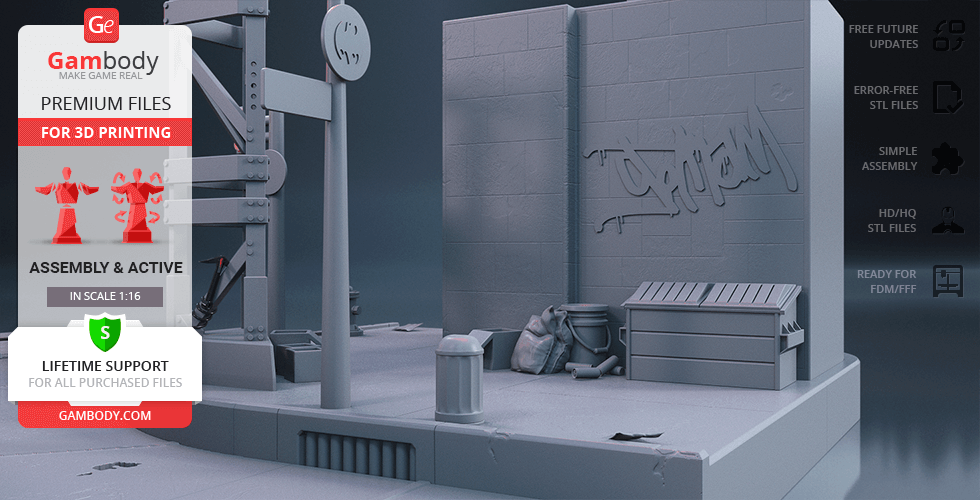
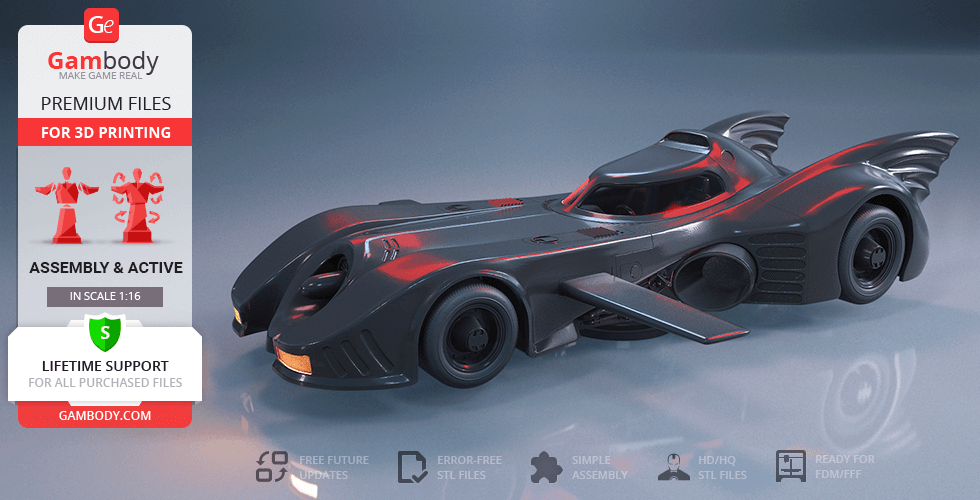
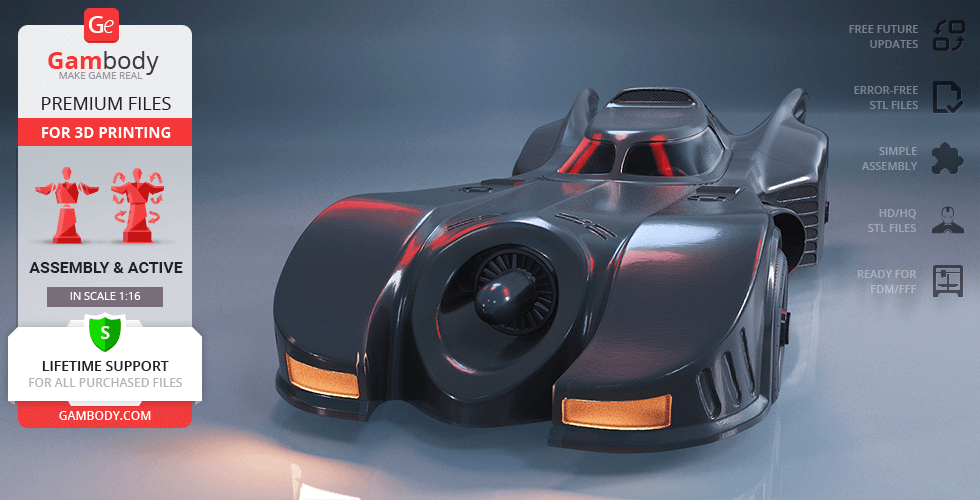
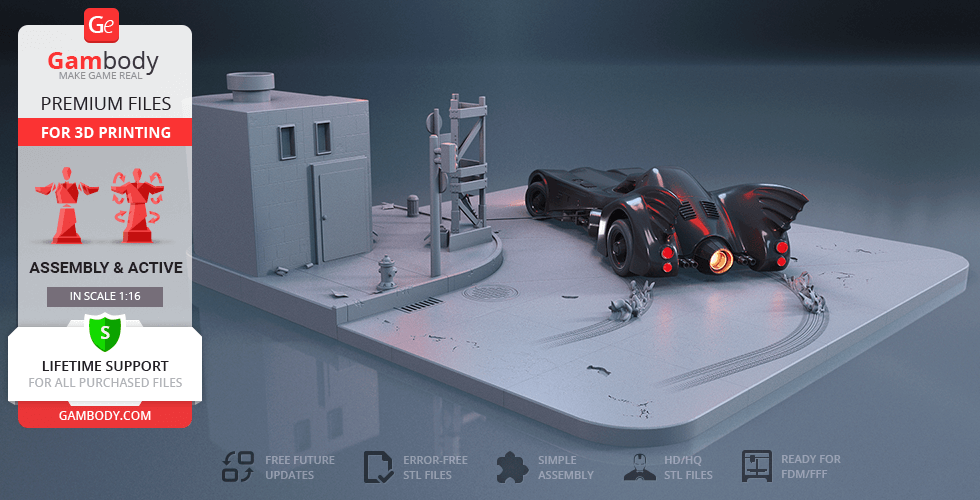
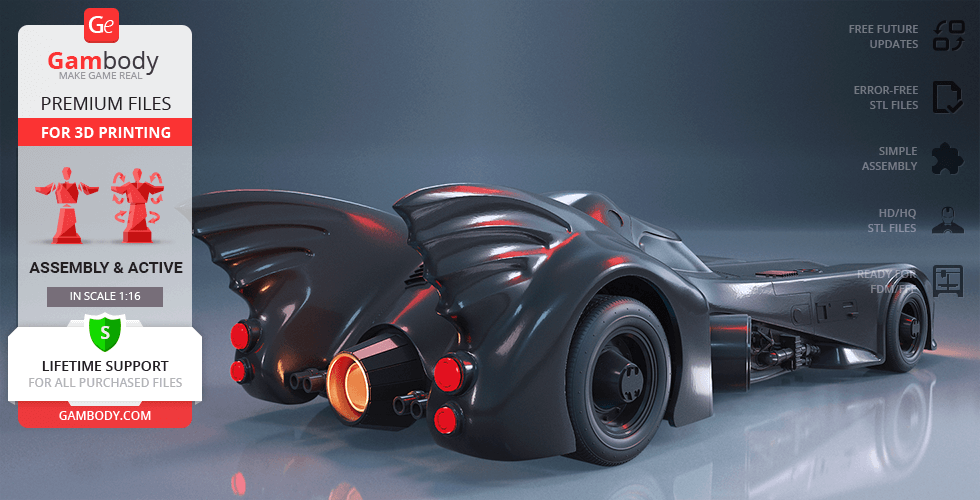
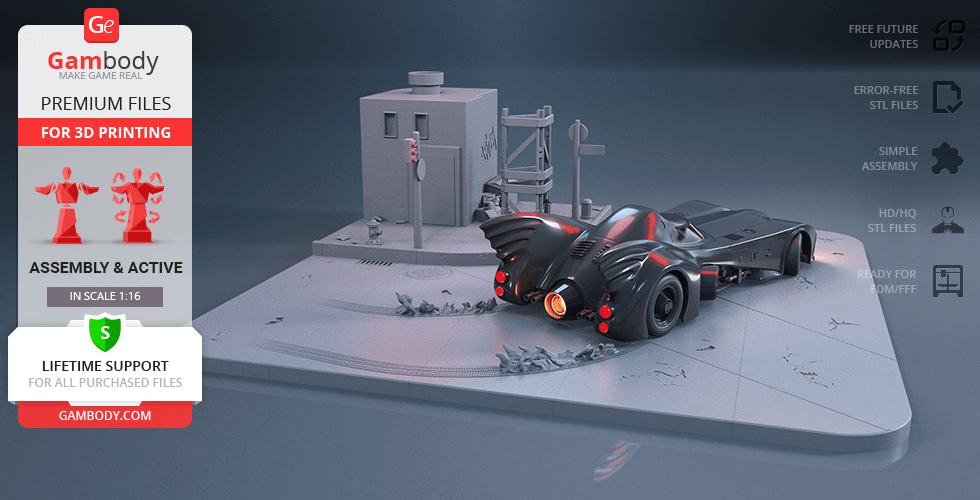
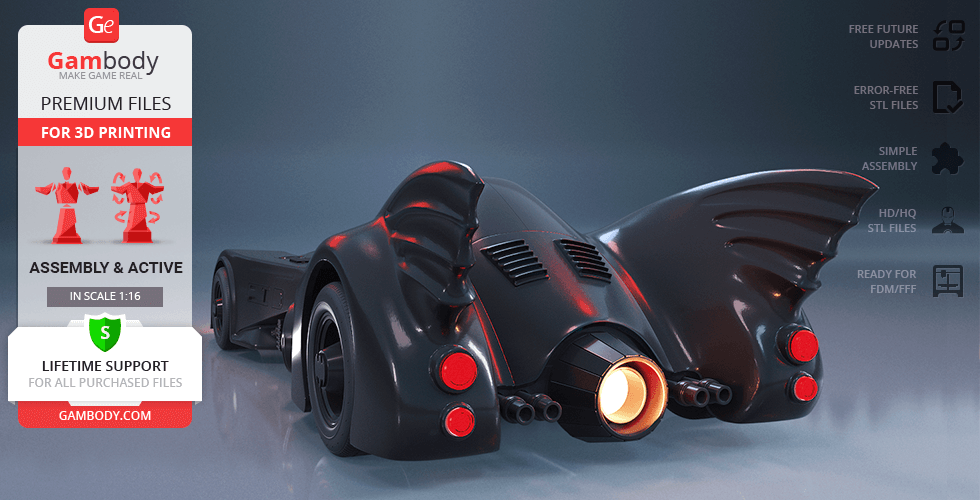
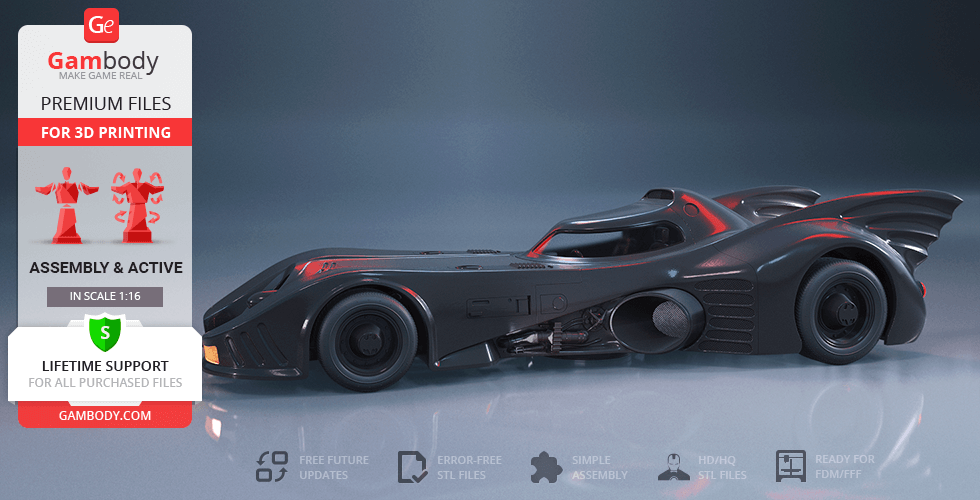
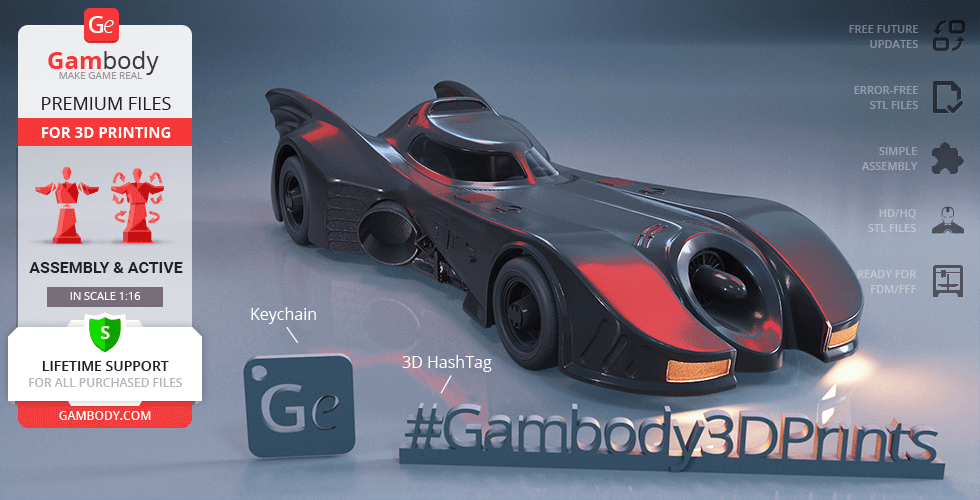
Thesleek,long and low Batmobile featured in the 1989 Tim Burton’s Batman movie struck down the superhero fans all over the world with its breathtaking design. Affectionately nicknamed the "Keaton Mobile" after the actor who played 1989 Bruce Wayne, the Batmobile is jet black, impossibly fast, and so very intimidating! Inspired by the iconic mode of transportation, one of our contributing 3D artists made up his mind to recreate the elegant vehicle and spent around 200 hours in order to make a 3D printing reality of the legendary car of the Gotham City. Thus, the 3D printing Batmobile 1989 is a beautiful embodiment of Batman’s trademark car that features all the coolest characteristics possible. The front of the vehicle has a large intimidating jet turbine engine in the middle, flanked by sweeping fenders. A pair of M1919 Browning machine guns are hidden behind flaps in each of these fenders, making the Batmobile a truly dangerous weapon in Batman’s arsenal. The rear of the car has a rounded, heavy look with its unmistakable majestic wings and a massive thruster that prompts the surprising speed of the Batmobile. The 3D printing vehicle also comes with a side-mounted grappling hook launcher, a Batdisc ejector and a central cylinder underneath the car that swiftly rotates the Batmobile 180 degrees. The two-seat cockpit of the legendary vehicle is concealed by a sleek canopy with double blast-proof windshield. Finally, the 3D artist decided to prepare a special platform to showcase your 3D printed Batmobile stylised as a fragment of the Gotham City street littered with boxes, cans and cigarette stubs. A smashing success at the time, Tim Burton’s Batmobile upholds the status of the most popular or even the best representation of Batman’s car ever to this very day. One would unlikely find a DC fan who hadn’t dreamed of getting behind the wheel of Batmobile. Fortunately, thanks to the opportunities that offers 3D printing technology you can now obtain your very own Keaton Mobile!
3D printing model features
Model-specific features:
- Fully functional steering rack synchronized with the steering wheel and front wheels.
- Active front and rear suspension system utilizing internal spring mechanisms.
- Sliding canopy providing access to a highly detailed two-seat cockpit interior.
- Spring-loaded machine gun deployment with both retracted and deployed modes.
- Interchangeable side modules: choose between Batdisc ejectors or signature wings.
- Side-mounted grappling hook launcher can be rigged with thread or finished with a cap.
- Authentic turboshaft engine and rotating wheels mounted on gear bearings.
- Central cylinder mechanism allows for 180-degree rotation of the chassis.
- Prepared for optional LED lighting in headlights, taillights, and the rear thruster.
- Includes a hidden battery compartment located under the rear luggage cover.
- Separate files for transparent elements (windshield, lights, turbine glass).
- Tires are designed to be printed with flexible (TPU/resin) materials.
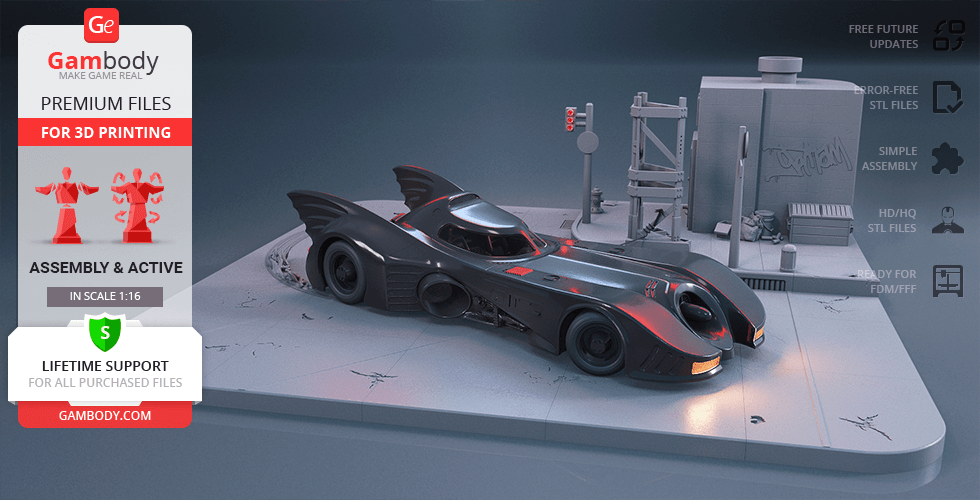
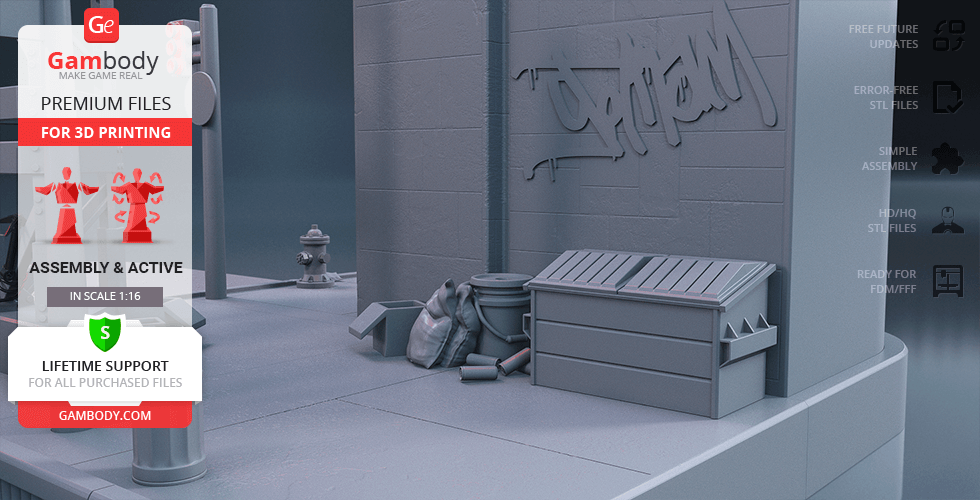
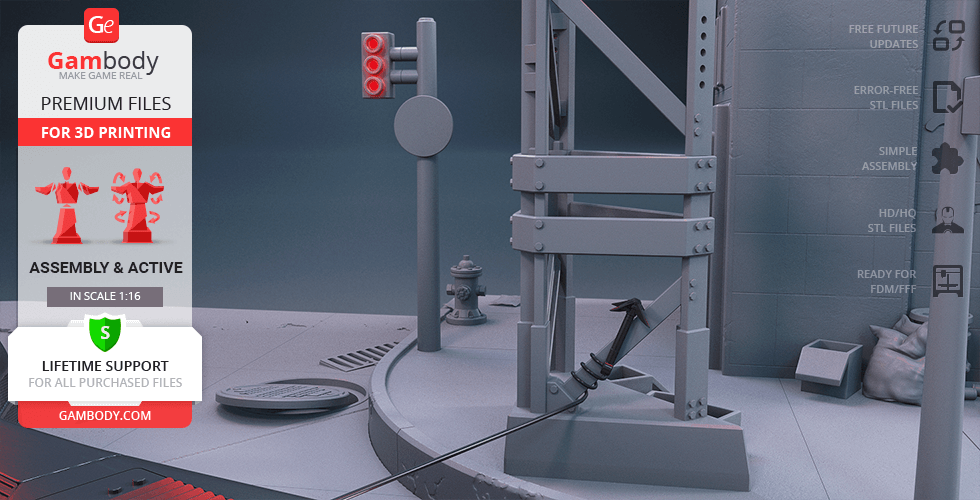
- Detailed Gotham-style display platform littered with street debris.
Printing & assembly details:
- Provided as error-free STL files compatible with most 3D printers;
- Optimized part division minimizes support material and ensures smooth surface detail;
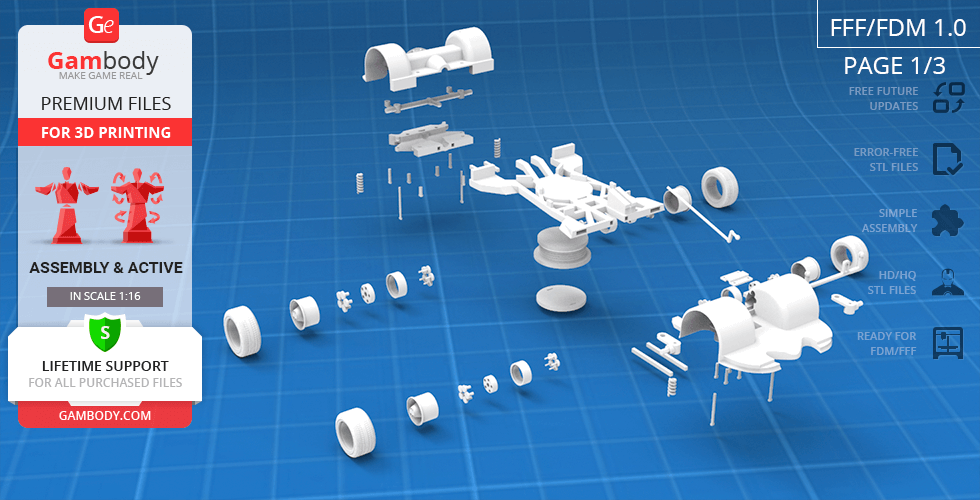
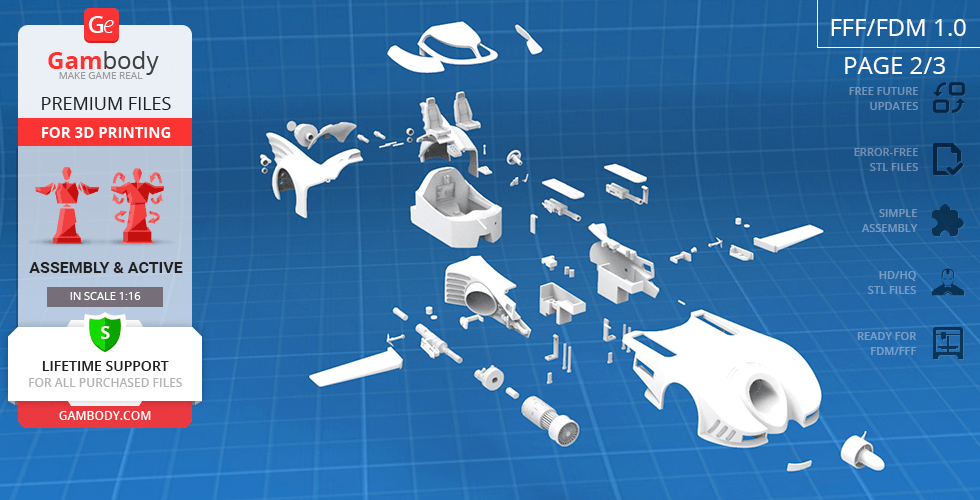
- The assembly parts in the FFF/FDM version come in the recommended print orientations for easy bed placement;
- Assembly manual in PDF and video formats is included for both FFF/FDM and DLP/SLA versions;
- The model is available in recommended scales of 1:16 for the FFF/FDM versions and 1:32 for the DLP/SLA version.
What will you get after purchase?
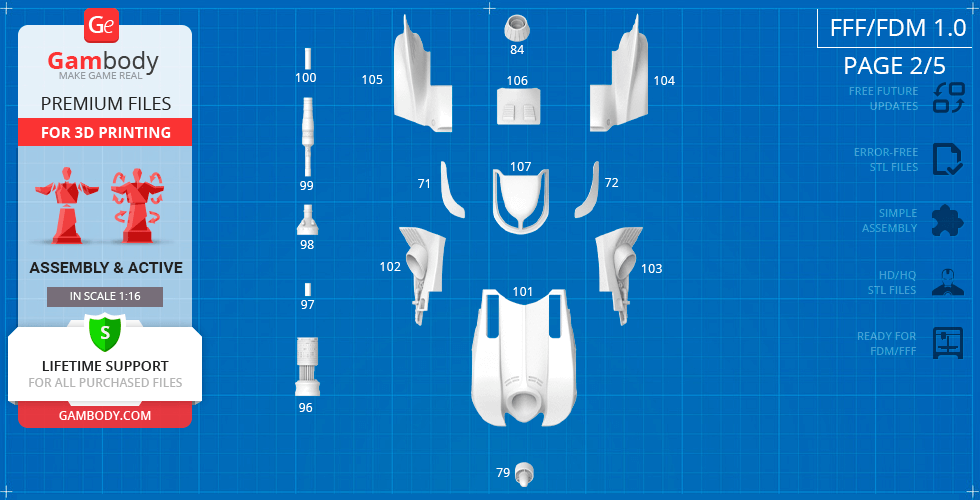
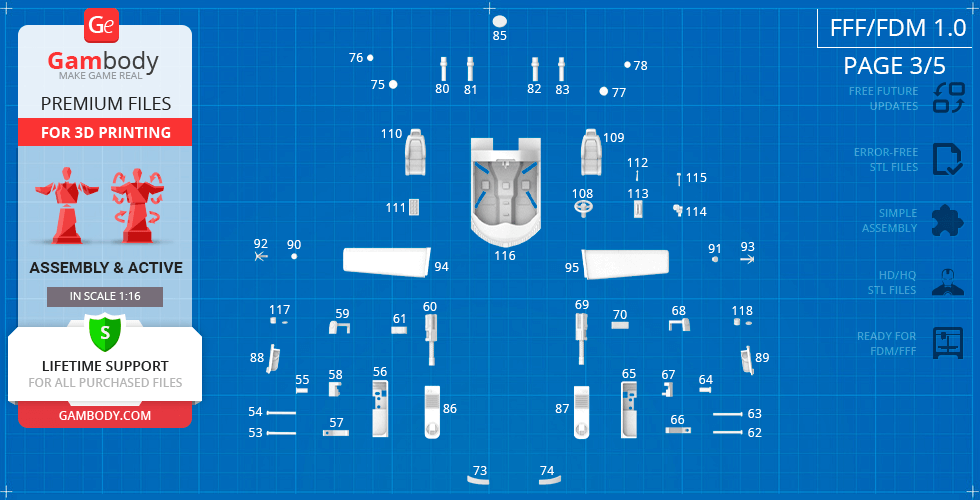
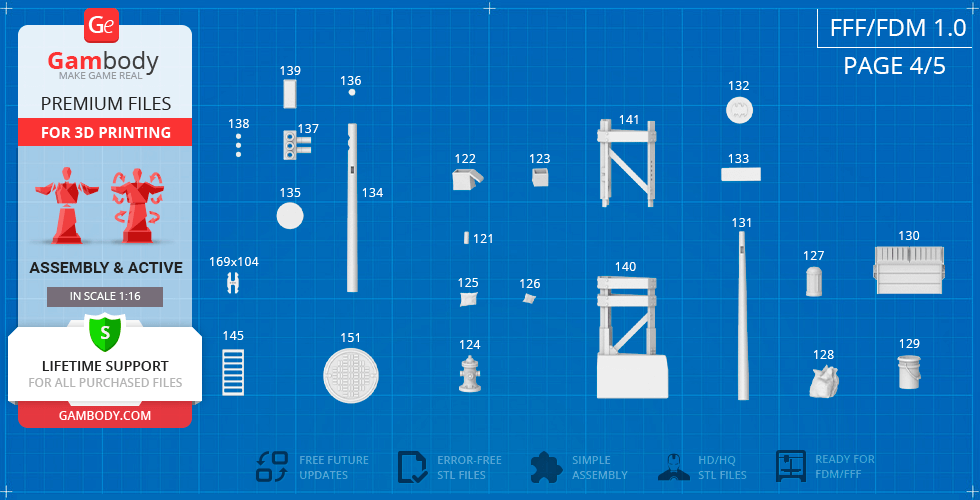
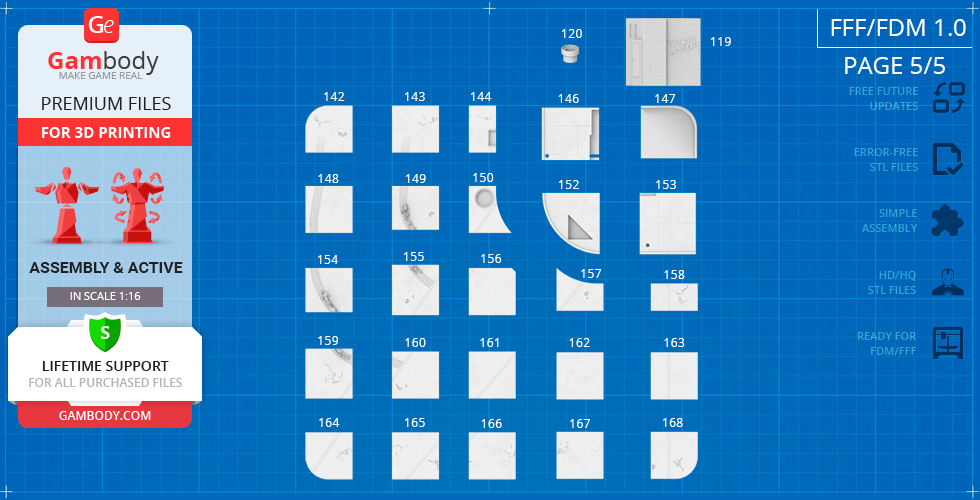
- 3 versions of Batmobile 1989 STL files for FFF/FDM and DLP/SLA — files for all versions are available for download after the purchase;
- STL files of high-poly Batmobile 1989 model for 3D printing consist of 428 files;
- Sizes for:
- FFF/FDM Model Size: 305 mm wide, 104 mm high, 408 mm deep;
- FFF/FDM Platform Size: 600 mm wide, 202 mm high, 600 mm deep;
- DLP/SLA Model Size: 153 mm wide, 52 mm high, 204 mm deep;
- DLP/SLA Platform Size: 300 mm wide, 101 mm high, 300 mm deep;
- Assembly Manual for 1.1 FFF/FDM, 1.0 FFF/FDM, and 1.1 DLP/SLA versions in PDF and video formats;
- Detailed settings that we provide as a recommendation for Bambu Studio, Cura, Orca Slicer, PrusaSlicer, Simplify3D, and Slic3r for the best print;
- Full technical support from the Gambody Support Team.
Average customer rating (28 reviews)
4.3
Ratings breakdown
Click a star rating to filter reviews
Overall experience
Level of detail in the model
4.3
Model cut quality and assembly guide
4.3
Clarity and accuracy of the model page
4.3
Level of detail in the model
4
Model cut quality and assembly guide
4.6
Clarity and accuracy of the model page
4.5
DLP/SLA Printer type: file _15_carBody_f_SLA (repaired).stl
FFF/FDM Printer type: files _104_hull_back_L (repaired).stl and _105_hull_back_R (repaired).stl
We'd be excited to see your studio-scale Batmobile once it's completed, so you're very welcome to share it in our 3D Printing Community: https://www.facebook.com/groups/183216945475583/
And if you have any questions or suggestions, we're always here to assist!
We've forwarded your suggestion regarding the silver caps to Noah, the author of the model, as well as to our moderation team for consideration. This is certainly an improvement that may be possible to implement, although we can't provide an exact timeline at this stage, as it will depend on their current workload. We'll be sure to let you know as soon as we receive any updates.
Thank you again for taking the time to share your observations! Feedback like this is always appreciated and plays an important role in future improvements and updates.
Level of detail in the model
5
Model cut quality and assembly guide
5
Clarity and accuracy of the model page
5
Level of detail in the model
4
Model cut quality and assembly guide
4
Clarity and accuracy of the model page
4
Level of detail in the model
5
Model cut quality and assembly guide
5
Clarity and accuracy of the model page
5
Level of detail in the model
1
Model cut quality and assembly guide
1
Clarity and accuracy of the model page
1
Level of detail in the model
4
Model cut quality and assembly guide
4
Clarity and accuracy of the model page
4
Level of detail in the model
5
Model cut quality and assembly guide
5
Clarity and accuracy of the model page
5
Level of detail in the model
5
Model cut quality and assembly guide
5
Clarity and accuracy of the model page
5
Level of detail in the model
4
Model cut quality and assembly guide
4
Clarity and accuracy of the model page
4
Level of detail in the model
5
Model cut quality and assembly guide
5
Clarity and accuracy of the model page
5
Level of detail in the model
4
Model cut quality and assembly guide
4
Clarity and accuracy of the model page
4
Level of detail in the model
5
Model cut quality and assembly guide
5
Clarity and accuracy of the model page
5
Level of detail in the model
4
Model cut quality and assembly guide
4
Clarity and accuracy of the model page
4
Level of detail in the model
4
Model cut quality and assembly guide
4
Clarity and accuracy of the model page
4
Level of detail in the model
5
Model cut quality and assembly guide
5
Clarity and accuracy of the model page
5
Level of detail in the model
5
Model cut quality and assembly guide
5
Clarity and accuracy of the model page
5
Level of detail in the model
5
Model cut quality and assembly guide
5
Clarity and accuracy of the model page
5
Level of detail in the model
5
Model cut quality and assembly guide
5
Clarity and accuracy of the model page
5
Level of detail in the model
4
Model cut quality and assembly guide
4
Clarity and accuracy of the model page
4
Level of detail in the model
5
Model cut quality and assembly guide
5
Clarity and accuracy of the model page
5
Below you'll find detailed slicing settings for Bambu Studio 2.0+, Orca Slicer 2.0+, UltiMaker Cura 5.0+, PrusaSlicer 2.0+, Slic3r 1.3+, Simplify3D 5.0+ to help you get the best results when printing this model. These settings are optimized specifically for this 3D model, but please note they may need slight adjustments depending on your printer or filament. When in doubt, refer to your printer's user manual.
To avoid printing issues and achieve the best quality, we highly recommend applying the following settings:
For better quality use 0.12 mm layer height, for fast printing use 0.2 mm layer height. For pins and the Ge connectors, use 0.2 layer height.
120-150% of your Layer Height
But you can paint the seam if you want.
You have to calibrate this parameter
You have to calibrate this parameter
You have to calibrate this parameter
For pins and power elements of the structure, such as the vehicle frame, use 3 loop
Disabled for vehicles and enabled for characters
For 0,2 Layer Height
The parameters in this tab vary greatly, it all depends on the quality of your printer. For example, if you have a classic Ender3, stick to the minimum parameters, but if you have a newer printer, for example Anycubic cobra 3 v2, you can select the maximum recommended values
Settings for advanced users, change these parameters only if you have sufficient 3D printing expertise
Enable this parameter if your model requires supports
We also recommend placing and removing supports manually in some places using special button
1-2 loops for more thick support
Top Z distance = 1-1.3 layer Height. If the supports are hard to remove, try increasing this setting by 0.1-0,4 mm
Bottom Z distance = 1-1.3 layer Height. If the supports are hard to remove, try increasing this setting by 0.1-0,4 mm
You have to calibrate this parameter which one is better for your filament
Increase this parameter if the supports are hard to remove from walls
For PLA and PETG filament types
5-8 mm is optional for small prints that have bad adhesion to the build plate
You have to calibrate this parameter
Read the description on your filament roll
Read the description on your filament roll and increase this parameter for fast printers
Read the description on your filament roll and increase this parameter for fast printers
For better quality use 0.12 mm layer height, for fast printing use 0.2 mm layer height. For pins and the Ge connectors, use 0.2 layer height.
120-150% of your Layer Height
But you can paint the seam if you want.
0.01-0.05 You have to calibrate this parameter
0.01-0.05 You have to calibrate this parameter
0.1-0.2 You have to calibrate this parameter
For pins and power elements of the structure, such as the vehicle frame, use 3 loop
Disabled for vehicles and ships, enabled for characters
For 0,2 Layer Height
For 0,2 Layer Height
The parameters in this tab vary greatly, it all depends on the quality of your printer. For example, if you have a classic Ender3, stick to the minimum parameters, but if you have a newer printer, for example, Anycubic Kobra 3 Or Bambulab A1, you can select the maximum recommended values.
Settings for advanced users, change these parameters only if you have sufficient 3D printing expertise
Enable this parameter if your model requires supports
We also recommend placing and removing supports manually in some places using special button
Top Z distance = 1-1.3 layer Height. If the supports are hard to remove, try increasing this setting by 0.1-0,4 mm
Bottom Z distance = 1-1.3 layer Height. If the supports are hard to remove, try increasing this setting by 0.1-0,4 mm
Increase this parameter if the supports are hard to remove from walls
For PLA and PETG filament types
5-8 mm is optional for small prints that have bad adhesion to the build plate
Read the description on your filament roll
Read the description on your filament roll and increase this parameter for fast printers
You have to calibrate this parameter
Read the description on your filament roll and increase this parameter for fast printers
Read the description on your filament roll
This field is filled in according to your printer specifications when you add it to the slicer.
You can add custom G-code here for the start and end of the print. However, be careful - this is for advanced users only!
You have to calibrate your printer using Ge retraction test models
Retraction Length: For direct-drive setups use 0.5 mm to 2.5 mm; for Bowden extruders use 5 to 7 mm
This is how fast the filament is pulled back—40-60 mm/s for direct drive and 30-50 mm/s for Bowden setups.
You have to calibrate this parameter: Reduce it until the printer starts to hit the parts with the nozzle during printing, then increase it by 0.2.
For better quality use 0.12 mm layer height, for fast printing use 0.2 mm layer height. For pins and the Ge connectors, use 0.2 layer height.
120-150% of your Layer Height
To increase the strength of the print parts, use wall line count: 3
For pins and connectors use 50% Infill
These parameters are for standard PLA plastic. If you are using a different type of plastic, check the printing temperature recommended by the manufacturer. Also, read the description on your filament spool. For fast printers, add +30 °C to the current parameters.
The parameters in this tab vary greatly, it all depends on the quality of your printer. For example, if you have a classic Ender3, stick to the minimum parameters, but if you have a newer printer, for example Anycubic cobra 3 v3, you can select the maximum recommended values
Settings for advanced users, change these parameters only if you have sufficient 3D printing expertise.
You need to calibrate this parameter using Gambody test models. These values are average values for a Direct Drive extruder; for a Bowden extruder, the values should be increased.
You need to calibrate this parameter using Gambody test models. These values are average values for a Direct Drive extruder; for a Bowden extruder, the values should be increased.
Use this value other than 0 if your nozzle catches on the internal infill during travel moves. Try to keep this value as low as possible in height.
Use normal supports to support large, straight surfaces (most mechanical or technical parts).
You have to calibrate this parameter according to the capabilities of your printer and your filament, using a Gambody test models.
Use 1 instead of 0 if your supports are thin and tall. They will be harder to remove, but much stronger.
Top Z distance = 1-1.3 layer Height. If the supports are hard to remove, try increasing this setting by 0.1-0,4 mm
Increase this parameter if the supports are hard to remove from walls
Use tree supports to support complex objects, such as characters.
You have to calibrate this parameter according to the capabilities of your printer and your filament, using a Gambody test models.
Top Z distance = 1-1.3 layer Height. If the supports are hard to remove, try increasing this setting by 0.1-0,4 mm
Increase this parameter if the supports are hard to remove from walls
Use a skirt for all parts when printing on outdated printers.
Use a brim when printing thin but tall parts, as well as parts with a small bed adhesion area.
For better quality use 0.12 mm layer height, for fast printing use 0.2 mm layer height. For pins and the Ge connectors, use 0.2 layer height.
120-150% of your Layer Height
for 0.2 Layer Height
But you can paint the seam if you want.
(for PLA and PETG)
(5-8 mm is optional for small prints that have bad adhesion to the build plate)
Enable this parameter if your model requires supports
(45-50 degree)You have to calibrate this parameter according to the capabilities of your printer
and your filament, using a Gambody test models.
Top contact Z distance = 1-1.3 layer Height. If the supports are hard to remove, try
increasing this setting by 0.1-0,4 mm
Top contact Z distance = 1-1.3 layer Height. If the supports are hard to remove, try
increasing this setting by 0.1-0,4 mm
Increase this parameter if the supports are hard to remove from walls
The parameters in this tab vary greatly, it all depends on the quality of your printer. For example, if you have a classic Ender3, stick to the minimum parameters, but if you have a newer printer, for example Anycubic cobra 3 v3, you can select the maximum recommended values
Settings for advanced users, change these parameters only if you have sufficient 3D printing expertise. Use the minimum value for outdated printers without acceleration calibration, and the maximum value for modern printers if you need it.
These settings only work for 3D printers with multiple extruders
You can try setting all parameters in this section, except the First layer, to values between 0.75% of your nozzle diameter and 1.25% of your nozzle diameter. Adjusting them will help you work out the optimal parameters for the best quality for your print. As for the First layer, you can set it to 150% of the diameter of your nozzle for better adhesion to the build plate (for a nozzle with a diameter of 0.4 mm, the First layer extrusion width can be from 0.3 mm to 0.5 mm)
For better printing quality you have to calibrate this parameter using Gambody test model.
Check your filament manufacturer's temperature recommendations on the spool.
Cooling parameters depends on the material you use for printing.
*for PLA
For better quality use 0.12 mm layer height, for fast printing use 0.2 mm layer height. For pins and the Ge connectors, use 0.2 layer height.
120-150% of your Layer Height
For 0.12 Layer Height
For 0.12 Layer Height
For pins and connectors use 50% Infill
Use skirt for outdated 3d printers
(5-8 mm is optional for small prints that have bad adhesion to the build plate)
Enable this parameter if your model requires supports
(45-60 degree)You have to calibrate this parameter according to the capabilities of your printer and your filament, using a Gambody test models
Contact Z distance = 1-1.3 layer Height. If the supports are hard to remove, try increasing this setting by 0.1-0,4 mm
The parameters in this tab vary greatly, it all depends on the quality of your printer. For example, if you have a classic Ender3, stick to the minimum parameters, but if you have a newer printer, for example Anycubic cobra 3 v3, you can select the maximum recommended values
Settings for advanced users, change these parameters only if you have sufficient 3D printing expertise. Use the minimum value for outdated printers without acceleration calibration, and the maximum value for modern printers if you need it.
You have to calibrate this parameter from 0.9 to 1.1 according to the capabilities of your printer and your filament, using a Gambody test models.
Check your filament manufacturer's temperature recommendations on the spool.
Cooling parameters depends on the material you use for printing.
Calibrate this value if you need to reduce or improve the adhesion between the plastic and the heat bed
Your current nozzle diameter
You need to calibrate this parameter using Gambody test models. These values are average values for a Direct Drive extruder; for a Bowden extruder, the values should be increased.
Your current nozzle diameter
You have to calibrate this parameter using Gambody test models.
You need to calibrate this parameter using Gambody test models. These values are average values for a Direct Drive extruder; for a Bowden extruder, the values should be increased.
For better quality use 0.12 mm layer height, for fast printing use 0.2 mm layer height. For pins and the Ge connectors, use 0.2 layer height.
For 0,2 Layer Height
For 0,2 Layer Height
To increase the strength of the print parts, use Outline Perimeters: 3
You can enable this parameter to print rounded or spherical models, as well as character models.
Use this option only if your parts are too tight. but better calibrate your printer extrusion
Use this option only if your parts are too tight. but better calibrate your printer extrusion
Use 2 and more if you want to create skirt instead brim
1-2 for skirt and 10-20 for brim
Use for wipe nozzle if you need
Use For ABS filament
For pins and connectors use 50% Infill
Top Z distance = 1-1.3 layer Height. If the supports are hard to remove, try increasing this setting by 0.1-0,4 mm
Calibrate your filament and detect optimal temperature for it
Average temperature for PLA filament
The parameters in this tab vary greatly, it all depends on the quality of your printer. For example, if you have a classic Ender3, stick to the minimum parameters, but if you have a newer printer, for example Anycubic cobra 3 v3, you can select the maximum recommended values
Settings for advanced users, change these parameters only if you have sufficient 3D printing expertise.
DLP/SLA
- High-resolution resin version featuring a fully redesigned cockpit and seats for improved proportional accuracy.
- Refined internal frame and turbine components to increase space for electronics and LED wiring.
- Sliding canopy and movable gearstick.
- Functioning steering rack for synchronized wheel movement.
- Two machine gun options: open and closed (removable).
- Interchangeable wings and Batdisc ejectors.
- LED-ready design with hidden battery compartment.
- Separate transparent parts for windshield, lights, and turbine glass.
- Gotham-inspired display platform included.
- The assembly parts are connected using specially designed integrated connectors that fit securely into the corresponding slots. Optionally, for added strength and rigidity, the static connections can be glued together.
- The assembly requires additional "pins" to secure the parts of the 3D printed vehicle. These pins do not come in STL files but can be made out of short pieces of 1 mm wire.
FFF/FDM
- Upgraded version featuring a fully redesigned cockpit and seats for improved proportional accuracy.
- Refined internal frame and turbine components to increase space for electronics and LED wiring.
- Features improved bearings for smoother mechanical operation.
- Sliding canopy and movable gearstick.
- Functioning steering rack and active suspension.
- Spring-loaded machine gun mechanism with retracted and deployed modes.
- Interchangeable wings and Batdisc ejectors.
- LED-ready design with hidden battery compartment.
- Gotham-inspired display platform included.
- The assembly parts are connected using specially designed integrated connectors that fit securely into the corresponding slots. Optionally, for added strength and rigidity, the static connections can be glued together. Some model parts use separate connectors (part "_169_Ge_lock_x104", requires 104 copies).
- The assembly requires additional "pins" to secure the parts of the 3D printed vehicle. These pins do not come in STL files but can be made out of short pieces of regular 1.75 mm filament.
FFF/FDM
- Initial version of the Batmobile 1989 model.
- Active front and rear suspension using ball pen springs.
- Functional steering rack synchronized with the steering wheel.
- Retractable spring-loaded machine guns activated by a side button.
- Sliding canopy to access the detailed interior.
- Rotating gear bearings in all wheels.
- Side-mounted grappling hook and Batdisc ejectors.
- Authentic turboshaft engine and rotating chassis cylinder.
- Includes Gotham-style display platform.
- The assembly parts are connected using specially designed integrated connectors that fit securely into the corresponding slots. Optionally, for added strength and rigidity, the static connections can be glued together. Some model parts use separate connectors (part "169_Ge_lock_x104", requires 104 copies).
- The assembly requires additional "pins" to secure the parts of the 3D printed vehicle. These pins do not come in STL files but can be made out of short pieces of regular 1.75 mm filament.