Black Pearl STL Files for 3D Printing | Assembly Model
17 Feedback
Images
Community 3D Prints
Video
How it's made
360° Preview
1.0 Initial
Features
Blueprints
Scale
Specifications
Source Files
Description
Update History
Printing Details
Feedback (17)
Comments
Specifications
Source Files
Description
Update History
Printing Details
Feedback (17)
Comments
Black Pearl 3D Printer Files | Assembly
Specifications
Files
3D model format
Stereolithography (.stl)
Total files
243
The total number of 3D model files available across all versions and updates of this model, including variants optimized for different types of 3D printers.
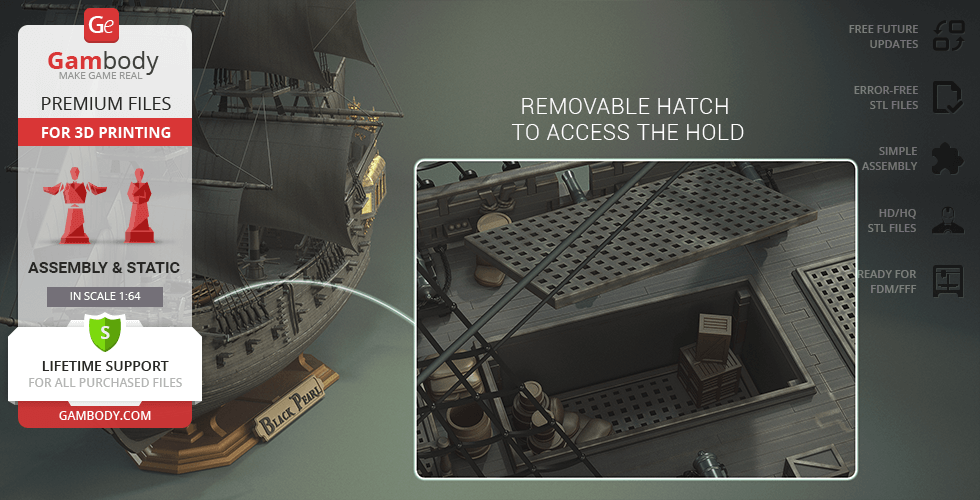
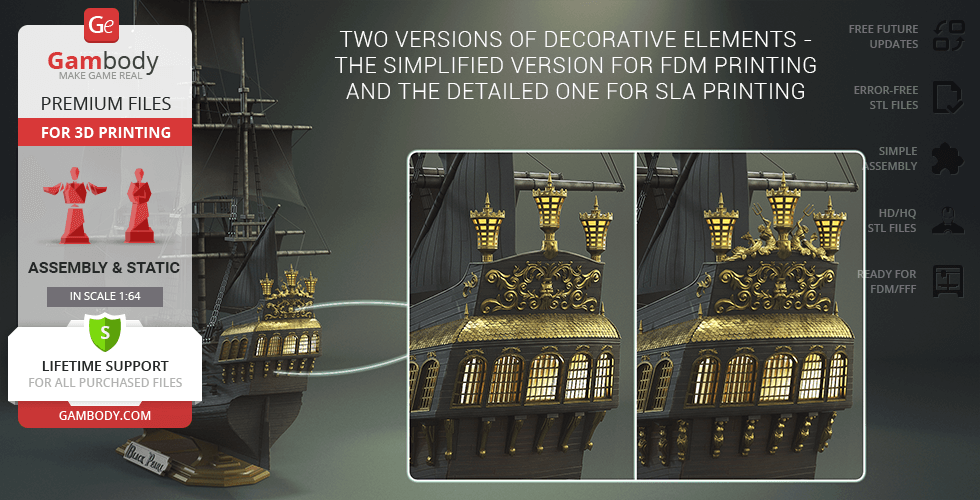
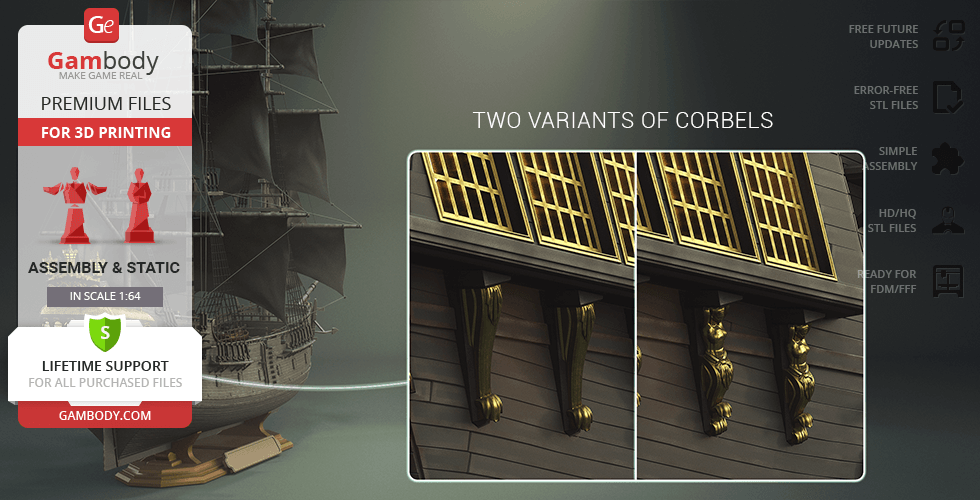
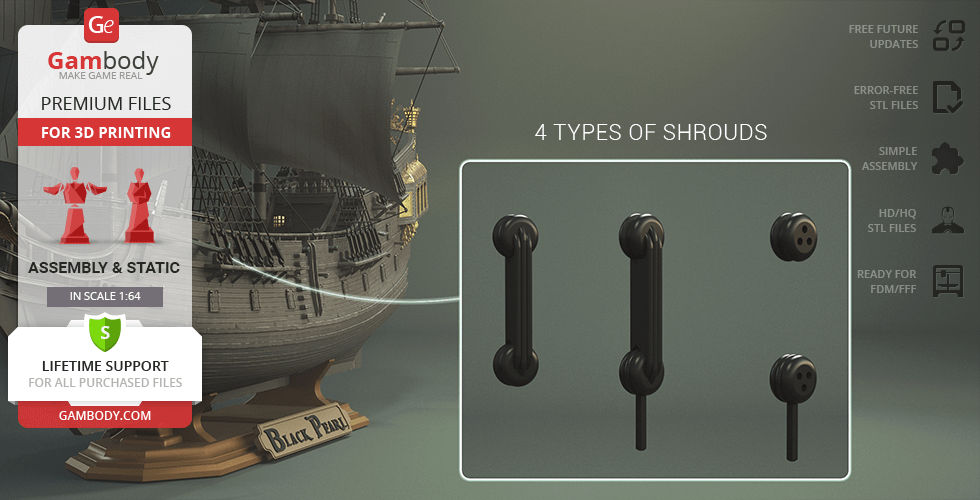
Removable hatches to access the ship’s hold; Two versions of decorative elements; Two variants of corbels; The gunports have two positions: open and closed; 4 types of shrouds; Two versions of the platform design: with and without the lettering; The captain’s cabin and the lamps can be illuminated; We recommend printing statues and columns using a resin 3D printer for the best detail; The assembly parts are connected using specially designed integrated connectors that fit securely into the corresponding slots; Optionally, for added strength and rigidity, the static connections can be glued together.
You will get instant access to the STL files of Black Pearl 3D Printer Files | Assembly after completing your purchase. Simply add the model to your cart and check out using PayPal, credit or debit card, Apple Pay, Google Pay, Alipay, or other available payment methods.
Watch the assembly video for Black Pearl 3D Printer Files | Assembly, and explore more tutorials, behind-the-scenes content, 3D printing timelapses, and painting guides on the official Gambody YouTube channel.
Source Files
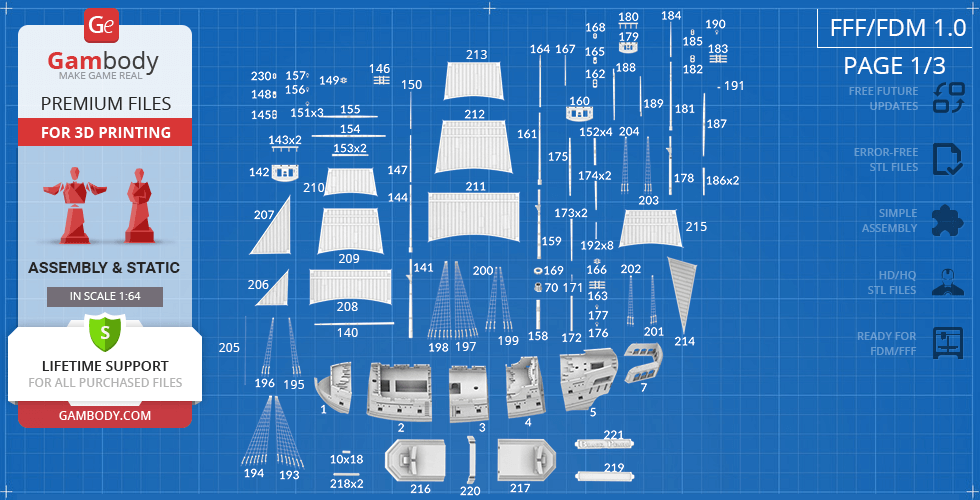
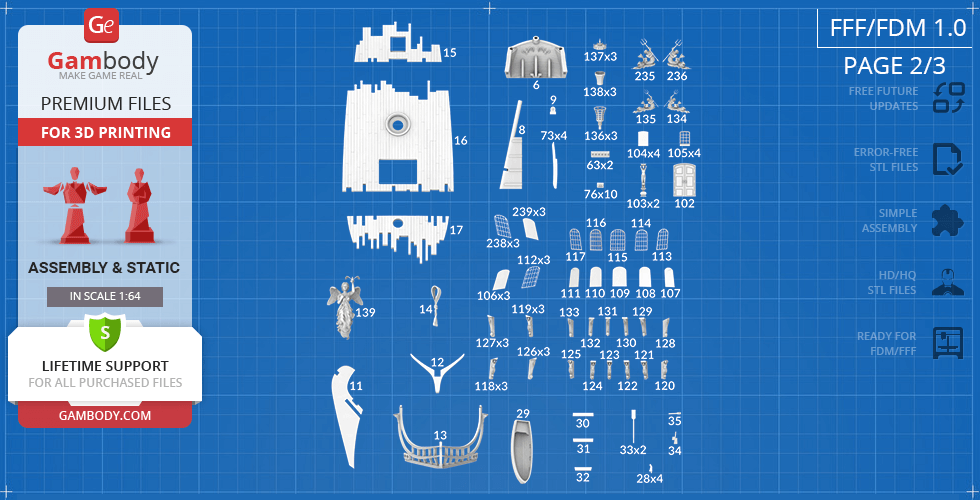
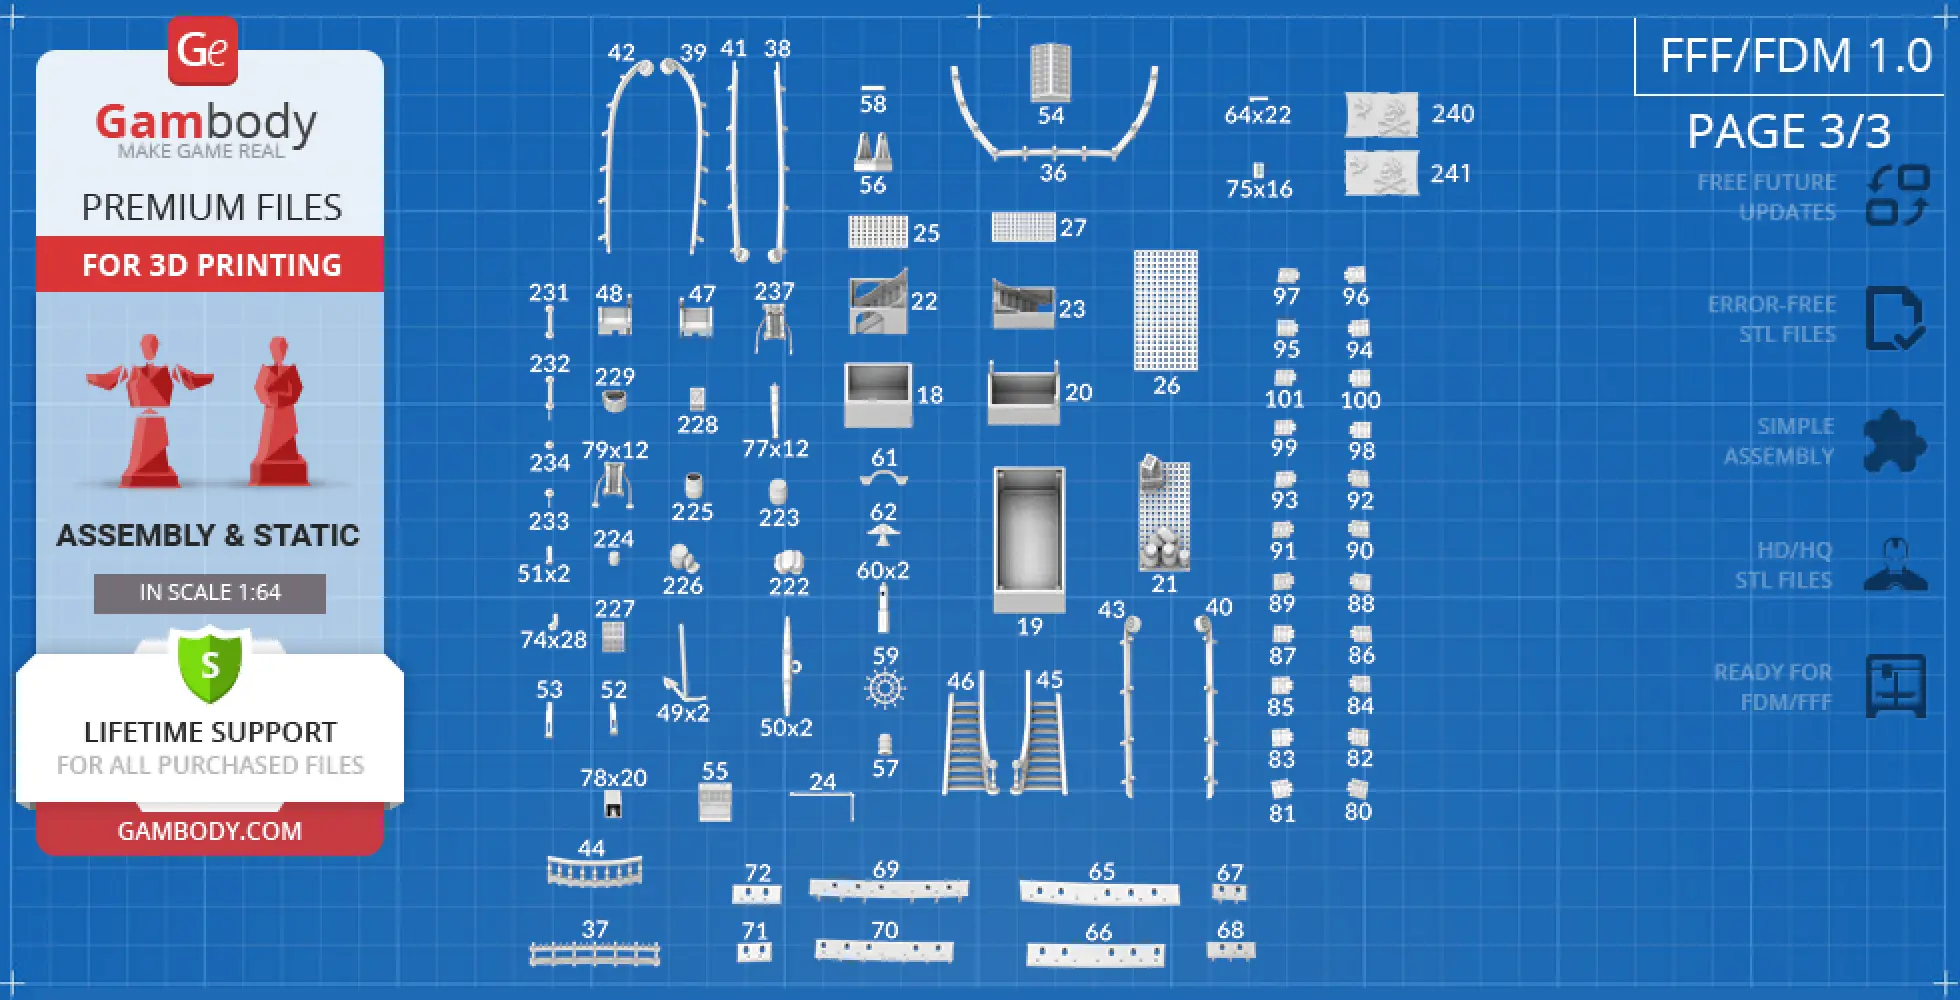
This 3D model of the Black Pearl consists of files in StereoLithography (.Stl) format that is optimized for 3D printing.
Before printing the files, we strongly recommend reading the PRINTING DETAILS section.
WHAT WILL YOU GET AFTER PURCHASE?
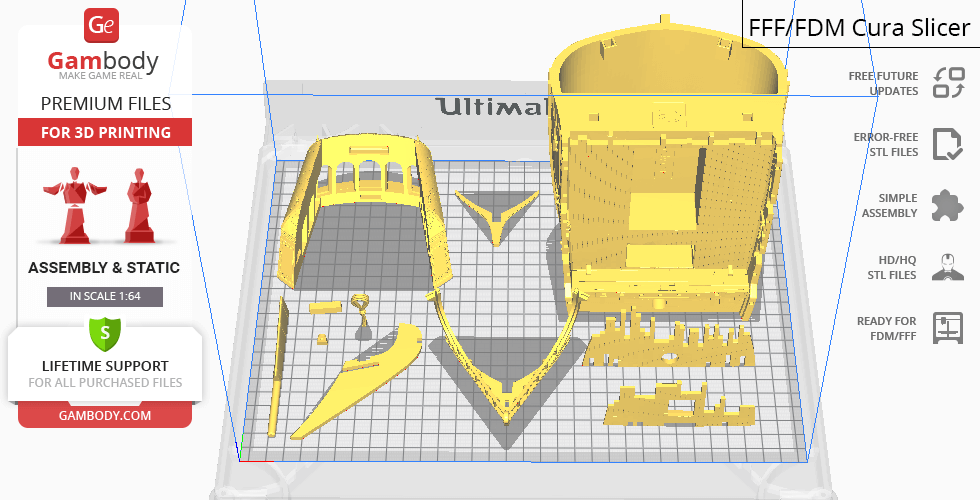
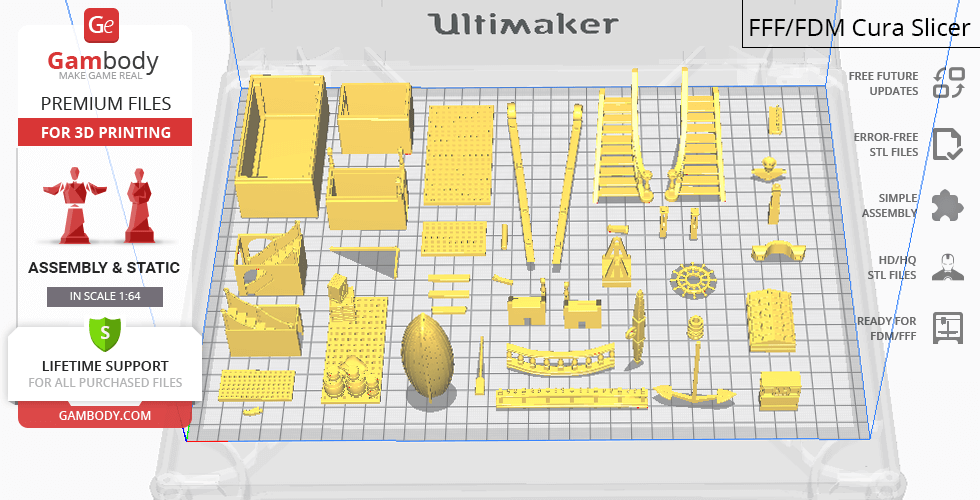
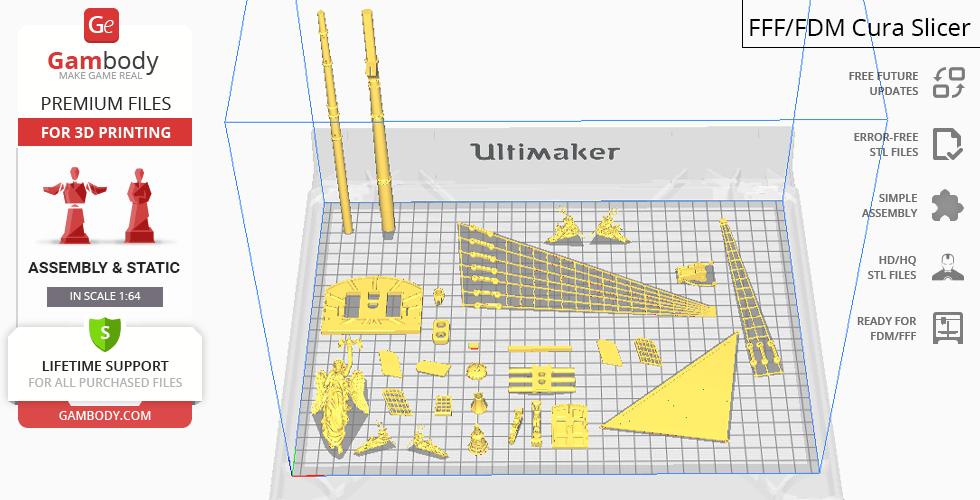
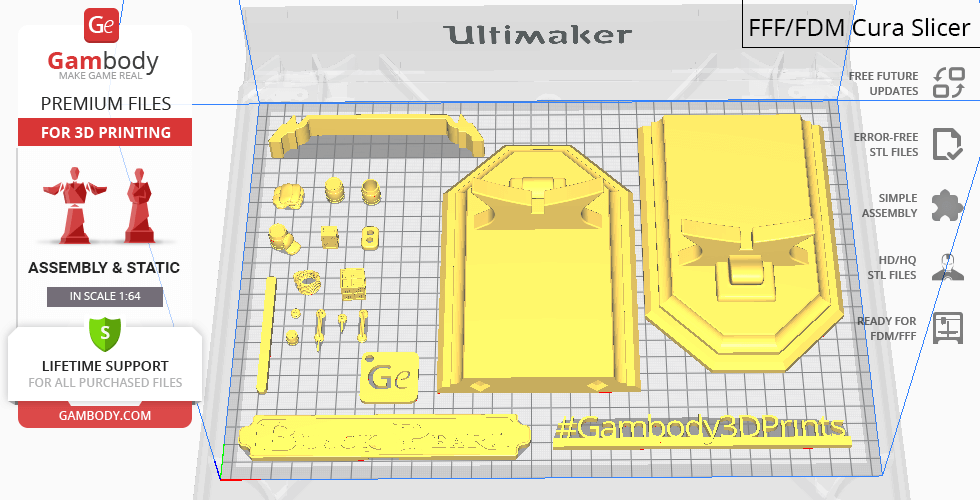
1 version of the Black Pearl STL files for FFF/FDM - files for the version are available for download after the purchase;
STL files of high-poly Black Pearl Model for 3D printing consist of 241 files;
Sizes for: FFF/FDM: 653 mm tall, 278 mm wide, 707 mm deep;
Assembly Manual for FFF/FDM 1.0 version in PDF and video formats;
Detailed settings that we provide as a recommendation for Cura, Simplify3D, Slic3r and PrusaSlicer for the best print;
Full technical support from the Gambody Support Team.
Detailed information about this 3D printing model is available in the DESCRIPTION section.
Important
Before printing, take a look at Printing Details for recommended settings and tips to achieve better results.
--Select printer type--
FFF/FDM
Selected
The model is optimized for 3D printing on FFF/FDM printers using filament as the amount of support structures during printing and to ensure that each part fits on an average-sized print bed.
View update history
--Select model version--
1.0
Selected
Initial
File name
Size (mm | in)
Size(mb)
Printing Time / Filament
_01_bodyPart_a_FDM (repaired).stl 111.92 x 126.12 x 91.97 mm | 4.41 x 4.97 x 3.62 in
Size: 111.92 x 126.12 x 91.97 mm | 4.41 x 4.97 x 3.62 in
File size: 57.83 mb
Printing Time / Filament: 34 h 21 min / 17 m
_02_bodyPart_b_FDM (repaired).stl 139.85 x 122.83 x 159.81 mm | 5.51 x 4.84 x 6.29 in
Size: 139.85 x 122.83 x 159.81 mm | 5.51 x 4.84 x 6.29 in
File size: 21.34 mb
Printing Time / Filament: 86 h 34 min / 48 m
_03_bodyPart_c_FDM (repaired).stl 139.84 x 114.86 x 98.61 mm | 5.51 x 4.52 x 3.88 in
Size: 139.84 x 114.86 x 98.61 mm | 5.51 x 4.52 x 3.88 in
File size: 22.52 mb
Printing Time / Filament: 45 h 42 min / 23 m
_06_bodyPart_f_FDM (repaired).stl 64.99 x 28.74 x 47.06 mm | 2.56 x 1.13 x 1.85 in
Size: 64.99 x 28.74 x 47.06 mm | 2.56 x 1.13 x 1.85 in
File size: 18.88 mb
Printing Time / Filament: 3 h 21 min / 2 m
_07_tailPart_FDM (repaired).stl 110.9 x 102.2 x 47.75 mm | 4.37 x 4.02 x 1.88 in
Size: 110.9 x 102.2 x 47.75 mm | 4.37 x 4.02 x 1.88 in
File size: 51.66 mb
Printing Time / Filament: 11 h 50 min / 6 m
_08_rudder_FDM (repaired).stl 5.53 x 93.56 x 23.12 mm | 0.22 x 3.68 x 0.91 in
Size: 5.53 x 93.56 x 23.12 mm | 0.22 x 3.68 x 0.91 in
File size: 2.02 mb
Printing Time / Filament: 42 min / <1 m
_09_rudderPart_FDM (repaired).stl 6.44 x 3.66 x 8.12 mm | 0.25 x 0.14 x 0.32 in
Size: 6.44 x 3.66 x 8.12 mm | 0.25 x 0.14 x 0.32 in
File size: 0.08 mb
Printing Time / Filament: 4 min / <1 m
_10_bodyPin_X18_FDM (repaired).stl 20.29 x 6.95 x 5 mm | 0.8 x 0.27 x 0.2 in
Size: 20.29 x 6.95 x 5 mm | 0.8 x 0.27 x 0.2 in
File size: 0.00 mb
Printing Time / Filament: 6 min / <1 m
_11_nosePart_a_FDM (repaired).stl 74.59 x 84.75 x 3.02 mm | 2.94 x 3.34 x 0.12 in
Size: 74.59 x 84.75 x 3.02 mm | 2.94 x 3.34 x 0.12 in
File size: 0.12 mb
Printing Time / Filament: 52 min / 1 m
_12_nosePart_b_FDM (repaired).stl 55.49 x 48.45 x 2.89 mm | 2.18 x 1.91 x 0.11 in
Size: 55.49 x 48.45 x 2.89 mm | 2.18 x 1.91 x 0.11 in
File size: 4.32 mb
Printing Time / Filament: 16 min / <1 m
_13_nosePart_c_FDM (repaired).stl 97.7 x 84.17 x 59.15 mm | 3.85 x 3.31 x 2.33 in
Size: 97.7 x 84.17 x 59.15 mm | 3.85 x 3.31 x 2.33 in
File size: 17.79 mb
Printing Time / Filament: 4 h 15 min / 2 m
_14_boegsprieRope_FDM (repaired).stl 10.57 x 15.61 x 40.14 mm | 0.42 x 0.61 x 1.58 in
Size: 10.57 x 15.61 x 40.14 mm | 0.42 x 0.61 x 1.58 in
File size: 6.91 mb
Printing Time / Filament: 33 min / <1 m
_15_bodyPlane_a_RearT_FDM (repaired).stl 89.74 x 3.07 x 42.42 mm | 3.53 x 0.12 x 1.67 in
Size: 89.74 x 3.07 x 42.42 mm | 3.53 x 0.12 x 1.67 in
File size: 0.28 mb
Printing Time / Filament: 1 h 21 min / 1 m
_16_bodyPlane_b_MidT_FDM (repaired).stl 114.56 x 4.24 x 121.39 mm | 4.51 x 0.17 x 4.78 in
Size: 114.56 x 4.24 x 121.39 mm | 4.51 x 0.17 x 4.78 in
File size: 2.50 mb
Printing Time / Filament: 6 h 48 min / 4 m
_17_bodyPlane_c_FrontT_FDM (repaired).stl 104.77 x 3.43 x 55.16 mm | 4.12 x 0.14 x 2.17 in
Size: 104.77 x 3.43 x 55.16 mm | 4.12 x 0.14 x 2.17 in
File size: 1.12 mb
Printing Time / Filament: 2 h 13 min / 1 m
_18_shipHoldPart_a_FDM (repaired).stl 38.62 x 27.26 x 28.57 mm | 1.52 x 1.07 x 1.12 in
Size: 38.62 x 27.26 x 28.57 mm | 1.52 x 1.07 x 1.12 in
File size: 0.05 mb
Printing Time / Filament: 1 h 45 min / 1 m
_19_shipHoldPart_b_FDM (repaired).stl 40.81 x 77.66 x 31.21 mm | 1.61 x 3.06 x 1.23 in
Size: 40.81 x 77.66 x 31.21 mm | 1.61 x 3.06 x 1.23 in
File size: 0.13 mb
Printing Time / Filament: 4 h 43 min / 3 m
_20_shipHoldPart_c_FDM (repaired).stl 40.81 x 24.03 x 39.78 mm | 1.61 x 0.95 x 1.57 in
Size: 40.81 x 24.03 x 39.78 mm | 1.61 x 0.95 x 1.57 in
File size: 2.09 mb
Printing Time / Filament: 1 h 40 min / 1 m
_21_shipHoldPart_d_FDM (repaired).stl 28.92 x 65.76 x 26.66 mm | 1.14 x 2.59 x 1.05 in
Size: 28.92 x 65.76 x 26.66 mm | 1.14 x 2.59 x 1.05 in
File size: 9.09 mb
Printing Time / Filament: 2 h 14 min / 1 m
_22_shipHoldStairs_a_FDM (repaired).stl 33.18 x 21.46 x 36.68 mm | 1.31 x 0.84 x 1.44 in
Size: 33.18 x 21.46 x 36.68 mm | 1.31 x 0.84 x 1.44 in
File size: 2.88 mb
Printing Time / Filament: 2 h 3 min / 1 m
_23_shipHoldStairs_b_FDM (repaired).stl 35.56 x 16.62 x 36.69 mm | 1.4 x 0.65 x 1.44 in
Size: 35.56 x 16.62 x 36.69 mm | 1.4 x 0.65 x 1.44 in
File size: 2.85 mb
Printing Time / Filament: 1 h 47 min / 1 m
_24_shipHoldPartCBarrier_FDM (repaired).stl 36.94 x 21.27 x 1.76 mm | 1.45 x 0.84 x 0.07 in
Size: 36.94 x 21.27 x 1.76 mm | 1.45 x 0.84 x 0.07 in
File size: 0.10 mb
Printing Time / Filament: 4 min / <1 m
_25_deckGrid_a_FDM (repaired).stl 33.63 x 22.27 x 2.5 mm | 1.32 x 0.88 x 0.1 in
Size: 33.63 x 22.27 x 2.5 mm | 1.32 x 0.88 x 0.1 in
File size: 0.13 mb
Printing Time / Filament: 24 min / <1 m
_26_deckGrid_b_FDM (repaired).stl 36.02 x 72.85 x 2.43 mm | 1.42 x 2.87 x 0.1 in
Size: 36.02 x 72.85 x 2.43 mm | 1.42 x 2.87 x 0.1 in
File size: 0.37 mb
Printing Time / Filament: 1 h 31 min / 1 m
_27_deckGrid_c_FDM (repaired).stl 36.21 x 17.71 x 2.21 mm | 1.43 x 0.7 x 0.09 in
Size: 36.21 x 17.71 x 2.21 mm | 1.43 x 0.7 x 0.09 in
File size: 0.16 mb
Printing Time / Filament: 25 min / <1 m
_28_boatHolder_X4_FDM (repaired).stl 9.63 x 4.62 x 2.23 mm | 0.38 x 0.18 x 0.09 in
Size: 9.63 x 4.62 x 2.23 mm | 0.38 x 0.18 x 0.09 in
File size: 0.01 mb
Printing Time / Filament: 2 min / <1 m
_29_boat_FDM (repaired).stl 25.12 x 18.84 x 66.09 mm | 0.99 x 0.74 x 2.6 in
Size: 25.12 x 18.84 x 66.09 mm | 0.99 x 0.74 x 2.6 in
File size: 4.79 mb
Printing Time / Filament: 2 h 2 min / 1 m
_30_boatSeat_a_FDM (repaired).stl 21.58 x 3.68 x 1.93 mm | 0.85 x 0.14 x 0.08 in
Size: 21.58 x 3.68 x 1.93 mm | 0.85 x 0.14 x 0.08 in
File size: 0.01 mb
Printing Time / Filament: 3 min / <1 m
_31_boatSeat_b_FDM (repaired).stl 21.13 x 3.68 x 1.93 mm | 0.83 x 0.14 x 0.08 in
Size: 21.13 x 3.68 x 1.93 mm | 0.83 x 0.14 x 0.08 in
File size: 0.01 mb
Printing Time / Filament: 3 min / <1 m
_32_boatSeat_c_FDM (repaired).stl 18.07 x 3.67 x 1.93 mm | 0.71 x 0.14 x 0.08 in
Size: 18.07 x 3.67 x 1.93 mm | 0.71 x 0.14 x 0.08 in
File size: 0.01 mb
Printing Time / Filament: 3 min / <1 m
_33_boatOar_X2_FDM (repaired).stl 4.55 x 35.52 x 1.6 mm | 0.18 x 1.4 x 0.06 in
Size: 4.55 x 35.52 x 1.6 mm | 0.18 x 1.4 x 0.06 in
File size: 0.11 mb
Printing Time / Filament: 3 min / <1 m
_34_boatRudderPart_a_FDM (repaired).stl 5.68 x 15.34 x 1.2 mm | 0.22 x 0.6 x 0.05 in
Size: 5.68 x 15.34 x 1.2 mm | 0.22 x 0.6 x 0.05 in
File size: 0.01 mb
Printing Time / Filament: 2 min / <1 m
_35_boatRudderPart_b_FDM (repaired).stl 3.05 x 12.88 x 1.2 mm | 0.12 x 0.51 x 0.05 in
Size: 3.05 x 12.88 x 1.2 mm | 0.12 x 0.51 x 0.05 in
File size: 0.01 mb
Printing Time / Filament: 1 min / <1 m
_36_deckBarrier_a_F_FDM (repaired).stl 117.12 x 80.42 x 11.16 mm | 4.61 x 3.17 x 0.44 in
Size: 117.12 x 80.42 x 11.16 mm | 4.61 x 3.17 x 0.44 in
File size: 1.27 mb
Printing Time / Filament: 1 h 24 min / 1 m
_37_deckBarrier_b_F_FDM (repaired).stl 74.02 x 4.36 x 15.15 mm | 2.91 x 0.17 x 0.6 in
Size: 74.02 x 4.36 x 15.15 mm | 2.91 x 0.17 x 0.6 in
File size: 3.30 mb
Printing Time / Filament: 53 min / <1 m
_38_deckBarrier_c_MidL_FDM (repaired).stl 7.67 x 128.03 x 18.11 mm | 0.3 x 5.04 x 0.71 in
Size: 7.67 x 128.03 x 18.11 mm | 0.3 x 5.04 x 0.71 in
File size: 1.04 mb
Printing Time / Filament: 46 min / <1 m
_39_deckBarrier_d_MidL_FDM (repaired).stl 10.96 x 127.89 x 35.33 mm | 0.43 x 5.04 x 1.39 in
Size: 10.96 x 127.89 x 35.33 mm | 0.43 x 5.04 x 1.39 in
File size: 1.04 mb
Printing Time / Filament: 1 h / 1 m
_40_deckBarrier_e_RearL_FDM (repaired).stl 16.54 x 109.47 x 15.92 mm | 0.65 x 4.31 x 0.63 in
Size: 16.54 x 109.47 x 15.92 mm | 0.65 x 4.31 x 0.63 in
File size: 1.21 mb
Printing Time / Filament: 48 min / <1 m
_41_deckBarrier_f_MidR_FDM (repaired).stl 7.76 x 128.16 x 16.31 mm | 0.31 x 5.05 x 0.64 in
Size: 7.76 x 128.16 x 16.31 mm | 0.31 x 5.05 x 0.64 in
File size: 1.18 mb
Printing Time / Filament: 48 min / <1 m
_42_deckBarrier_g_MidR_FDM (repaired).stl 10.96 x 127.89 x 35.33 mm | 0.43 x 5.04 x 1.39 in
Size: 10.96 x 127.89 x 35.33 mm | 0.43 x 5.04 x 1.39 in
File size: 1.04 mb
Printing Time / Filament: 1 h 1 min / 1 m
_43_deckBarrier_h_RearR_FDM (repaired).stl 16.54 x 109.47 x 15.92 mm | 0.65 x 4.31 x 0.63 in
Size: 16.54 x 109.47 x 15.92 mm | 0.65 x 4.31 x 0.63 in
File size: 1.21 mb
Printing Time / Filament: 49 min / <1 m
_44_deckBarrier_i_RearMid_FDM (repaired).stl 53.8 x 9.61 x 17.14 mm | 2.12 x 0.38 x 0.67 in
Size: 53.8 x 9.61 x 17.14 mm | 2.12 x 0.38 x 0.67 in
File size: 4.82 mb
Printing Time / Filament: 56 min / <1 m
_45_stairs_a_L_FDM (repaired).stl 32.76 x 46.09 x 55.77 mm | 1.29 x 1.81 x 2.2 in
Size: 32.76 x 46.09 x 55.77 mm | 1.29 x 1.81 x 2.2 in
File size: 6.52 mb
Printing Time / Filament: 2 h 22 min / 1 m
_46_stairs_b_R_FDM (repaired).stl 32.76 x 46.12 x 55.76 mm | 1.29 x 1.82 x 2.2 in
Size: 32.76 x 46.12 x 55.76 mm | 1.29 x 1.82 x 2.2 in
File size: 6.52 mb
Printing Time / Filament: 2 h 23 min / 1 m
_47_stairs_c_L_FDM (repaired).stl 19 x 19.05 x 16.28 mm | 0.75 x 0.75 x 0.64 in
Size: 19 x 19.05 x 16.28 mm | 0.75 x 0.75 x 0.64 in
File size: 0.46 mb
Printing Time / Filament: 33 min / <1 m
_48_stairs_d_R_FDM (repaired).stl 18.99 x 19.04 x 16.28 mm | 0.75 x 0.75 x 0.64 in
Size: 18.99 x 19.04 x 16.28 mm | 0.75 x 0.75 x 0.64 in
File size: 0.46 mb
Printing Time / Filament: 33 min / <1 m
_49_anchorPart_a_X2_FDM (repaired).stl 40.67 x 10.42 x 47.66 mm | 1.6 x 0.41 x 1.88 in
Size: 40.67 x 10.42 x 47.66 mm | 1.6 x 0.41 x 1.88 in
File size: 0.15 mb
Printing Time / Filament: 19 min / <1 m
_50_anchorPart_b_X2_FDM (repaired).stl 10.13 x 9.19 x 56.6 mm | 0.4 x 0.36 x 2.23 in
Size: 10.13 x 9.19 x 56.6 mm | 0.4 x 0.36 x 2.23 in
File size: 2.21 mb
Printing Time / Filament: 41 min / <1 m
_51_anchorPin_X2_FDM (repaired).stl 11.39 x 4.94 x 3.81 mm | 0.45 x 0.19 x 0.15 in
Size: 11.39 x 4.94 x 3.81 mm | 0.45 x 0.19 x 0.15 in
File size: 0.41 mb
Printing Time / Filament: 3 min / <1 m
_52_nosesSidePart_a_R_FDM (repaired).stl 4.39 x 5.06 x 20.75 mm | 0.17 x 0.2 x 0.82 in
Size: 4.39 x 5.06 x 20.75 mm | 0.17 x 0.2 x 0.82 in
File size: 0.03 mb
Printing Time / Filament: 20 min / <1 m
_53_nosesSidePart_b_L_FDM (repaired).stl 4.39 x 5.06 x 20.75 mm | 0.17 x 0.2 x 0.82 in
Size: 4.39 x 5.06 x 20.75 mm | 0.17 x 0.2 x 0.82 in
File size: 0.03 mb
Printing Time / Filament: 20 min / <1 m
_54_bodyDecorPart_a_FDM (repaired).stl 22.68 x 33.63 x 9.47 mm | 0.89 x 1.32 x 0.37 in
Size: 22.68 x 33.63 x 9.47 mm | 0.89 x 1.32 x 0.37 in
File size: 0.19 mb
Printing Time / Filament: 48 min / <1 m
_55_bodyDecorPart_b_FDM (repaired).stl 19.01 x 9.42 x 20.38 mm | 0.75 x 0.37 x 0.8 in
Size: 19.01 x 9.42 x 20.38 mm | 0.75 x 0.37 x 0.8 in
File size: 0.24 mb
Printing Time / Filament: 32 min / <1 m
_56_steeringWheelStand_FDM (repaired).stl 14.98 x 15.83 x 22.14 mm | 0.59 x 0.62 x 0.87 in
Size: 14.98 x 15.83 x 22.14 mm | 0.59 x 0.62 x 0.87 in
File size: 0.21 mb
Printing Time / Filament: 32 min / <1 m
_57_steeringWheelBody_FDM (repaired).stl 8.36 x 8.36 x 11.03 mm | 0.33 x 0.33 x 0.43 in
Size: 8.36 x 8.36 x 11.03 mm | 0.33 x 0.33 x 0.43 in
File size: 1.39 mb
Printing Time / Filament: 10 min / <1 m
_58_steeringWheelAxis_FDM (repaired).stl 3.2 x 15.8 x 2.85 mm | 0.13 x 0.62 x 0.11 in
Size: 3.2 x 15.8 x 2.85 mm | 0.13 x 0.62 x 0.11 in
File size: 0.09 mb
Printing Time / Filament: 3 min / <1 m
_59_steeringWheel_FDM (repaired).stl 24.62 x 24.62 x 2.3 mm | 0.97 x 0.97 x 0.09 in
Size: 24.62 x 24.62 x 2.3 mm | 0.97 x 0.97 x 0.09 in
File size: 4.81 mb
Printing Time / Filament: 12 min / <1 m
_60_bellStandPart_a_X2_FDM (repaired).stl 5.21 x 5.21 x 28.71 mm | 0.21 x 0.21 x 1.13 in
Size: 5.21 x 5.21 x 28.71 mm | 0.21 x 0.21 x 1.13 in
File size: 0.04 mb
Printing Time / Filament: 23 min / <1 m
_61_bellStandPart_b_FDM (repaired).stl 27.79 x 8.45 x 8.05 mm | 1.09 x 0.33 x 0.32 in
Size: 27.79 x 8.45 x 8.05 mm | 1.09 x 0.33 x 0.32 in
File size: 0.22 mb
Printing Time / Filament: 12 min / <1 m
_62_bell_FDM (repaired).stl 18.67 x 7.95 x 13.04 mm | 0.74 x 0.31 x 0.51 in
Size: 18.67 x 7.95 x 13.04 mm | 0.74 x 0.31 x 0.51 in
File size: 2.56 mb
Printing Time / Filament: 11 min / <1 m
_63_bodyDecorPart_c_X2_FDM (repaired).stl 8.3 x 19.56 x 5.56 mm | 0.33 x 0.77 x 0.22 in
Size: 8.3 x 19.56 x 5.56 mm | 0.33 x 0.77 x 0.22 in
File size: 1.17 mb
Printing Time / Filament: 6 min / <1 m
_64_bodyDecorPart_d_X22_FDM (repaired).stl 11.07 x 5.66 x 3 mm | 0.44 x 0.22 x 0.12 in
Size: 11.07 x 5.66 x 3 mm | 0.44 x 0.22 x 0.12 in
File size: 0.07 mb
Printing Time / Filament: 2 min / <1 m
_65_vantHolder_a_FrontL_FDM (repaired).stl 91.19 x 16.06 x 17.72 mm | 3.59 x 0.63 x 0.7 in
Size: 91.19 x 16.06 x 17.72 mm | 3.59 x 0.63 x 0.7 in
File size: 0.67 mb
Printing Time / Filament: 1 h 13 min / 1 m
_66_vantHolder_b_MidL_FDM (repaired).stl 77.89 x 18.43 x 17.28 mm | 3.07 x 0.73 x 0.68 in
Size: 77.89 x 18.43 x 17.28 mm | 3.07 x 0.73 x 0.68 in
File size: 0.64 mb
Printing Time / Filament: 58 min / <1 m
_67_vantHolder_c_RearL_FDM (repaired).stl 19.76 x 14.33 x 13.77 mm | 0.78 x 0.56 x 0.54 in
Size: 19.76 x 14.33 x 13.77 mm | 0.78 x 0.56 x 0.54 in
File size: 0.14 mb
Printing Time / Filament: 16 min / <1 m
_68_vantHolder_d_RearL_FDM (repaired).stl 27.68 x 16.53 x 13.8 mm | 1.09 x 0.65 x 0.54 in
Size: 27.68 x 16.53 x 13.8 mm | 1.09 x 0.65 x 0.54 in
File size: 0.19 mb
Printing Time / Filament: 20 min / <1 m
_69_vantHolder_e_FrontLR_FDM (repaired).stl 91.19 x 16.06 x 17.72 mm | 3.59 x 0.63 x 0.7 in
Size: 91.19 x 16.06 x 17.72 mm | 3.59 x 0.63 x 0.7 in
File size: 0.67 mb
Printing Time / Filament: 1 h 14 min / 1 m
_70_vantHolder_f_MidR_FDM (repaired).stl 77.89 x 18.44 x 17.28 mm | 3.07 x 0.73 x 0.68 in
Size: 77.89 x 18.44 x 17.28 mm | 3.07 x 0.73 x 0.68 in
File size: 0.64 mb
Printing Time / Filament: 58 min / <1 m
_71_vantHolder_g_ReaR_FDM (repaired).stl 19.76 x 14.33 x 13.78 mm | 0.78 x 0.56 x 0.54 in
Size: 19.76 x 14.33 x 13.78 mm | 0.78 x 0.56 x 0.54 in
File size: 0.14 mb
Printing Time / Filament: 16 min / <1 m
_72_vantHolder_h_RearR_FDM (repaired).stl 27.68 x 16.53 x 13.8 mm | 1.09 x 0.65 x 0.54 in
Size: 27.68 x 16.53 x 13.8 mm | 1.09 x 0.65 x 0.54 in
File size: 0.19 mb
Printing Time / Filament: 20 min / <1 m
_73_sidePanel_X4_FDM (repaired).stl 8.12 x 48.06 x 1.2 mm | 0.32 x 1.89 x 0.05 in
Size: 8.12 x 48.06 x 1.2 mm | 0.32 x 1.89 x 0.05 in
File size: 0.08 mb
Printing Time / Filament: 5 min / <1 m
_74_sidePart_X28_FDM (repaired).stl 2.84 x 9.4 x 6.32 mm | 0.11 x 0.37 x 0.25 in
Size: 2.84 x 9.4 x 6.32 mm | 0.11 x 0.37 x 0.25 in
File size: 0.10 mb
Printing Time / Filament: 3 min / <1 m
_75_sideStep_X16_FDM (repaired).stl 6.25 x 9.81 x 2.2 mm | 0.25 x 0.39 x 0.09 in
Size: 6.25 x 9.81 x 2.2 mm | 0.25 x 0.39 x 0.09 in
File size: 0.06 mb
Printing Time / Filament: 2 min / <1 m
_76_cannonBallsHolder_X10_FDM (repaired).stl 9.62 x 9.62 x 4.59 mm | 0.38 x 0.38 x 0.18 in
Size: 9.62 x 9.62 x 4.59 mm | 0.38 x 0.38 x 0.18 in
File size: 0.35 mb
Printing Time / Filament: 4 min / <1 m
_77_cannon_a_X12_FDM (repaired).stl 5.81 x 5.81 x 33 mm | 0.23 x 0.23 x 1.3 in
Size: 5.81 x 5.81 x 33 mm | 0.23 x 0.23 x 1.3 in
File size: 7.03 mb
Printing Time / Filament: 13 min / <1 m
_78_cannon_b_X20_FDM (repaired).stl 10.15 x 10 x 30.59 mm | 0.4 x 0.39 x 1.2 in
Size: 10.15 x 10 x 30.59 mm | 0.4 x 0.39 x 1.2 in
File size: 4.01 mb
Printing Time / Filament: 29 min / <1 m
_79_cannonCarriage_V1_X12_FDM (repaired).stl 28.67 x 23.23 x 10.31 mm | 1.13 x 0.91 x 0.41 in
Size: 28.67 x 23.23 x 10.31 mm | 1.13 x 0.91 x 0.41 in
File size: 3.03 mb
Printing Time / Filament: 21 min / <1 m
_80_cannonBodyDoor_a_L_FDM (repaired).stl 6.39 x 9.73 x 12.17 mm | 0.25 x 0.38 x 0.48 in
Size: 6.39 x 9.73 x 12.17 mm | 0.25 x 0.38 x 0.48 in
File size: 0.36 mb
Printing Time / Filament: 7 min / <1 m
_81_cannonBodyDoor_a_R_FDM (repaired).stl 6.39 x 9.73 x 12.17 mm | 0.25 x 0.38 x 0.48 in
Size: 6.39 x 9.73 x 12.17 mm | 0.25 x 0.38 x 0.48 in
File size: 0.36 mb
Printing Time / Filament: 7 min / <1 m
_82_cannonBodyDoor_b_L_FDM (repaired).stl 2.92 x 10.35 x 12.15 mm | 0.11 x 0.41 x 0.48 in
Size: 2.92 x 10.35 x 12.15 mm | 0.11 x 0.41 x 0.48 in
File size: 0.34 mb
Printing Time / Filament: 7 min / <1 m
_83_cannonBodyDoor_b_R_FDM (repaired).stl 3.03 x 12.14 x 10.29 mm | 0.12 x 0.48 x 0.41 in
Size: 3.03 x 12.14 x 10.29 mm | 0.12 x 0.48 x 0.41 in
File size: 0.34 mb
Printing Time / Filament: 7 min / <1 m
_84_cannonBodyDoor_c_L_FDM (repaired).stl 3.51 x 10.36 x 12.19 mm | 0.14 x 0.41 x 0.48 in
Size: 3.51 x 10.36 x 12.19 mm | 0.14 x 0.41 x 0.48 in
File size: 0.34 mb
Printing Time / Filament: 7 min / <1 m
_85_cannonBodyDoor_c_R_FDM (repaired).stl 3.51 x 10.36 x 12.19 mm | 0.14 x 0.41 x 0.48 in
Size: 3.51 x 10.36 x 12.19 mm | 0.14 x 0.41 x 0.48 in
File size: 0.34 mb
Printing Time / Filament: 7 min / <1 m
_86_cannonBodyDoor_d_L_FDM (repaired).stl 4.06 x 10.37 x 12.03 mm | 0.16 x 0.41 x 0.47 in
Size: 4.06 x 10.37 x 12.03 mm | 0.16 x 0.41 x 0.47 in
File size: 0.35 mb
Printing Time / Filament: 7 min / <1 m
_87_cannonBodyDoor_d_R_FDM (repaired).stl 4.06 x 10.37 x 12.03 mm | 0.16 x 0.41 x 0.47 in
Size: 4.06 x 10.37 x 12.03 mm | 0.16 x 0.41 x 0.47 in
File size: 0.35 mb
Printing Time / Filament: 7 min / <1 m
_88_cannonBodyDoor_e_L_FDM (repaired).stl 4.3 x 10.33 x 12.12 mm | 0.17 x 0.41 x 0.48 in
Size: 4.3 x 10.33 x 12.12 mm | 0.17 x 0.41 x 0.48 in
File size: 0.35 mb
Printing Time / Filament: 7 min / <1 m
_89_cannonBodyDoor_e_R_FDM (repaired).stl 4.3 x 10.33 x 12.12 mm | 0.17 x 0.41 x 0.48 in
Size: 4.3 x 10.33 x 12.12 mm | 0.17 x 0.41 x 0.48 in
File size: 0.35 mb
Printing Time / Filament: 7 min / <1 m
_90_cannonBodyDoor_f_L_FDM (repaired).stl 4.24 x 10.31 x 12.13 mm | 0.17 x 0.41 x 0.48 in
Size: 4.24 x 10.31 x 12.13 mm | 0.17 x 0.41 x 0.48 in
File size: 0.35 mb
Printing Time / Filament: 7 min / <1 m
_91_cannonBodyDoor_f_R_FDM (repaired).stl 8.27 x 11.37 x 11.14 mm | 0.33 x 0.45 x 0.44 in
Size: 8.27 x 11.37 x 11.14 mm | 0.33 x 0.45 x 0.44 in
File size: 0.36 mb
Printing Time / Filament: 7 min / <1 m
_92_cannonBodyDoor_g_L_FDM (repaired).stl 4.55 x 10.4 x 12.14 mm | 0.18 x 0.41 x 0.48 in
Size: 4.55 x 10.4 x 12.14 mm | 0.18 x 0.41 x 0.48 in
File size: 0.35 mb
Printing Time / Filament: 8 min / <1 m
_93_cannonBodyDoor_g_R_FDM (repaired).stl 4.55 x 10.4 x 12.14 mm | 0.18 x 0.41 x 0.48 in
Size: 4.55 x 10.4 x 12.14 mm | 0.18 x 0.41 x 0.48 in
File size: 0.34 mb
Printing Time / Filament: 8 min / <1 m
_94_cannonBodyDoor_h_L_FDM (repaired).stl 4.08 x 10.35 x 12.15 mm | 0.16 x 0.41 x 0.48 in
Size: 4.08 x 10.35 x 12.15 mm | 0.16 x 0.41 x 0.48 in
File size: 0.34 mb
Printing Time / Filament: 7 min / <1 m
_95_cannonBodyDoor_h_R_FDM (repaired).stl 4.08 x 10.35 x 12.15 mm | 0.16 x 0.41 x 0.48 in
Size: 4.08 x 10.35 x 12.15 mm | 0.16 x 0.41 x 0.48 in
File size: 0.34 mb
Printing Time / Filament: 7 min / <1 m
_96_cannonBodyDoor_i_L_FDM (repaired).stl 3.97 x 10.35 x 12.11 mm | 0.16 x 0.41 x 0.48 in
Size: 3.97 x 10.35 x 12.11 mm | 0.16 x 0.41 x 0.48 in
File size: 0.35 mb
Printing Time / Filament: 7 min / <1 m
_97_cannonBodyDoor_i_R_FDM (repaired).stl 3.96 x 10.36 x 12.1 mm | 0.16 x 0.41 x 0.48 in
Size: 3.96 x 10.36 x 12.1 mm | 0.16 x 0.41 x 0.48 in
File size: 0.34 mb
Printing Time / Filament: 7 min / <1 m
_98_cannonBodyDoor_j_L_FDM (repaired).stl 3.25 x 10.34 x 12.17 mm | 0.13 x 0.41 x 0.48 in
Size: 3.25 x 10.34 x 12.17 mm | 0.13 x 0.41 x 0.48 in
File size: 0.33 mb
Printing Time / Filament: 7 min / <1 m
_99_cannonBodyDoor_j_R_FDM (repaired).stl 3.25 x 10.34 x 12.17 mm | 0.13 x 0.41 x 0.48 in
Size: 3.25 x 10.34 x 12.17 mm | 0.13 x 0.41 x 0.48 in
File size: 0.34 mb
Printing Time / Filament: 7 min / <1 m
_100_cannonBodyDoor_k_L_FDM (repaired).stl 4.43 x 10.47 x 12.11 mm | 0.17 x 0.41 x 0.48 in
Size: 4.43 x 10.47 x 12.11 mm | 0.17 x 0.41 x 0.48 in
File size: 0.33 mb
Printing Time / Filament: 8 min / <1 m
_101_cannonBodyDoor_k_R_FDM (repaired).stl 4.43 x 10.47 x 12.11 mm | 0.17 x 0.41 x 0.48 in
Size: 4.43 x 10.47 x 12.11 mm | 0.17 x 0.41 x 0.48 in
File size: 0.33 mb
Printing Time / Filament: 8 min / <1 m
_102_cabinDoor_FDM (repaired).stl 23.06 x 34.56 x 3.42 mm | 0.91 x 1.36 x 0.13 in
Size: 23.06 x 34.56 x 3.42 mm | 0.91 x 1.36 x 0.13 in
File size: 0.84 mb
Printing Time / Filament: 26 min / <1 m
_103_cabinDecorPart_X2_FDM (repaired).stl 6.74 x 34.06 x 4.28 mm | 0.27 x 1.34 x 0.17 in
Size: 6.74 x 34.06 x 4.28 mm | 0.27 x 1.34 x 0.17 in
File size: 30.14 mb
Printing Time / Filament: 11 min / <1 m
_104_glassFront_X4_FDM (repaired).stl 10.6 x 15.46 x 1.62 mm | 0.42 x 0.61 x 0.06 in
Size: 10.6 x 15.46 x 1.62 mm | 0.42 x 0.61 x 0.06 in
File size: 0.05 mb
Printing Time / Filament: 5 min / <1 m
_105_glassFrontFrame_X4_FDM (repaired).stl 10.6 x 15.46 x 3.1 mm | 0.42 x 0.61 x 0.12 in
Size: 10.6 x 15.46 x 3.1 mm | 0.42 x 0.61 x 0.12 in
File size: 0.36 mb
Printing Time / Filament: 5 min / <1 m
_106_tailSideGlass_a_L_X3_FDM (repaired).stl 16.79 x 23.18 x 1.47 mm | 0.66 x 0.91 x 0.06 in
Size: 16.79 x 23.18 x 1.47 mm | 0.66 x 0.91 x 0.06 in
File size: 0.04 mb
Printing Time / Filament: 7 min / <1 m
_107_tailGlass_a_FDM (repaired).stl 23.68 x 13.56 x 2.03 mm | 0.93 x 0.53 x 0.08 in
Size: 23.68 x 13.56 x 2.03 mm | 0.93 x 0.53 x 0.08 in
File size: 0.20 mb
Printing Time / Filament: 6 min / <1 m
_108_tailGlass_b_FDM (repaired) (Shell 2).stl 22.67 x 19.14 x 2.31 mm | 0.89 x 0.75 x 0.09 in
Size: 22.67 x 19.14 x 2.31 mm | 0.89 x 0.75 x 0.09 in
File size: 0.09 mb
Printing Time / Filament: 8 min / <1 m
_109_tailGlass_c_FDM (repaired).stl 14.94 x 22.05 x 2.45 mm | 0.59 x 0.87 x 0.1 in
Size: 14.94 x 22.05 x 2.45 mm | 0.59 x 0.87 x 0.1 in
File size: 0.24 mb
Printing Time / Filament: 9 min / <1 m
_110_tailGlass_d_FDM (repaired).stl 22.67 x 19.13 x 2.31 mm | 0.89 x 0.75 x 0.09 in
Size: 22.67 x 19.13 x 2.31 mm | 0.89 x 0.75 x 0.09 in
File size: 0.23 mb
Printing Time / Filament: 8 min / <1 m
_111_tailGlass_e_FDM (repaired).stl 23.68 x 13.58 x 2.02 mm | 0.93 x 0.53 x 0.08 in
Size: 23.68 x 13.58 x 2.02 mm | 0.93 x 0.53 x 0.08 in
File size: 0.20 mb
Printing Time / Filament: 6 min / <1 m
_112_sideGlassGrid_a_L_X3_FDM (repaired).stl 21.22 x 22.14 x 1.57 mm | 0.84 x 0.87 x 0.06 in
Size: 21.22 x 22.14 x 1.57 mm | 0.84 x 0.87 x 0.06 in
File size: 0.28 mb
Printing Time / Filament: 5 min / <1 m
_113_tailGlassGreed_a_FDM (repaired).stl 24.99 x 14.98 x 1.88 mm | 0.98 x 0.59 x 0.07 in
Size: 24.99 x 14.98 x 1.88 mm | 0.98 x 0.59 x 0.07 in
File size: 0.31 mb
Printing Time / Filament: 5 min / <1 m
_114_tailGlassGreed_b_FDM (repaired).stl 23.01 x 19.6 x 2.35 mm | 0.91 x 0.77 x 0.09 in
Size: 23.01 x 19.6 x 2.35 mm | 0.91 x 0.77 x 0.09 in
File size: 0.34 mb
Printing Time / Filament: 7 min / <1 m
_115_tailGlassGreed_c_FDM (repaired).stl 15.42 x 22.74 x 2.04 mm | 0.61 x 0.9 x 0.08 in
Size: 15.42 x 22.74 x 2.04 mm | 0.61 x 0.9 x 0.08 in
File size: 0.37 mb
Printing Time / Filament: 7 min / <1 m
_116_tailGlassGreed_d_FDM (repaired).stl 23.01 x 19.49 x 2.3 mm | 0.91 x 0.77 x 0.09 in
Size: 23.01 x 19.49 x 2.3 mm | 0.91 x 0.77 x 0.09 in
File size: 0.34 mb
Printing Time / Filament: 7 min / <1 m
_117_tailGlassGreed_e_FDM (repaired).stl 25 x 14.99 x 1.99 mm | 0.98 x 0.59 x 0.08 in
Size: 25 x 14.99 x 1.99 mm | 0.98 x 0.59 x 0.08 in
File size: 0.31 mb
Printing Time / Filament: 5 min / <1 m
_118_tailDecorSidePart_a_V1_X3_FDM (repaired).stl 9.35 x 21.62 x 10.06 mm | 0.37 x 0.85 x 0.4 in
Size: 9.35 x 21.62 x 10.06 mm | 0.37 x 0.85 x 0.4 in
File size: 22.39 mb
Printing Time / Filament: 11 min / <1 m
_119_tailDecorSidePart_h_V1_X3_FDM (repaired).stl 9.35 x 21.62 x 10.06 mm | 0.37 x 0.85 x 0.4 in
Size: 9.35 x 21.62 x 10.06 mm | 0.37 x 0.85 x 0.4 in
File size: 22.39 mb
Printing Time / Filament: 11 min / <1 m
_120_tailDecorPart_b_V1_L_FDM (repaired).stl 13.29 x 19.46 x 10.11 mm | 0.52 x 0.77 x 0.4 in
Size: 13.29 x 19.46 x 10.11 mm | 0.52 x 0.77 x 0.4 in
File size: 22.91 mb
Printing Time / Filament: 11 min / <1 m
_121_tailDecorPart_c_V1_L_FDM (repaired).stl 20.71 x 17.09 x 11.46 mm | 0.82 x 0.67 x 0.45 in
Size: 20.71 x 17.09 x 11.46 mm | 0.82 x 0.67 x 0.45 in
File size: 22.23 mb
Printing Time / Filament: 12 min / <1 m
_122_tailDecorPart_d_V1_MidL_FDM (repaired).stl 14.56 x 22.33 x 11.29 mm | 0.57 x 0.88 x 0.44 in
Size: 14.56 x 22.33 x 11.29 mm | 0.57 x 0.88 x 0.44 in
File size: 22.42 mb
Printing Time / Filament: 13 min / <1 m
_123_tailDecorPart_e_V1_MidR_FDM (repaired).stl 6.13 x 19.98 x 17.23 mm | 0.24 x 0.79 x 0.68 in
Size: 6.13 x 19.98 x 17.23 mm | 0.24 x 0.79 x 0.68 in
File size: 22.42 mb
Printing Time / Filament: 18 min / <1 m
_124_tailDecorPart_f_V1_R_FDM (repaired).stl 20.71 x 17.09 x 11.46 mm | 0.82 x 0.67 x 0.45 in
Size: 20.71 x 17.09 x 11.46 mm | 0.82 x 0.67 x 0.45 in
File size: 22.23 mb
Printing Time / Filament: 13 min / <1 m
_125_tailDecorPart_g_V1_L_FDM (repaired).stl 13.29 x 19.46 x 10.11 mm | 0.52 x 0.77 x 0.4 in
Size: 13.29 x 19.46 x 10.11 mm | 0.52 x 0.77 x 0.4 in
File size: 22.90 mb
Printing Time / Filament: 12 min / <1 m
_126_tailDecorSidePart_a_V2_L_X3_FDM (repaired).stl 9.35 x 21.6 x 10.06 mm | 0.37 x 0.85 x 0.4 in
Size: 9.35 x 21.6 x 10.06 mm | 0.37 x 0.85 x 0.4 in
File size: 6.15 mb
Printing Time / Filament: 9 min / <1 m
_127_tailDecorSidePart_h_V2_R_X3_FDM (repaired).stl 9.35 x 21.6 x 10.06 mm | 0.37 x 0.85 x 0.4 in
Size: 9.35 x 21.6 x 10.06 mm | 0.37 x 0.85 x 0.4 in
File size: 6.14 mb
Printing Time / Filament: 9 min / <1 m
_128_tailDecorPart_b_V2_L_FDM (repaired).stl 13.68 x 19.83 x 11.57 mm | 0.54 x 0.78 x 0.46 in
Size: 13.68 x 19.83 x 11.57 mm | 0.54 x 0.78 x 0.46 in
File size: 5.90 mb
Printing Time / Filament: 9 min / <1 m
_129_tailDecorPart_c_V2_L_FDM (repaired).stl 20.66 x 17.18 x 11.46 mm | 0.81 x 0.68 x 0.45 in
Size: 20.66 x 17.18 x 11.46 mm | 0.81 x 0.68 x 0.45 in
File size: 5.66 mb
Printing Time / Filament: 10 min / <1 m
_130_tailDecorPart_d_V2_MidL_FDM (repaired).stl 14.56 x 22.33 x 11.32 mm | 0.57 x 0.88 x 0.45 in
Size: 14.56 x 22.33 x 11.32 mm | 0.57 x 0.88 x 0.45 in
File size: 5.52 mb
Printing Time / Filament: 10 min / <1 m
_131_tailDecorPart_e_V2_MidR_FDM (repaired).stl 14.57 x 22.33 x 11.32 mm | 0.57 x 0.88 x 0.45 in
Size: 14.57 x 22.33 x 11.32 mm | 0.57 x 0.88 x 0.45 in
File size: 5.52 mb
Printing Time / Filament: 10 min / <1 m
_132_tailDecorPart_f_V2_R_FDM (repaired).stl 20.66 x 17.18 x 11.46 mm | 0.81 x 0.68 x 0.45 in
Size: 20.66 x 17.18 x 11.46 mm | 0.81 x 0.68 x 0.45 in
File size: 5.66 mb
Printing Time / Filament: 10 min / <1 m
_133_tailDecorPart_g_V2_R_FDM (repaired).stl 13.68 x 19.83 x 11.57 mm | 0.54 x 0.78 x 0.46 in
Size: 13.68 x 19.83 x 11.57 mm | 0.54 x 0.78 x 0.46 in
File size: 5.84 mb
Printing Time / Filament: 9 min / <1 m
_134_tailDecor_a_L_FDM (repaired).stl 27.34 x 13.02 x 22.4 mm | 1.08 x 0.51 x 0.88 in
Size: 27.34 x 13.02 x 22.4 mm | 1.08 x 0.51 x 0.88 in
File size: 30.17 mb
Printing Time / Filament: 22 min / <1 m
_135_tailDecor_b_R_FDM (repaired).stl 27 x 13.27 x 22.34 mm | 1.06 x 0.52 x 0.88 in
Size: 27 x 13.27 x 22.34 mm | 1.06 x 0.52 x 0.88 in
File size: 30.00 mb
Printing Time / Filament: 22 min / <1 m
_136_tailLightPart_a_X3_FDM (repaired).stl 13.46 x 13.46 x 22.69 mm | 0.53 x 0.53 x 0.89 in
Size: 13.46 x 13.46 x 22.69 mm | 0.53 x 0.53 x 0.89 in
File size: 3.03 mb
Printing Time / Filament: 16 min / <1 m
_137_tailLightPart_b_X3_FDM (repaired).stl 13.4 x 13.4 x 10.56 mm | 0.53 x 0.53 x 0.42 in
Size: 13.4 x 13.4 x 10.56 mm | 0.53 x 0.53 x 0.42 in
File size: 7.52 mb
Printing Time / Filament: 8 min / <1 m
_138_tailLightGlass_X3_FDM (repaired).stl 10.71 x 10.71 x 12.41 mm | 0.42 x 0.42 x 0.49 in
Size: 10.71 x 10.71 x 12.41 mm | 0.42 x 0.42 x 0.49 in
File size: 0.06 mb
Printing Time / Filament: 10 min / <1 m
_139_latrineFigure_FDM (repaired).stl 37.22 x 65.85 x 45.65 mm | 1.47 x 2.59 x 1.8 in
Size: 37.22 x 65.85 x 45.65 mm | 1.47 x 2.59 x 1.8 in
File size: 76.14 mb
Printing Time / Filament: 3 h 32 min / 2 m
_140_boegspriet_FDM (repaired).stl 7.9 x 7.88 x 197.65 mm | 0.31 x 0.31 x 7.78 in
Size: 7.9 x 7.88 x 197.65 mm | 0.31 x 0.31 x 7.78 in
File size: 1.53 mb
Printing Time / Filament: 3 h 20 min / 1 m
_141_foremastPart_h_FDM (repaired).stl 10.26 x 17.34 x 195.55 mm | 0.4 x 0.68 x 7.7 in
Size: 10.26 x 17.34 x 195.55 mm | 0.4 x 0.68 x 7.7 in
File size: 5.48 mb
Printing Time / Filament: 3 h 15 min / 1 m
_142_foremastMainTop_FDM (repaired).stl 66.7 x 49.89 x 4 mm | 2.63 x 1.96 x 0.16 in
Size: 66.7 x 49.89 x 4 mm | 2.63 x 1.96 x 0.16 in
File size: 0.49 mb
Printing Time / Filament: 1 h 58 min / 1 m
_143_topRailing_a_X2_FDM (repaired).stl 66.27 x 19.74 x 3.33 mm | 2.61 x 0.78 x 0.13 in
Size: 66.27 x 19.74 x 3.33 mm | 2.61 x 0.78 x 0.13 in
File size: 0.19 mb
Printing Time / Filament: 17 min / <1 m
_144_foremastPart_b_FDM (repaired).stl 8.25 x 121.85 x 122.42 mm | 0.32 x 4.8 x 4.82 in
Size: 8.25 x 121.85 x 122.42 mm | 0.32 x 4.8 x 4.82 in
File size: 3.02 mb
Printing Time / Filament: 2 h 2 min / 1 m
_145_foremastPart_e_FDM (repaired).stl 11.1 x 21.91 x 5 mm | 0.44 x 0.86 x 0.2 in
Size: 11.1 x 21.91 x 5 mm | 0.44 x 0.86 x 0.2 in
File size: 0.34 mb
Printing Time / Filament: 10 min / <1 m
_146_foremastCrosstrees_a_FDM (repaired).stl 40.33 x 22.79 x 4.71 mm | 1.59 x 0.9 x 0.19 in
Size: 40.33 x 22.79 x 4.71 mm | 1.59 x 0.9 x 0.19 in
File size: 1.07 mb
Printing Time / Filament: 25 min / <1 m
_147_foremastPart_c_FDM (repaired).stl 6.81 x 84.84 x 84.77 mm | 0.27 x 3.34 x 3.34 in
Size: 6.81 x 84.84 x 84.77 mm | 0.27 x 3.34 x 3.34 in
File size: 2.26 mb
Printing Time / Filament: 1 h 2 min / <1 m
_148_foremastPart_f_FDM (repaired).stl 9.21 x 17.53 x 5 mm | 0.36 x 0.69 x 0.2 in
Size: 9.21 x 17.53 x 5 mm | 0.36 x 0.69 x 0.2 in
File size: 0.49 mb
Printing Time / Filament: 8 min / <1 m
_149_foremastCrosstrees_b_FDM (repaired).stl 17.01 x 15.03 x 4 mm | 0.67 x 0.59 x 0.16 in
Size: 17.01 x 15.03 x 4 mm | 0.67 x 0.59 x 0.16 in
File size: 0.91 mb
Printing Time / Filament: 8 min / <1 m
_150_foremastPart_d_FDM (repaired).stl 5 x 5 x 92.12 mm | 0.2 x 0.2 x 3.63 in
Size: 5 x 5 x 92.12 mm | 0.2 x 0.2 x 3.63 in
File size: 0.42 mb
Printing Time / Filament: 22 min / <1 m
_151_yardConnector_a_X3_FDM (repaired).stl 8.42 x 11.99 x 3.84 mm | 0.33 x 0.47 x 0.15 in
Size: 8.42 x 11.99 x 3.84 mm | 0.33 x 0.47 x 0.15 in
File size: 3.27 mb
Printing Time / Filament: 4 min / <1 m
_152_yardPart_X4_FDM (repaired).stl 7.3 x 7.3 x 67.69 mm | 0.29 x 0.29 x 2.66 in
Size: 7.3 x 7.3 x 67.69 mm | 0.29 x 0.29 x 2.66 in
File size: 3.25 mb
Printing Time / Filament: 1 h 8 min / <1 m
_153_foremastYardPart_a_X2_FDM (repaired).stl 7.12 x 7.12 x 90.62 mm | 0.28 x 0.28 x 3.57 in
Size: 7.12 x 7.12 x 90.62 mm | 0.28 x 0.28 x 3.57 in
File size: 1.12 mb
Printing Time / Filament: 58 min / <1 m
_154_foremastYard_b_FDM (repaired).stl 9.67 x 7.34 x 183.42 mm | 0.38 x 0.29 x 7.22 in
Size: 9.67 x 7.34 x 183.42 mm | 0.38 x 0.29 x 7.22 in
File size: 4.77 mb
Printing Time / Filament: 1 h 47 min / <1 m
_155_foremastYard_c_FDM (repaired).stl 8.17 x 7.36 x 143.82 mm | 0.32 x 0.29 x 5.66 in
Size: 8.17 x 7.36 x 143.82 mm | 0.32 x 0.29 x 5.66 in
File size: 4.69 mb
Printing Time / Filament: 1 h 28 min / <1 m
_156_foremastYardConnector_a_FDM (repaired).stl 7.46 x 11.41 x 5.49 mm | 0.29 x 0.45 x 0.22 in
Size: 7.46 x 11.41 x 5.49 mm | 0.29 x 0.45 x 0.22 in
File size: 2.66 mb
Printing Time / Filament: 5 min / <1 m
_157_foremastYardConnector_b_FDM (repaired).stl 7.46 x 11.41 x 7.27 mm | 0.29 x 0.45 x 0.29 in
Size: 7.46 x 11.41 x 7.27 mm | 0.29 x 0.45 x 0.29 in
File size: 3.26 mb
Printing Time / Filament: 6 min / <1 m
_158_mainmastPart_h_FDM (repaired).stl 11.25 x 11.25 x 73.7 mm | 0.44 x 0.44 x 2.9 in
Size: 11.25 x 11.25 x 73.7 mm | 0.44 x 0.44 x 2.9 in
File size: 3.43 mb
Printing Time / Filament: 1 h 14 min / 1 m
_159_mainmastPart_a_FDM (repaired).stl 10.42 x 17.34 x 172.21 mm | 0.41 x 0.68 x 6.78 in
Size: 10.42 x 17.34 x 172.21 mm | 0.41 x 0.68 x 6.78 in
File size: 8.88 mb
Printing Time / Filament: 3 h 11 min / 1 m
_160_mainmastMainTop_FDM (repaired).stl 66.7 x 4 x 49.89 mm | 2.63 x 0.16 x 1.96 in
Size: 66.7 x 4 x 49.89 mm | 2.63 x 0.16 x 1.96 in
File size: 0.56 mb
Printing Time / Filament: 2 h 54 min / 1 m
_161_mainmastPart_b_FDM (repaired).stl 8.25 x 130.37 x 130.29 mm | 0.32 x 5.13 x 5.13 in
Size: 8.25 x 130.37 x 130.29 mm | 0.32 x 5.13 x 5.13 in
File size: 2.98 mb
Printing Time / Filament: 2 h 12 min / 1 m
_162_mainmastPart_e_FDM (repaired).stl 11.1 x 21.91 x 5 mm | 0.44 x 0.86 x 0.2 in
Size: 11.1 x 21.91 x 5 mm | 0.44 x 0.86 x 0.2 in
File size: 0.35 mb
Printing Time / Filament: 10 min / <1 m
_163_mainmastCrosstrees_a_FDM (repaired).stl 42 x 22.79 x 4.71 mm | 1.65 x 0.9 x 0.19 in
Size: 42 x 22.79 x 4.71 mm | 1.65 x 0.9 x 0.19 in
File size: 1.05 mb
Printing Time / Filament: 25 min / <1 m
_164_mainmastPart_c_FDM (repaired).stl 6.66 x 94.58 x 94.28 mm | 0.26 x 3.72 x 3.71 in
Size: 6.66 x 94.58 x 94.28 mm | 0.26 x 3.72 x 3.71 in
File size: 1.70 mb
Printing Time / Filament: 1 h 10 min / <1 m
_165_mainmastPart_f_FDM (repaired).stl 9.21 x 17.53 x 5 mm | 0.36 x 0.69 x 0.2 in
Size: 9.21 x 17.53 x 5 mm | 0.36 x 0.69 x 0.2 in
File size: 0.49 mb
Printing Time / Filament: 8 min / <1 m
_166_mainmastCrosstrees_b_FDM (repaired).stl 17.01 x 15.03 x 4 mm | 0.67 x 0.59 x 0.16 in
Size: 17.01 x 15.03 x 4 mm | 0.67 x 0.59 x 0.16 in
File size: 0.89 mb
Printing Time / Filament: 8 min / <1 m
_167_mainmastPart_d_FDM (repaired).stl 5 x 5 x 76.48 mm | 0.2 x 0.2 x 3.01 in
Size: 5 x 5 x 76.48 mm | 0.2 x 0.2 x 3.01 in
File size: 0.36 mb
Printing Time / Filament: 19 min / <1 m
_168_mainmastPart_g_FDM (repaired).stl 9.21 x 13.92 x 3.88 mm | 0.36 x 0.55 x 0.15 in
Size: 9.21 x 13.92 x 3.88 mm | 0.36 x 0.55 x 0.15 in
File size: 0.29 mb
Printing Time / Filament: 5 min / <1 m
_169_mainmastPart_i_FDM (repaired).stl 22.14 x 22.27 x 5.8 mm | 0.87 x 0.88 x 0.23 in
Size: 22.14 x 22.27 x 5.8 mm | 0.87 x 0.88 x 0.23 in
File size: 0.28 mb
Printing Time / Filament: 25 min / <1 m
_170_mainmastPart_j_FDM (repaired).stl 19.69 x 19.69 x 15.4 mm | 0.78 x 0.78 x 0.61 in
Size: 19.69 x 19.69 x 15.4 mm | 0.78 x 0.78 x 0.61 in
File size: 0.51 mb
Printing Time / Filament: 25 min / <1 m
_171_mainmastPart_k_X8_FDM (repaired).stl 2 x 18.74 x 2 mm | 0.08 x 0.74 x 0.08 in
Size: 2 x 18.74 x 2 mm | 0.08 x 0.74 x 0.08 in
File size: 0.01 mb
Printing Time / Filament: 2 min / <1 m
_172_mainmastPin_FDM (repaired).stl 4.35 x 88.31 x 4.35 mm | 0.17 x 3.48 x 0.17 in
Size: 4.35 x 88.31 x 4.35 mm | 0.17 x 3.48 x 0.17 in
File size: 0.01 mb
Printing Time / Filament: 18 min / <1 m
_173_mainmastYardPart_a_X2_FDM (repaired).stl 38.54 x 38.65 x 95.73 mm | 1.52 x 1.52 x 3.77 in
Size: 38.54 x 38.65 x 95.73 mm | 1.52 x 1.52 x 3.77 in
File size: 1.27 mb
Printing Time / Filament: 1 h 40 min / 1 m
_174_mainmastYardPart_b_X2_FDM (repaired).stl 7.12 x 7.12 x 72.32 mm | 0.28 x 0.28 x 2.85 in
Size: 7.12 x 7.12 x 72.32 mm | 0.28 x 0.28 x 2.85 in
File size: 1.12 mb
Printing Time / Filament: 49 min / <1 m
_175_mainmastYard_c_FDM (repaired).stl 10.32 x 7.35 x 143.78 mm | 0.41 x 0.29 x 5.66 in
Size: 10.32 x 7.35 x 143.78 mm | 0.41 x 0.29 x 5.66 in
File size: 4.62 mb
Printing Time / Filament: 1 h 48 min / <1 m
_176_mainmastYardConnector_a_FDM (repaired).stl 7.46 x 11.59 x 5.49 mm | 0.29 x 0.46 x 0.22 in
Size: 7.46 x 11.59 x 5.49 mm | 0.29 x 0.46 x 0.22 in
File size: 2.68 mb
Printing Time / Filament: 5 min / <1 m
_177_mainmastYardConnector_b_FDM (repaired).stl 7.46 x 11.37 x 6.43 mm | 0.29 x 0.45 x 0.25 in
Size: 7.46 x 11.37 x 6.43 mm | 0.29 x 0.45 x 0.25 in
File size: 3.48 mb
Printing Time / Filament: 6 min / <1 m
_178_mizzenmastPart_a_FDM (repaired).stl 8.2 x 15.92 x 145.56 mm | 0.32 x 0.63 x 5.73 in
Size: 8.2 x 15.92 x 145.56 mm | 0.32 x 0.63 x 5.73 in
File size: 6.38 mb
Printing Time / Filament: 2 h 22 min / 1 m
_179_mizzenmastMainTop_FDM (repaired).stl 46.13 x 35.93 x 3.59 mm | 1.82 x 1.41 x 0.14 in
Size: 46.13 x 35.93 x 3.59 mm | 1.82 x 1.41 x 0.14 in
File size: 0.39 mb
Printing Time / Filament: 1 h 4 min / 1 m
_180_mainTopRailing_b_FDM (repaired).stl 48.43 x 19.74 x 3.33 mm | 1.91 x 0.78 x 0.13 in
Size: 48.43 x 19.74 x 3.33 mm | 1.91 x 0.78 x 0.13 in
File size: 0.29 mb
Printing Time / Filament: 14 min / <1 m
_181_mizzenmastPart_b_FDM (repaired).stl 7.47 x 123.83 x 123.4 mm | 0.29 x 4.88 x 4.86 in
Size: 7.47 x 123.83 x 123.4 mm | 0.29 x 4.88 x 4.86 in
File size: 2.77 mb
Printing Time / Filament: 1 h 55 min / 1 m
_182_mizzenmastPart_d_FDM (repaired).stl 11.1 x 18.33 x 5 mm | 0.44 x 0.72 x 0.2 in
Size: 11.1 x 18.33 x 5 mm | 0.44 x 0.72 x 0.2 in
File size: 0.28 mb
Printing Time / Filament: 9 min / <1 m
_183_mizzenmastCrosstrees_FDM (repaired).stl 43.7 x 23.06 x 4.71 mm | 1.72 x 0.91 x 0.19 in
Size: 43.7 x 23.06 x 4.71 mm | 1.72 x 0.91 x 0.19 in
File size: 0.97 mb
Printing Time / Filament: 27 min / <1 m
_184_mizzenmastPart_c_FDM (repaired).stl 5.8 x 5.8 x 87.98 mm | 0.23 x 0.23 x 3.46 in
Size: 5.8 x 5.8 x 87.98 mm | 0.23 x 0.23 x 3.46 in
File size: 0.38 mb
Printing Time / Filament: 28 min / <1 m
_185_mizzenmastPart_e_FDM (repaired).stl 8.71 x 13.93 x 5.02 mm | 0.34 x 0.55 x 0.2 in
Size: 8.71 x 13.93 x 5.02 mm | 0.34 x 0.55 x 0.2 in
File size: 0.29 mb
Printing Time / Filament: 6 min / <1 m
_186_mizzenmastYardPart_a_X2_FDM (repaired).stl 31.09 x 22.58 x 64.16 mm | 1.22 x 0.89 x 2.53 in
Size: 31.09 x 22.58 x 64.16 mm | 1.22 x 0.89 x 2.53 in
File size: 0.91 mb
Printing Time / Filament: 41 min / <1 m
_187_mizzenmastYard_b_FDM (repaired).stl 13.1 x 7.82 x 168.7 mm | 0.52 x 0.31 x 6.64 in
Size: 13.1 x 7.82 x 168.7 mm | 0.52 x 0.31 x 6.64 in
File size: 4.96 mb
Printing Time / Filament: 1 h 38 min / <1 m
_188_bezaanPart_a_FDM (repaired).stl 5.56 x 7.04 x 136.03 mm | 0.22 x 0.28 x 5.36 in
Size: 5.56 x 7.04 x 136.03 mm | 0.22 x 0.28 x 5.36 in
File size: 4.13 mb
Printing Time / Filament: 1 h 5 min / <1 m
_189_bezaanPart_b_FDM (repaired).stl 5.56 x 6.47 x 106.33 mm | 0.22 x 0.25 x 4.19 in
Size: 5.56 x 6.47 x 106.33 mm | 0.22 x 0.25 x 4.19 in
File size: 1.62 mb
Printing Time / Filament: 45 min / <1 m
_190_mizzenmastYardConnector_FDM (repaired).stl 7.46 x 11.59 x 5.49 mm | 0.29 x 0.46 x 0.22 in
Size: 7.46 x 11.59 x 5.49 mm | 0.29 x 0.46 x 0.22 in
File size: 2.70 mb
Printing Time / Filament: 5 min / <1 m
_191_pezaanPin_FDM (repaired).stl 7.19 x 2.89 x 2.73 mm | 0.28 x 0.11 x 0.11 in
Size: 7.19 x 2.89 x 2.73 mm | 0.28 x 0.11 x 0.11 in
File size: 0.01 mb
Printing Time / Filament: 2 min / <1 m
_192_yardPin_X8_FDM (repaired).stl 42.84 x 2.9 x 2.9 mm | 1.69 x 0.11 x 0.11 in
Size: 42.84 x 2.9 x 2.9 mm | 1.69 x 0.11 x 0.11 in
File size: 0.00 mb
Printing Time / Filament: 5 min / <1 m
_193_foremastVant_a_L_FDM (repaired).stl 132.48 x 166.09 x 2.62 mm | 5.22 x 6.54 x 0.1 in
Size: 132.48 x 166.09 x 2.62 mm | 5.22 x 6.54 x 0.1 in
File size: 5.88 mb
Printing Time / Filament: 43 min / <1 m
_194_foremastVant_b_R_FDM (repaired).stl 132.49 x 166.07 x 2.61 mm | 5.22 x 6.54 x 0.1 in
Size: 132.49 x 166.07 x 2.61 mm | 5.22 x 6.54 x 0.1 in
File size: 6.04 mb
Printing Time / Filament: 44 min / <1 m
_195_foremastVant_c_L_FDM (repaired).stl 44.51 x 149.25 x 2.7 mm | 1.75 x 5.88 x 0.11 in
Size: 44.51 x 149.25 x 2.7 mm | 1.75 x 5.88 x 0.11 in
File size: 2.99 mb
Printing Time / Filament: 20 min / <1 m
_196_foremastVant_d_R_FDM (repaired).stl 44.57 x 149.23 x 2.67 mm | 1.75 x 5.88 x 0.11 in
Size: 44.57 x 149.23 x 2.67 mm | 1.75 x 5.88 x 0.11 in
File size: 2.96 mb
Printing Time / Filament: 20 min / <1 m
_197_mainmasVant_a_L_FDM (repaired).stl 114.44 x 192.9 x 2.62 mm | 4.51 x 7.59 x 0.1 in
Size: 114.44 x 192.9 x 2.62 mm | 4.51 x 7.59 x 0.1 in
File size: 8.45 mb
Printing Time / Filament: 46 min / <1 m
_198_mainmasVant_b_R_FDM (repaired).stl 114.56 x 193 x 2.69 mm | 4.51 x 7.6 x 0.11 in
Size: 114.56 x 193 x 2.69 mm | 4.51 x 7.6 x 0.11 in
File size: 9.60 mb
Printing Time / Filament: 47 min / <1 m
_199_mainmasVant_c_L_FDM (repaired).stl 47.52 x 163.35 x 2.65 mm | 1.87 x 6.43 x 0.1 in
Size: 47.52 x 163.35 x 2.65 mm | 1.87 x 6.43 x 0.1 in
File size: 2.45 mb
Printing Time / Filament: 25 min / <1 m
_200_mainmasVant_d_R_FDM (repaired).stl 47.56 x 163.37 x 2.65 mm | 1.87 x 6.43 x 0.1 in
Size: 47.56 x 163.37 x 2.65 mm | 1.87 x 6.43 x 0.1 in
File size: 2.47 mb
Printing Time / Filament: 25 min / <1 m
_201_mizzenmasVant_a_L_FDM (repaired).stl 58.26 x 122.63 x 2.65 mm | 2.29 x 4.83 x 0.1 in
Size: 58.26 x 122.63 x 2.65 mm | 2.29 x 4.83 x 0.1 in
File size: 3.15 mb
Printing Time / Filament: 20 min / <1 m
_202_mizzenmasVant_b_R_FDM (repaired).stl 58.26 x 122.63 x 2.65 mm | 2.29 x 4.83 x 0.1 in
Size: 58.26 x 122.63 x 2.65 mm | 2.29 x 4.83 x 0.1 in
File size: 3.21 mb
Printing Time / Filament: 19 min / <1 m
_203_mizzenmasVant_c_L_FDM (repaired).stl 29.3 x 144.97 x 2.67 mm | 1.15 x 5.71 x 0.11 in
Size: 29.3 x 144.97 x 2.67 mm | 1.15 x 5.71 x 0.11 in
File size: 2.73 mb
Printing Time / Filament: 20 min / <1 m
_204_mizzenmasVant_d_R_FDM (repaired).stl 29.28 x 144.98 x 2.68 mm | 1.15 x 5.71 x 0.11 in
Size: 29.28 x 144.98 x 2.68 mm | 1.15 x 5.71 x 0.11 in
File size: 2.88 mb
Printing Time / Filament: 20 min / <1 m
_205_boegsprieVal_FDM (repaired).stl 130.59 x 111.1 x 0.8 mm | 5.14 x 4.37 x 0.03 in
Size: 130.59 x 111.1 x 0.8 mm | 5.14 x 4.37 x 0.03 in
File size: 0.02 mb
Printing Time / Filament: 2 min / <1 m
_206_sail_a_FDM (repaired).stl 95.97 x 93.68 x 0.82 mm | 3.78 x 3.69 x 0.03 in
Size: 95.97 x 93.68 x 0.82 mm | 3.78 x 3.69 x 0.03 in
File size: 0.12 mb
Printing Time / Filament: 23 min / <1 m
_207_sail_b_FDM (repaired).stl 114.46 x 147.64 x 1.01 mm | 4.51 x 5.81 x 0.04 in
Size: 114.46 x 147.64 x 1.01 mm | 4.51 x 5.81 x 0.04 in
File size: 0.17 mb
Printing Time / Filament: 57 min / 1 m
_208_sail_c_FDM (repaired).stl 204.93 x 90.15 x 0.8 mm | 8.07 x 3.55 x 0.03 in
Size: 204.93 x 90.15 x 0.8 mm | 8.07 x 3.55 x 0.03 in
File size: 0.38 mb
Printing Time / Filament: 1 h 23 min / 1 m
_209_sail_d_FDM (repaired).stl 166.38 x 116.48 x 0.83 mm | 6.55 x 4.59 x 0.03 in
Size: 166.38 x 116.48 x 0.83 mm | 6.55 x 4.59 x 0.03 in
File size: 0.36 mb
Printing Time / Filament: 1 h 21 min / 1 m
_210_sail_e_FDM (repaired).stl 135.01 x 72.15 x 0.84 mm | 5.32 x 2.84 x 0.03 in
Size: 135.01 x 72.15 x 0.84 mm | 5.32 x 2.84 x 0.03 in
File size: 0.19 mb
Printing Time / Filament: 41 min / 1 m
_211_sail_f_FDM (repaired).stl 228.32 x 125.04 x 0.8 mm | 8.99 x 4.92 x 0.03 in
Size: 228.32 x 125.04 x 0.8 mm | 8.99 x 4.92 x 0.03 in
File size: 0.50 mb
Printing Time / Filament: 1 h 58 min / 2 m
_212_sail_g_FDM (repaired).stl 195.17 x 134.12 x 0.8 mm | 7.68 x 5.28 x 0.03 in
Size: 195.17 x 134.12 x 0.8 mm | 7.68 x 5.28 x 0.03 in
File size: 0.44 mb
Printing Time / Filament: 1 h 44 min / 2 m
_213_sail_h_FDM (repaired).stl 151.47 x 96.92 x 0.82 mm | 5.96 x 3.82 x 0.03 in
Size: 151.47 x 96.92 x 0.82 mm | 5.96 x 3.82 x 0.03 in
File size: 0.28 mb
Printing Time / Filament: 59 min / 1 m
_214_sail_i_FDM (repaired).stl 175.72 x 116.5 x 0.84 mm | 6.92 x 4.59 x 0.03 in
Size: 175.72 x 116.5 x 0.84 mm | 6.92 x 4.59 x 0.03 in
File size: 0.21 mb
Printing Time / Filament: 48 min / 1 m
_215_sail_j_FDM (repaired).stl 162.59 x 95.79 x 0.82 mm | 6.4 x 3.77 x 0.03 in
Size: 162.59 x 95.79 x 0.82 mm | 6.4 x 3.77 x 0.03 in
File size: 0.43 mb
Printing Time / Filament: 1 h 5 min / 1 m
_216_standPart_a_F_FDM (repaired).stl 104.53 x 157.26 x 45.58 mm | 4.12 x 6.19 x 1.79 in
Size: 104.53 x 157.26 x 45.58 mm | 4.12 x 6.19 x 1.79 in
File size: 1.06 mb
Printing Time / Filament: 17 h 51 min / 10 m
_217_standPart_b_Rr_FDM (repaired).stl 104.53 x 157.26 x 50.17 mm | 4.12 x 6.19 x 1.98 in
Size: 104.53 x 157.26 x 50.17 mm | 4.12 x 6.19 x 1.98 in
File size: 0.98 mb
Printing Time / Filament: 17 h 50 min / 10 m
_218_sptandPin_X2_FDM (repaired).stl 51.4 x 51.4 x 5 mm | 2.02 x 2.02 x 0.2 in
Size: 51.4 x 51.4 x 5 mm | 2.02 x 2.02 x 0.2 in
File size: 0.00 mb
Printing Time / Filament: 18 min / <1 m
_219_standTextPlaneClear_FDM (repaired).stl 130.5 x 86.83 x 4.66 mm | 5.14 x 3.42 x 0.18 in
Size: 130.5 x 86.83 x 4.66 mm | 5.14 x 3.42 x 0.18 in
File size: 0.14 mb
Printing Time / Filament: 2 h 1 min / 1 m
_220_standTextPlaneConnector_FDM (repaired).stl 119.33 x 19.5 x 15.24 mm | 4.7 x 0.77 x 0.6 in
Size: 119.33 x 19.5 x 15.24 mm | 4.7 x 0.77 x 0.6 in
File size: 0.04 mb
Printing Time / Filament: 1 h 17 min / 1 m
_221_standTextPlaneWithText_FDM (repaired).stl 130.5 x 86.83 x 5.16 mm | 5.14 x 3.42 x 0.2 in
Size: 130.5 x 86.83 x 5.16 mm | 5.14 x 3.42 x 0.2 in
File size: 1.69 mb
Printing Time / Filament: 2 h 11 min / 1 m
_222_bags_FDM (repaired).stl 17.19 x 14.97 x 7.65 mm | 0.68 x 0.59 x 0.3 in
Size: 17.19 x 14.97 x 7.65 mm | 0.68 x 0.59 x 0.3 in
File size: 6.12 mb
Printing Time / Filament: 16 min / <1 m
_223_barrel_a_FDM (repaired).stl 10.46 x 10.46 x 12.02 mm | 0.41 x 0.41 x 0.47 in
Size: 10.46 x 10.46 x 12.02 mm | 0.41 x 0.41 x 0.47 in
File size: 1.71 mb
Printing Time / Filament: 12 min / <1 m
_224_barrel_b_FDM (repaired).stl 6.53 x 6.53 x 6.69 mm | 0.26 x 0.26 x 0.26 in
Size: 6.53 x 6.53 x 6.69 mm | 0.26 x 0.26 x 0.26 in
File size: 1.33 mb
Printing Time / Filament: 5 min / <1 m
_225_barrel_c_FDM (repaired).stl 10.46 x 10.46 x 12.02 mm | 0.41 x 0.41 x 0.47 in
Size: 10.46 x 10.46 x 12.02 mm | 0.41 x 0.41 x 0.47 in
File size: 1.81 mb
Printing Time / Filament: 12 min / <1 m
_226_barrel_e_FDM (repaired).stl 16.79 x 13.57 x 12.04 mm | 0.66 x 0.53 x 0.47 in
Size: 16.79 x 13.57 x 12.04 mm | 0.66 x 0.53 x 0.47 in
File size: 2.05 mb
Printing Time / Filament: 13 min / <1 m
_227_box_a_FDM (repaired).stl 13.11 x 13.11 x 12.43 mm | 0.52 x 0.52 x 0.49 in
Size: 13.11 x 13.11 x 12.43 mm | 0.52 x 0.52 x 0.49 in
File size: 0.19 mb
Printing Time / Filament: 19 min / <1 m
_228_box_b_FDM (repaired).stl 8.41 x 6.57 x 12.24 mm | 0.33 x 0.26 x 0.48 in
Size: 8.41 x 6.57 x 12.24 mm | 0.33 x 0.26 x 0.48 in
File size: 0.07 mb
Printing Time / Filament: 13 min / <1 m
_229_rope_FDM (repaired).stl 13.98 x 12.93 x 8.8 mm | 0.55 x 0.51 x 0.35 in
Size: 13.98 x 12.93 x 8.8 mm | 0.55 x 0.51 x 0.35 in
File size: 6.48 mb
Printing Time / Filament: 14 min / <1 m
_230_foremastPart_g_FDM (repaired).stl 9.21 x 13.92 x 3.88 mm | 0.36 x 0.55 x 0.15 in
Size: 9.21 x 13.92 x 3.88 mm | 0.36 x 0.55 x 0.15 in
File size: 0.28 mb
Printing Time / Filament: 5 min / <1 m
_231_vantBlock_V1_FDM (repaired).stl 4.97 x 19.5 x 3.72 mm | 0.2 x 0.77 x 0.15 in
Size: 4.97 x 19.5 x 3.72 mm | 0.2 x 0.77 x 0.15 in
File size: 0.40 mb
Printing Time / Filament: 4 min / <1 m
_232_vantBlock_V2_FDM (repaired).stl 5.08 x 25.48 x 3.72 mm | 0.2 x 1 x 0.15 in
Size: 5.08 x 25.48 x 3.72 mm | 0.2 x 1 x 0.15 in
File size: 0.59 mb
Printing Time / Filament: 4 min / <1 m
_233_vantBlock_V3_FDM (repaired).stl 5.08 x 11.01 x 3 mm | 0.2 x 0.43 x 0.12 in
Size: 5.08 x 11.01 x 3 mm | 0.2 x 0.43 x 0.12 in
File size: 0.32 mb
Printing Time / Filament: 3 min / <1 m
_234_vantBlock_V4_FDM (repaired).stl 4.97 x 4.97 x 3 mm | 0.2 x 0.2 x 0.12 in
Size: 4.97 x 4.97 x 3 mm | 0.2 x 0.2 x 0.12 in
File size: 0.16 mb
Printing Time / Filament: 3 min / <1 m
_235_tailDecor_b_V2_R_FDM (repaired).stl 28.84 x 11.69 x 32.45 mm | 1.14 x 0.46 x 1.28 in
Size: 28.84 x 11.69 x 32.45 mm | 1.14 x 0.46 x 1.28 in
File size: 32.50 mb
Printing Time / Filament: 37 min / <1 m
_236_tailDecor_a_V2_L_FDM (repaired).stl 30.3 x 10.37 x 31.59 mm | 1.19 x 0.41 x 1.24 in
Size: 30.3 x 10.37 x 31.59 mm | 1.19 x 0.41 x 1.24 in
File size: 32.61 mb
Printing Time / Filament: 36 min / <1 m
_237_cannonCarriage_V2_FDM (repaired).stl 27.66 x 21.08 x 10.35 mm | 1.09 x 0.83 x 0.41 in
Size: 27.66 x 21.08 x 10.35 mm | 1.09 x 0.83 x 0.41 in
File size: 3.12 mb
Printing Time / Filament: 22 min / <1 m
_238_sideGlassGrid_b_R_X3_FDM (repaired).stl 18.14 x 24.4 x 1.59 mm | 0.71 x 0.96 x 0.06 in
Size: 18.14 x 24.4 x 1.59 mm | 0.71 x 0.96 x 0.06 in
File size: 0.46 mb
Printing Time / Filament: 5 min / <1 m
_239_tailSideGlass_b_R_X3_FDM (repaired).stl 16.89 x 23.1 x 1.26 mm | 0.66 x 0.91 x 0.05 in
Size: 16.89 x 23.1 x 1.26 mm | 0.66 x 0.91 x 0.05 in
File size: 0.05 mb
Printing Time / Filament: 6 min / <1 m
_04_bodyPart_d_FDM (repaired).stl 131.99 x 145.21 x 90.19 mm | 5.2 x 5.72 x 3.55 in
Size: 131.99 x 145.21 x 90.19 mm | 5.2 x 5.72 x 3.55 in
File size: 92.59 mb
Printing Time / Filament: 44 h 50 min / 22 m
_05_bodyPart_e_FDM (repaired).stl 113.73 x 172.61 x 144.28 mm | 4.48 x 6.8 x 5.68 in
Size: 113.73 x 172.61 x 144.28 mm | 4.48 x 6.8 x 5.68 in
File size: 85.08 mb
Printing Time / Filament: 74 h 1 min / 45 m
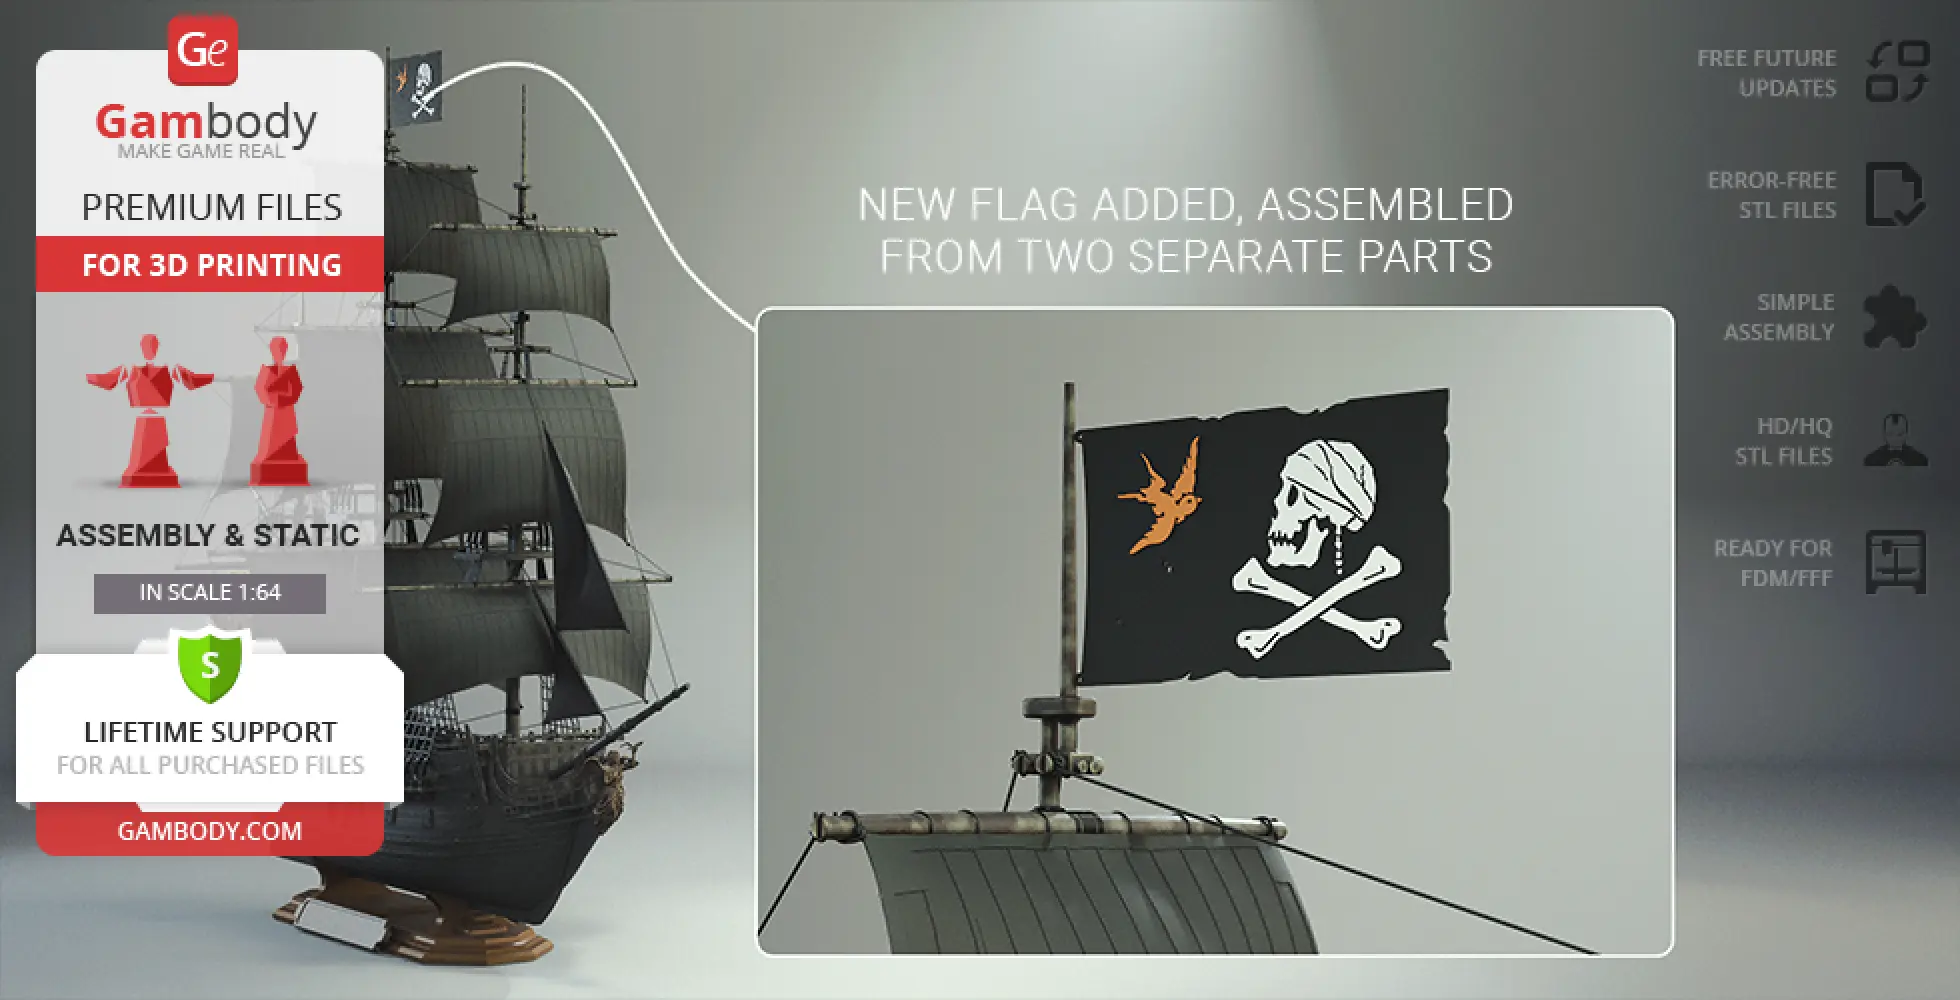
_240_Jack_flag_R_FDM.stl 83.16 x 50 x 0.7 mm | 3.27 x 1.97 x 0.03 in
Size: 83.16 x 50 x 0.7 mm | 3.27 x 1.97 x 0.03 in
File size: 1.71 mb
Printing Time / Filament: 20 min / <1 m
_241_Jack_flag_L_FDM.stl 83.16 x 50 x 0.7 mm | 3.27 x 1.97 x 0.03 in
Size: 83.16 x 50 x 0.7 mm | 3.27 x 1.97 x 0.03 in
File size: 1.71 mb
Printing Time / Filament: 20 min / <1 m
Keychain (repaired).stl 29.68 x 29.69 x 2.42 mm | 1.17 x 1.17 x 0.1 in
Size: 29.68 x 29.69 x 2.42 mm | 1.17 x 1.17 x 0.1 in
File size: 0.37 mb
Printing Time / Filament: 23 min / <1 m
Tag (repaired).stl 150.15 x 18.16 x 4.59 mm | 5.91 x 0.71 x 0.18 in
Size: 150.15 x 18.16 x 4.59 mm | 5.91 x 0.71 x 0.18 in
File size: 1.78 mb
Printing Time / Filament: 1 h 18 min / 1 m
Models are regularly enhanced with updates and adjustments based on customer feedback. View update history
Description
3D model history
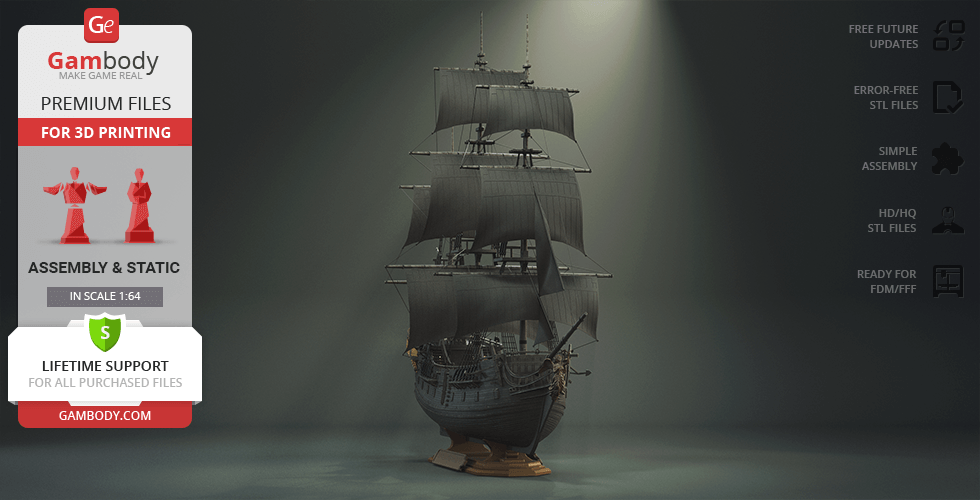
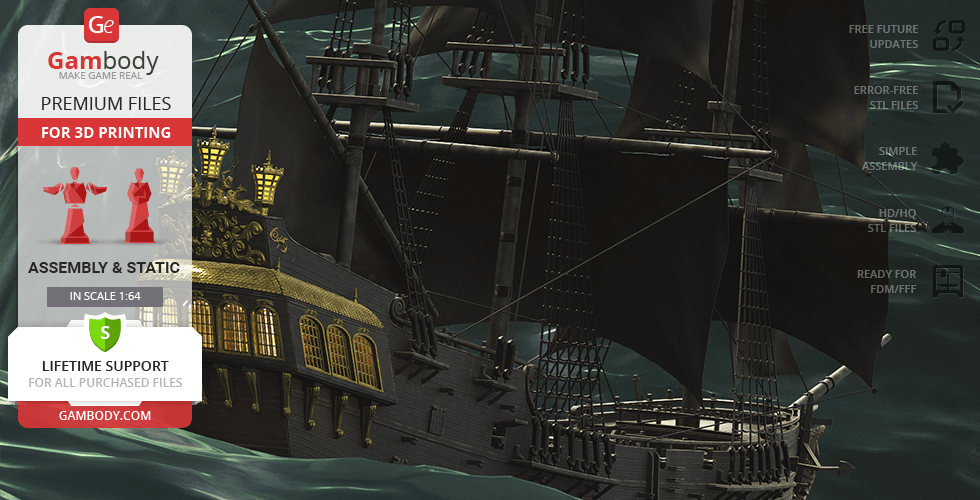
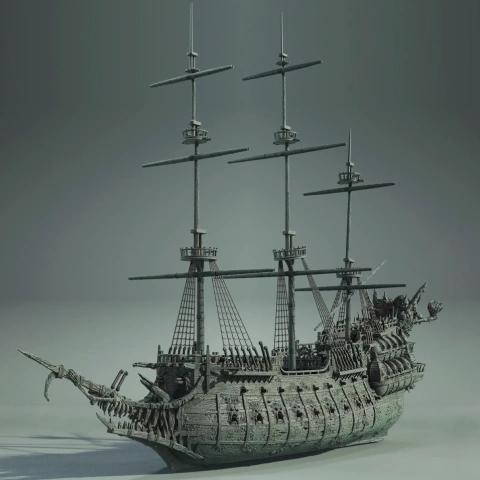
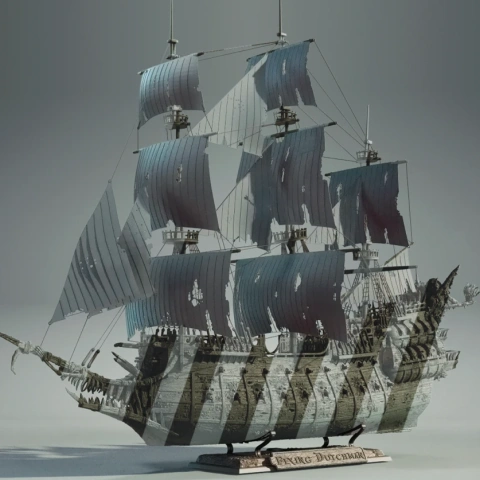
Wherever we want to go, we'll go. That's what a ship is, you know. It's not just a keel and a hull and a deck and sails, that's what a ship needs but what a ship is... what the Black Pearl really is... is freedom.
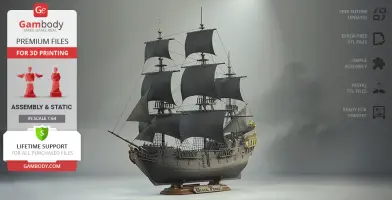
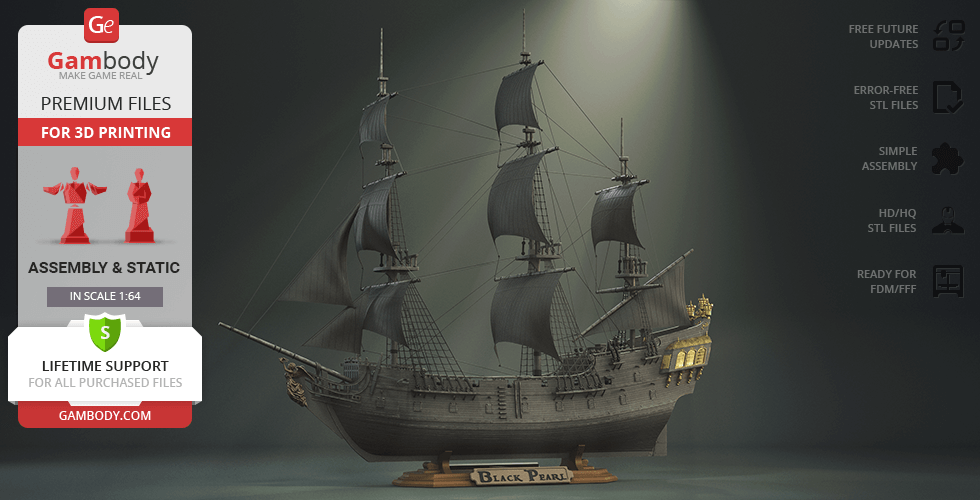
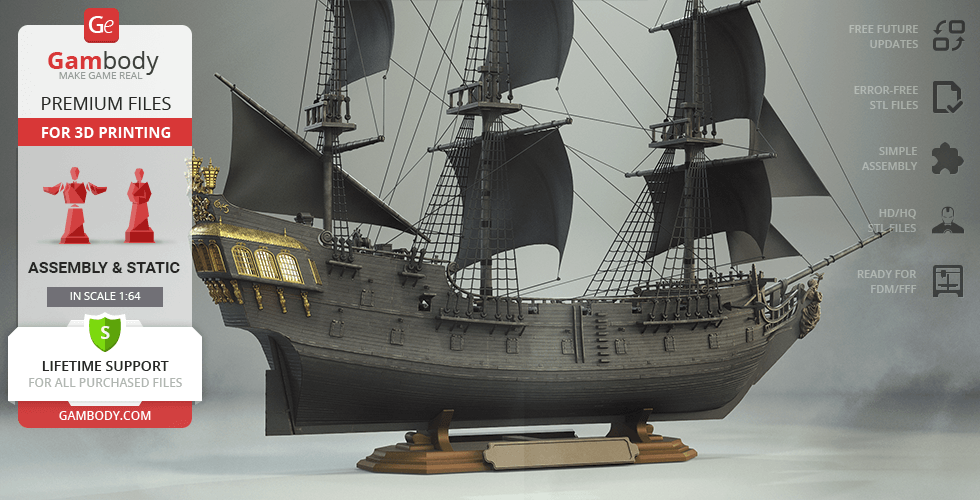
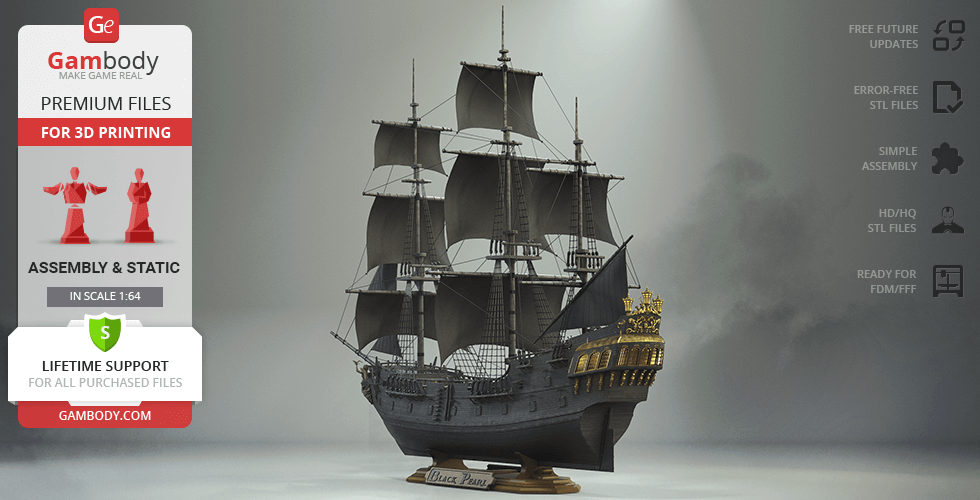
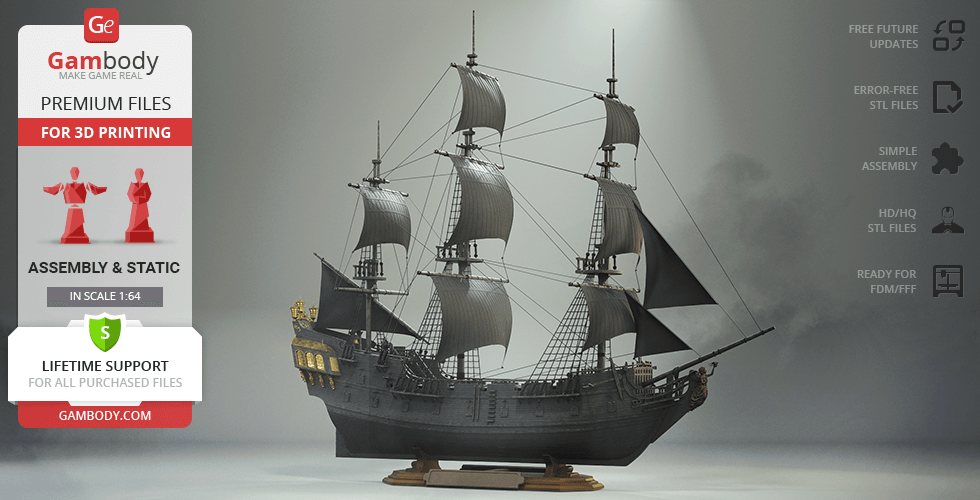
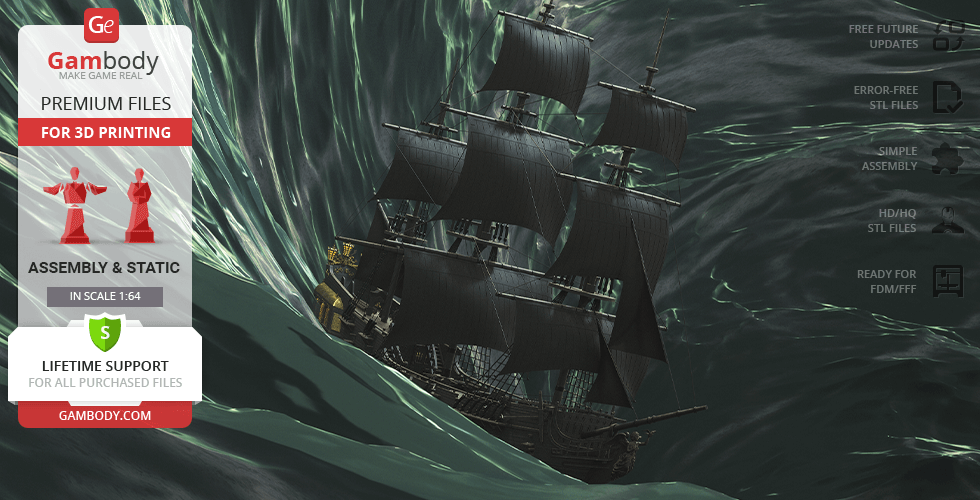
The Black Pearl is a legendary pirate vessel used by Jack Sparrow and Hector Barbossa, who both fought over the captaincy of the Wicked Wench. The design of the infamous ship can not but impress: a completely black hull and flattering sails as black as night. The Pearl is extremely rapid and is the fastest ship in the Caribbean, it is the only ship that can outrun the Flying Dutchman which was considered to be the fastest ship both on and beneath the sea. For Jack Sparrow, the Black Pearl is a symbol of freedom, it's a place he belongs and is ready to sell his soul for.
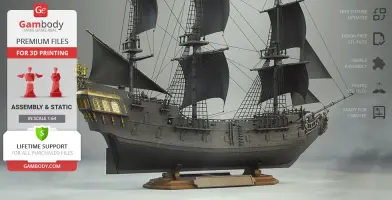
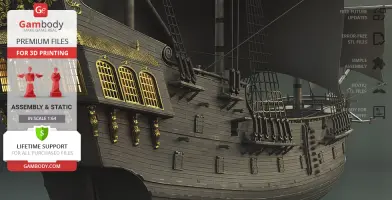
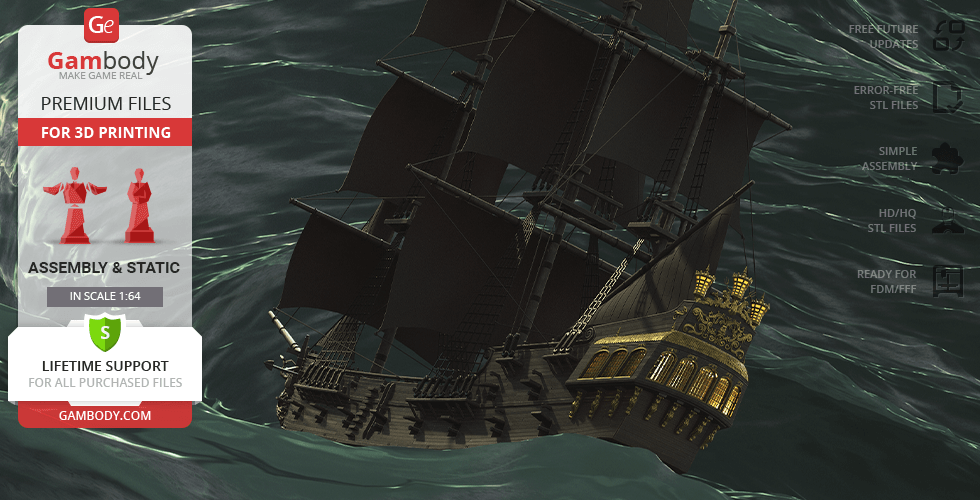
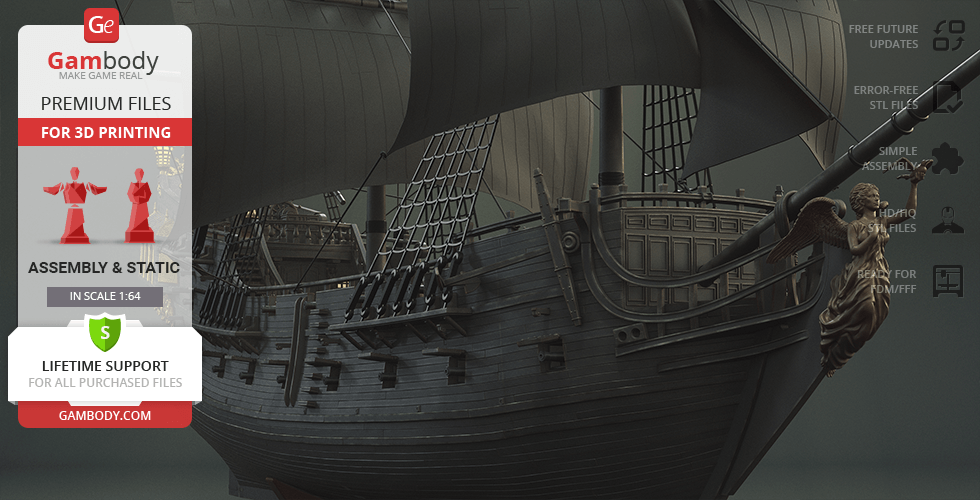
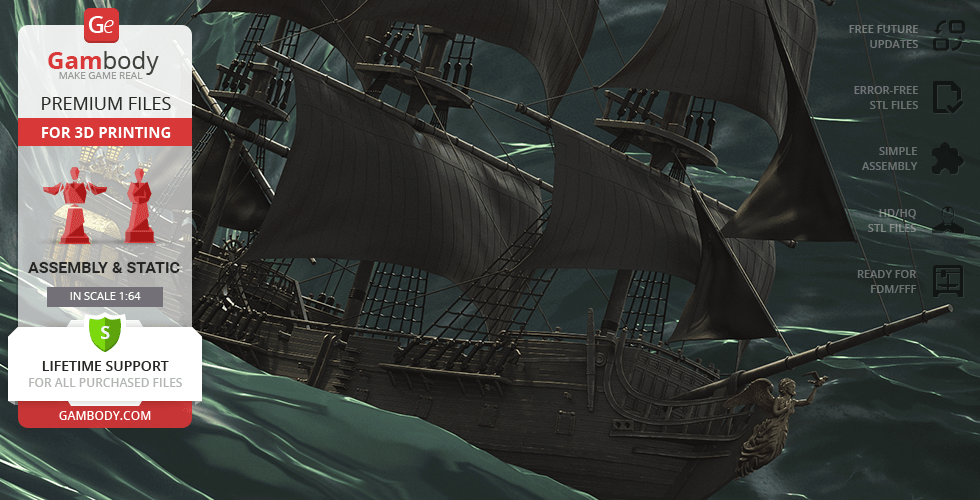
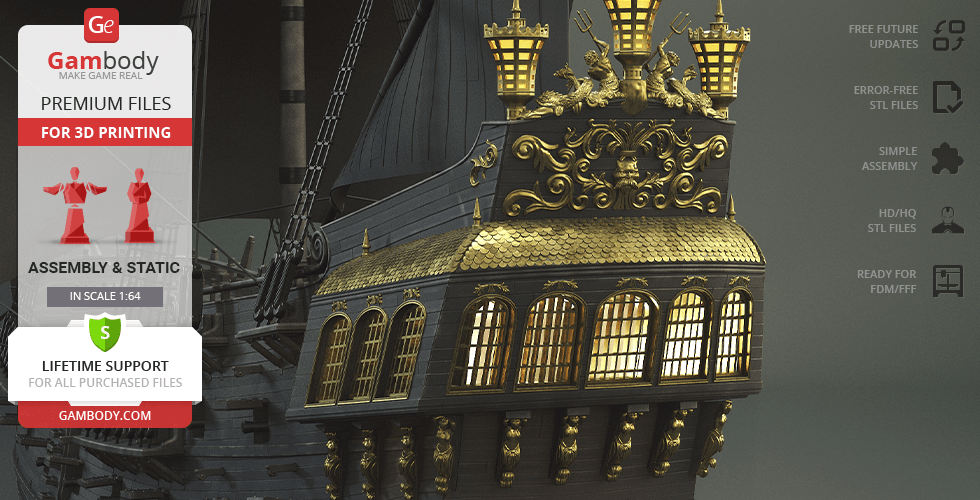
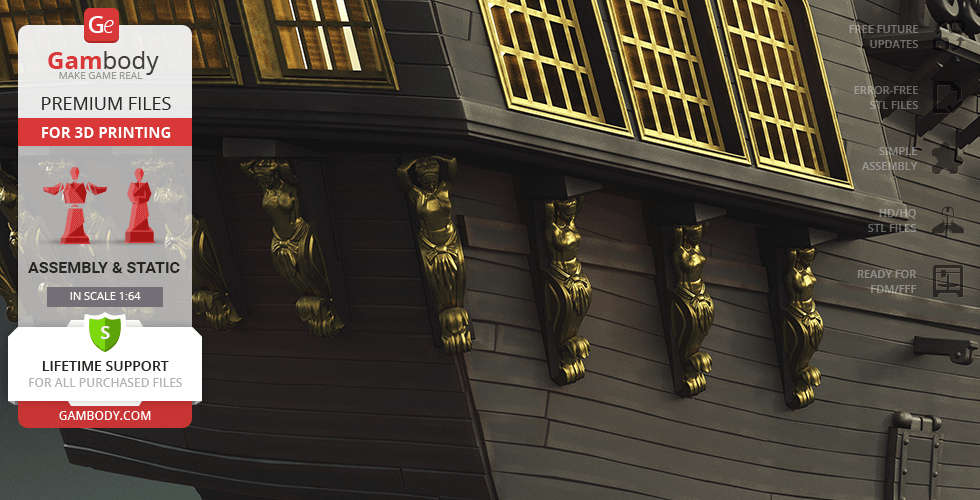
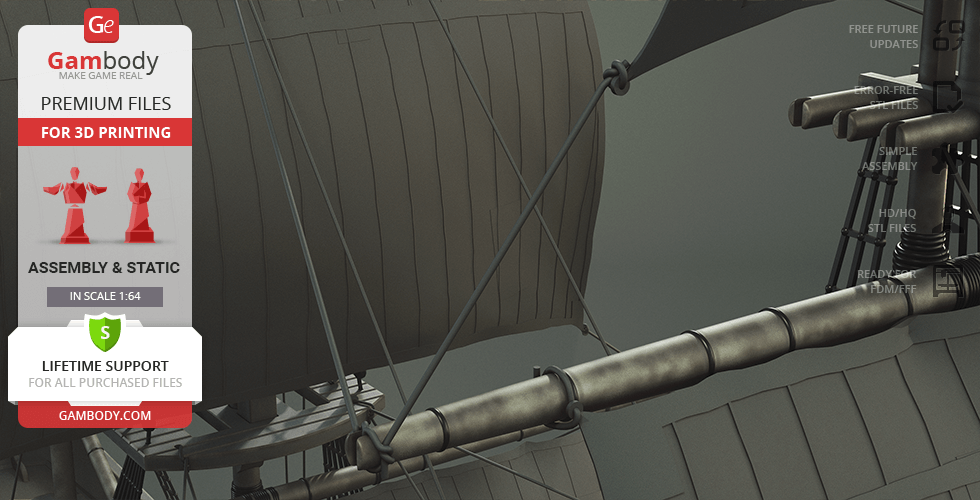
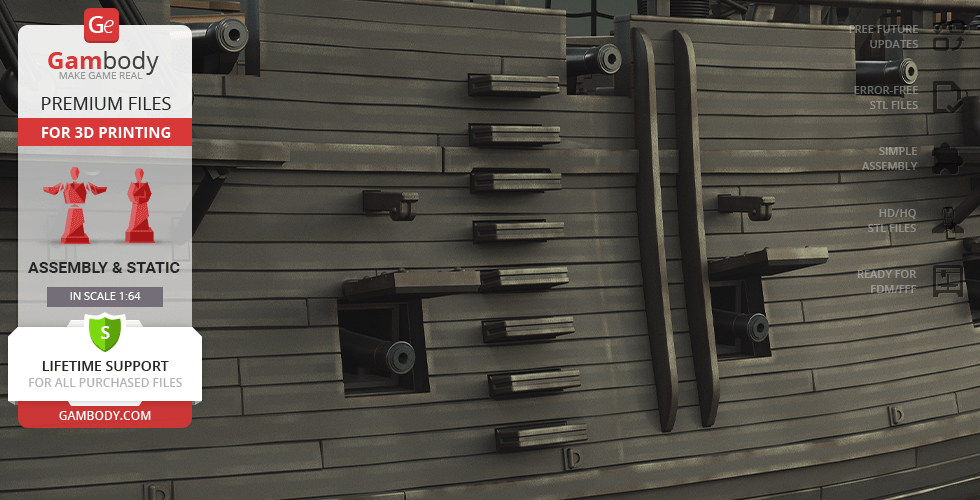
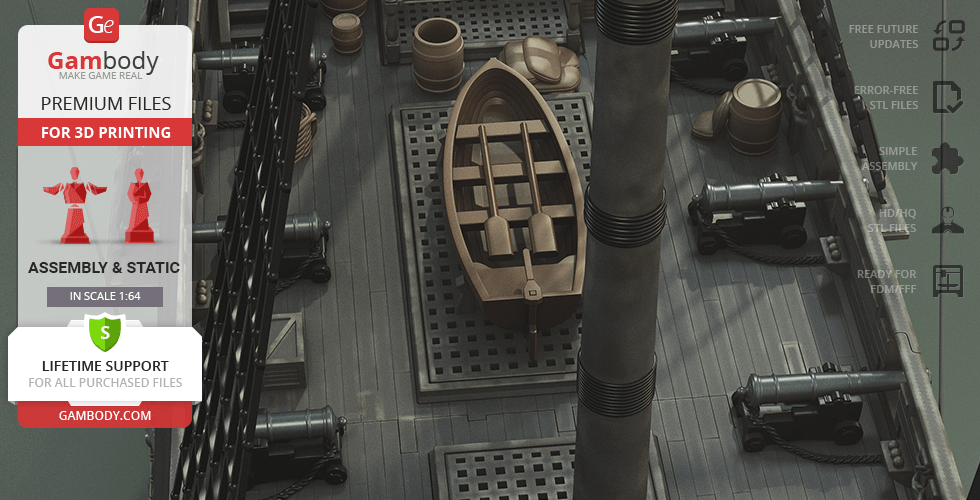
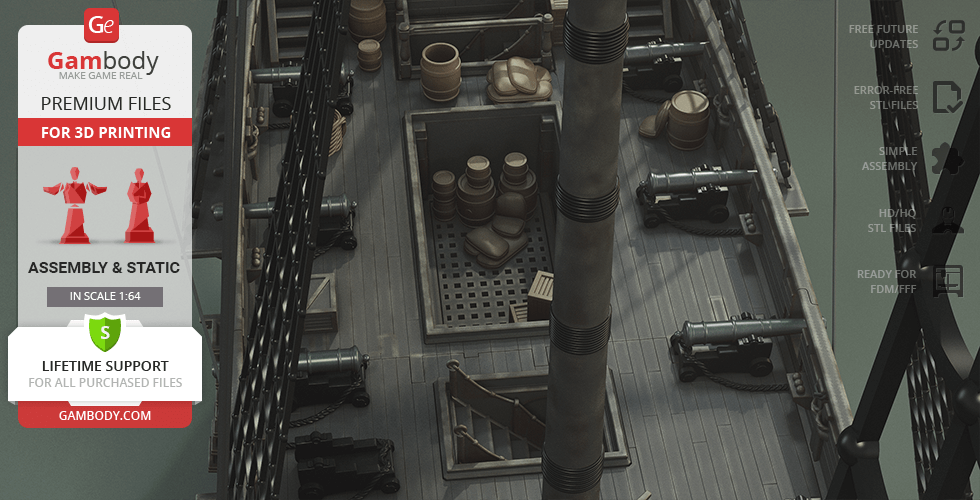
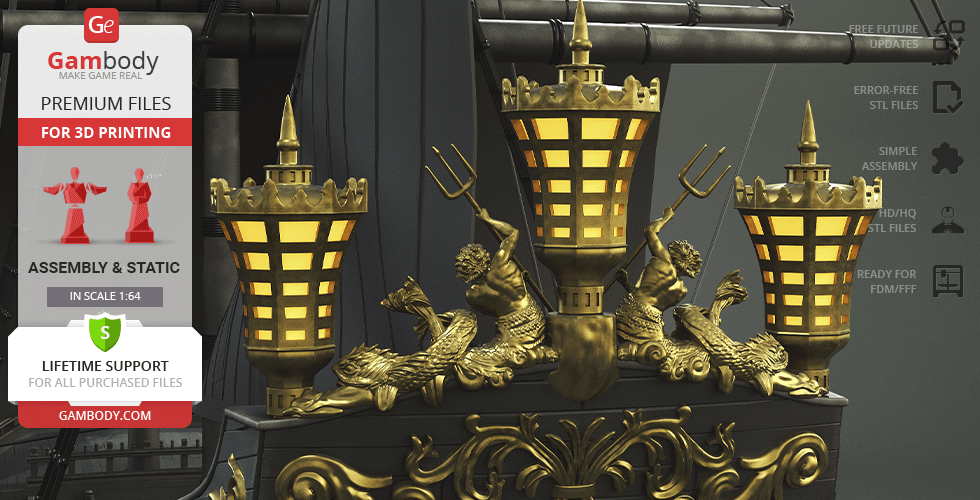
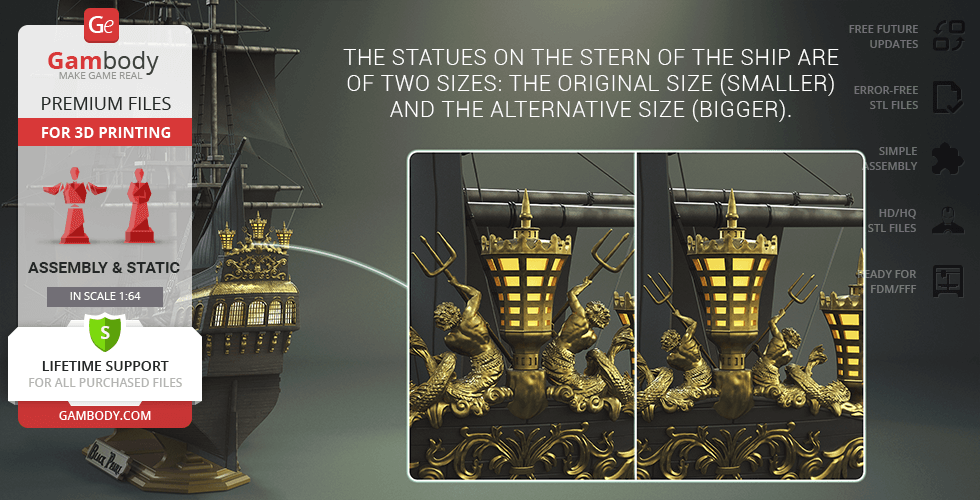
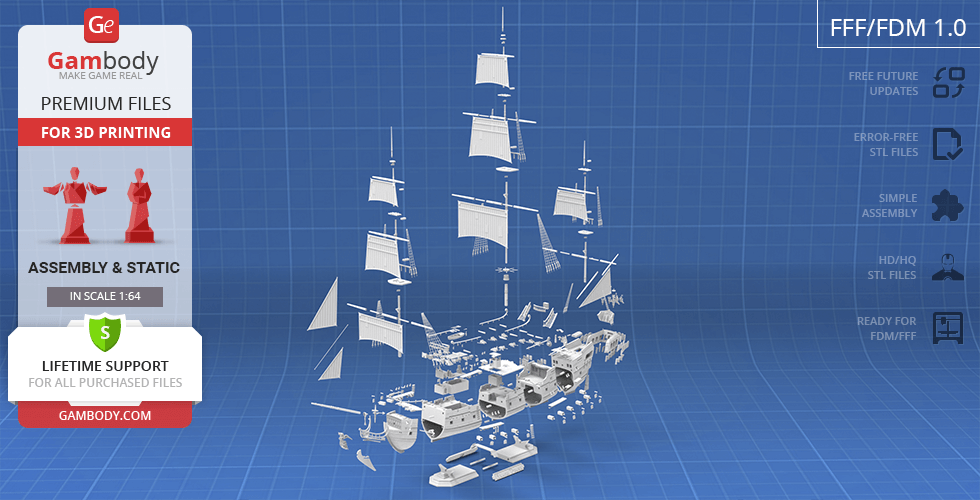
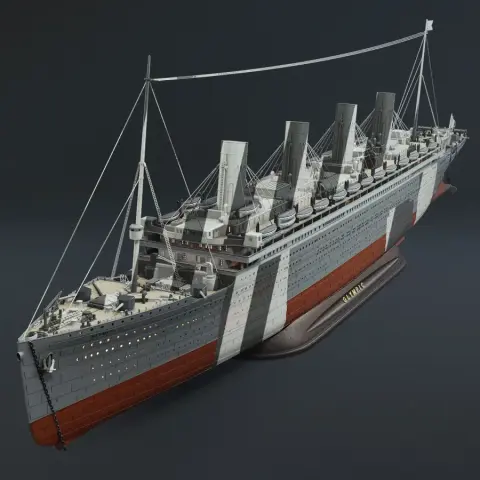
The nigh uncatchable pirate vessel that was raised from the seafloor and transformed into a powerful ship left a great impression on our contributing 3D artist who created this truly masterful and spectacular model for 3D printing. The level of detail of the Black Pearl is undoubtedly great, the artist recreated the tiniest features: the bow of the ship is decorated with a figurehead featuring a beautiful woman with a bird in her hand, beautiful corbels and lamps adore the stern; there are numerous cannons that are hidden under the gun ports along the hull; the shape of the wooden hull of the ship indicates in belonging to galleons, that combine the best design features of the caravel and carrack. The Black Pearl is not just a vessel, it’s a dream of all captains! Do not delay and start printing this stunning project today!
3D printing model features
Model-specific features:
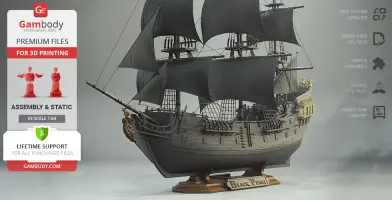
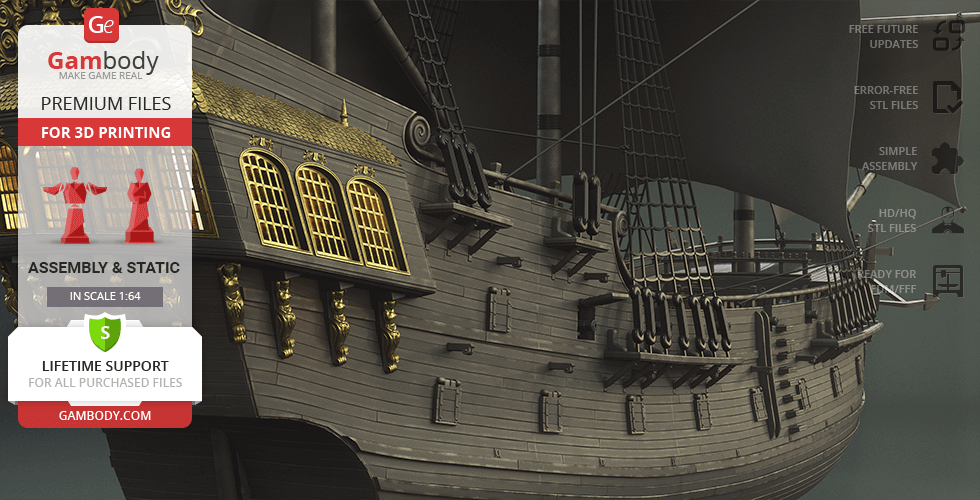
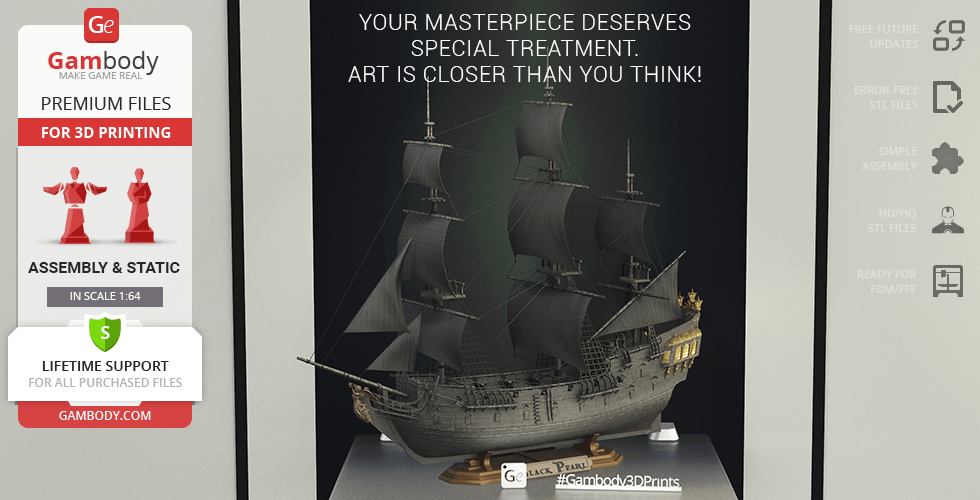
This highly detailed Black Pearl model is inspired by the iconic pirate vessel from the Pirates of the Caribbean franchise.
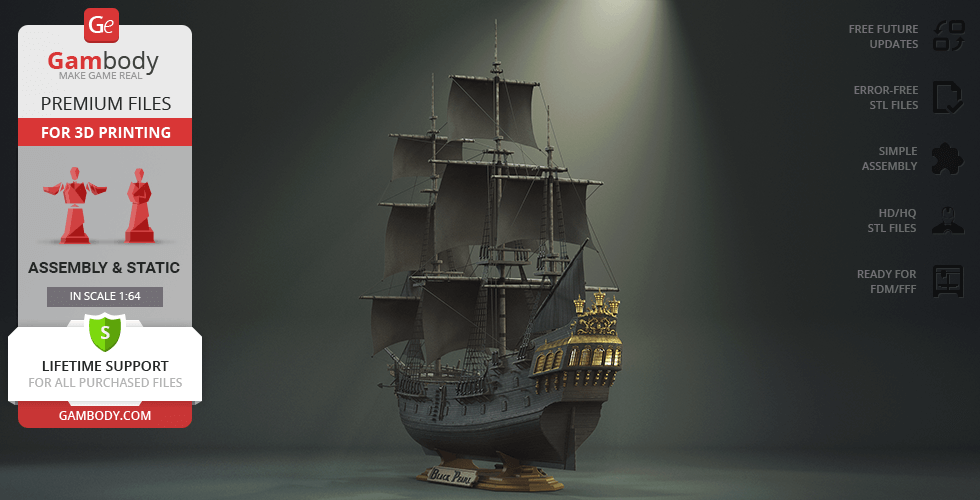
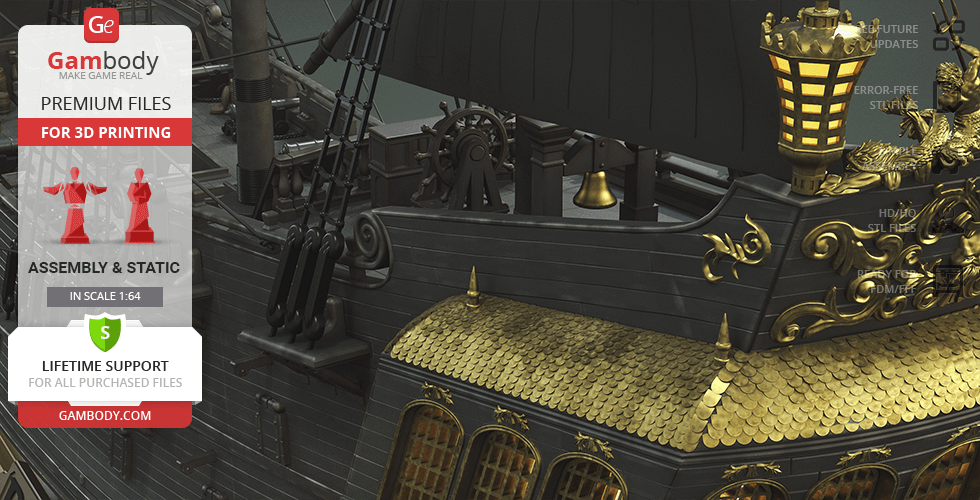
Features include the iconic black hull, numerous hidden cannons behind gunports, detailed figurehead (beautiful woman with a bird), and ornate corbels and lamps on the stern.
The captain’s cabin and the stern lamps can be illuminated.
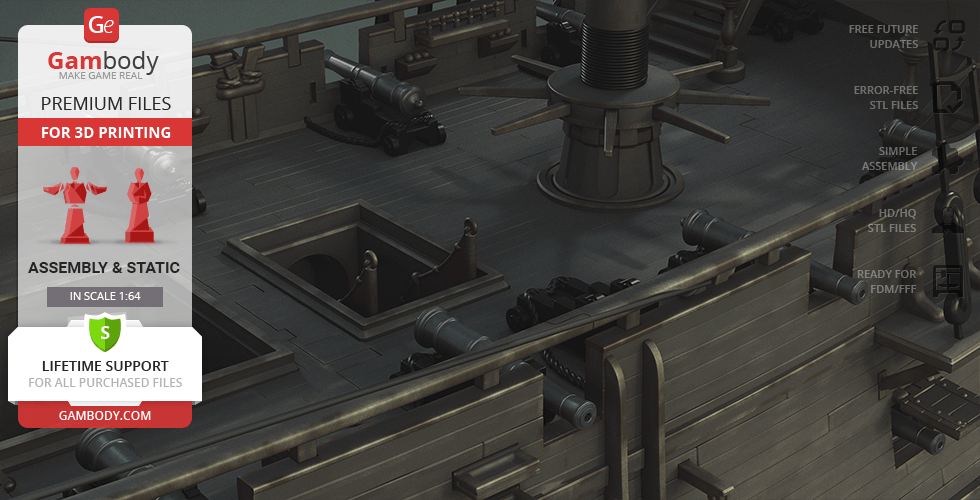
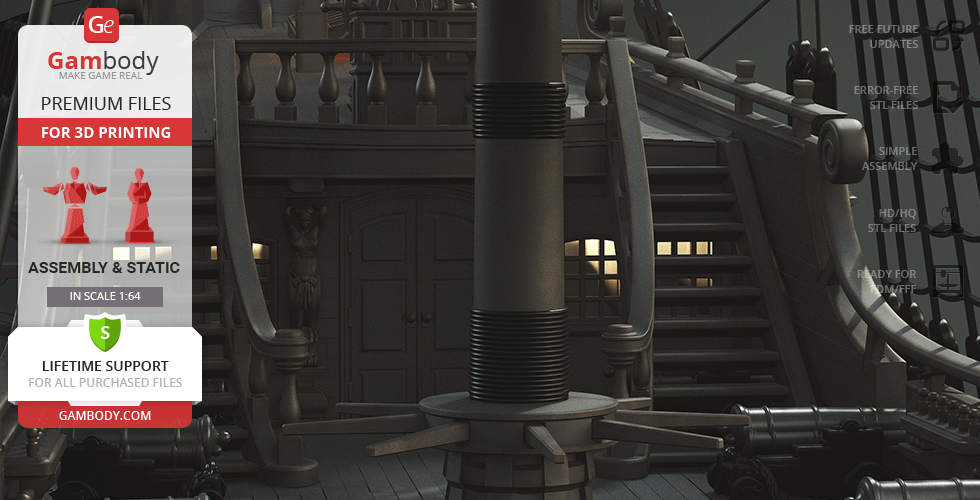
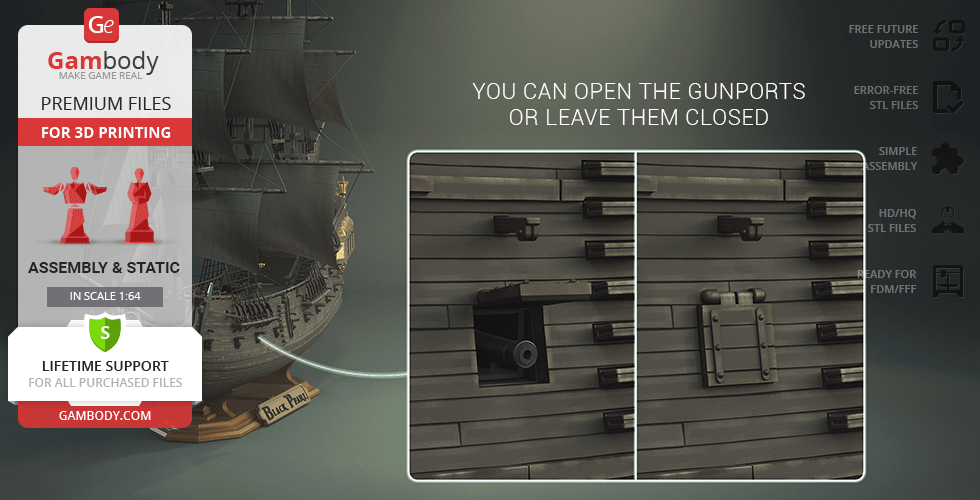
The gunports are functional and can be displayed in two positions: open or closed.
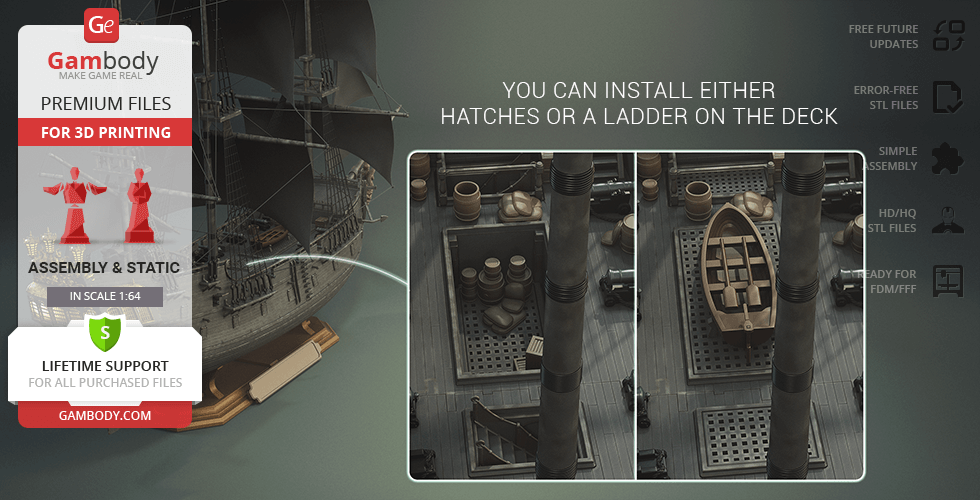
Features removable hatches to access the ship's hold.
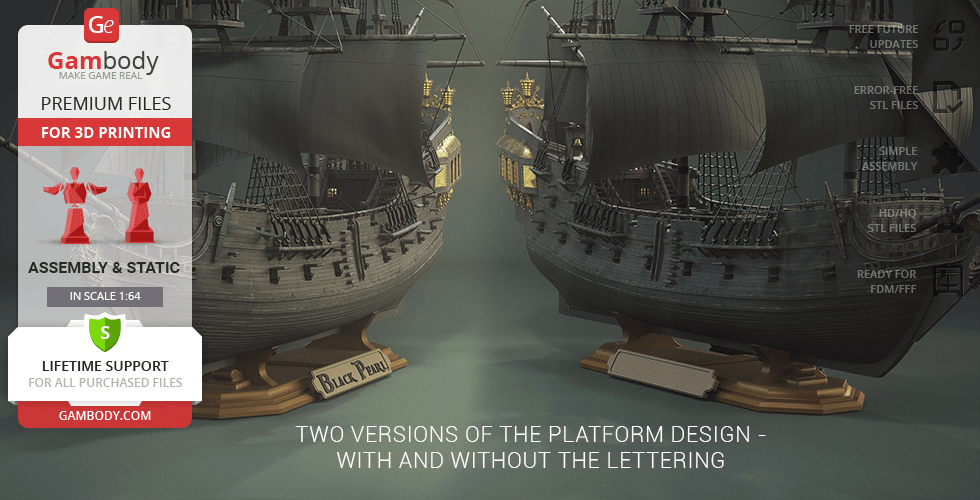
Includes two versions of decorative elements, two variants of corbels, and two versions of the platform design (with and without lettering).
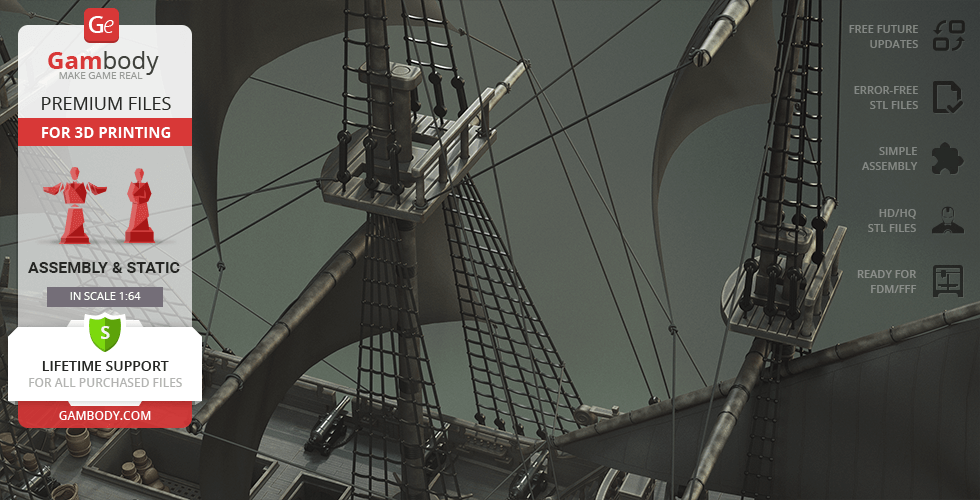
Comes with 4 types of shrouds for enhanced rigging detail.
The pirate flag parts can be used as one-sided flags or glued together for a double-sided display.
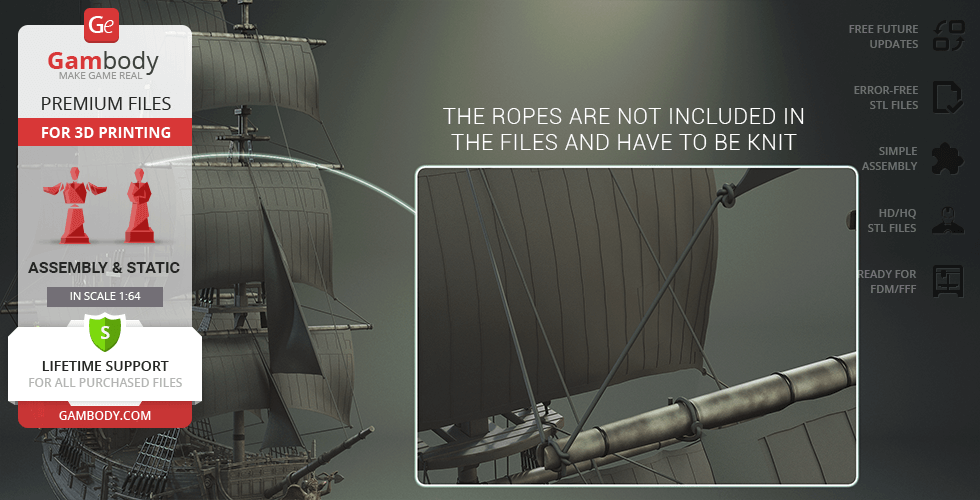
The design acknowledges that ropes cannot be printed and must be knitted by the builder for realism. Builders are also encouraged to sew the sails and knit the rope ladders for the best result.
The model specifically recommends printing statues and columns using a resin 3D printer for the best detail.
Printing & assembly details:
Provided as error-free STL files compatible with most 3D printers;
Optimized part division minimizes support material and ensures smooth and precise surface detailing;
The assembly parts in the FFF/FDM version come in the recommended print orientations for easy bed placement;
Assembly manual in PDF and video formats is included for the FFF/FDM version;
The model is available in recommended scales — 1:64 for the FFF/FDM version.
What will you get after purchase?
1 version of Black PearlSTL files for FFF/FDM — files are available for download after the purchase;
STL files of high-poly Black Pearl model for 3D printing consist of 241 files;
Sizes for:
FFF/FDM Model Size: 278 mm wide, 653 mm high, 707 mm deep;
Assembly Manual for 1.0 FFF/FDM version in PDF and video formats;
Detailed settings that we provide as a recommendation for Bambu Studio, Cura, Orca Slicer, PrusaSlicer, Simplify3D, and Slic3r for the best print;
Full technical support from the Gambody Support Team.
Feedback
Average customer rating (17 reviews)
4.4
Ratings breakdown
Click a star rating to filter reviews
5
11
4
4
3
1
2 0
1
1
Overall experience
Level of detail in the model
4.4
Model cut quality and assembly guide
4.4
Clarity and accuracy of the model page
4.4
A.J. leget
Verified purchase
nice for tryout
Reviewed in Netherlands on December 18, 2025
Overall experience
Level of detail in the model
3.9
Model cut quality and assembly guide
4
Clarity and accuracy of the model page
3.7
too bad the led channels are not present, but overall a good model if you are used to model tooling
. Comments (1)
Julia Layton
Replied on December 19, 2025
Community Support Team
Thank you for your feedback — we’re glad to hear you enjoyed the model.
For the Black Pearl ship, lighting is intended mainly for the captain’s cabin. You can see this in the Features image inside the Images viewer, or via this link: https://www.gambody.com/storage/model-images/002166/bul_980x500.webp We’ve just updated the image and adjusted the “ROOM FOR LED WIRING” label to avoid any confusion.
Since both the cabin and the interior of the vessel are hollow and provide plenty of space for routing wires and placing LED components, we didn’t add dedicated LED channels in the design. This approach gives makers more flexibility to implement lighting in the way that best fits their setup and preferences.
If you’d like, tell us what LEDs you plan to use (strip / single diodes / battery pack), and we’ll be happy to suggest an easy wiring route.
Galumbo
This feedback is from a user who hasn't purchased this model
Quick rating from the old site version (no comment)
Reviewed in Spain on September 27, 2025
Overall experience
Level of detail in the model
5
Model cut quality and assembly guide
5
Clarity and accuracy of the model page
5
Anna
This feedback is from a user who hasn't purchased this model
Quick rating from the old site version (no comment)
Reviewed in Canada on June 05, 2025
Overall experience
Level of detail in the model
5
Model cut quality and assembly guide
5
Clarity and accuracy of the model page
5
User ID: 83194
Verified purchase
Quick rating from the old site version (no comment)
Reviewed on December 02, 2024
Overall experience
Level of detail in the model
5
Model cut quality and assembly guide
5
Clarity and accuracy of the model page
5
User ID: 110468
This feedback is from a user who hasn't purchased this model
Quick rating from the old site version (no comment)
Reviewed on November 25, 2024
Overall experience
Level of detail in the model
5
Model cut quality and assembly guide
5
Clarity and accuracy of the model page
5
User ID: 57591
Verified purchase
Quick rating from the old site version (no comment)
Reviewed on October 13, 2024
Overall experience
Level of detail in the model
3
Model cut quality and assembly guide
3
Clarity and accuracy of the model page
3
drrichman
This feedback is from a user who hasn't purchased this model
Quick rating from the old site version (no comment)
Reviewed in Netherlands on July 30, 2024
Overall experience
Level of detail in the model
5
Model cut quality and assembly guide
5
Clarity and accuracy of the model page
5
User ID: 111318
This feedback is from a user who hasn't purchased this model
Quick rating from the old site version (no comment)
Reviewed on July 22, 2024
Overall experience
Level of detail in the model
5
Model cut quality and assembly guide
5
Clarity and accuracy of the model page
5
User ID: 110151
Verified purchase
Quick rating from the old site version (no comment)
Reviewed on July 07, 2024
Overall experience
Level of detail in the model
5
Model cut quality and assembly guide
5
Clarity and accuracy of the model page
5
Gwilhou
This feedback is from a user who hasn't purchased this model
Quick rating from the old site version (no comment)
Reviewed in France on June 13, 2024
Overall experience
Level of detail in the model
4
Model cut quality and assembly guide
4
Clarity and accuracy of the model page
4
User ID: 82989
This feedback is from a user who hasn't purchased this model
Quick rating from the old site version (no comment)
Reviewed on March 30, 2024
Overall experience
Level of detail in the model
1
Model cut quality and assembly guide
1
Clarity and accuracy of the model page
1
Dennis Lee
This feedback is from a user who hasn't purchased this model
Quick rating from the old site version (no comment)
Reviewed in Denmark on February 07, 2024
Overall experience
Level of detail in the model
5
Model cut quality and assembly guide
5
Clarity and accuracy of the model page
5
User ID: 99524
This feedback is from a user who hasn't purchased this model
Quick rating from the old site version (no comment)
Reviewed on December 14, 2023
Overall experience
Level of detail in the model
5
Model cut quality and assembly guide
5
Clarity and accuracy of the model page
5
User ID: 96618
This feedback is from a user who hasn't purchased this model
Quick rating from the old site version (no comment)
Reviewed on November 25, 2023
Overall experience
Level of detail in the model
4
Model cut quality and assembly guide
4
Clarity and accuracy of the model page
4
User ID: 79875
Verified purchase
Quick rating from the old site version (no comment)
Reviewed on November 24, 2023
Overall experience
Level of detail in the model
4
Model cut quality and assembly guide
4
Clarity and accuracy of the model page
4
User ID: 6899
This feedback is from a user who hasn't purchased this model
Quick rating from the old site version (no comment)
Reviewed on November 22, 2023
Overall experience
Level of detail in the model
5
Model cut quality and assembly guide
5
Clarity and accuracy of the model page
5
Aleksandr I.
This feedback is from a user who hasn't purchased this model
Quick rating from the old site version (no comment)
Reviewed in United Kingdom of Great Britain and Northern Ireland on November 21, 2023
Overall experience
Level of detail in the model
5
Model cut quality and assembly guide
5
Clarity and accuracy of the model page
5
Model rating
Overall experience
Level of detail in the model
Model cut quality and assembly guide
Clarity and accuracy of the model page
Enter for new line | Ctrl+Enter to submit text
Printing Details
Below you'll find detailed slicing settings for Bambu Studio 2.0+, Orca Slicer 2.0+, UltiMaker Cura 5.0+, PrusaSlicer 2.0+, Slic3r 1.3+, Simplify3D 5.0+ to help you get the best results when printing this model. These settings are optimized specifically for this 3D model, but please note they may need slight adjustments depending on your printer or filament. When in doubt, refer to your printer's user manual.
Important
To avoid printing issues and achieve the best quality, we highly recommend applying the following settings:
Bambu Studio 2.0+
Settings name
Option
Quality Tab
Layer height
Layer Height
0.12 - 0.20 mm
For better quality use 0.12 mm layer height, for fast printing use 0.2 mm layer height. For pins and the Ge connectors, use 0.2 layer height.
First layer height
0.20 - 0.28 mm
120-150% of your Layer Height
Line width
Default:
0.42 mm
Initial Layer
0.50 - 0.60 mm
Outer wall
0.40 mm
Inner wall
0.45 mm
Top surface
0.45 mm
Sparse infill
0.45 mm
Internal solid infill
0.42 mm
Support
0.42 mm
Seam
Seam position
Aligned
But you can paint the seam if you want.
Smart scarf seam application
✔
Scarf application angle threshold
155.0 °
Scarf steps
10.0
Scarf joint for inner walls
✔
Role-based wipe speed
✔
Precision
Slice gap closing radius
0.0490 mm
Resolution
0.0120 mm
Arc fitting
✔
X-Y hole compensation
0.010 - 0.050 mm
You have to calibrate this parameter
X-Y contour compensation
0.010 - 0.050 mm
You have to calibrate this parameter
Elephant foot compensation
0.10 - 0.20 mm
You have to calibrate this parameter
Wall generator
Wall generator
Classic
Wall transitioning threshold angle
10.0 °
Wall transitioning filter margin
25.0 %
Wall transition length
100.0 %
Minimum wall width
85.0 %
Minimum feature size
25.0 %
Advanced
Order of walls
inner/outer
Bridge flow
0.85
Only one wall on top surfaces
Top surfaces
Smooth speed discontinuity area
✔
Smooth coefficient
80.0
Strength
Walls
Wall loops
2 - 3
For pins and power elements of the structure, such as the vehicle frame, use 3 loop
Detect thin wall
Disabled for vehicles and enabled for characters
Top/bottom shells
Top surface pattern
Monotonic
Top shell layers
5
For 0,2 Layer Height
Top shell thickness
1.00 mm
Top paint penetration layers
5
Bottom surface pattern
Monotonic
Bottom shell layers
5
Bottom shell thickness
1.00 mm
Bottom paint penetration layers
5
Internal solid infill pattern
Rectilinear
Sparse infill
Sparse infill density
6.0 %
Sparse infill pattern
Triangles
Length of sparse infill anchor
400.0 %
Maximum length of sparse infill anchor
20.0 mm
Advanced
Infill/Wall overlap
15.0 - 25.0 %
Infill direction
45.0 °
Bridge direction
0.0 °
Minimum sparse infill threshold
10.0 mm²
Detect narrow internal solid infill
✔
Ensure vertical shell thickness
Enabled
Detect floating vertical shells
✔
Speed
The parameters in this tab vary greatly, it all depends on the quality of your printer. For example, if you have a classic Ender3, stick to the minimum parameters, but if you have a newer printer, for example Anycubic cobra 3 v2, you can select the maximum recommended values
Initial layer speed
Initial layer
15.0 - 45.0 mm/sec
Initial layer infill
35.0 - 75.0 mm/sec
Other layers speed
Outer wall
30.0 - 150.0 mm/sec
Inner wall
30.0 - 250.0 mm/sec
Small perimeters
50.0 %
Small perimeter threshold
0.1 mm
Sparse infill
50.0 - 250.0 mm/sec
Internal solid infill
50.0 - 200.0 mm/sec
Vertical shell speed
80.0 %
Top surface
25.0 - 150.0 mm/sec
Slow down for overhangs
✔
Overhang speed
Overhang speed 10%
0.0 mm/sec
Overhang speed 25%
40.0 mm/sec
Overhang speed 50%
20.0 mm/sec
Overhang speed 75%
10.0 mm/sec
Overhang speed 100%
10.0 mm/sec
Bridge
20.0 - 40.0 mm/sec
Gap infill
30.0 - 150.0 mm/sec
Support
30.0 - 100.0 mm/sec
Support interface
30.0 - 60.0 mm/sec
Travel speed
Travel
80.0 - 350.0 mm/sec
Acceleration
Settings for advanced users, change these parameters only if you have sufficient 3D printing expertise
Normal printing
2,500.0 - 4,000.0 mm/sec²
Travel
2,000.0 - 7,000.0 mm/sec²
Initial layer travel
700.0 - 5,000.0 mm/sec²
Initial layer
300.0 - 500.0 mm/sec²
Outer wall
500.0 - 3,000.0 mm/sec²
Inner wall
500.0 - 4,000.0 mm/sec²
Top surface
500.0 - 2,500.0 mm/sec²
Sparse infill
100.0 - 100.0 %
Support
Support
Enable support
✔
Enable this parameter if your model requires supports
Type
Tree (auto)
Style
Default
Threshold angle
10.0 - 60.0 °
We also recommend placing and removing supports manually in some places using special button
Remove small overhangs
✔
Raft
Raft layers
0 layers
Advanced
Initial layer density
90.0 %
Initial layer expansion
-1.0 mm
Support wall loops
-1 - 2
1-2 loops for more thick support
Top Z distance
0.20 - 0.25 mm
Top Z distance = 1-1.3 layer Height. If the supports are hard to remove, try increasing this setting by 0.1-0,4 mm
Bottom Z distance
Bottom Z distance = 1-1.3 layer Height. If the supports are hard to remove, try increasing this setting by 0.1-0,4 mm
Base pattern
Rectilinear
Base pattern spacing
2.50 mm
Pattern angle
0.0 °
Top interface layers
2 - 3 layers
Interface pattern
Concentric
Top interface spacing
0.00 - 0.50 mm
You have to calibrate this parameter which one is better for your filament
Normal Support expansion
0.00 mm
Support/object xy distance
0.35 - 0.80 mm
Increase this parameter if the supports are hard to remove from walls
Support/object first layer gap
0.35 mm
Max bridge length (only for tree supports)
1.0 mm
Independent support layer height
✔
Tree Support (only for tree supports)
Branch distance
5.0 mm
Branch diameter
2.0 mm
Branch angle
45.0 °
Branch diameter angle
5.0 °
Others
Bed adhesion
Skirt loops
0
Skirt height
1 layers
For PLA and PETG filament types
Brim type
Outer and inner brim
Brim width
5.00 mm
5-8 mm is optional for small prints that have bad adhesion to the build plate
Brim-object gap
0.01 - 0.12 mm
Prime tower
Enable
✔
Skip points
✔
Width
35.0 mm
Max speed
90.0 mm/sec
Brim width
3.0 mm
Infill gap
150.0 %
Rib wall
✔
Rib width
8.0 mm
Fillet wall
✔
Flush options
Flush into objects support
✔
Special mode
Slicing Mode
Regular
Print sequence
By layer
Timelapse
Traditional
G-code output
Reduce infill retraction
✔
Filament settings
Filament
Type
PLA
Filament ramming length
10.0 mm
Filament prime volume
45.0 mm³
Diameter
1.75 mm
Flow ratio
0.90 - 1.10
You have to calibrate this parameter
Shrinkage
100.0 %
Velocity Adaptation Factor
1.0
Softening temperature
45.0 - 80.0 ⁰C
Read the description on your filament roll
Travel time after ramming
0.0 sec
Precooling target temperature
0.0 ⁰C
Recommended nozzle temperature
190.0 - 270.0 ⁰C
Read the description on your filament roll and increase this parameter for fast printers
Print temperature
Cool Plate SuperTack
45.0 - 45.0 ⁰C
Cool Plate
35.0 - 35.0 ⁰C
Engineering Plate
0.0 - 0.0 ⁰C
Smooth PEI Plate / High
65.0 - 65.0 ⁰C
Temp Plate
65.0 - 65.0 ⁰C
Textured PEl Plate
65.0 - 65.0 ⁰C
Nozzle
220.0 - 270,200.0 ⁰C
Read the description on your filament roll and increase this parameter for fast printers
Volumetric speed limitation
Max volumetric speed
12.0 mm/sec
Ramming volumetric speed
-1.0 mm/sec
Filament scarf seam settings
Scarf start height
10.0 %
Scarf length
10.0 mm
Cooling
Cooling for specific layer
1 layers
No cooling for the first
1 layers
Part cooling fan
Min fan speed threshold
Fan speed
60.0 %
Layer time
90.0 sec
Max fan speed threshold
Fan speed
80.0 %
Layer time
8.0 sec
Keep fan always on
✔
Slow printing down for better layer cooling
✔
Min print speed
10.0 mm/sec
Force cooling for overhangs and bridges
✔
Cooling overhang threshold
50.0 %
Overhang threshold for participating cooling
100.0 %
Fan speed for overhangs
100.0 %
Pre start fan time
0.0 sec
Auxiliary part cooling fan
Fan speed
70.0 %
Printer Settings Tab
Motion ability
Jerk limitation
Maximum jerk X
7.0 mm/sec
Maximum jerk Y
7.0 mm/sec
Maximum jerk Z
0.4 mm/sec
Maximum jerk E
5.0 mm/sec
Extruder
Basic information
Type
Direct drive extruder
Nozzle diameter
0.40 mm
Nozzle volume
0.0 mm³
Layer height limits
Min
0.08 mm
Max
0.35 mm
Retraction
Length
0.70 mm
Z hop when retract
0.3 mm
Z hop lower boundary
0.0 mm
Z Hop Type
Normal
Retraction Speed
30.0 mm/sec
Deretraction Speed
30.0 mm/sec
Travel distance threshold
1.0 mm
Retract when change layer
✔
Wipe while retracting
✔
Wipe Distance
2.0 mm
Retract amount before wipe
70.0 %
Orca Slicer 2.0+
Settings name
Option
Quality Tab
Layer height
Layer Height
0.12 - 0.20 mm
For better quality use 0.12 mm layer height, for fast printing use 0.2 mm layer height. For pins and the Ge connectors, use 0.2 layer height.
For pins and power elements of the structure, such as the vehicle frame, use 3 loop
Detect thin walls
Disabled for vehicles and ships, enabled for characters
Top/bottom shells
Top shell layers
5 layers
For 0,2 Layer Height
Top shell thickness
1.00 mm
Top surface density
100 %
Top surface pattern
Monotonic line
Bottom shell layers
5 layers
For 0,2 Layer Height
Bottom shell thickness
1.00 mm
Bottom surface density
100.0 %
Bottom surface pattern
Monotonic
Top/Bottom solid infill/wall overlap
25.0 %
Infill
Sparse infill density
5.0 %
Fill Multiline
1.00
Sparse infill pattern
Triangles
Sparse infill direction
45.0 °
Maximum length of the infill anchor
20.0 mm
Sparse infill anchor length
400.0 %
Internal solid infill pattern
Monotonic
Solid infill direction
45.0 °
Apply gap fill
Nowhere
Filter out tiny gaps
0.00 mm
Infill/wall overlap
10.0 - 25.0 %
Advanced
External bridge infill direction
0.0 °
Internal bridge infill direction
0.0 °
Minimum sparse infill threshold
15.0 mm²
Detect narrow internal solid infill
✔
Ensure vertical shell thickness
All
Speed
The parameters in this tab vary greatly, it all depends on the quality of your printer. For example, if you have a classic Ender3, stick to the minimum parameters, but if you have a newer printer, for example, Anycubic Kobra 3 Or Bambulab A1, you can select the maximum recommended values.
First layer speed
First layer
15.0 - 45.0 mm/sec
First layer infill
35.0 - 75.0 mm/sec
Initial layer travel speed
50.0 %
Number of slow layers
2 layers
Other layers speed
Outer wall
30.0 - 150.0 mm/sec
Inner wall
30.0 - 250.0 mm/sec
Small perimeters
50.0 %
Small perimeter threshold
0.1 mm
Sparse infill
50.0 - 250.0 mm/sec
Internal solid infill
50.0 - 250.0 mm/sec
Top surface
30.0 - 150.0 mm/sec
Gap infill
30.0 - 200.0 mm/sec
Slow down by height
✘
Overhang speed
Slow down for overhangs
✔
Slow down for curled perimeters
✔
Overhang speed 10%, 25%
0.0 mm/sec
Overhang speed 25%, 50%
50.0 mm/sec
Overhang speed 50%, 75%
30.0 mm/sec
Overhang speed 75%, 100%
10.0 mm/sec
Bridge external
20.0 - 40.0 mm/sec
Bridge internal
30.0 mm/sec
Travel speed
Travel
100.0 - 300.0 mm/sec
Acceleration
Settings for advanced users, change these parameters only if you have sufficient 3D printing expertise
Normal printing
5,000.0 mm/sec²
Outer wall
3,000.0 mm/sec²
Inner wall
3,000.0 mm/sec²
Bridge
50.0 %
Sparse infill
100.0 %
Internal solid infill
100.0 %
First layer
300.0 mm/sec²
Top surface
3,000.0 mm/sec²
Travel
5,000.0 mm/sec²
accel to decel
50.0 %
Jerk(XY)
Default
9.0 mm/sec
Outer wall
7.0 mm/sec
Inner wall
7.0 mm/sec
Infill
10.0 mm/sec
Top surface
7.0 mm/sec
First layer
9.0 mm/sec
Travel
12.0 mm/sec
Support
Support
Enable support
✔
Enable this parameter if your model requires supports
Type
Tree (auto)
Style
Default
Threshold angle
60.0 °
We also recommend placing and removing supports manually in some places using special button
Threshold overlap
50.0 %
First layer density
90.0 %
First layer expansion
2.0 mm
Remove small overhangs
✔
Raft
Raft layers
0 layers
Advanced
Top Z distance
0.20 - 0.25 mm
Top Z distance = 1-1.3 layer Height. If the supports are hard to remove, try increasing this setting by 0.1-0,4 mm
Bottom Z distance
0.20 - 0.25 mm
Bottom Z distance = 1-1.3 layer Height. If the supports are hard to remove, try increasing this setting by 0.1-0,4 mm
Support wall loops
0
Base pattern
Rectilinear
Base pattern spacing
2.50 mm
Pattern angle
0.0 °
Top interface layers
2 layers
Bottom interface layers
2 layers
Interface pattern
Rectilinear
Top interface spacing
0.00 mm
Bottom interface spacing
0.00 mm
Normal Support expansion
0.00 mm
Support/object xy distance
0.40 mm
Increase this parameter if the supports are hard to remove from walls
Support/object first layer gap
0.35 mm
Independent support layer height
✔
Tree Support (only for tree supports)
Tip Diameter
0.80 mm
Tree support branch distance
1.00 mm
Branch Density
30.0 %
Tree support branch diameter
2.0 mm
Branch Diameter Angle
5.0 °
Tree support branch angle
40.0 °
Preferred Branch
25.0 °
Others
Skirt
Skirt loops
0
Skirt type
Combined
Skirt minimum extrusion length
0.00 mm
Skirt distance
2.00 mm
Skirt start point
-135.0 °
Skirt speed
50.0 mm/sec
Skirt height
1.0 layers
For PLA and PETG filament types
Draft shield
Disabled
Brim
Brim type
Outer and inner brim
Brim width
5.0 mm
5-8 mm is optional for small prints that have bad adhesion to the build plate
Brim-object gap
0.01 - 0.12 mm
Special mode
Slicing Mode
Regular
Print sequence
By layer
Intra-layer order
Default
G-code output
Label objects
✔
Filename format
{input _filename_ base}_{print_time}.gcode
Filament Tab
Filament
Basic information
Type
PLA
Shrinkage (XY)
100.0 %
Shrinkage (Z)
100.0 %
Softening temperature
60.0 ⁰C
Read the description on your filament roll
Idle temperature
0.0 ⁰C
Recommended nozzle temperature
190.0 - 270.0 ⁰C
Read the description on your filament roll and increase this parameter for fast printers
Flow ratio and Pressure Advance
Flow ratio
0.90 - 1.10
You have to calibrate this parameter
Print chamber temperature
Chamber temperature
0.0 ⁰C
Print temperature
Nozzle
Read the description on your filament roll and increase this parameter for fast printers
First layer
190.0 - 270.0 ⁰C
Other layers
190.0 - 270.0 ⁰C
Bed temperature
Read the description on your filament roll
Cool Plate (SuperTack)
First layer
45.0 ⁰C
Other layers
45.0 ⁰C
Cool Plate
First layer
35.0 ⁰C
Other layers
35.0 ⁰C
Textured Cool Plate
First layer
40.0 ⁰C
Other layers
40.0 ⁰C
Engineering Plate
First layer
0.0 ⁰C
Other layers
0.0 ⁰C
Smooth PEI Plate / High Temp Plate
First layer
55.0 ⁰C
Other layers
55.0 ⁰C
Textured PEI Plate
First layer
55.0 ⁰C
Other layers
55.0 ⁰C
Volumetric speed limitation
Max volumetric speed
21.0 mm/sec
Cooling
Cooling for specific layer
No cooling for the first
1.0 layers
Full fan speed at layer
3.0 layers
Part cooling fan
Min fan speed threshold
Fan speed
70.0 %
Layer time
80.0 sec
Max fan speed threshold
Fan speed
80.0 %
Layer time
6.0 sec
Keep fan always on
✔
Slow printing down for better layer cooling
✔
Min print speed
9 mm/sec
Force cooling for overhangs and bridges
✔
Overhang cooling activation threshold
50.0 %
Overhangs and external bridges fan speed
100.0 %
Internal bridges fan speed
-1.0 %
Support interface fan speed
-1.0 %
Ironing fan speed
-1.0 %
Auxiliary part cooling fan
Fan speed
70.0 %
Exhaust fan
During print
69.9 %
Complete print
70.0 %
Printer Settings Tab
Basic information
This field is filled in according to your printer specifications when you add it to the slicer.
Machine G-code
You can add custom G-code here for the start and end of the print. However, be careful - this is for advanced users only!
Retraction Length: For direct-drive setups use 0.5 mm to 2.5 mm; for Bowden extruders use 5 to 7 mm
Extra length on restart
0.00 mm
Retraction speed
40 mm/sec
Deretraction speed
40.0 mm/sec
This is how fast the filament is pulled back—40-60 mm/s for direct drive and 30-50 mm/s for Bowden setups.
Travel distance threshold
1.00 mm
Retract on layer change
✔
Wipe while retracting
✔
Wipe distance
2.00 mm
Retract amount before wipe
70.0 %
Z-Hop
On surfaces
All surfaces
Z-hop type
Auto
Z-hop height
0.30 mm
You have to calibrate this parameter: Reduce it until the printer starts to hit the parts with the nozzle during printing, then increase it by 0.2.
Traveling angle
3.0 °
Only lift Z above
0.00 mm
Only lift Z below
0.00 mm
Retraction when switching material
Length
1.00 mm
Extra length on restart
0.00 mm
UltiMaker Cura 5.0+
Settings name
Option
Quality
Layer Height
0.12 - 0.20 mm
For better quality use 0.12 mm layer height, for fast printing use 0.2 mm layer height. For pins and the Ge connectors, use 0.2 layer height.
Initial Layer Height
0.20 mm
120-150% of your Layer Height
Line Width
0.42 mm
Wall Line Width
0.40 mm
Outer Wall Line Width
0.40 mm
Inner Wall(s) Line Width
0.42 mm
Top/Bottom Line Width
0.44 mm
Infill Line Width
0.40 mm
Skirt/Brim Line Width
0.42 mm
Initial Layer Line Width
0.5 %
Walls
Wall Thickness
0.80 mm
Wall Line Count
2
To increase the strength of the print parts, use wall line count: 3
Wall Transition Length
0.20 mm
Wall Distribution Count
1
Wall Transitioning Threshold Angle
10.0 °
Wall Transitioning Filter Margin
0.10 mm
Outer Wall Wipe Distance
0.00 mm
Optimize Wall Printing Order
✔
Wall Ordering
Inside to Outsize
Minimum Wall Line Width
0.34 mm
Minimum Even Wall Line Width
0.34 mm
Minimum Odd Wall Line Width
0.34 mm
Print Thin Walls
✔
Minimum Feature Size
0.10 mm
Minimum Thin Wall Line Width
0.34 mm
Horizontal Expansion
0.00 mm
Initial Layer Horizontal Expansion
0.00 mm
Hole horizontal expansion
0.00 mm
Z Seam Alignment
User Specified
Z Seam Position
Back
Z Seam X
0.0 mm
Z Seam Y
200.0 mm
Top/Bottom
Top Surface Skin Layers
0 layers
Bottom Surface Skin Layers
0 layers
Top/Bottom Thickness
1.00 mm
Top Thickness
1.00 mm
Bottom Thickness
1.00 mm
Initial Bottom Layers
4 - 5 layers
Top/Bottom Pattern
Lines
Bottom Pattern Initial Layer
Lines
Extra Skin Wall Count
1
Enable Ironing
✘
Infill
For pins and connectors use 50% Infill
Infill Density
5.0 - 30.0 %
Infill Line Distance
6.00 mm
Infill Pattern
Triangles
Infill X Offset
0.00 mm
Infill Y Offset
0.00 mm
Infill Line Multiplier
1
Infill Overlap Percentage
30.0 %
Infill Overlap
0.12 mm
Infill Wipe Distance
0.00 mm
Infill Layer Thickness
0.20 mm
Gradual Infill Steps
0
Minimum Infill Area
0.00 mm²
Skin Edge Support Thickness
0.00 mm
Skin Edge Support Layers
0
Extra Infill Lines To Support Skins
Walls and Lines
Material
These parameters are for standard PLA plastic. If you are using a different type of plastic, check the printing temperature recommended by the manufacturer. Also, read the description on your filament spool. For fast printers, add +30 °C to the current parameters.
Printing Temperature
210.0 ⁰C
Printing Temperature Initial Layer
210.0 ⁰C
Initial Printing Temperature
210.0 ⁰C
Final Printing Temperature
210.0 ⁰C
Build Plate Temperature
60.0 ⁰C
Build Plate Temperature Initial Layer
60.0 ⁰C
Scaling Factor Shrinkage Compensation
100.0 %
Horizontal Scaling Factor Shrinkage Compensation
100.0 %
Vertical Scaling Factor Shrinkage Compensation
100.0 %
Flow
98.0 - 102.0 %
Speed
The parameters in this tab vary greatly, it all depends on the quality of your printer. For example, if you have a classic Ender3, stick to the minimum parameters, but if you have a newer printer, for example Anycubic cobra 3 v3, you can select the maximum recommended values
Print Speed
60.0 - 160.0 mm/sec
Infill Speed
60.0 - 160.0 mm/sec
Wall Speed
30.0 - 90.0 mm/sec
Outer Wall Speed
30.0 - 90.0 mm/sec
Inner Wall Speed
40.0 - 80.0 mm/sec
Top/Bottom Speed
40.0 - 100.0 mm/sec
Travel Speed
100.0 - 250.0 mm/sec
Initial Layer Speed
15.0 - 30.0 mm/sec
Initial Layer Print Speed
15.0 - 30.0 mm/sec
Initial Layer Travel Speed
100.0 - 150.0 mm/sec
Skirt/Brim Speed
20.0 - 30.0 mm/sec
Number of Slower Layers
2.0 layers
Flow Equalization Ratio
100.0 %
Enable Acceleration Control
✔
Settings for advanced users, change these parameters only if you have sufficient 3D printing expertise.
Print Acceleration
500.00 - 3,000.00 mm/sec²
Infill Acceleration
500.0 - 3,000.0 mm/sec²
Wall Acceleration
500.0 - 2,000.0 mm/sec²
Outer Wall Acceleration
500.0 - 2,000.0 mm/sec²
Inner Wall Acceleration
500.0 - 3,000.0 mm/sec²
Top/Bottom Acceleration
500.0 - 2,000.0 mm/sec²
Travel Acceleration
500.0 - 4,000.0 mm/sec²
Initial Layer Acceleration
500.0 - 1,000.0 mm/sec²
Initial Layer Print Acceleration
500.0 - 1,000.0 mm/sec²
Initial Layer Travel Acceleration
500.0 - 3,000.0 mm/sec²
Skirt/Brim Acceleration
500.0 - 2,500.0 mm/sec²
Travel
Enable Retraction
✔
Retraction Distance
0.8 mm
You need to calibrate this parameter using Gambody test models. These values are average values for a Direct Drive extruder; for a Bowden extruder, the values should be increased.
Retraction Speed
35.0 - 50.0 mm/sec
You need to calibrate this parameter using Gambody test models. These values are average values for a Direct Drive extruder; for a Bowden extruder, the values should be increased.
Retraction Retract Speed
40.0 mm/sec
Retraction Prime Speed
40.0 mm/sec
Retraction Extra Prime Amount
0.00 mm³
Retraction Minimum Travel
1.49 mm
Maximum Retraction Count
100
Minimum Extrusion Distance Window
2.00 - 3.00 mm
Combing Mode
All
Retract Before Outer Wall
✔
Layer Start X
0.00 mm
Layer Start Y
0.00 mm
Z Hop When Retracted
✔
Use this value other than 0 if your nozzle catches on the internal infill during travel moves. Try to keep this value as low as possible in height.
Cooling
Enable Print Cooling
✔
Fan Speed
100.0 %
Regular Fan Speed
100.0 %
Maximum Fan Speed
100.0 %
Regular/Maximum Fan Speed Threshold
10.0 sec
Initial Fan Speed
0.0 %
Regular Fan Speed at Height
0.5 mm
Regular Fan Speed at Layer
3 layers
Minimum Layer Time
5.0 sec
Minimum Speed
10.0 mm/sec
Cooling during extruder switch
Unchanged
Support
Generate Support
✔
Support Structure Normal
✔
Use normal supports to support large, straight surfaces (most mechanical or technical parts).
Support Z Seam Away from Model
Min Z Seam Distance from Model
0.80 mm
Support Placement
Everywhere
Support Overhang Angle
45.0 - 65.0 °
You have to calibrate this parameter according to the capabilities of your printer and your filament, using a Gambody test models.
Support Pattern
Zig Zag
Support Wall Line Count
0
Use 1 instead of 0 if your supports are thin and tall. They will be harder to remove, but much stronger.
Support Interface Wall Line Count
0
Support Roof Wall Line Count
0
Support Bottom Wall Line Count
0
Connect Support ZigZags
✔
Support Density
5.0 - 20.0 %
Support Line Distance
2.0 - 8.0 mm
Enable Support Brim
✔
Support Brim Width
4.0 mm
Support Brim Line Count
10
Support Z Distance
0.24 mm
Top Z distance = 1-1.3 layer Height. If the supports are hard to remove, try increasing this setting by 0.1-0,4 mm
Support Top Distance
0.24 mm
Support Bottom Distance
0.24 mm
Support X/Y Distance
0.80 mm
Increase this parameter if the supports are hard to remove from walls
Support Distance Priority
X/Y overrides Z
Support Stair Step Height
0.00 mm
Support Join Distance
2.00 mm
Support Horizontal Expansion
0.80 mm
Support Infill Layer Thickness
0.20 mm
Gradual Support Infill Steps
0
Minimum Support Area
2.0 mm²
Enable Support Interface
✔
Enable Support Roof
✔
Enable Support Floor
✔
Support Interface Thickness
0.40 mm
Support Roof Thickness
0.40 mm
Support Floor Thickness
0.40 mm
Support Interface Density
33.33 - 33.33 %
Support Roof Density
33.33 - 33.33 %
Support Roof Line Distance
2.40 mm
Support Floor Density
33.3 - 33.3 %
Support Floor Line Distance
2.40 mm
Support Interface Pattern
Concentric
Support Roof Pattern
Concentric
Support Floor Pattern
Concentric
Minimum Support Interface Area
10.0 mm²
Minimum Support Roof Area
10.0 mm²
Minimum Support Floor Area
10.0 mm²
Support Interface Horizontal Expansion
0.0 mm
Support Roof Horizontal Expansion
0.0 mm
Support Floor Horizontal Expansion
0.0 mm
Use Towers
✔
Tower Diameter
3.0 mm
Maximum Tower-Supported Diameter
3.0 mm
Tower Roof Angle
65.0 °
Support Structure Tree
✔
Use tree supports to support complex objects, such as characters.
Maximum Branch Angle
45.0 °
You have to calibrate this parameter according to the capabilities of your printer and your filament, using a Gambody test models.
Branch Diameter
5.0 mm
Trunk Diameter
25.0 mm
Branch Diameter Angle
7.0 °
Support Z Seam Away from Model
✔
Min Z Seam Distance from Model
0.80 mm
Support Placement
Everywhere
Preferred Branch Angle
30.0 °
Diameter Increase To Model
1.0 mm
Minimum Height To Model
3.0 mm
Initial Layer Diameter
7.5 mm
Branch Density
30.0 %
Tip Diameter
0.8 mm
Limit Branch Reach
✔
Optimal Branch Range
30.0 mm
Rest Preference
On model if required
Support Overhang Angle
45.0 °
Support Pattern
Zig Zag
Support Wall Line Count
1
Support Interface Wall Line Count
0
Support Roof Wall Line Count
0
Support Bottom Wall Line Count
0
Connect Support ZigZags
✔
Support Density
0.0 %
Support Line Distance
0.0 %
Initial Layer Support Line Distance
0.0 %
Support Infill Density Multiplier Initial Layer
1
Enable Support Brim
✔
Support Brim Width
4.0 mm
Support Brim Line Count
10
Support Z Distance
0.24 mm
Top Z distance = 1-1.3 layer Height. If the supports are hard to remove, try increasing this setting by 0.1-0,4 mm
Support Top Distance
0.22 mm
Support Bottom Distance
0.22 mm
Support X/Y Distance
0.22 mm
Increase this parameter if the supports are hard to remove from walls
Support Distance Priority
X/Y overrides Z
Minimum Support Area
0.00 mm²
Enable Support Interface
✔
Enable Support Roof
✔
Enable Support Floor
✔
Support Interface Thickness
0.80 mm
Support Roof Thickness
0.80 mm
Support Floor Thickness
0.80 mm
Support Interface Density
33.33 mm
Support Roof Density
33.33 %
Support Floor Density
2.39 %
Support Interface Pattern
Grid
Support Roof Pattern
Grid
Support Floor Pattern
Grid
Minimum Support Interface Area
10.00 mm²
Minimum Support Roof Area
10.00 mm²
Support Interface Horizontal Expansion
0.00 mm
Support Roof Horizontal Expansion
0.00 mm
Support Floor Horizontal Expansion
0.00 mm
Support Interface Priority
Interface preferred
Build Plate Adhesion
Build plate type: Skirt
Use a skirt for all parts when printing on outdated printers.
Skirt Line Count
3.00
Skirt Height
3.00
Skirt Distance
10.00 mm
Skirt/Brim Minimum Length
250 mm
Build plate type: Brim
Use a brim when printing thin but tall parts, as well as parts with a small bed adhesion area.
Skirt/Brim Minimum Length
250.0 mm
Brim Width
10.0 mm
Brim Line Count
25
Brim Distance
0.0 mm
Brim Location
Outside Only
Brim Avoid Margin
1.6 mm
Smart Brim
✔
Z Offset
0.0 mm
PrusaSlicer 2.0+
Settings name
Option
Print Settings Tab
Layers and perimeters
Layer height
Layer Height
0.12 - 0.20 mm
For better quality use 0.12 mm layer height, for fast printing use 0.2 mm layer height. For pins and the Ge connectors, use 0.2 layer height.
First layer height
0.18 - 0.28 mm
120-150% of your Layer Height
Vertical shells
Perimeters
2 - 3
Horizontal shells
Solid layers top
4
for 0.2 Layer Height
Solid layers bottom
4
Minimum shell thickness top
0.80 mm
Minimum shell thickness bottom
0.80 mm
Quality (slower slicing)
Extra perimeters if needed
✔
Ensure vertical shell thickness
Enabled
Advanced
Seam position
Aligned
But you can paint the seam if you want.
Seam gap distance
15.0 %
Scarf joint placement
Nowhere
External perimeters first
✔
Fill gaps
✔
Perimeter generator
Arachne
Fuzzy skin (experimental)
Fuzzy Skin
None
Fuzzy skin thickness
0.30 mm
Fuzzy skin point distance
0.80 mm
Only one perimeter
Single perimeter on top surfaces
Disabled
Infill
Infill
Fill Density
6.0 %
Fill Pattern
Triangles
Length of the infill anchor
10.00 mm
Maximum length of the infill anchor
10.00 mm
Top Fill Pattern
Monotonic Lines
Bottom fill pattern
Monotonic Lines
Ironing
Enable ironing
✘
Skirt and brim
Skirt
Loops (minimum)
0
Distance from brim/object
6.00 mm
Skirt height
1 layers
(for PLA and PETG)
Minimal filament extrusion length
50.00 mm
Brim
Brim type
Outer brim only
Brim width
5.00 - 8.00 mm
(5-8 mm is optional for small prints that have bad adhesion to the build plate)
Brim separation gap
0.12 mm
Support material
Support material
Generate support material
✔
Enable this parameter if your model requires supports
Auto generated supports
✔
Overhang threshold
60.0 °
(45-50 degree)You have to calibrate this parameter according to the capabilities of your printer
and your filament, using a Gambody test models.
Enforce support for the first
2 layers
First layer density
90.0 %
First layer expansion
3.0 mm
Raft
Raft layers
0 layers
Options for support material and raft
Style
Grid
Top contact Z distance
0.24 mm
Top contact Z distance = 1-1.3 layer Height. If the supports are hard to remove, try
increasing this setting by 0.1-0,4 mm
Bottom contact Z distance
0.24 mm
Top contact Z distance = 1-1.3 layer Height. If the supports are hard to remove, try
increasing this setting by 0.1-0,4 mm
Pattern
Rectilinear
Pattern spacing
2.5 mm
Pattern angle
0.0 °
Top interface layers
2 layers
Bottom interface layers
2 layers
Interface pattern
Concentric
Intertace pattern spacing
0.00 mm
XY separation between an object and its support
1.00 mm
Increase this parameter if the supports are hard to remove from walls
Don't support bridges
✔
Organic supports
Maximum Branch Angle
45.0 °
Preferred Branch Angle
30.00 °
Branch Diameter
2.00 mm
Branch Diameter Angle
5.00 °
Branch Diameter with double walls
3.00 mm
Tip Diameter
0.80 mm
Branch Distance
1.00 mm
Branch Density
30.0 %
Speed
The parameters in this tab vary greatly, it all depends on the quality of your printer. For example, if you have a classic Ender3, stick to the minimum parameters, but if you have a newer printer, for example Anycubic cobra 3 v3, you can select the maximum recommended values
Speed for print moves
Perimeters
25.0 - 200.0 mm
Small perimeters
25.0 - 150.0 mm
External perimeters
25.0 - 200.0 mm/sec
Infill
50.0 - 250.0 mm/sec
Solid infill
40.0 - 200.0 mm/sec
Top solid infill
25.0 - 200.0 mm/sec
Support material
50.0 - 300.0 mm/sec
Support material interface
100.0 - 100.0 %
Bridges
25.0 - 100.0 mm/sec
Over bridges
25.0 - 100.0 mm/sec
Gap fill
25.0 - 100.0 mm/sec
Ironing
15.0 - 80.0 mm/sec
Dynamic overhang speed
speed for 0% overlap (bridge)
0.0 mm/sec
speed for 25% overlap
0.1 mm/sec
speed for 50% overlap
0.0 mm/sec
Speed for non-print moves
Travel
100.0 - 150.0 mm/sec
Modifiers
First layer speed
15.0 - 30.0 mm/sec
Speed of object first layer over raft interface
15.0 - 30.0 mm/sec
Acceleration control (advanced)
Settings for advanced users, change these parameters only if you have sufficient 3D printing expertise. Use the minimum value for outdated printers without acceleration calibration, and the maximum value for modern printers if you need it.
External perimeters
500.00 - 3,000.00 mm/sec²
Perimeters
500.00 - 4,000.00 mm/sec²
Top solid infill
500.00 - 1,500.00 mm/sec²
Solid infill
500.00 - 4,000.00 mm/sec²
Infill
500.00 - 3,000.00 mm/sec²
Bridge
500.00 - 4,000.00 mm/sec²
First layer
500.00 - 1,000.00 mm/sec²
First object layer over raft interface
500.00 - 3,000.00 mm/sec²
Wipe tower
500.00 - 4,000.00 mm/sec²
Travel
500.00 - 7,000.00 mm/sec²
Travel short distance acceleration
500.00 - 6,000.00 mm/sec²
Default
500.00 - 4,000.00 mm/sec²
Multiple Extruders
These settings only work for 3D printers with multiple extruders
Extruders
Perimeter extruder:
1
Infill extruder:
1
Solid infill extruder
1
Advanced
Extrusion width
You can try setting all parameters in this section, except the First layer, to values between 0.75% of your nozzle diameter and 1.25% of your nozzle diameter. Adjusting them will help you work out the optimal parameters for the best quality for your print. As for the First layer, you can set it to 150% of the diameter of your nozzle for better adhesion to the build plate (for a nozzle with a diameter of 0.4 mm, the First layer extrusion width can be from 0.3 mm to 0.5 mm)
Default extrusion width
0.44 mm
First layer
0.4 %
Perimeters
0.44 mm
External perimeters
0.42 mm
Infill
0.44 mm
Solid infill
0.44 mm
Top solid infill
0.40 mm
Support material
0.36 mm
Overlap
Infill/perimeters overlap:
25.0 %
Flow
Bridge flow ratio:
0.95
Arachne perimeter generator
Perimeter transitioning threshold angle
10.0 °
Perimeter transitioning filter margin
25.0 %
Perimeter transition length
100.0 %
Perimeter distribution count
1
Minimum perimeter width
85.0 %
Minimum feature size
24.9 %
Filament Settings Tab
Filament
Filament
PLA
Diameter
0.40 mm
Extrusion multiplier
1.0
For better printing quality you have to calibrate this parameter using Gambody test model.
Temperature
Check your filament manufacturer's temperature recommendations on the spool.
Cooling
Cooling parameters depends on the material you use for printing.
Enable auto cooling
✔
Cooling slowdown logic
Uniform cooling
Perimeter transition distance
0.00 mm
Fan settings
Fan speed
*for PLA
Min
50.0 %
Max
100.0 %
Bridges fan speed
100.0 %
Disable fan for the first
2.0 layers
Full fan speed at layer
4.0 layers
Cooling thresholds
Enable fan if layer print time is below
600.0 sec
Slow down if layer print time is below
9.0 sec
Min print speed
20.0 mm/sec
Slic3r 1.3+
Settings name
Option
Print Settings Tab
Layers and perimeters
Layer height
Layer height
0.12 mm
For better quality use 0.12 mm layer height, for fast printing use 0.2 mm layer height. For pins and the Ge connectors, use 0.2 layer height.
First layer height
0.18 mm
120-150% of your Layer Height
Vertical shells
Perimeters
2
Horizontal shells
Solid layers top
8 layers
For 0.12 Layer Height
Solid layers bottom
8 layers
For 0.12 Layer Height
Quality (slower slicing)
Extra perimeters if needed
✔
Avoid crossing perimeters
✔
Detect thin walls
✘
Detect bridging perimeters
✘
Advanced
Seam position
Aligned
External perimeters first
✘
Infill
Infill
Fill density
5.0 %
For pins and connectors use 50% Infill
Fill pattern top
Rectilinear
Fill pattern bottom
Rectilinear
Reducing printing time
Combine infill every
2 layers
Advanced
Fill gaps
✔
Solid infill every
0 layers
Fill angle:
45.0 °
Solid infill threshold area
70 mm²
Only retract when crossing perimeters
✔
Infill before perimeters
✘
Skirt and brim
Skirt
Use skirt for outdated 3d printers
Loops (minimum)
3
Distance from object
5.00 mm²
Skirt height
1 layers
Minimum extrusion length
50.0 mm
Brim
(5-8 mm is optional for small prints that have bad adhesion to the build plate)
Exterior brim width
8.00 mm
Interior brim width
3.00 mm
Support material
Support material
Generate support material
✔
Enable this parameter if your model requires supports
Overhang threshold
60.0 %
(45-60 degree)You have to calibrate this parameter according to the capabilities of your printer and your filament, using a Gambody test models
Options for support material and raft
Contact Z distance:
0.15 mm
Contact Z distance = 1-1.3 layer Height. If the supports are hard to remove, try increasing this setting by 0.1-0,4 mm
Pattern
rectilinear
Pattern spacing
2.50 mm
Pattern angle
0.0 °
Interface layers
3 layers
Interface pattern spacing
0.00 mm
Speed
The parameters in this tab vary greatly, it all depends on the quality of your printer. For example, if you have a classic Ender3, stick to the minimum parameters, but if you have a newer printer, for example Anycubic cobra 3 v3, you can select the maximum recommended values
Speed for print moves
Perimeters
25.0 - 200.0 mm/sec
small
52.0 - 90.0 mm/sec
external
25.0 - 90.0 mm/sec
Infill
50.0 - 160.0 mm/sec
solid
25.0 - 160.0 mm/sec
top solid
25.0 - 100.0 mm/sec
gaps
25.0 - 160.0 mm/sec
Bridges
25.0 - 50.0 mm/sec
Support material
50.0 - 200.0 mm/sec
interface
100.0 %
Speed for non-print moves
Travel:
100 - 250 mm/sec
Modifiers
First layer speed
15.00 - 30.00 mm/sec
Acceleration control (advanced)
Settings for advanced users, change these parameters only if you have sufficient 3D printing expertise. Use the minimum value for outdated printers without acceleration calibration, and the maximum value for modern printers if you need it.
Perimeters:
500 - 3,000 mm/sec²
Infill:
500 - 3,000 mm/sec²
Bridge:
500 - 3,000 mm/sec²
First layer:
500 - 1,000 mm/sec²
Default:
500 - 4,000 mm/sec²
Advanced
Extrusion width
Default extrusion width: auto
✔
Filament Settings Tab
Filament
Filament
Diameter
0.40 mm
Extrusion multiplier
1.00
You have to calibrate this parameter from 0.9 to 1.1 according to the capabilities of your printer and your filament, using a Gambody test models.
Temperature
Check your filament manufacturer's temperature recommendations on the spool.
Extruder first layer
220.0 ⁰C
Extruder other layers
220.0 ⁰C
Bed first layer
60.0 ⁰C
Bed other layers
60.0 ⁰C
Cooling
Cooling parameters depends on the material you use for printing.
Enable
Keep fan always on
✔
Fan settings
Fan speed
80.0 - 100.0 %
Bridges fan speed
100.0 %
Disable fan for the first
1 layers
Cooling thresholds
Enable fan if layer print time is below
60.0 sec
Slow down if layer print time is below
5.0 sec
Min print speed
10.0 mm/sec
Printer Settings Tab
General
Size and coordinates
Z offset
0.00 mm
Calibrate this value if you need to reduce or improve the adhesion between the plastic and the heat bed
Capabilities
Extruders
1
Has heated bed
✔
Extruder
Size
Nozzle diameter:
0.40 mm
Your current nozzle diameter
Retraction
You need to calibrate this parameter using Gambody test models. These values are average values for a Direct Drive extruder; for a Bowden extruder, the values should be increased.
Length
1.00 mm
Lift Z
0.30 mm
Speed
45.00 mm/sec
Extra length on restart
0.00 mm
Minimum travel after retraction
2.00 mm
Simplify3D 5.0+
Settings name
Option
Extruder
General
Nozzle diameter
0.4 mm
Your current nozzle diameter
Extrusion Multiplier
0.98
You have to calibrate this parameter using Gambody test models.
Extrusion Width
Automatic
✔
Ooze Control
Use Retraction
✔
You need to calibrate this parameter using Gambody test models. These values are average values for a Direct Drive extruder; for a Bowden extruder, the values should be increased.
Retract Distance
0.80 mm
Retract Vertical Lift
1.00 mm
Retract Speed
40.00 mm/sec
Layer
General
Primary Extruder
Primary Extruder
Layer Height
0.12 - 0.20 mm
For better quality use 0.12 mm layer height, for fast printing use 0.2 mm layer height. For pins and the Ge connectors, use 0.2 layer height.
Top Solid Layers
5
For 0,2 Layer Height
Bottom Solid Layers
5
For 0,2 Layer Height
Outline Perimeters
2
To increase the strength of the print parts, use Outline Perimeters: 3
Adaptive Layer Height
Enable Adaptive Layer Heights
✔
You can enable this parameter to print rounded or spherical models, as well as character models.
Minimum Adaptive Layer Height
0.08 mm
Maximum Adaptive Layer Height
0.24 mm
Adaptive Smoothing Level
5.0
Dimensional Adiustments
Horizontal Outer Size Compensation
0.00 mm
Use this option only if your parts are too tight. but better calibrate your printer extrusion
Horizontal Inner Size Compensation
0.00 mm
Use this option only if your parts are too tight. but better calibrate your printer extrusion
First Layer Settings
First Layer Height
100.0 %
First Layer Width
150.0 %
First Layer Speed
30.0 %
Start Point Selection
Optimize start points for fastest printing
✔
Restrict start points to preferred regions
✔
Printing Order
Outline Printing Order
Inside-Out
Island Printing Order
Minimize Print Time
Additions
Use Skirt/Brim
Skirt Extruder
Primary extruder
Skirt Layers
1 layers
Skirt Offset
0.00 mm
Use 2 and more if you want to create skirt instead brim
Skirt Outlines
1-2 for skirt and 10-20 for brim
Use Raft
✘
Use Prime Pillar
✘
Use for wipe nozzle if you need
Use Ooze Shield
✘
Use For ABS filament
Infill
Sparse Internal Infill
Internal Infill Pattern
Gyroid
Internal Pattern Rotation
0.0 °
Infill Percentage
7.0 %
For pins and connectors use 50% Infill
Infill Extrusion Width
100.0 %
Combined Infill Layers
2 layers
Outline Overlap
15.0 %
Minimum Infill Length
5.00 mm
Dense Internal Infill
Dense Infill Layers
0 layers
Dense Infill Percentage
50.0 %
Solid Layers
External Infill Pattern
Rectilinear
External Pattern Rotation
0 °
Solid Infill Threshold Area
25.00 mm²
Solid Infill Extra Expansion
0.00 mm
Add Solid Diaphragms
✘
Support
General
Support Extruder
All Extruders
Support Infill Pattern
Aligned
Support Pattern Rotation
0.0 °
Support Infill Percentage
30.0 %
Support Outlines
0.00
Base Support Layers
0 layers
Support inflation Distance
-0.01 mm
Combined Support Layers
1 layers
Dense Supports
Upper Dense Support Layers
0 layers
Lower Dense Support Layers
0 layers
Dense Support Infill Percentage
70.0 %
Dense Support Extra Expansion
0.00 mm
Part Separation
Support Horizontal Offset from Part
0.24 mm
Top Z distance = 1-1.3 layer Height. If the supports are hard to remove, try increasing this setting by 0.1-0,4 mm
Temperature
Extruder
General
Enable temperature controller
✔
Temperature Number
T0
Temperature Type
Extruder
Stabilize temperature controller at beginning of print
✔
Per-Layer Setpoints
Calibrate your filament and detect optimal temperature for it
Temperature
230.0 ⁰C
Idle Cooldown
Cooldown Extruder While Ide
✘
Heated Bed
General
Enable temperature controller
✔
Stabillze temperature controller at beginning of print
✔
Per-Layer Setpoints
Average temperature for PLA filament
Temperature
60.0 ⁰C
Idle Cooldown
Cooldown Extruder While Ide
✘
Cooling
Per-Layer Setpoints
Fan Speed Setpoints
Setpoint 1
Fan Speed Percentage
0.0 %
At layer
1 layers
Setpoint 2
Fan Speed Percentage
100.0 %
At layer
2 layers
Speeds
General
The parameters in this tab vary greatly, it all depends on the quality of your printer. For example, if you have a classic Ender3, stick to the minimum parameters, but if you have a newer printer, for example Anycubic cobra 3 v3, you can select the maximum recommended values
Default Printing Speed
40 - 160 mm/sec
Outer Perimeter Speed
50.0 %
Inner Perimeter Speed
80.0 %
Solid Infill Speed
80.0 %
Sparse Support Speed
80.0 %
Dense Support Speed
70.0 %
XY Travel Speed
200.0 mm/sec
Z Travel Speed
15.0 mm/sec
Time Estimation
Settings for advanced users, change these parameters only if you have sufficient 3D printing expertise.
XY Acceleration
500.0 - 3,000.0 mm/sec²
Z Acceleration
150.0 - 600.0 mm/sec²
Extruder Acceleration
1,000.0 - 4,000.0 mm/sec²
XY Jerk
10.00 - 25.00 mm/sec
Z Jerk
0.30 - 0.50 mm/sec
Extruder Jerk
5.00 - 5.00 mm/sec
Speed Overrides
Reduce print speed for excessively quick layers
✔
Begin reducing speed for layers below
15.0 sec
Minimum quick layer speed percentage
20.0 %
Reduce print speed for short perimeters
Begin reducing speed for perimeters below
80.00 mm
Minimum short perimeter speed percentage
50.0 %
Other
Bridging
Unsupported area threshold
50.00 mm²
Extra inflation distance
1.00 mm
Bridging extrusion multiplier
95.0 %
Bridging speed multiplier
30.0 %
Filament Properties
Filament diameter
1.75 mm
Advanced
Thin Wall Behavior
External Thin Wall Type
Perimeters only
Internal Thin Wall Type
Allow gap fill
Allowed Perimeter Overlap
10.0 %
Single Extrusions
Minimum Single Extrusion Length
1.00 mm
Minimum Single Extrusion Width
50.0 %
Maximum Single Extrusion Width
200.0 %
Single Extrusion Endpoint Extension
0.20 mm
Ooze Control Behavior
Only retract when crossing open spaces
✔
Force retraction between layers
✔
Update History
Version history:
All versions
All versions
Selected
Version 1.0 - Initial
FFF/FDM
Released 06 Aug 2025
Removable hatches to access the ship’s hold; Two versions of decorative elements; Two variants of corbels; The gunports have two positions: open and closed; 4 types of shrouds; Two versions of the platform design: with and without the lettering; The captain’s cabin and the lamps can be illuminated; We recommend printing statues and columns using a resin 3D printer for the best detail; The assembly parts are connected using specially designed integrated connectors that fit securely into the corresponding slots; Optionally, for added strength and rigidity, the static connections can be glued together.
All 3D models on Gambody are sold as downloadable STL or OBJ files. These are digital assets created by 3D artists who are often inspired by characters, vehicles, and elements from popular franchises and universes. While these designs may resemble well-known works, they are original fan-made creations and not official merchandise. When purchasing a model, you are not buying the full ownership of the file or any associated intellectual property. Instead, you are receiving a license to use the digital files under specific terms, as defined by the model's creator. This is commonly referred to as a Digital File License (e.g., Standard, Extended, Creator), which outlines what you can and cannot do with both the files themselves and the 3D-printed objects made from them. Always check the license type to ensure it matches your intended use.
License: Personal use
SDFL
Selected
Files for each 3D model are prepared specifically for a certain 3D printing technology to ensure the best results. Selecting the correct printer type ensures you get files optimized for your machine - minimizing the risk of slicing issues, failed prints, or unnecessary supports. Each printer type (FFF/FDM, DLP/SLA, or SLS) uses different materials and has different printing capabilities, so it's important to choose the one that matches your actual 3D printer.
Printer type: All this model is optimized for
Selected
3D printing files for each model are organized into "model versions". These versions may vary by design quality (e.g., improved detailing), pose, outfit, or additional features. Some models may also offer special variations - such as ECO versions with hollowed parts for resin-saving prints. Before purchasing or downloading, choose the one that best fits your intended use - whether you re looking for the latest improved release or a specific variant tailored to your needs.
We're glad you're here! Before you continue, let's set a few preferences to improve your experience on our marketplace. By clicking "Accept", you agree to our use of cookies to make your visit more enjoyable and personalized. This helps us offer you tailored product recommendations and relevant marketing content. Enjoy your time with Gambody, and thank you for choosing us!
Customise Consent Preferences
When you visit any website, it may collect and store information through cookies. These small data files help understand your preferences and improve your overall experience. While they usually don't identify you directly, they make your web experience more personalized. We value your privacy and are committed to being transparent about the types of cookies we use and how they enhance your experience. Explore the categories below to learn more and make choices about how your data is used, tailoring your web experience to your comfort level. Please note that rejecting some types of cookies may affect your experience on the marketplace and the services we can offer. For more information, please access our Privacy Policy.
Essential Cookies
These cookies are crucial for the proper functioning of our website. They support vital features such as privacy settings, logging in, filling out forms (including those for uploading items to the marketplace), and enabling participation in our affiliate program, which allows you to invite friends and earn rewards. Without these cookies, some parts of the site may not work as intended.
Advertising Cookies
These cookies are used by our advertising partners to build a profile of your interests and show you relevant ads on other websites. They do not store personal information directly but are based on uniquely identifying your browser and internet device. If you do not allow these cookies, you will still see ads, but they will be less tailored to you.
Didn't get an email? Check your spam folder or request another code in