


Files
3D model format
Stereolithography (.stl)
Total files
Slicer settings
Mesh error check
Netfabb
Support
Lifetime support from Gambody team
Update requests
Available to verified buyers
Model complexity
Advanced: may require tuning print settings or support placement, plus precise fitting, gluing, or sanding.
Model versions
FFF/FDM
Assembly method
Connectors, Glue
Features
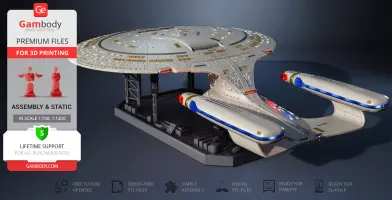
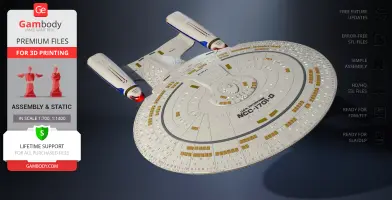
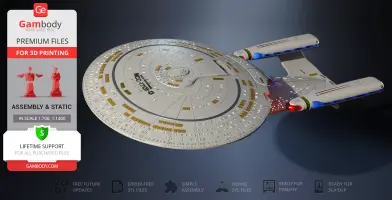
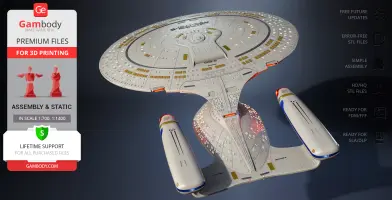
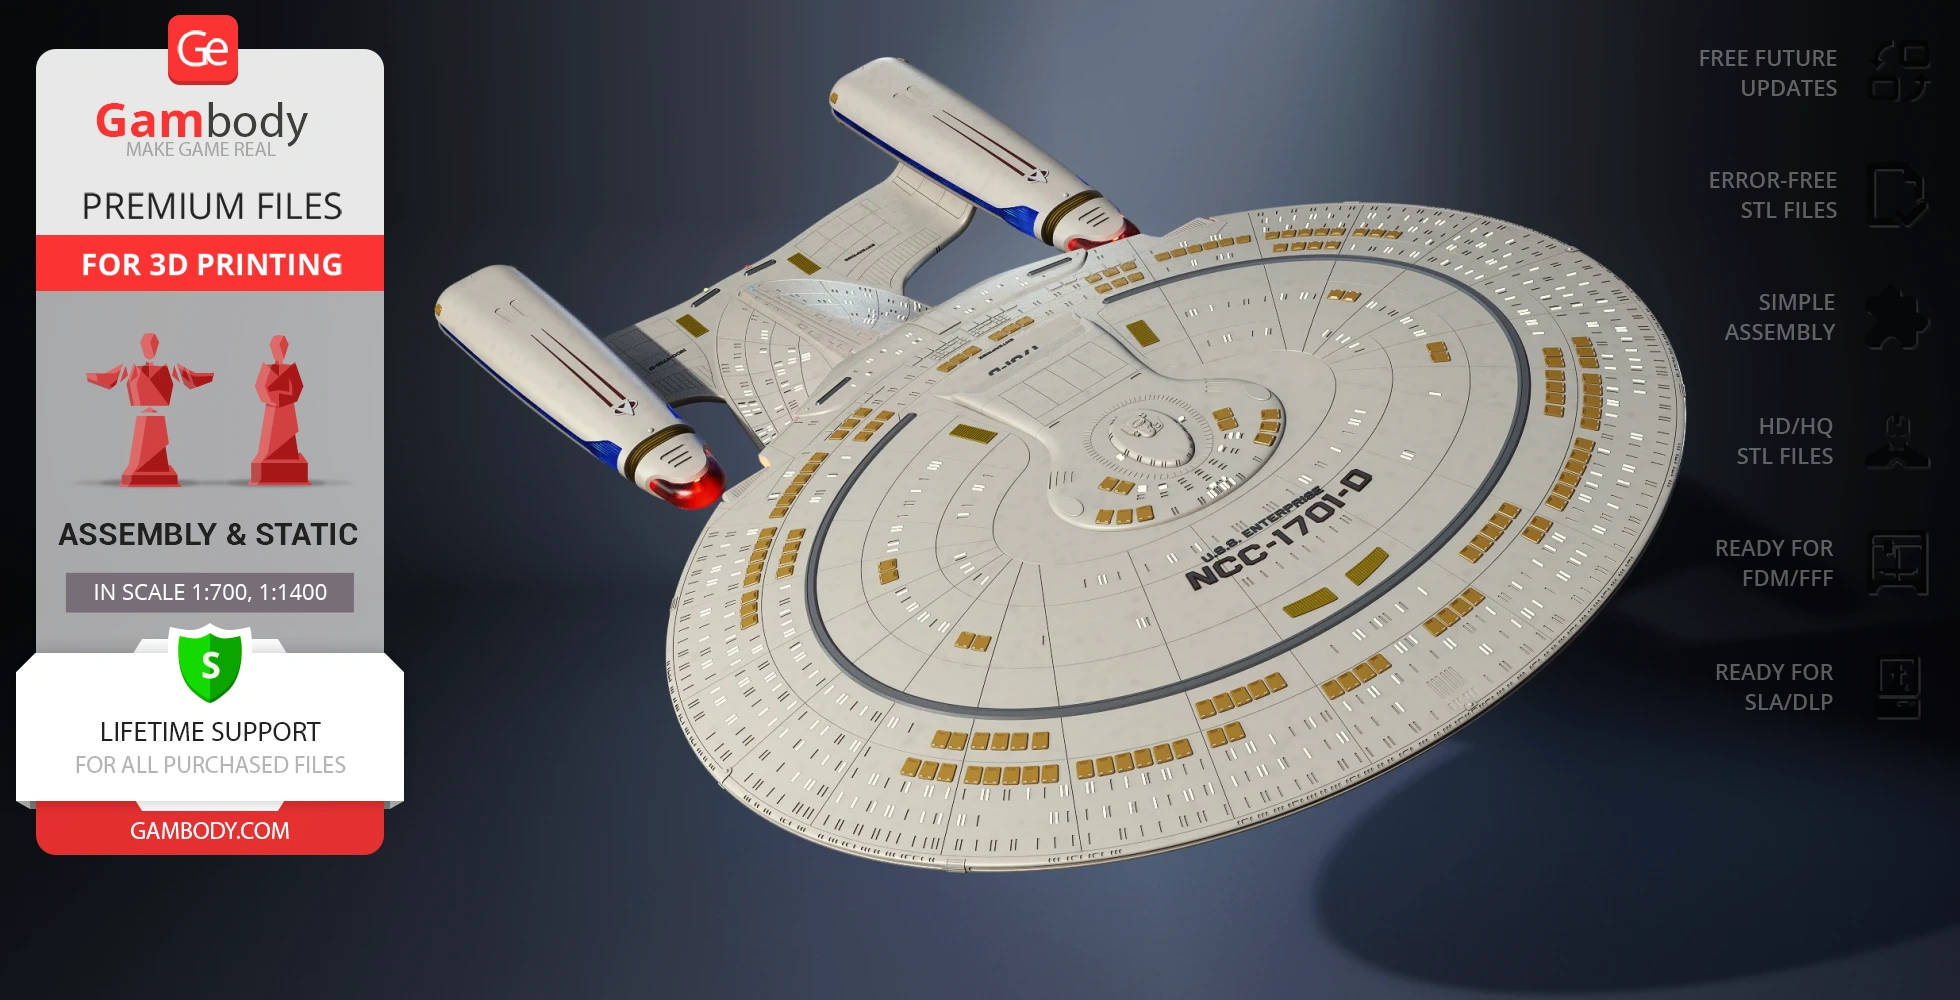
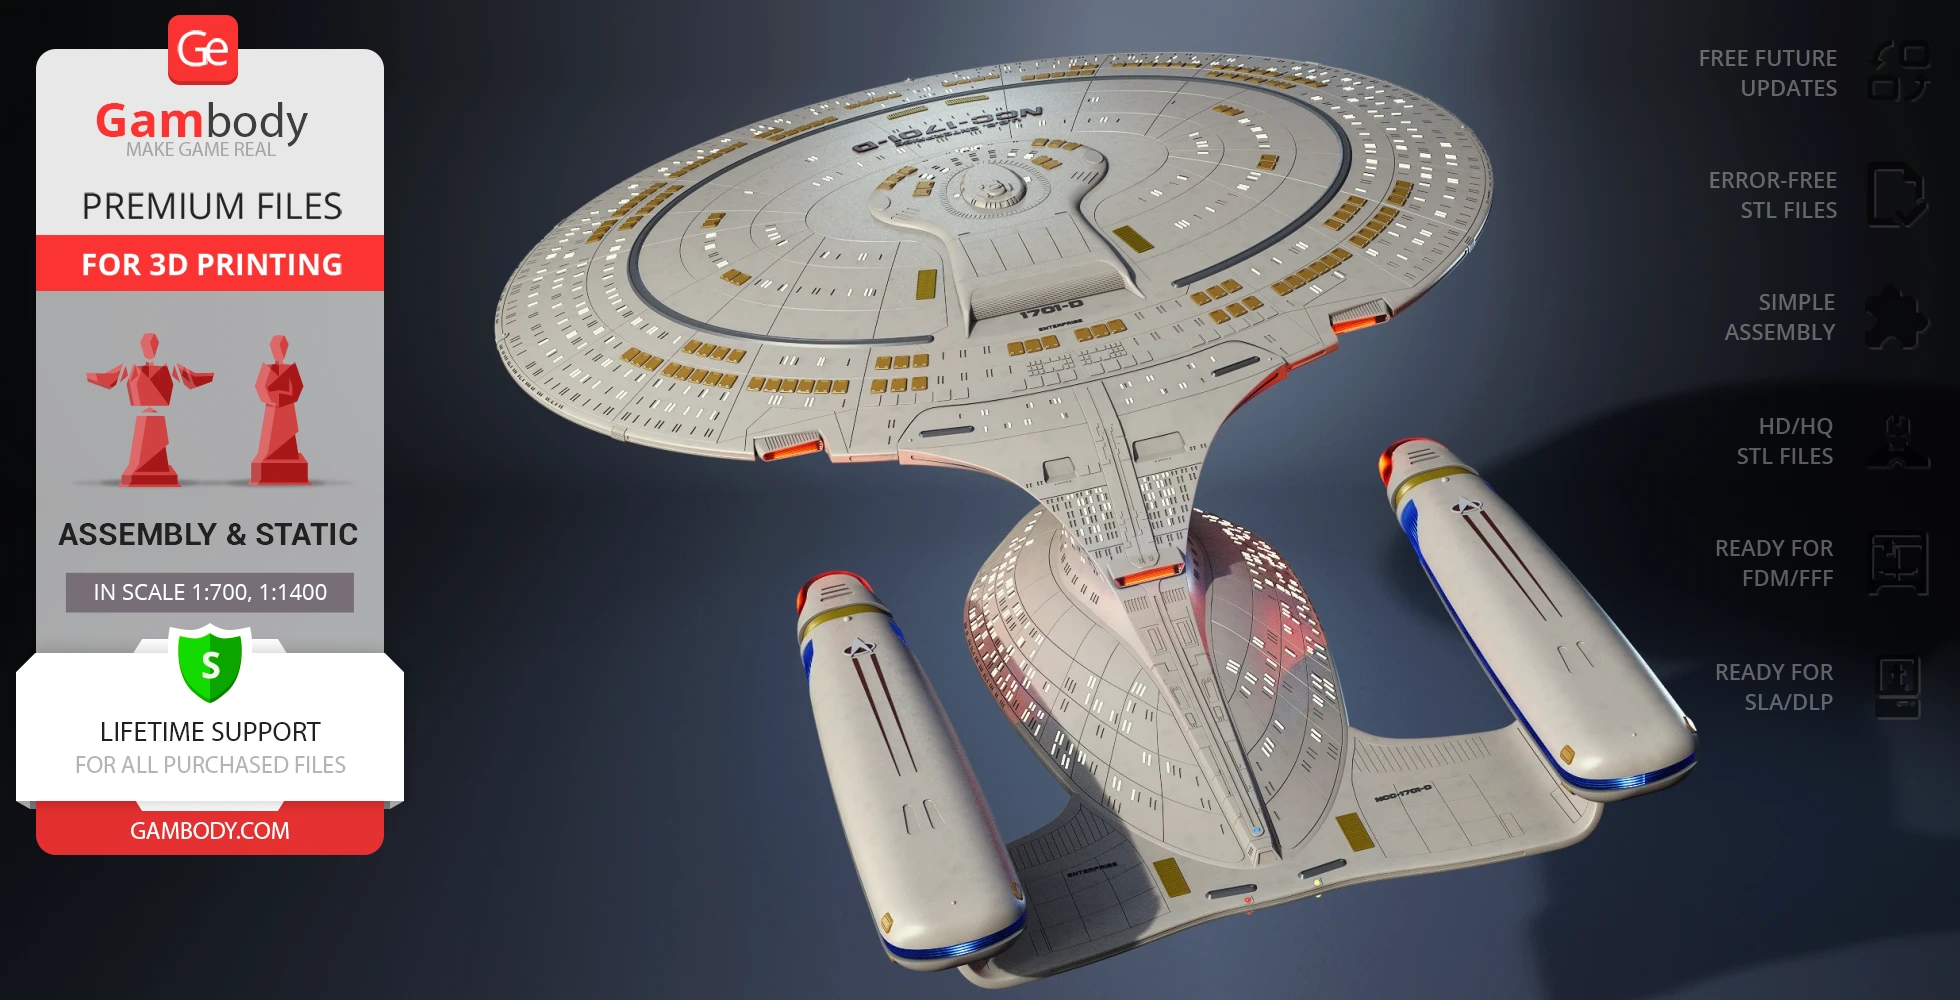
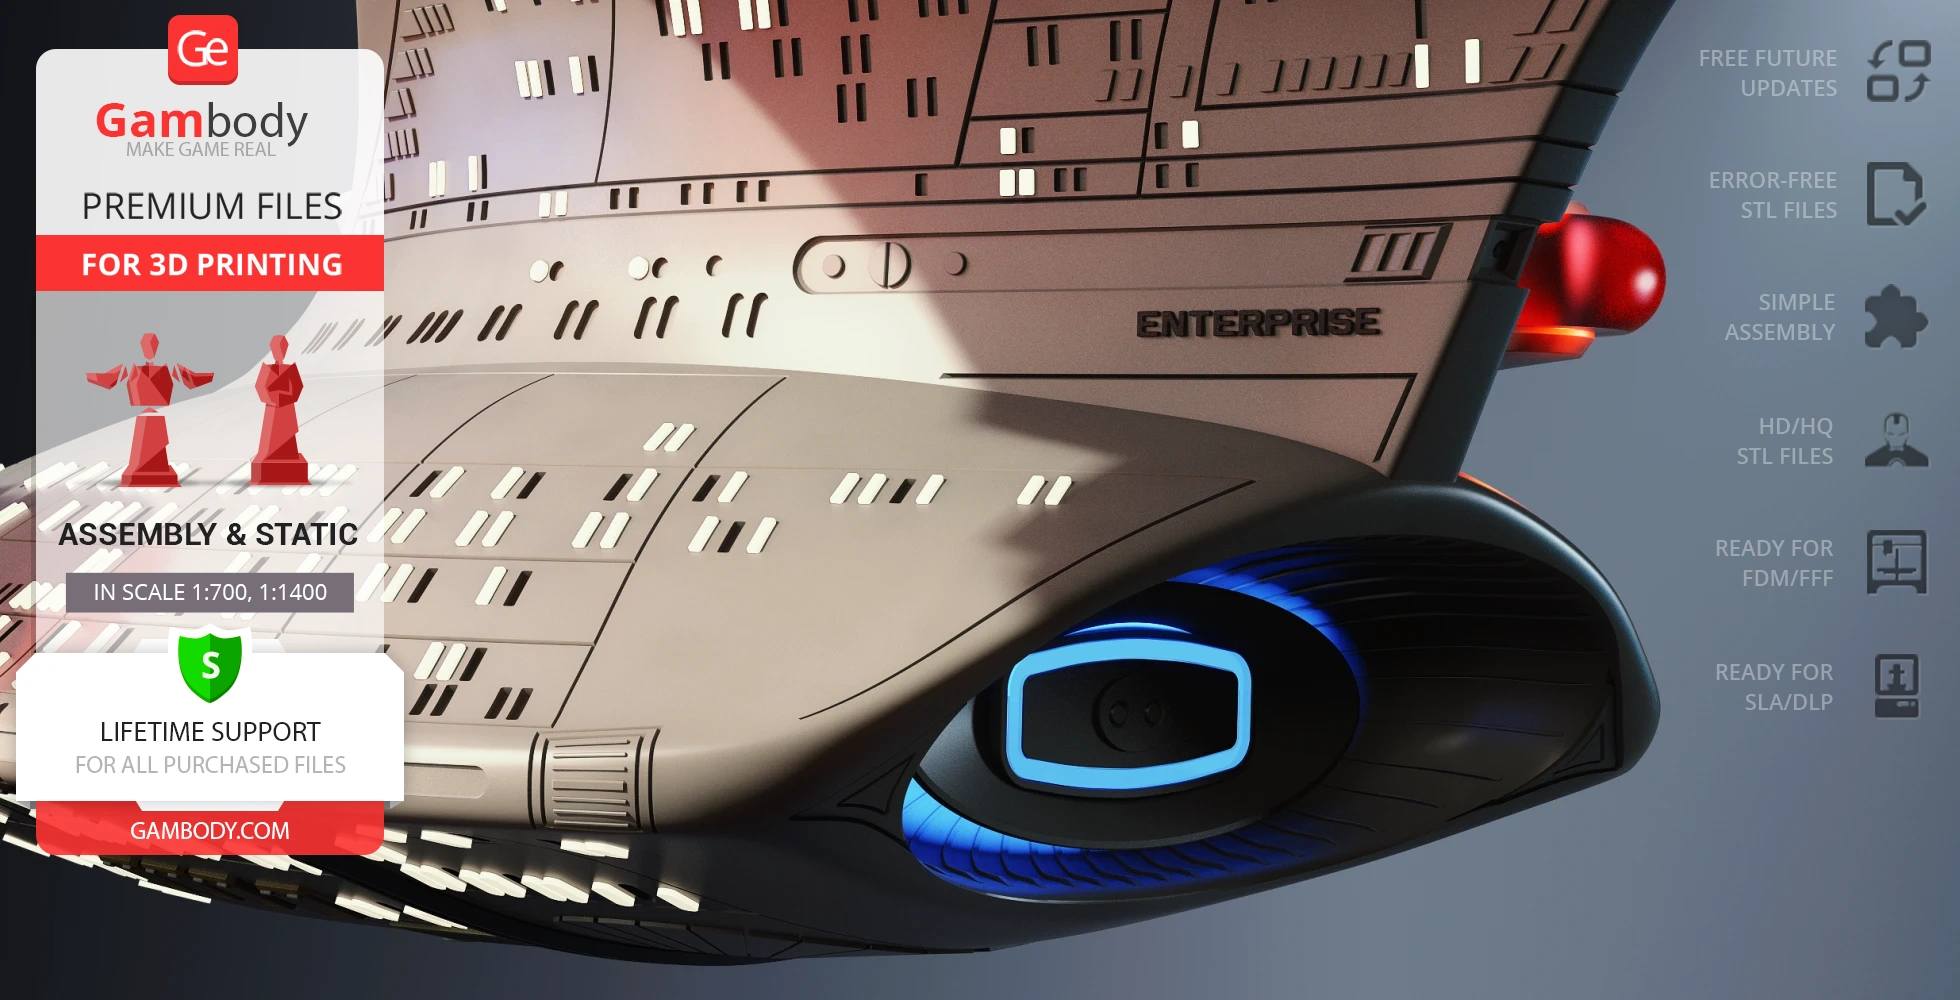
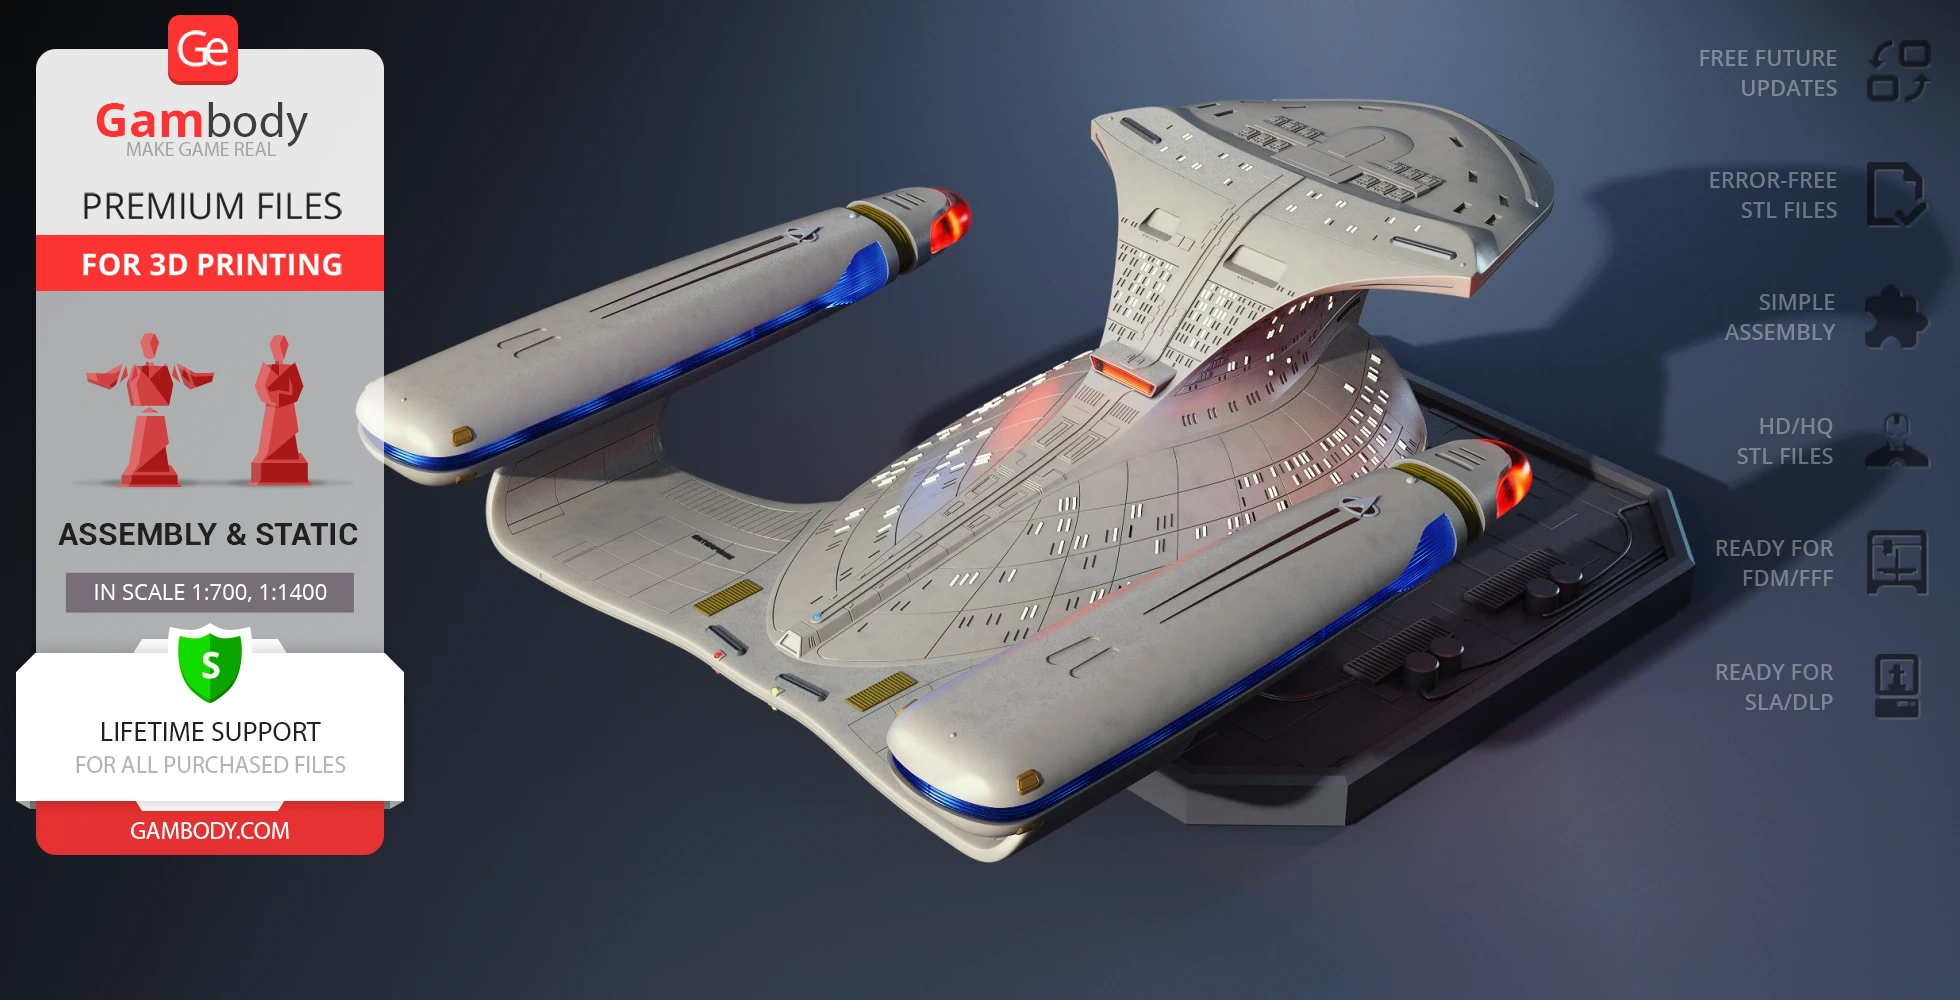
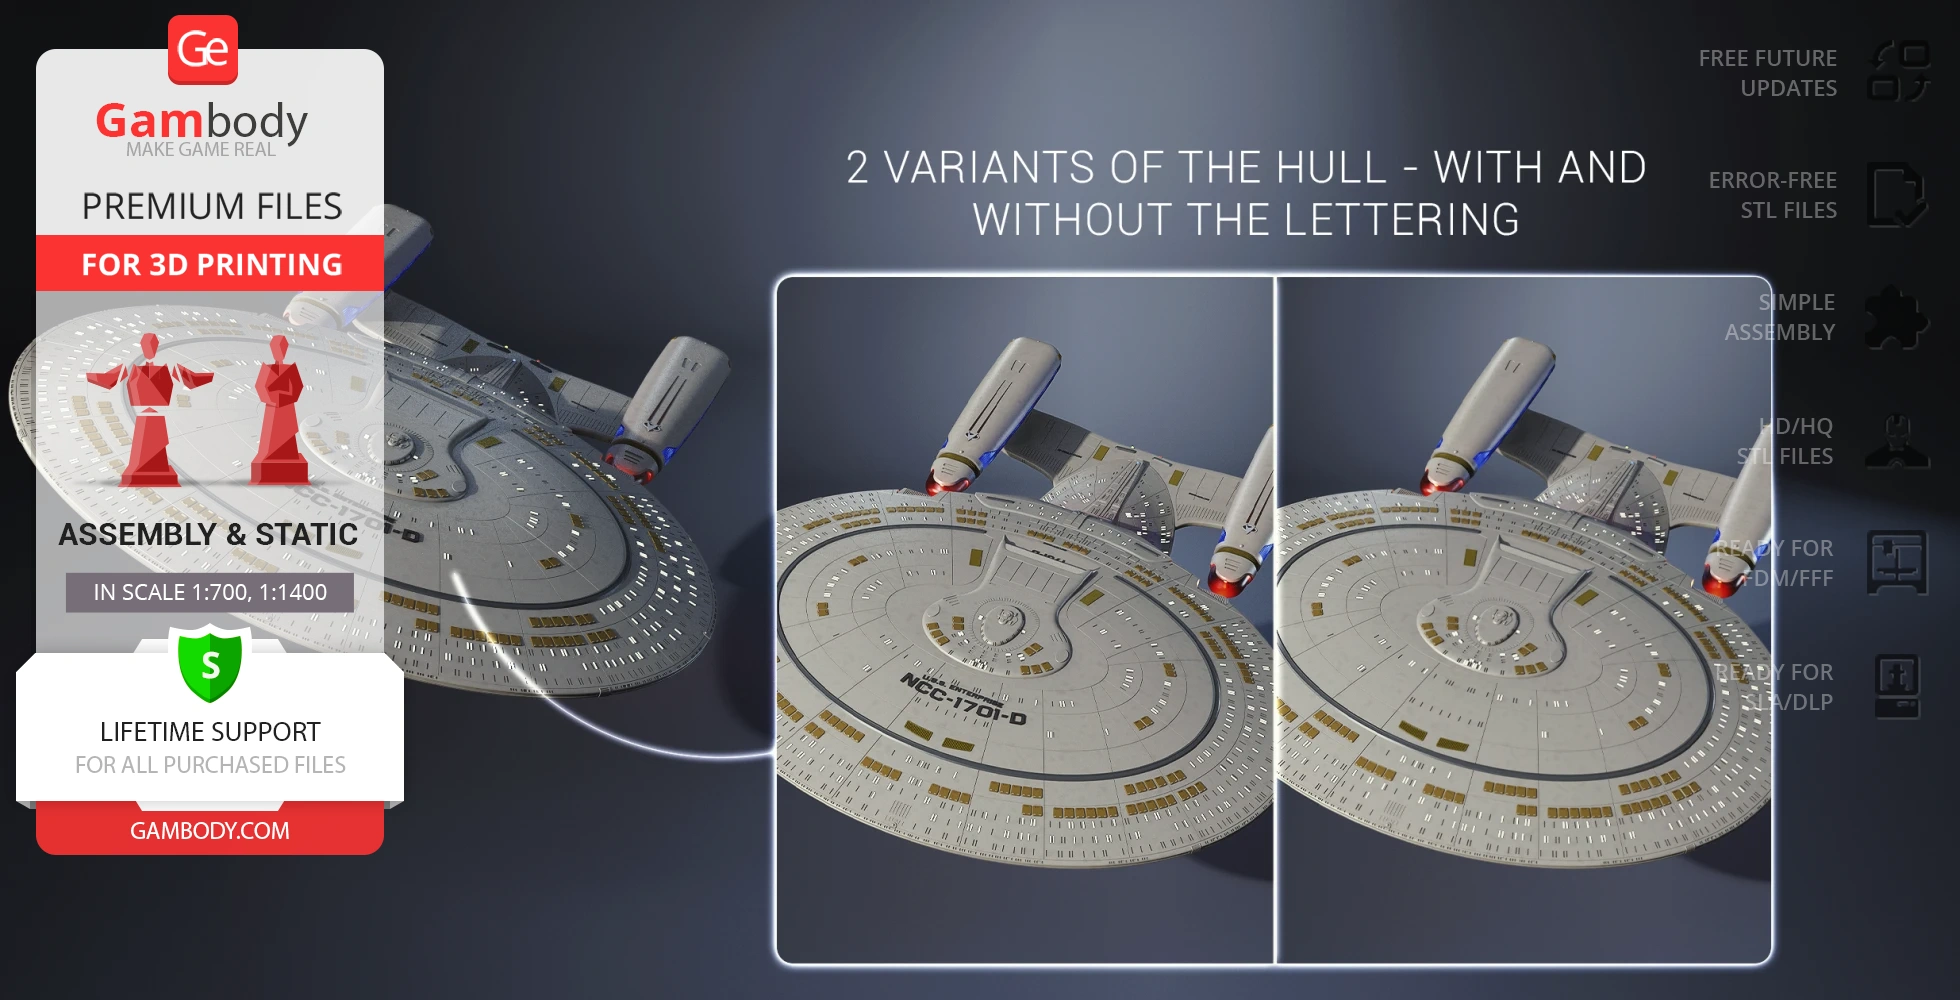
- 2 variants of the hull - with and without the lettering;
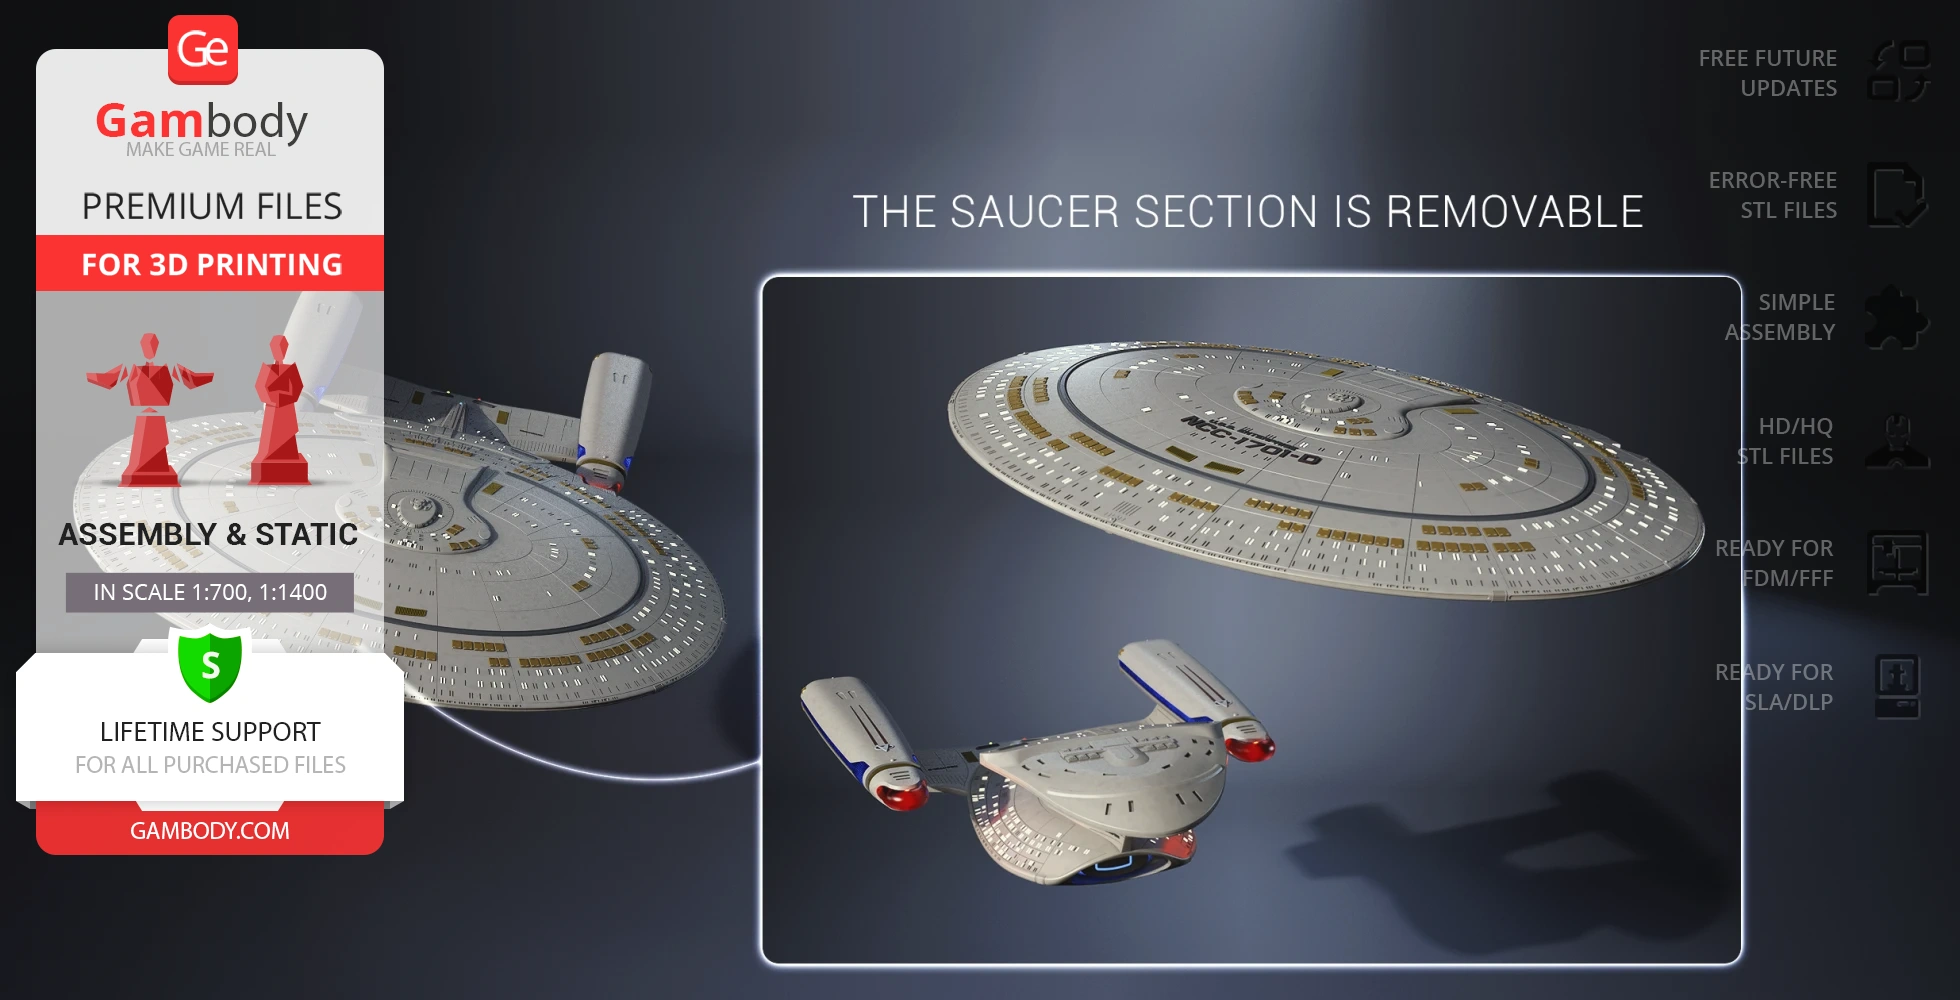
- The saucer section is removable;
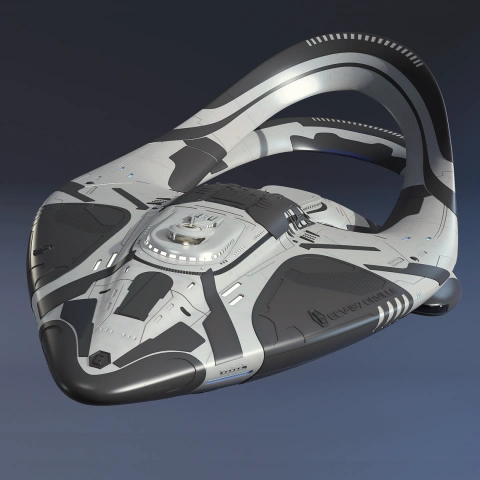
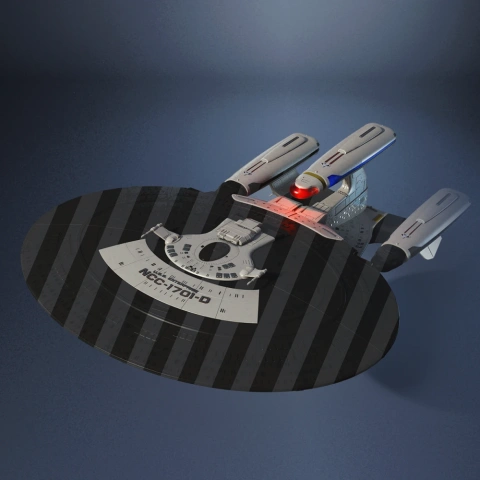
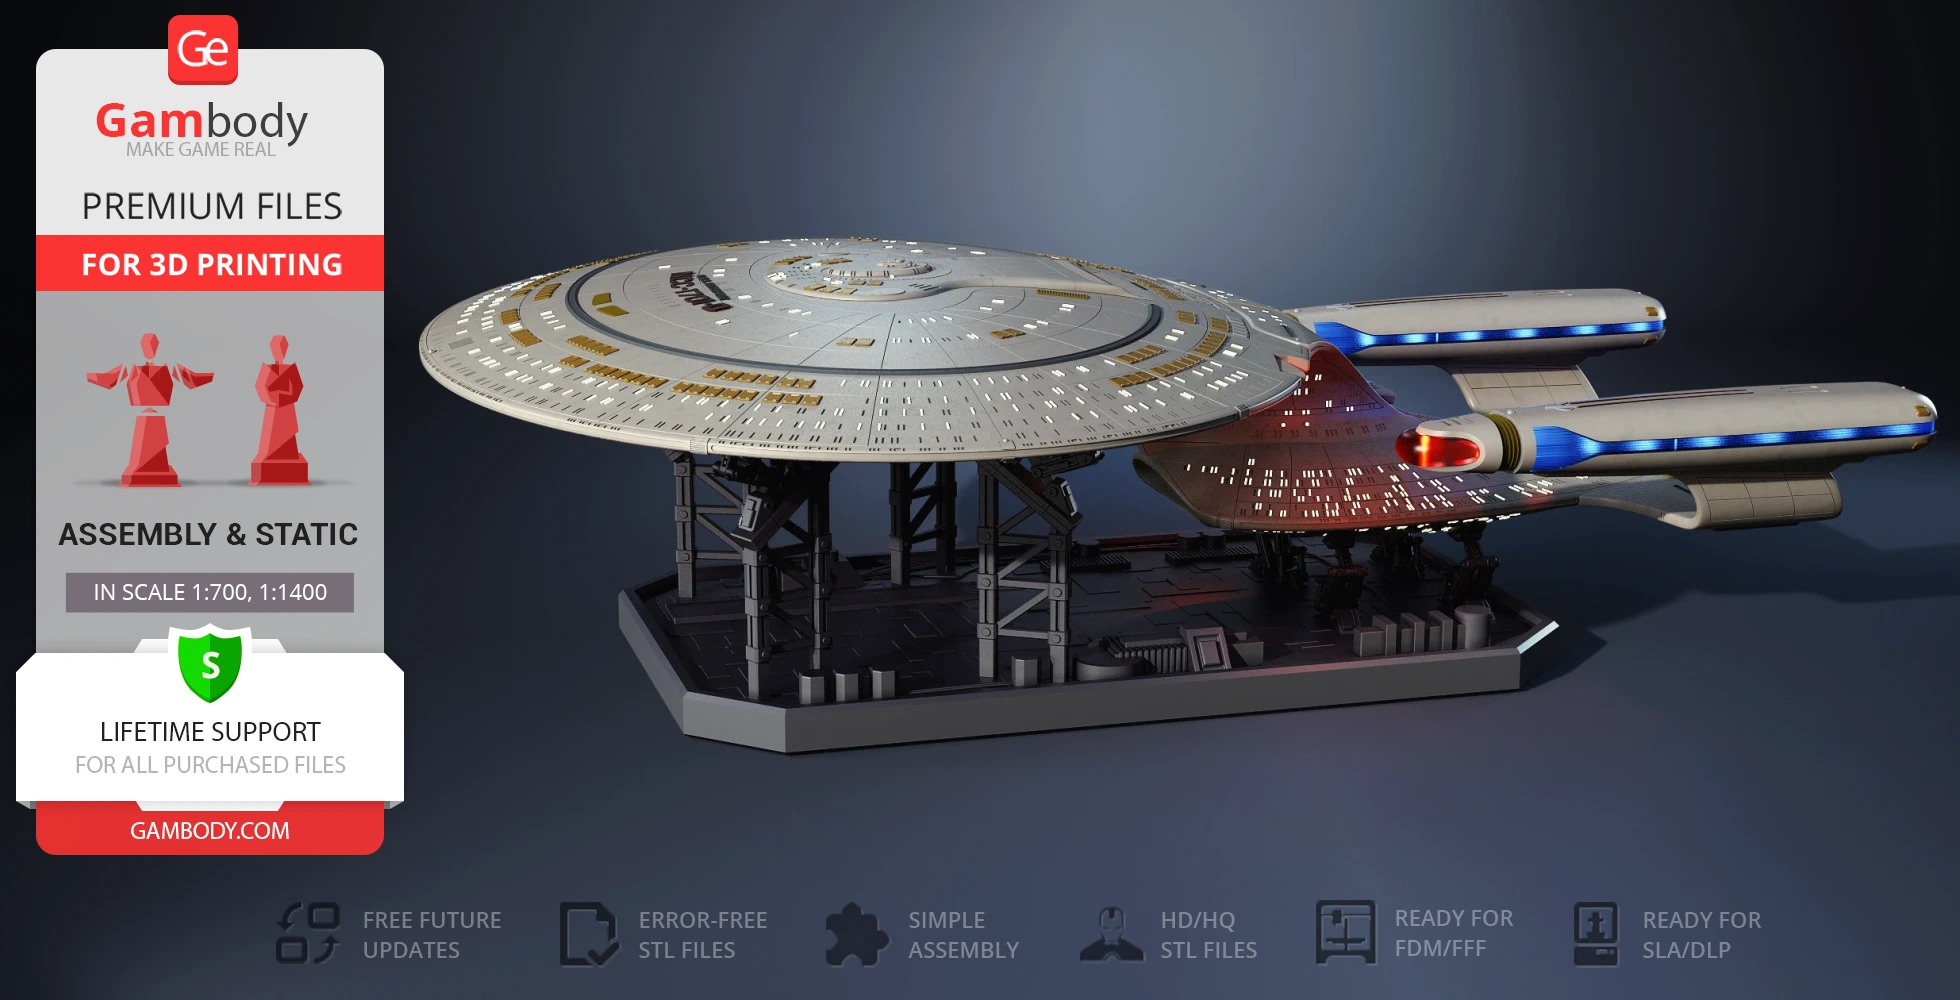
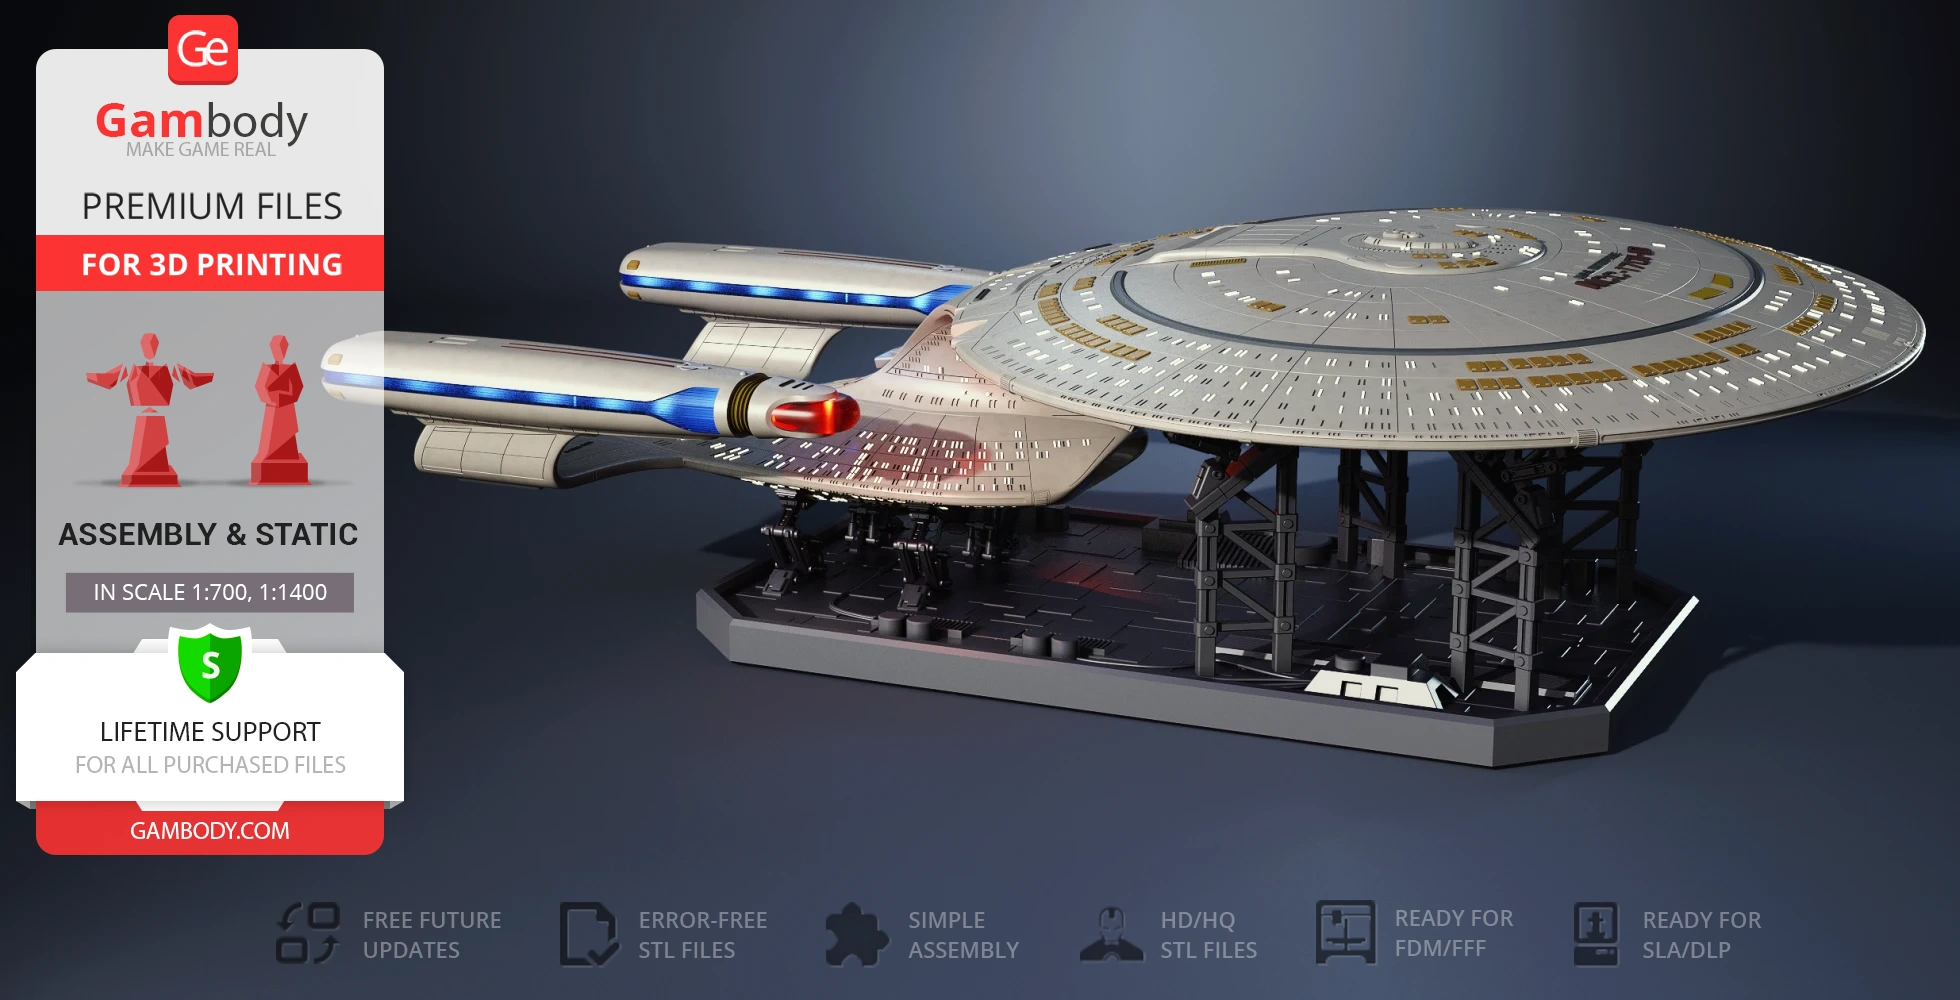
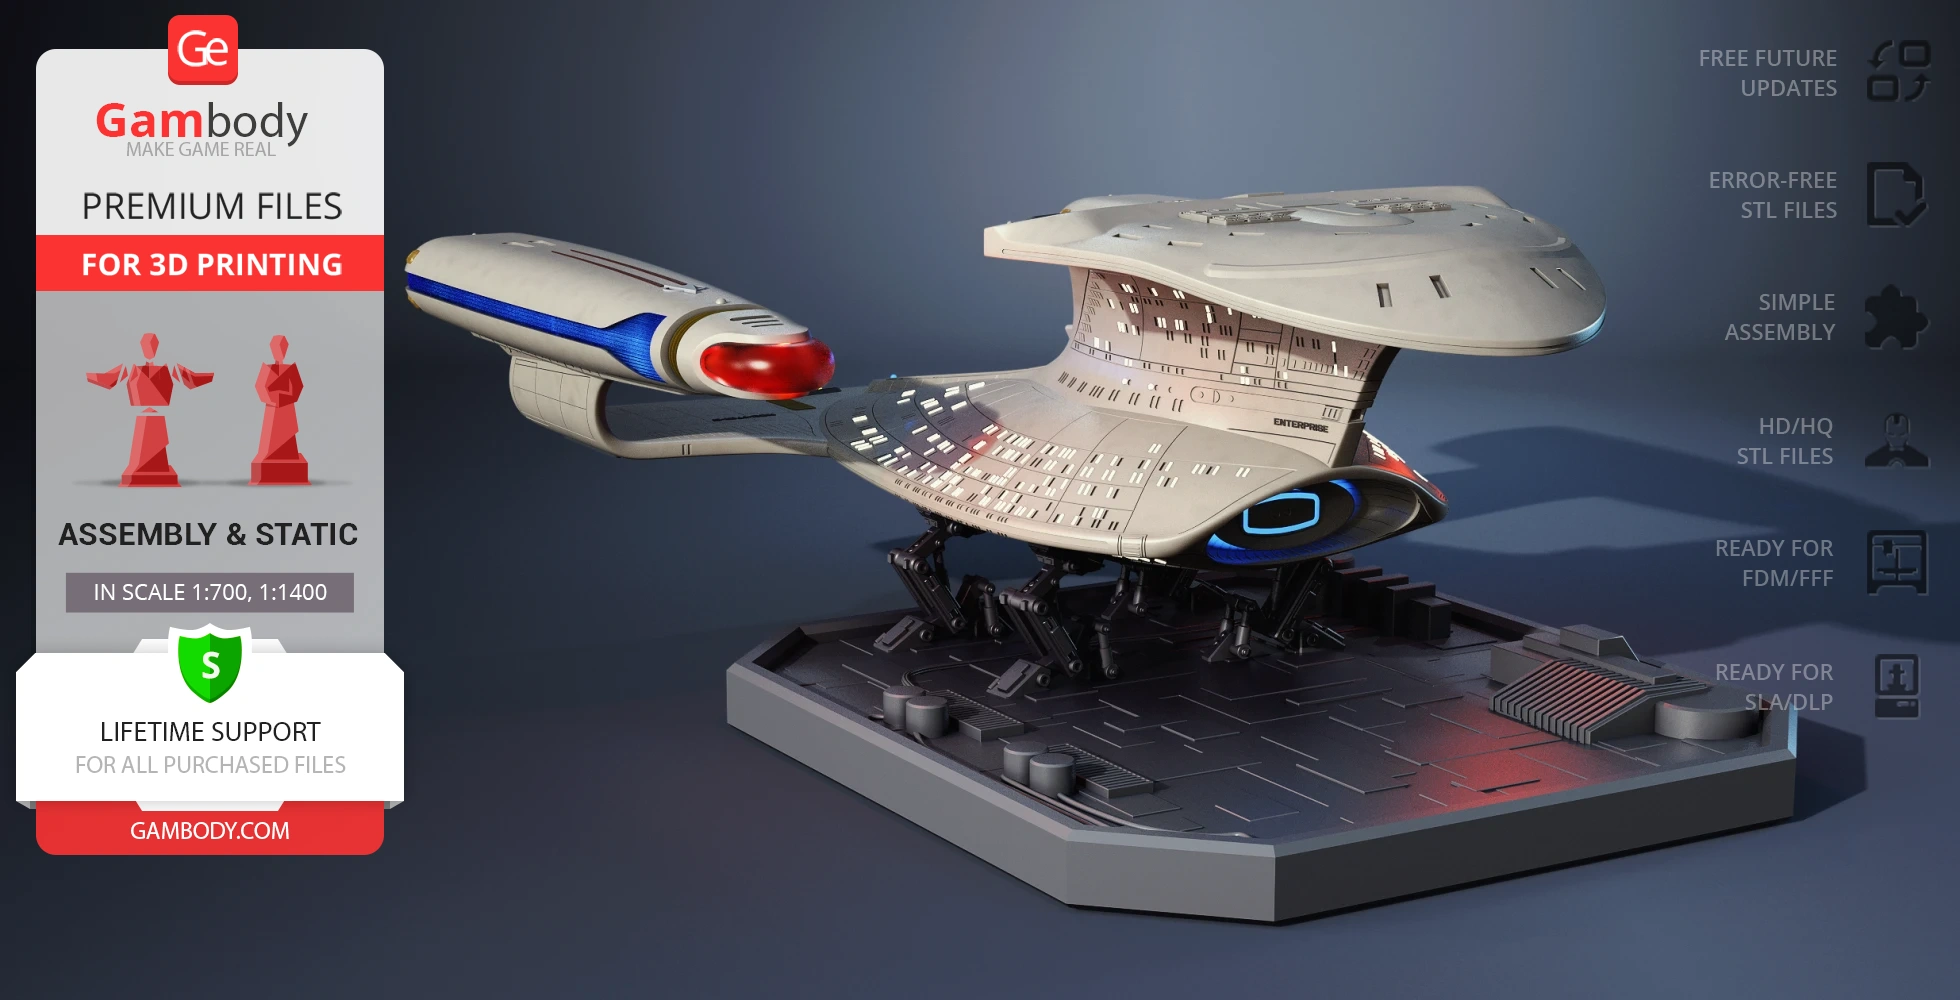
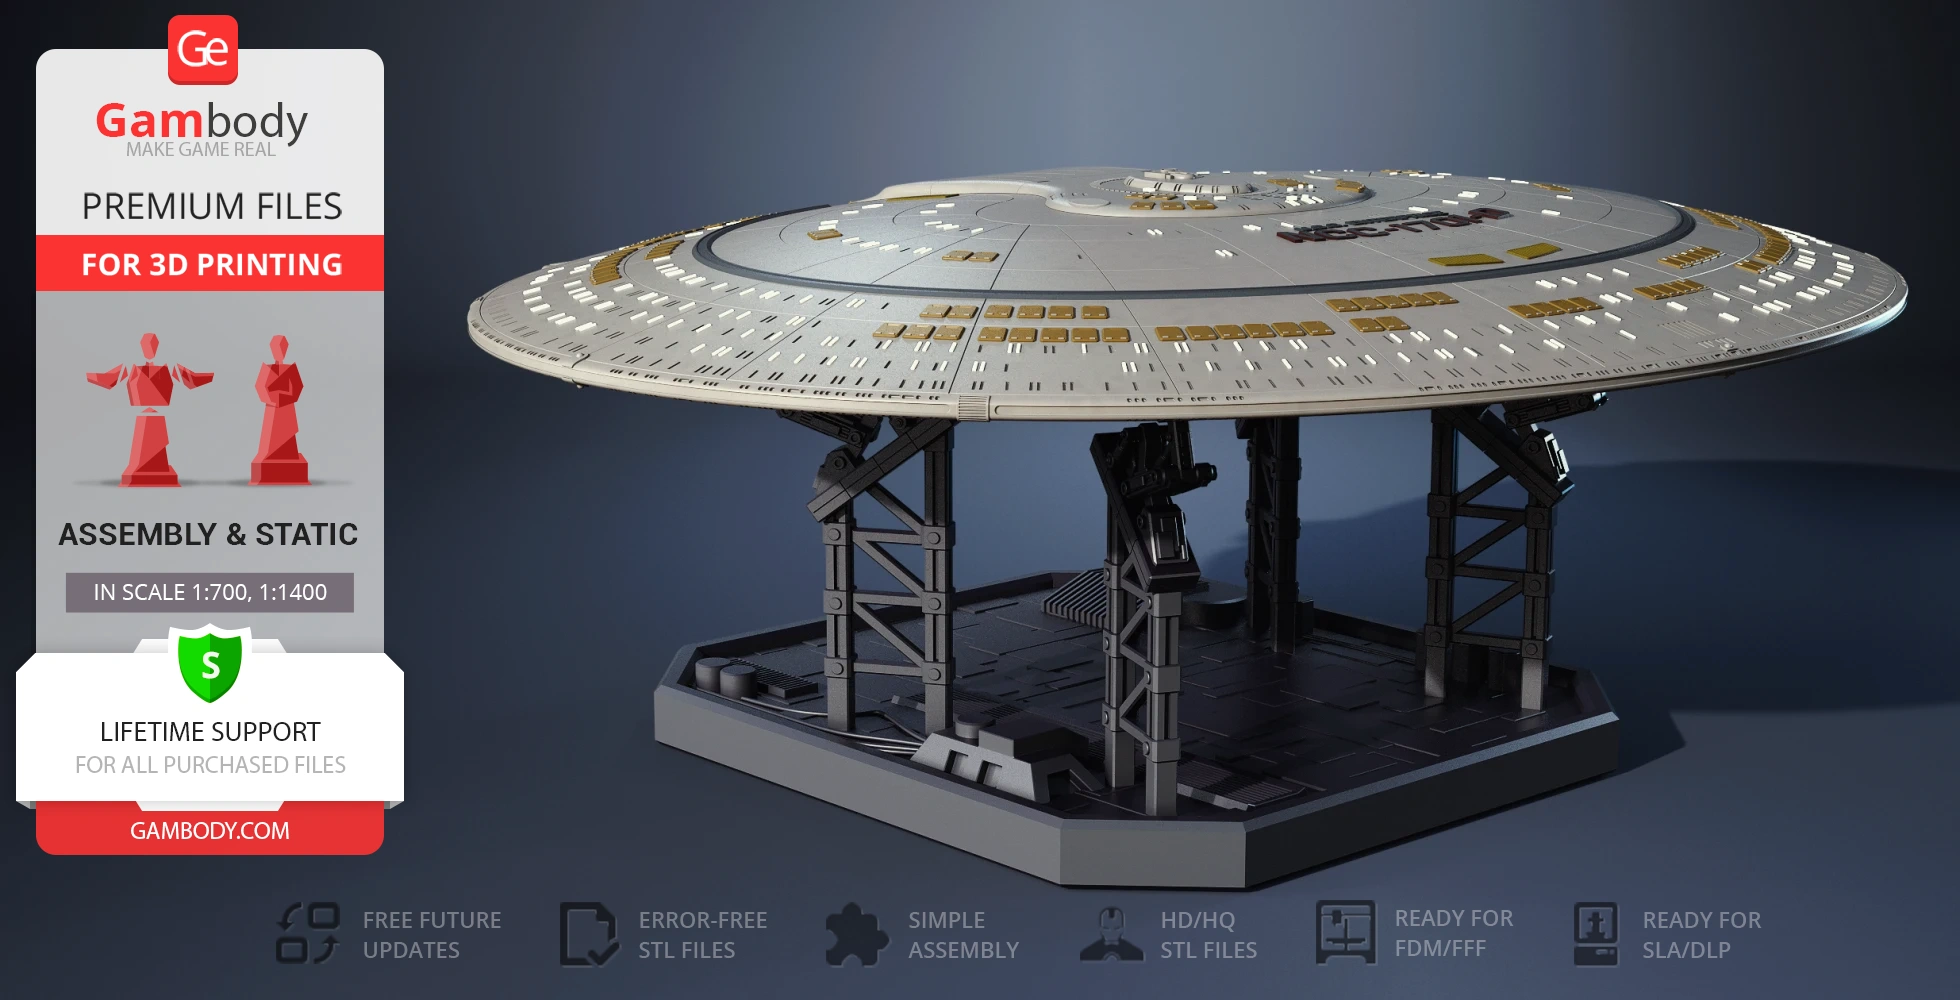
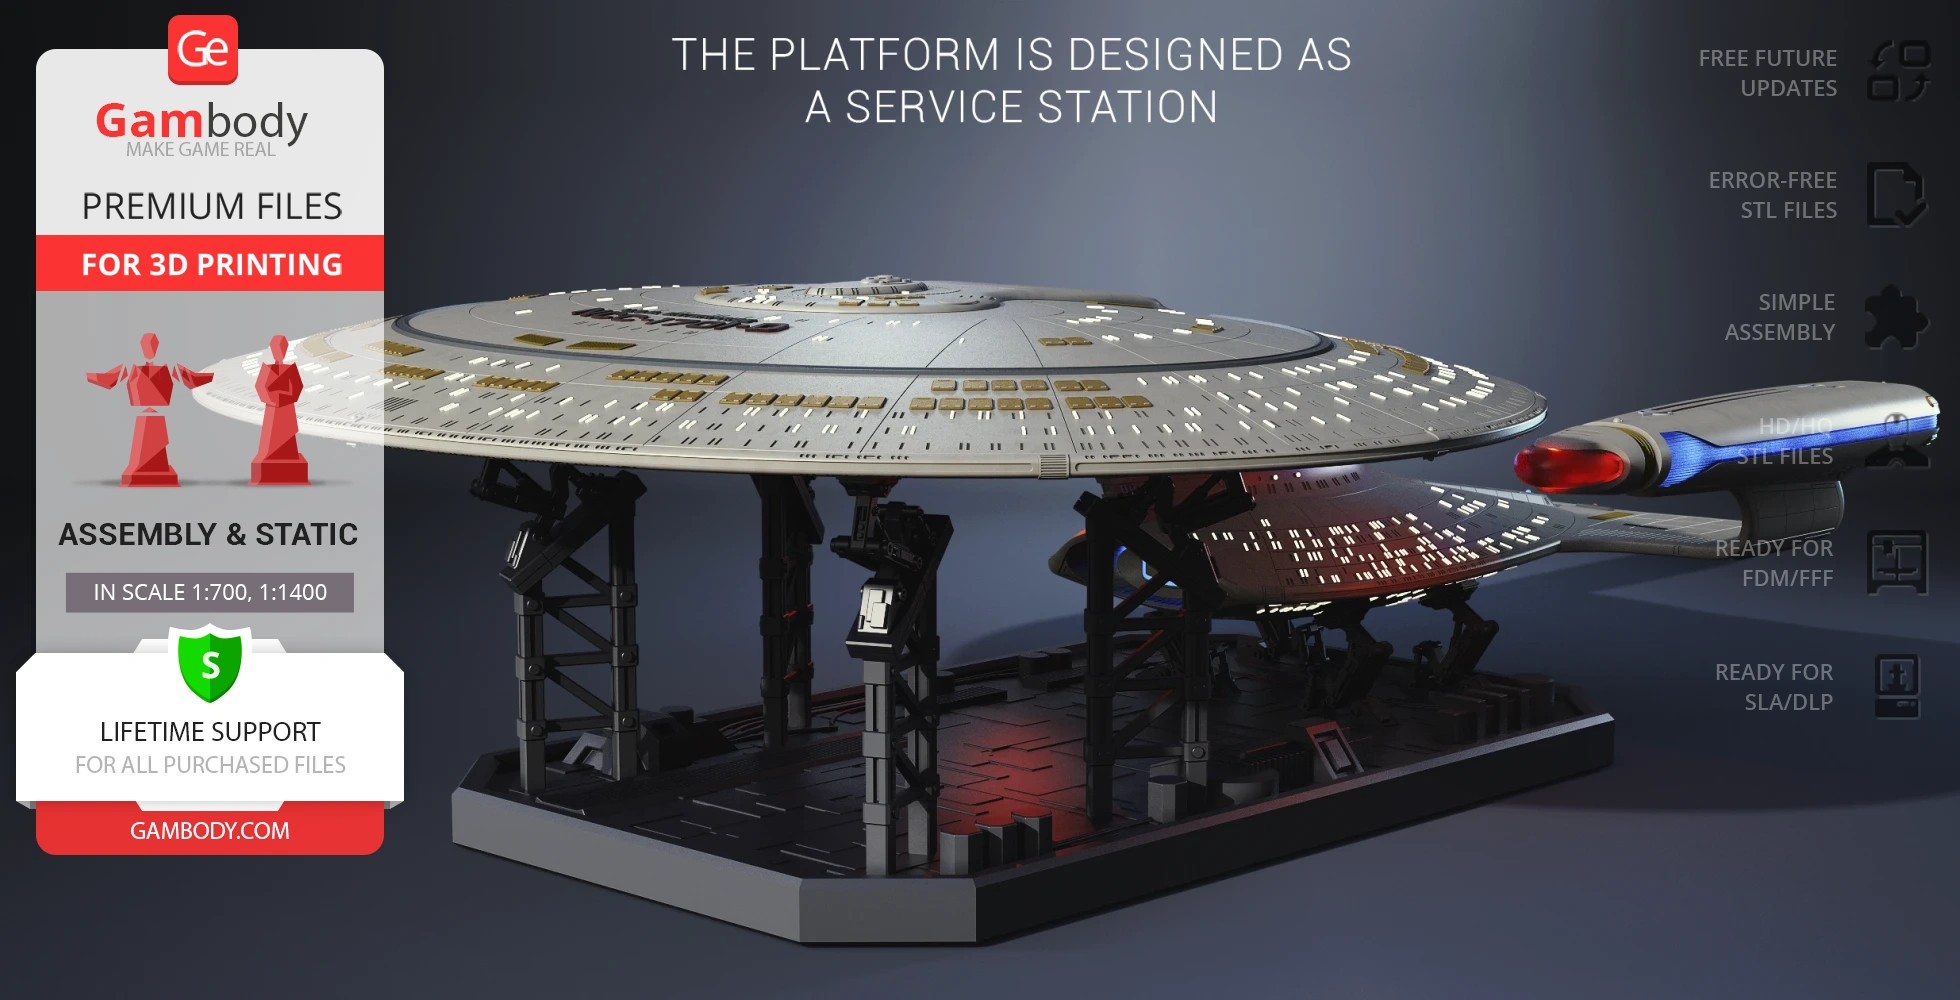
- The platform is designed as a service station;
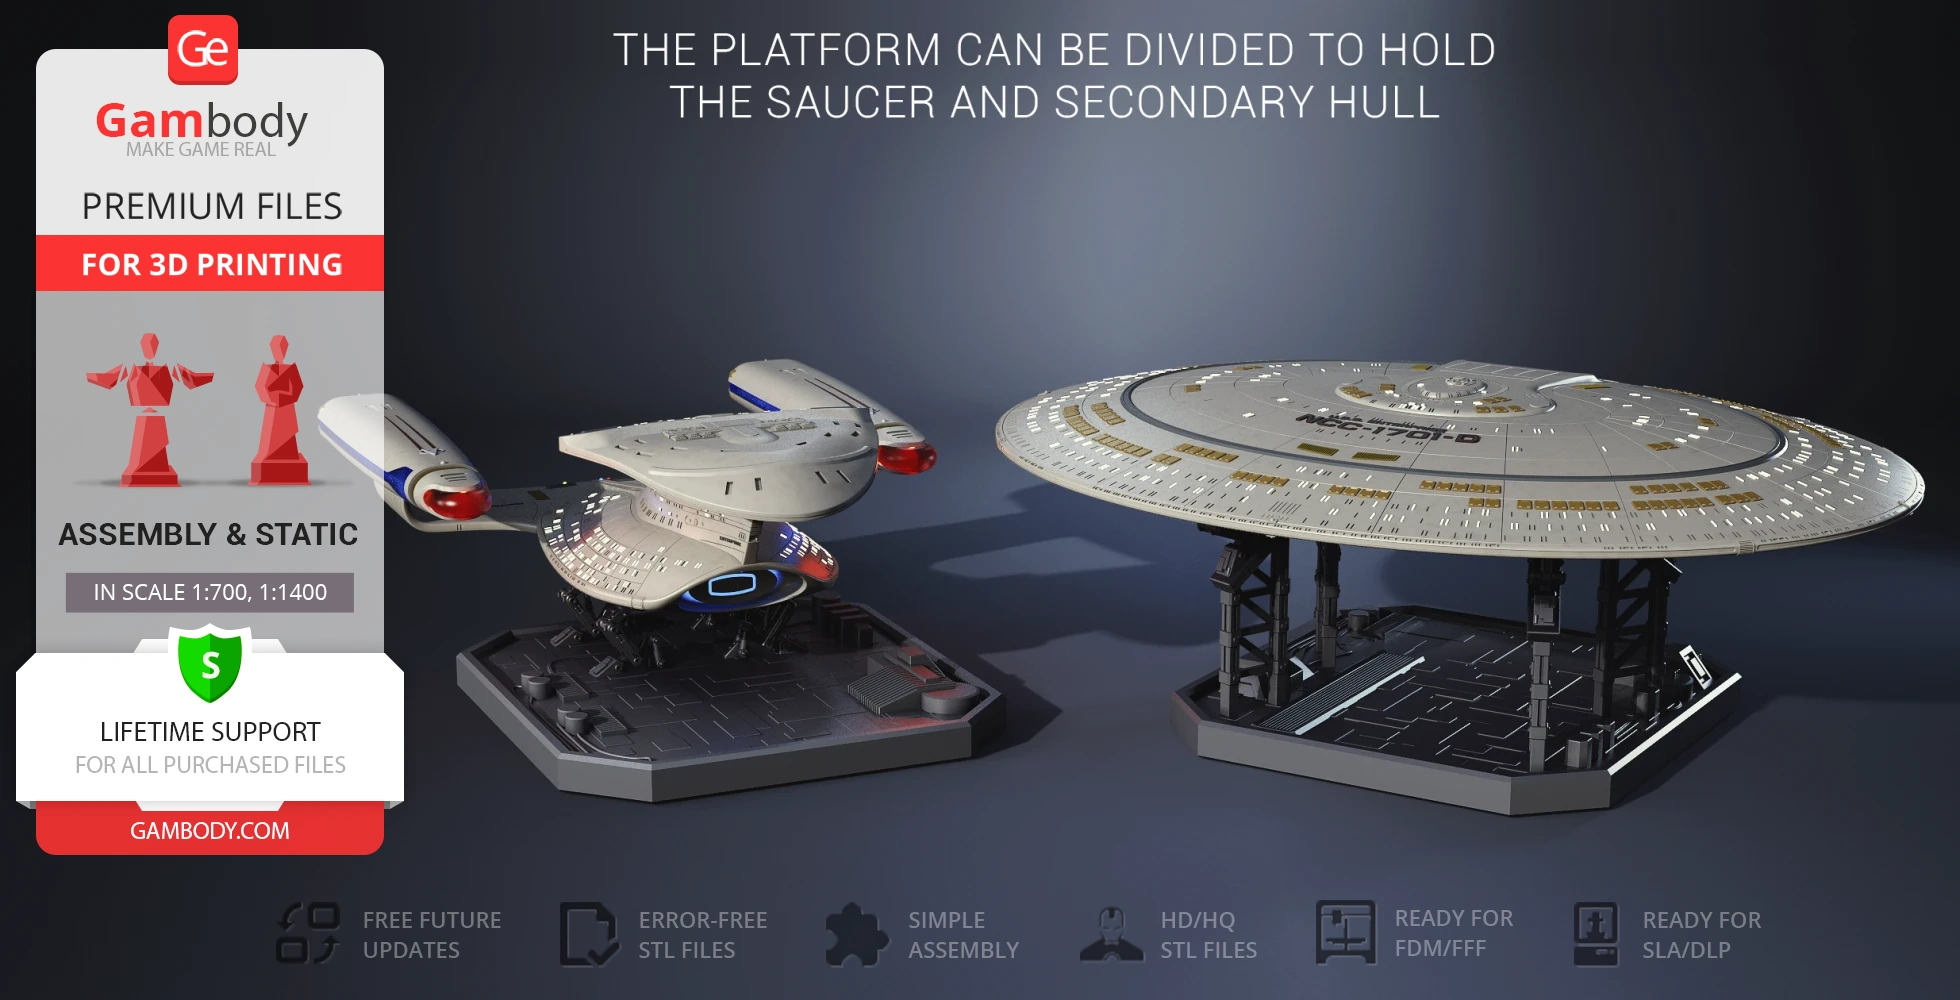
- The platform can be divided to hold the saucer and secondary hull;
- The manipulators are movable and allow adjusting the tilt angle of the starship on the platform;
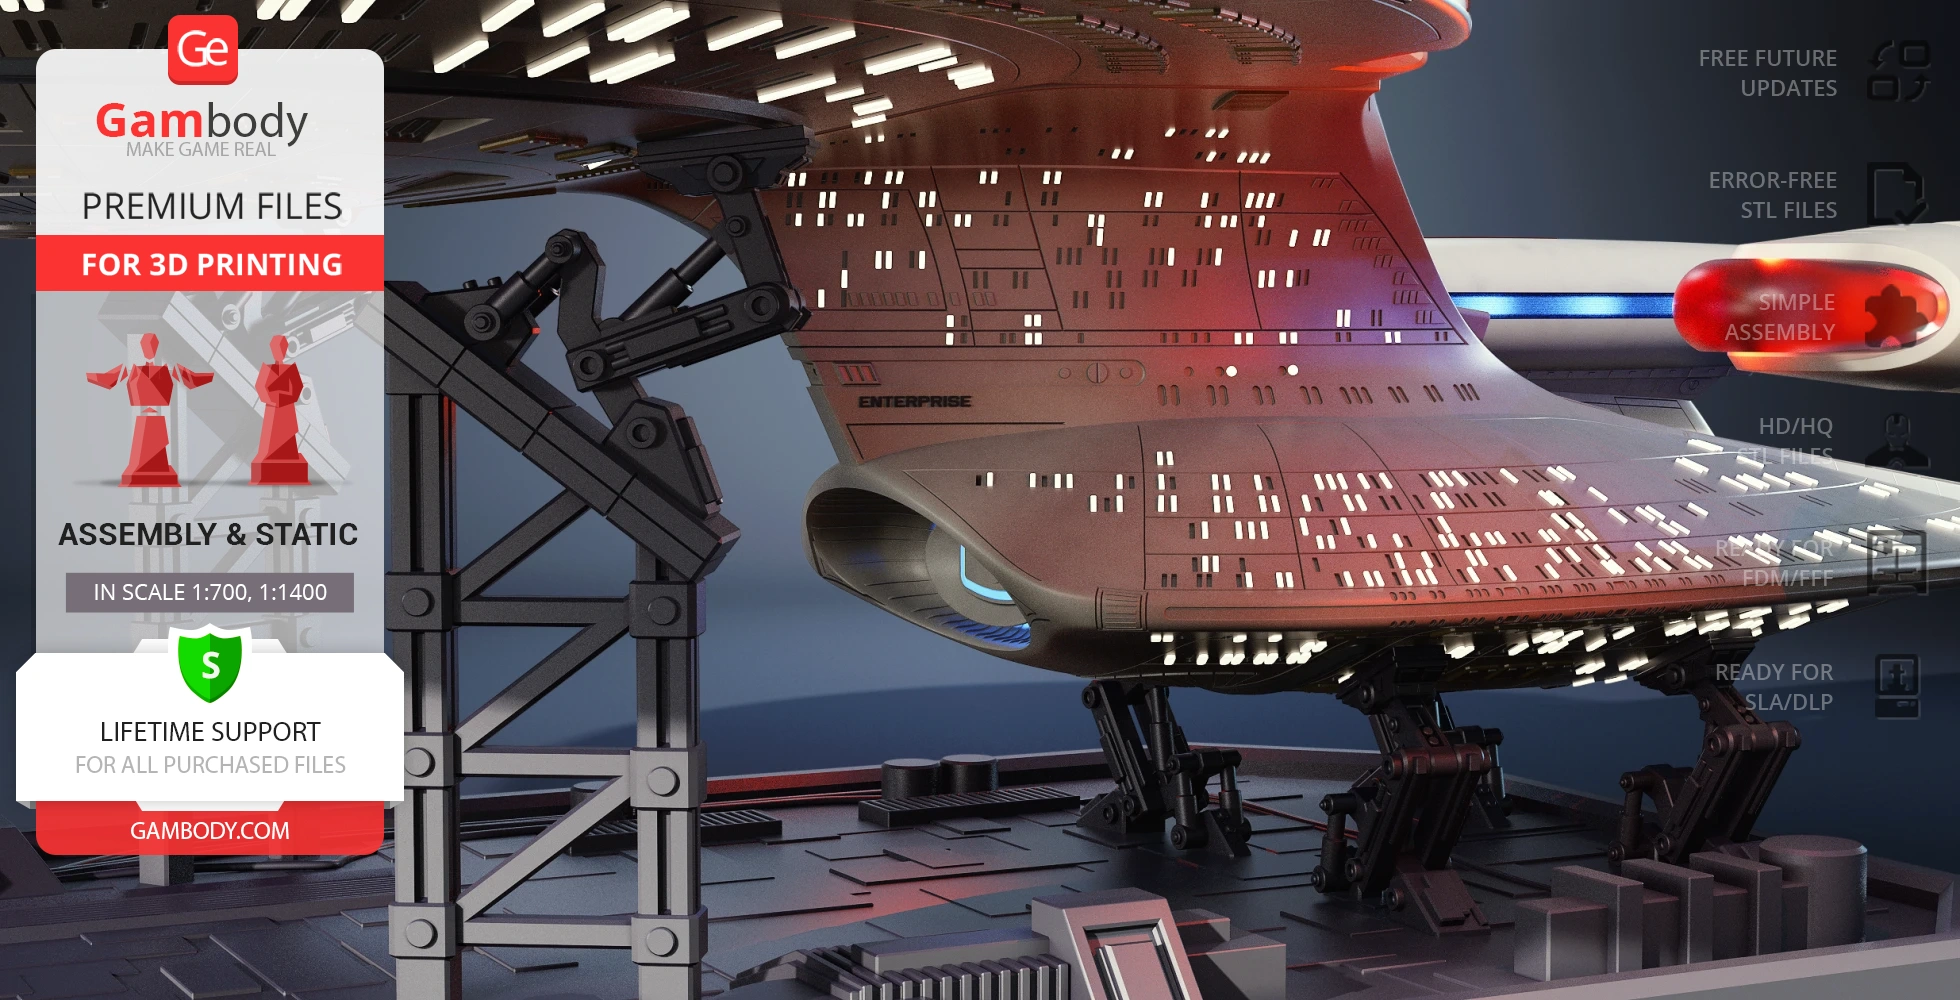
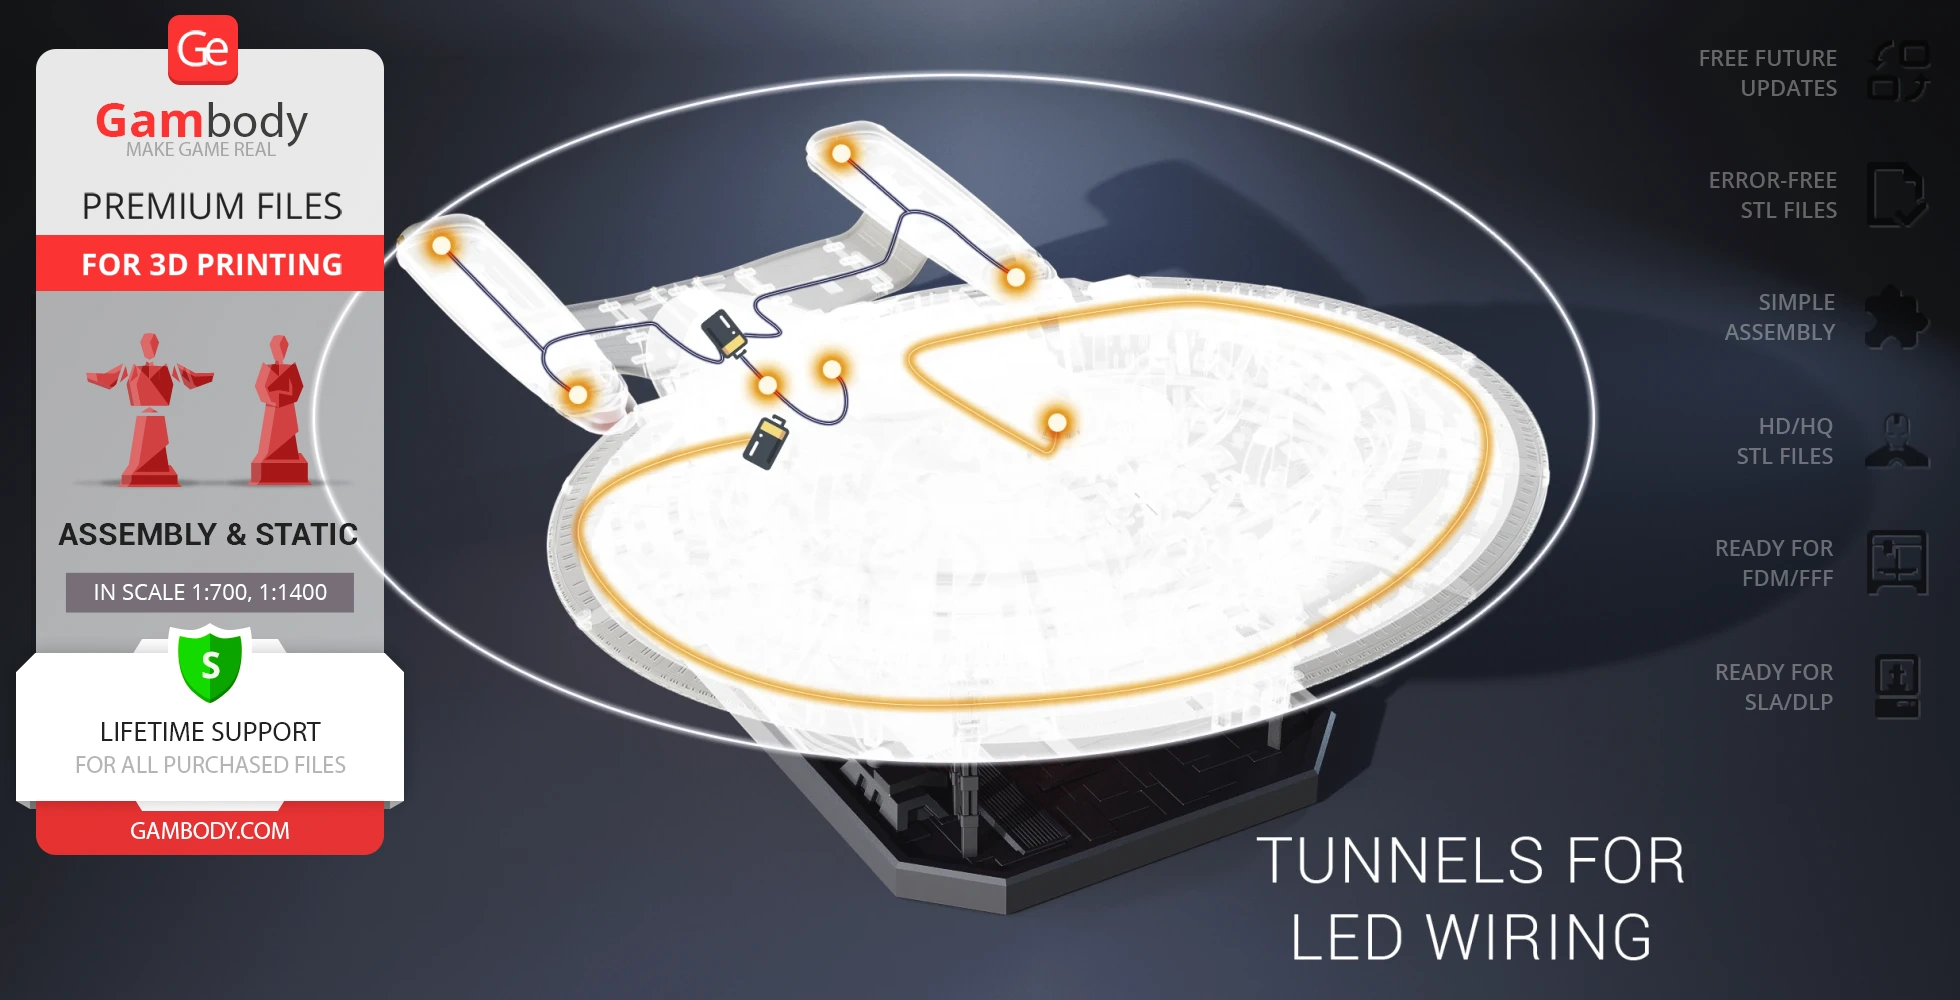
- There are tunnels for LED wiring to light up the warp engine, nacelles, and interior;
DLP/SLA
Assembly method
Connectors, Glue
Features
- 2 variants of the hull - with and without the lettering;
- The saucer section is removable;
- The platform is designed as a service station;
- The platform can be divided to hold the saucer and secondary hull;
- The manipulators are movable and allow adjusting the tilt angle of the starship on the platform;
- There are tunnels for LED wiring to light up the warp engine, nacelles, and interior;
Additional details
Part of diorama
Yes
Other model in diorama
Special pack included
You will get instant access to the STL files of USS Enterprise NCC-1701-D 3D Printing Model | Assembly after completing your purchase. Simply add the model to your cart and check out using PayPal, credit or debit card, Apple Pay, Google Pay, Alipay, or other available payment methods.
Watch the assembly video for USS Enterprise NCC-1701-D 3D Printing Model | Assembly, and explore more tutorials, behind-the-scenes content, 3D printing timelapses, and painting guides on the official Gambody YouTube channel.
This 3D model of USS Enterprise NCC-1701-D consists of files in StereoLithography (.Stl) format that is optimized for 3D printing.
Before printing the files, we strongly recommend reading the PRINTING DETAILS section.
WHAT WILL YOU GET AFTER PURCHASE?
- 2 versions of USS Enterprise NCC-1701-D STL files for FFF/FDM and DLP/SLA - files for all versions are available for download after the purchase;
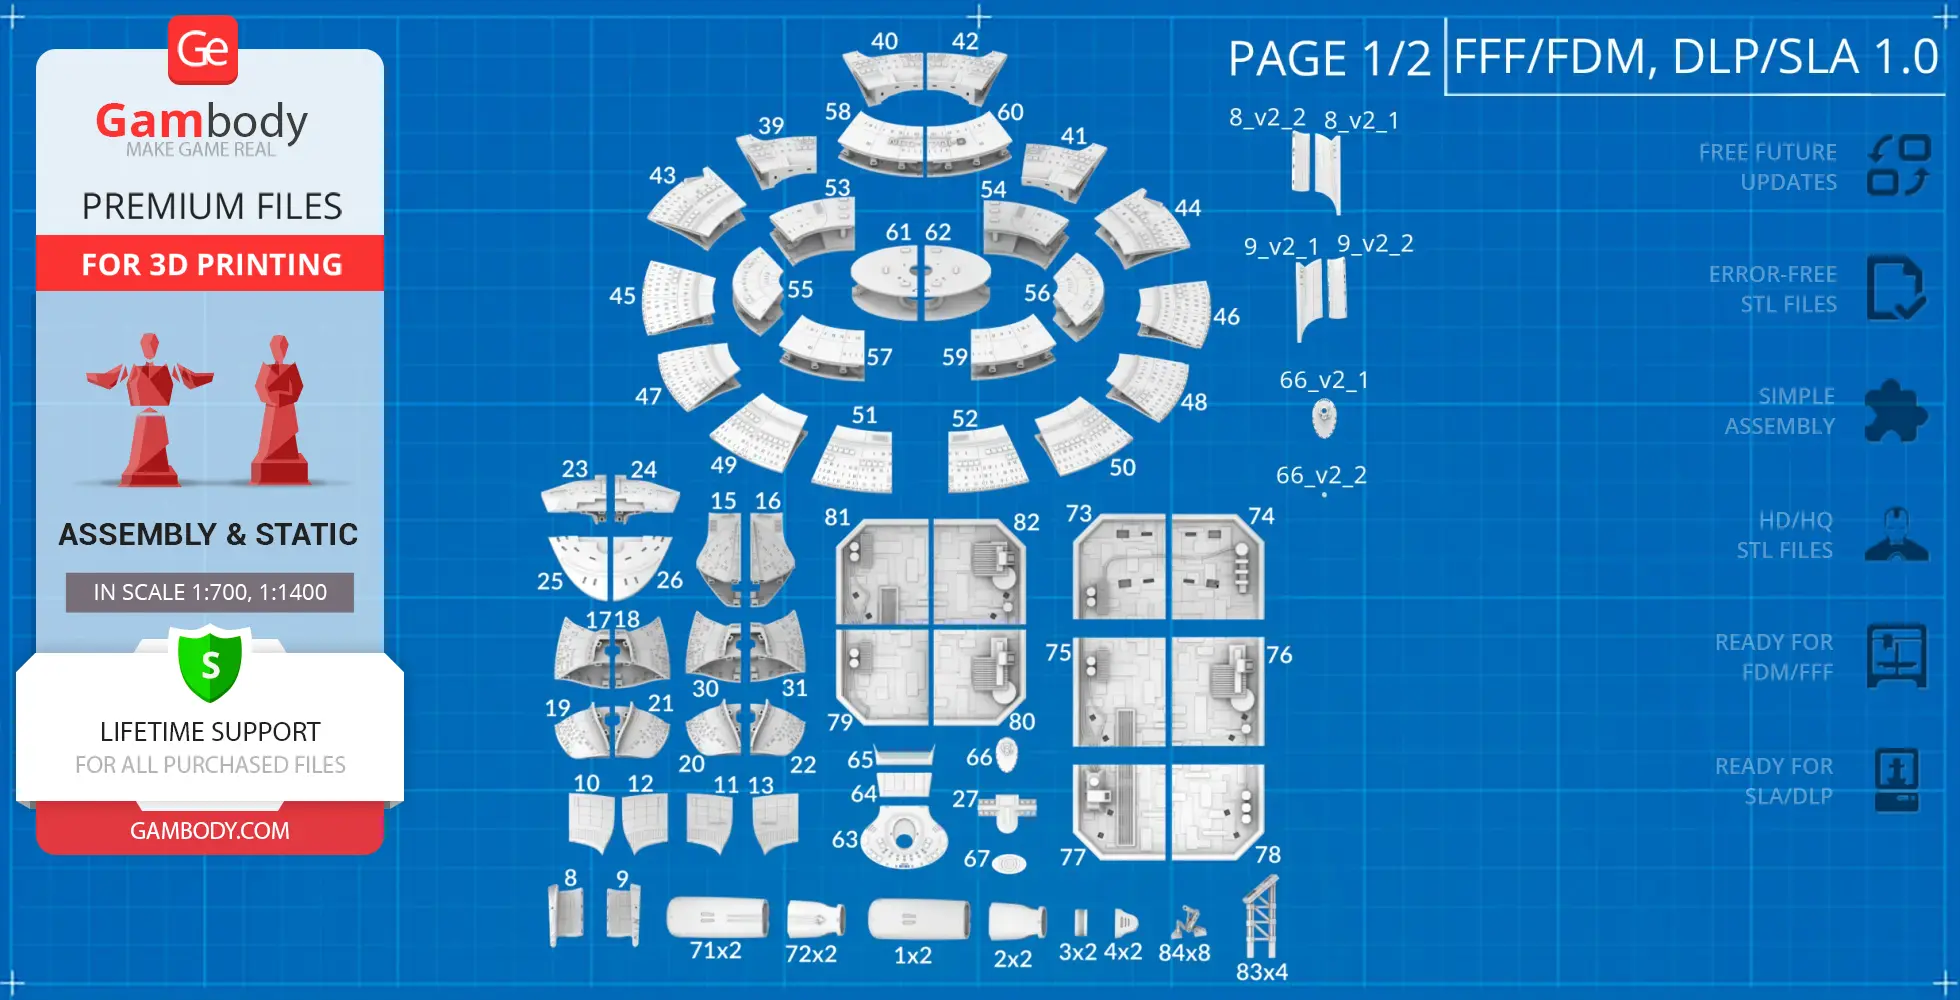
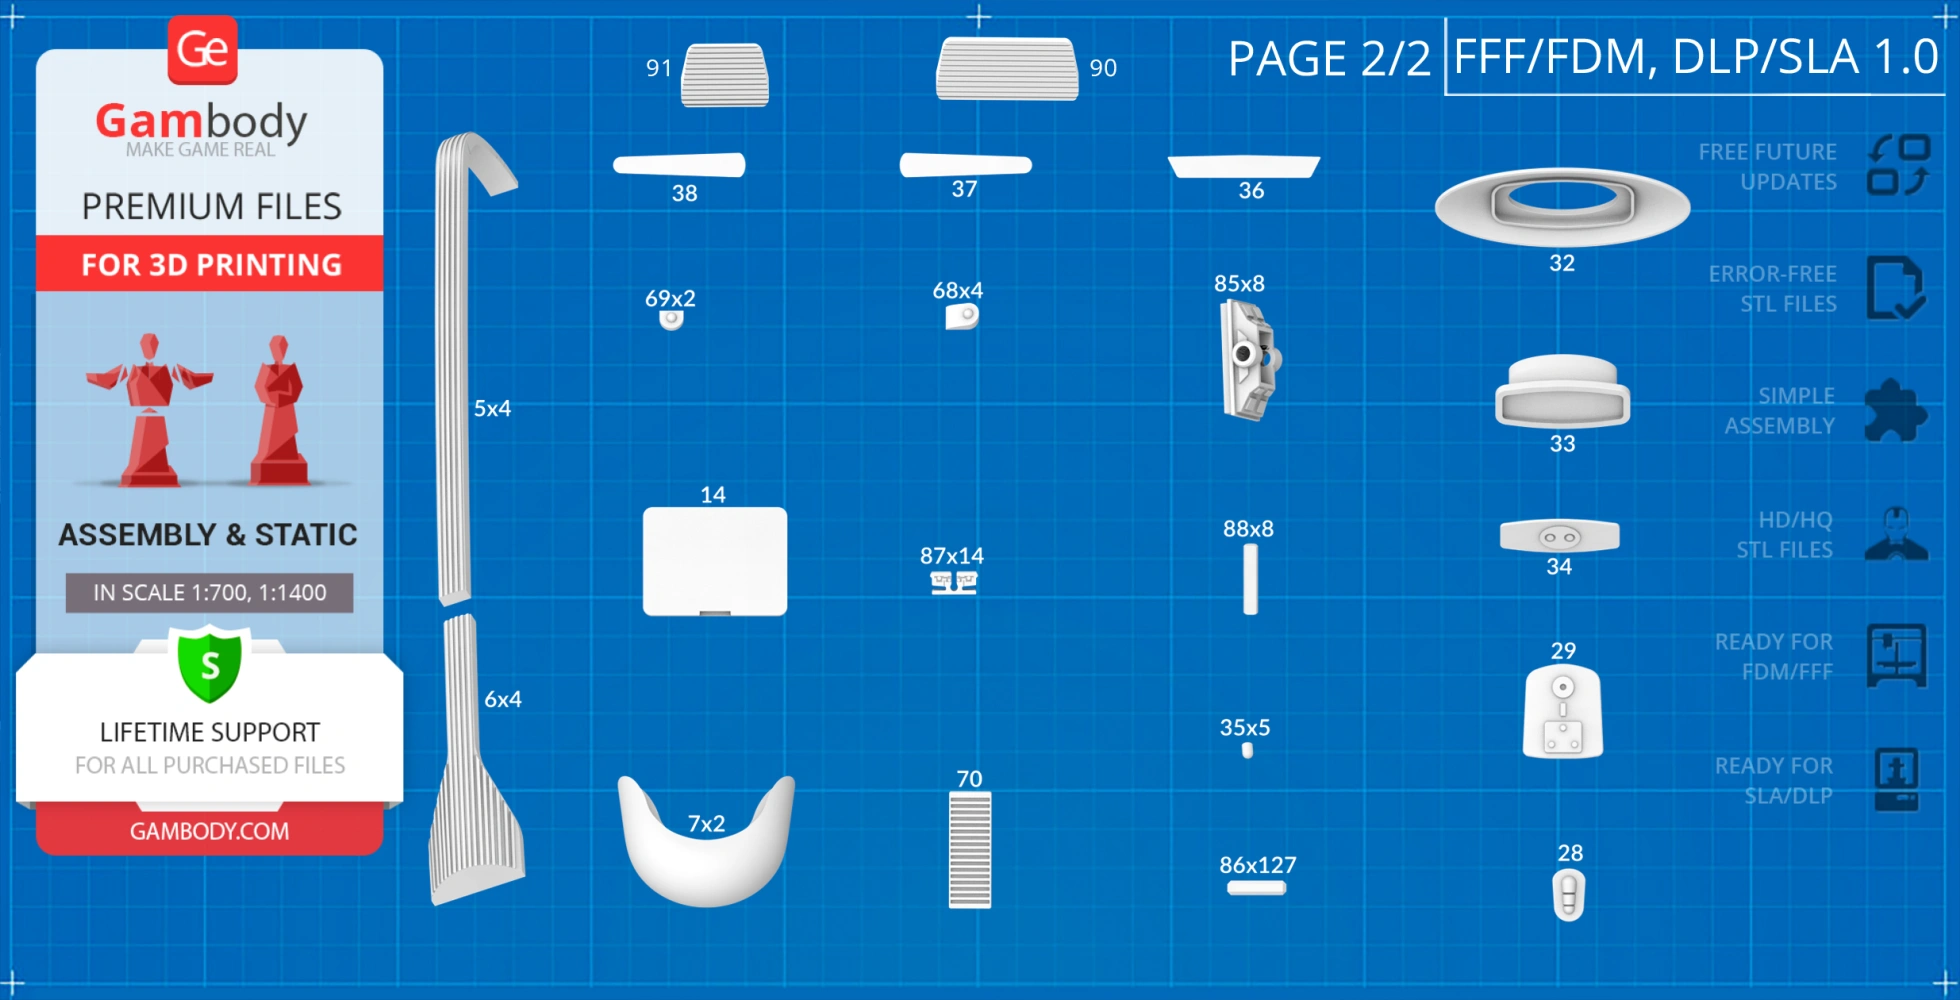
- STL files of high-poly USS Enterprise NCC-1701-D Model for 3D printing consist of 188 files;
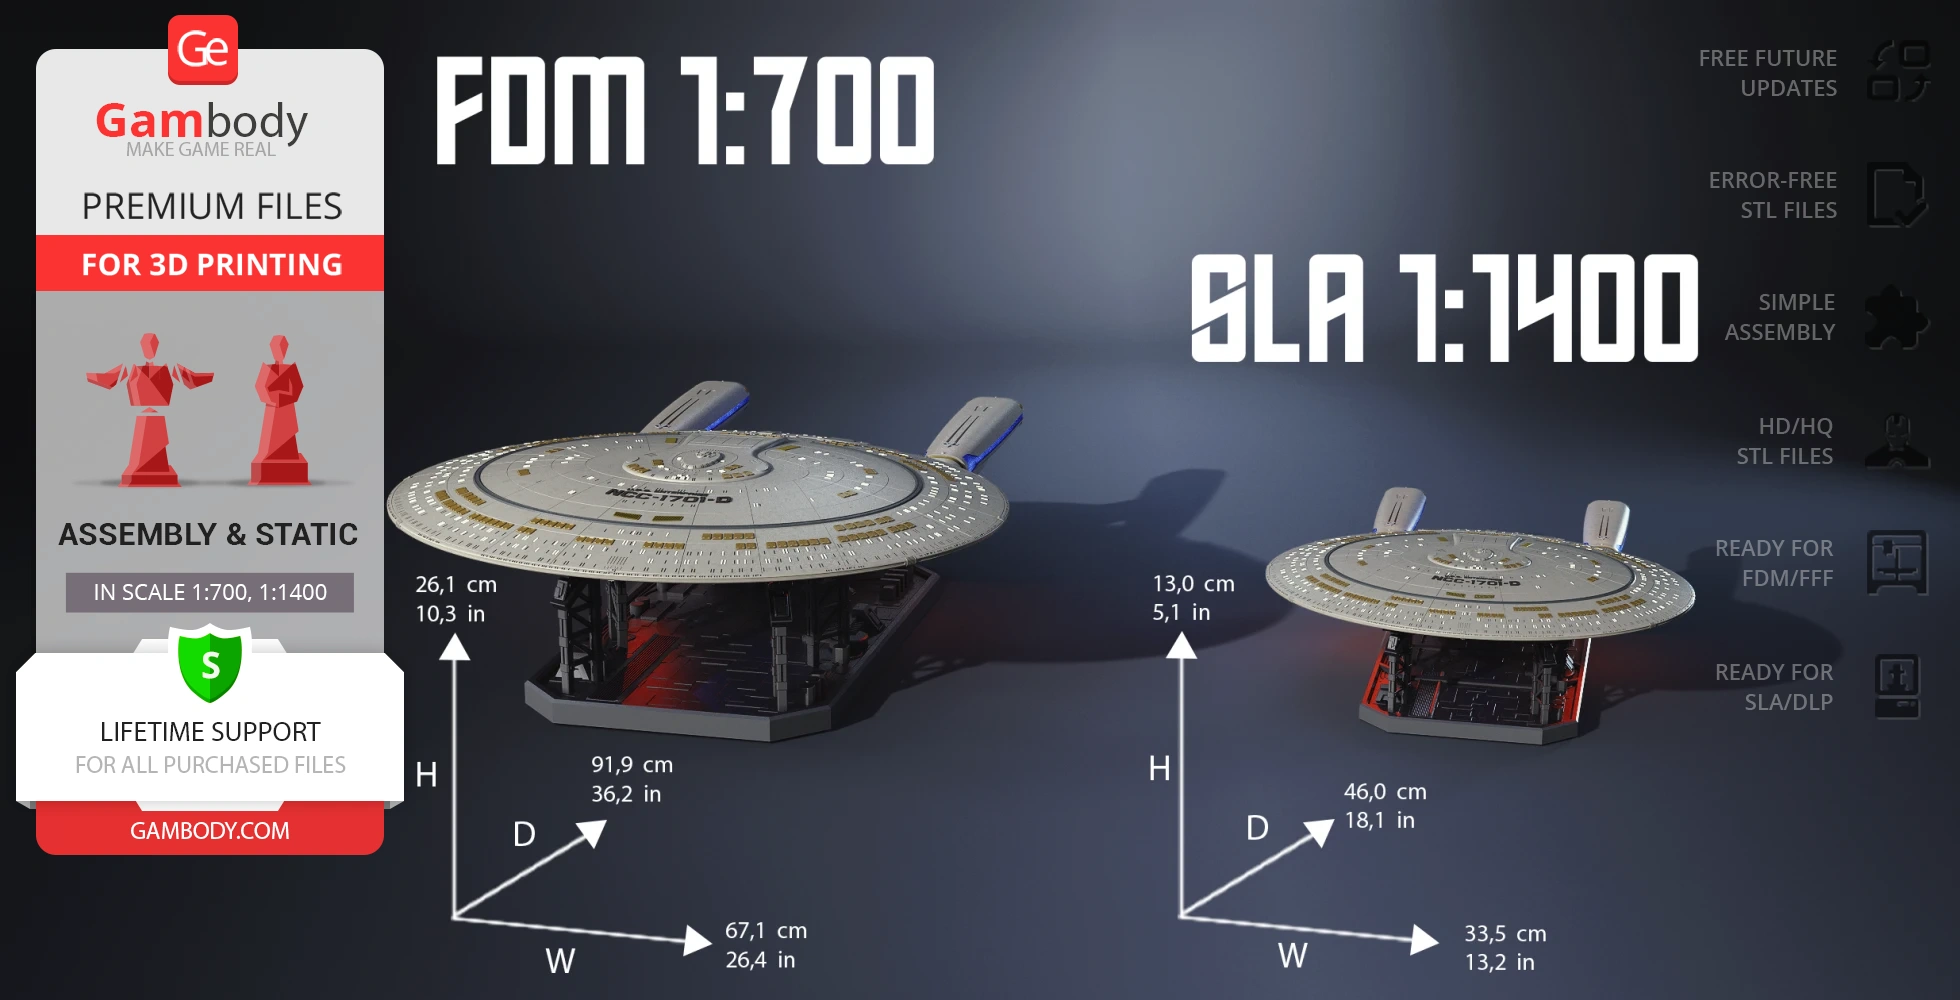
- Sizes for:
- FFF/FDM: 261 mm tall, 671 mm wide, 919 mm deep;
- DLP/SLA: 130 mm tall, 335 mm wide, 460 mm deep;
- Assembly Manual for FFF/FDM 1.0 and DLP/SLA 1.0 versions in PDF and video formats;
- Detailed settings that we provide as a recommendation for Cura, Simplify3D, Slic3r and PrusaSlicer for the best print;
- Full technical support from the Gambody Support Team.
Detailed information about this 3D printing model is available in the DESCRIPTION section.
Before printing, take a look at Printing Details for recommended settings and tips to achieve better results.
ABOUT THIS 3D MODEL
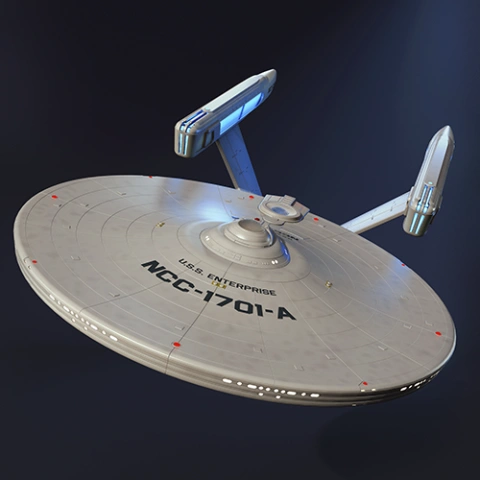
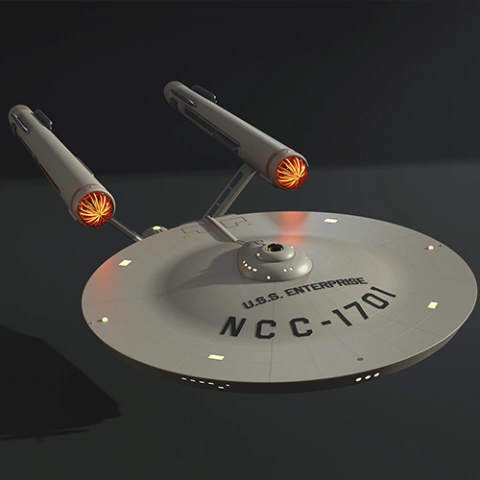
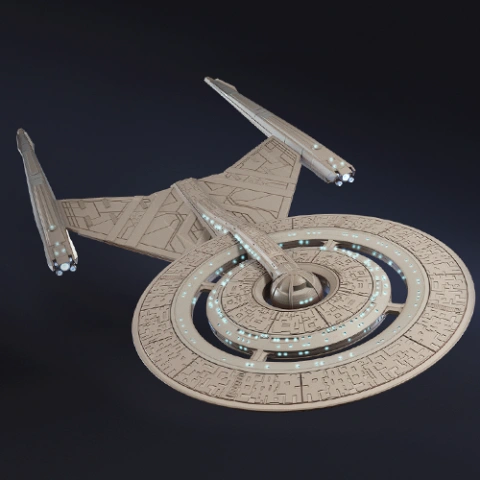
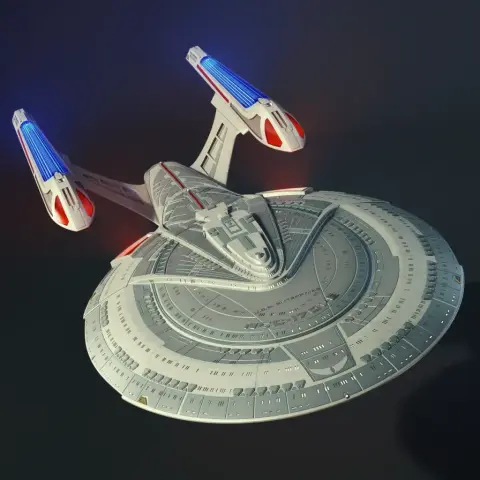
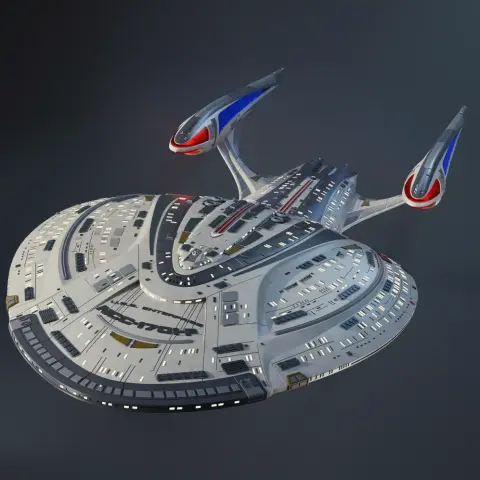
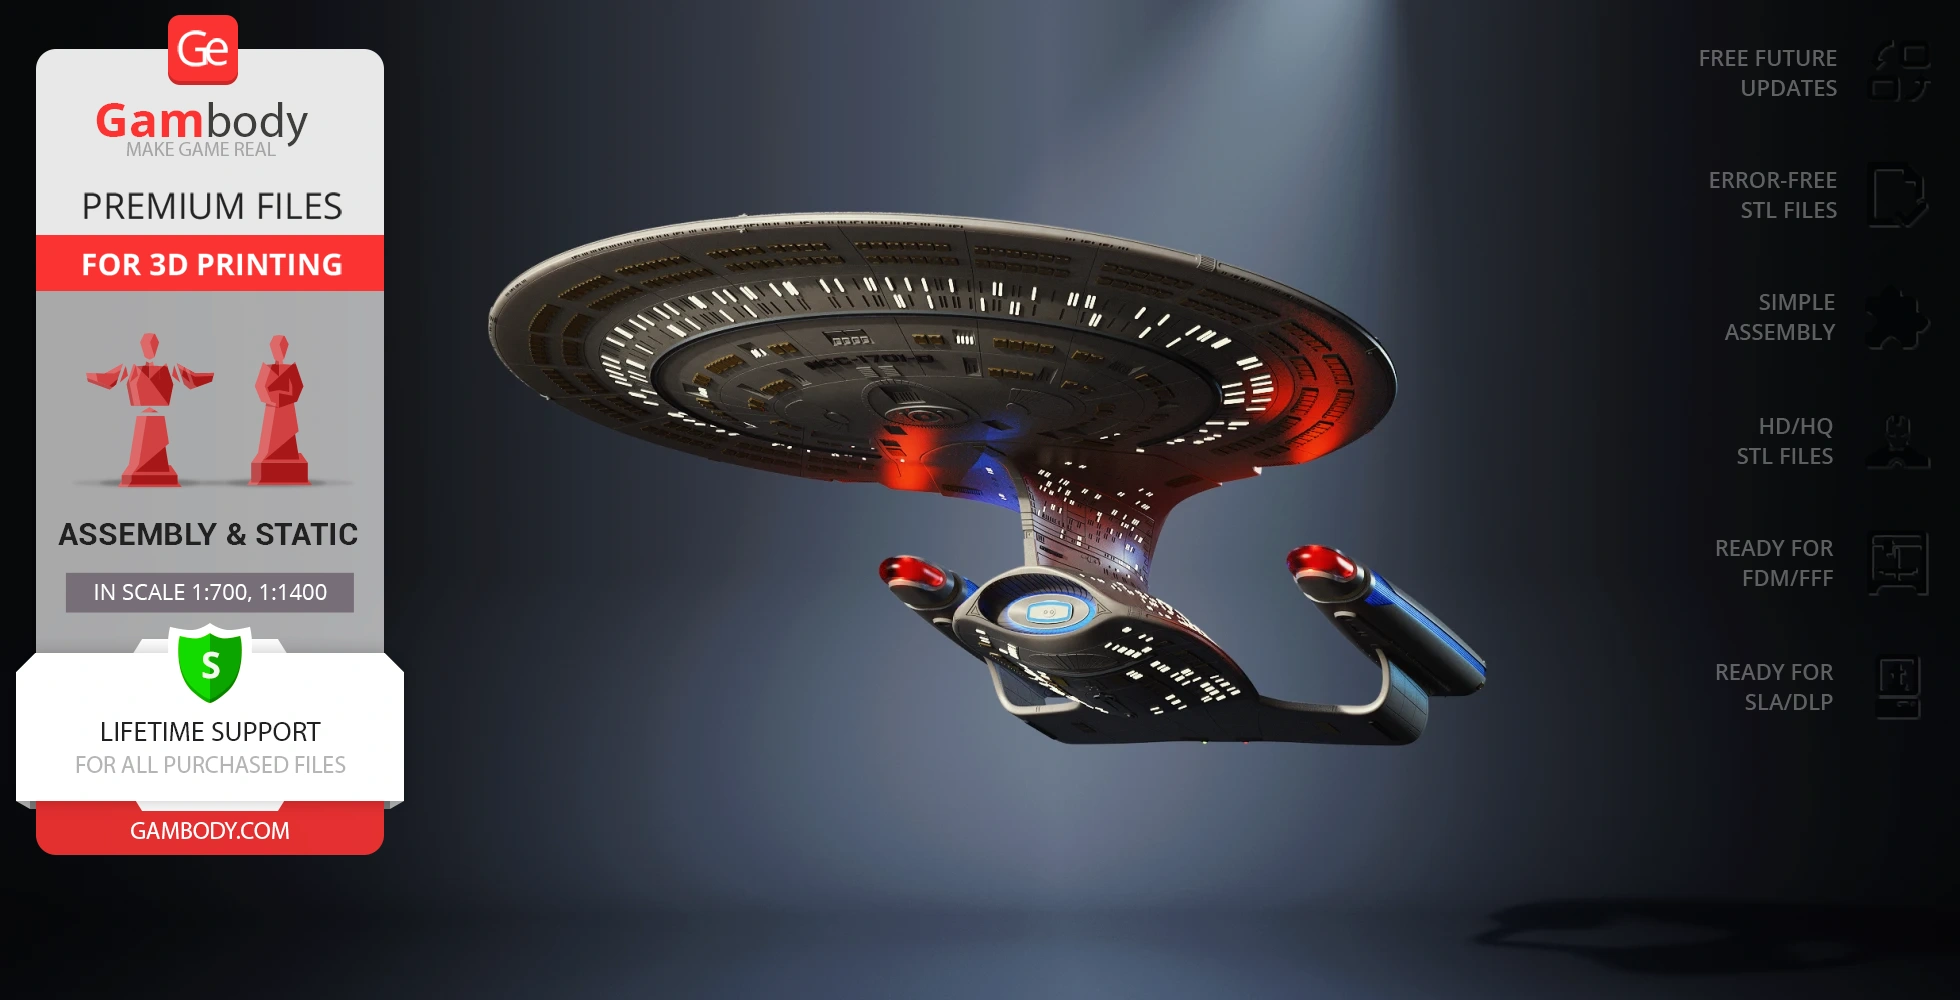
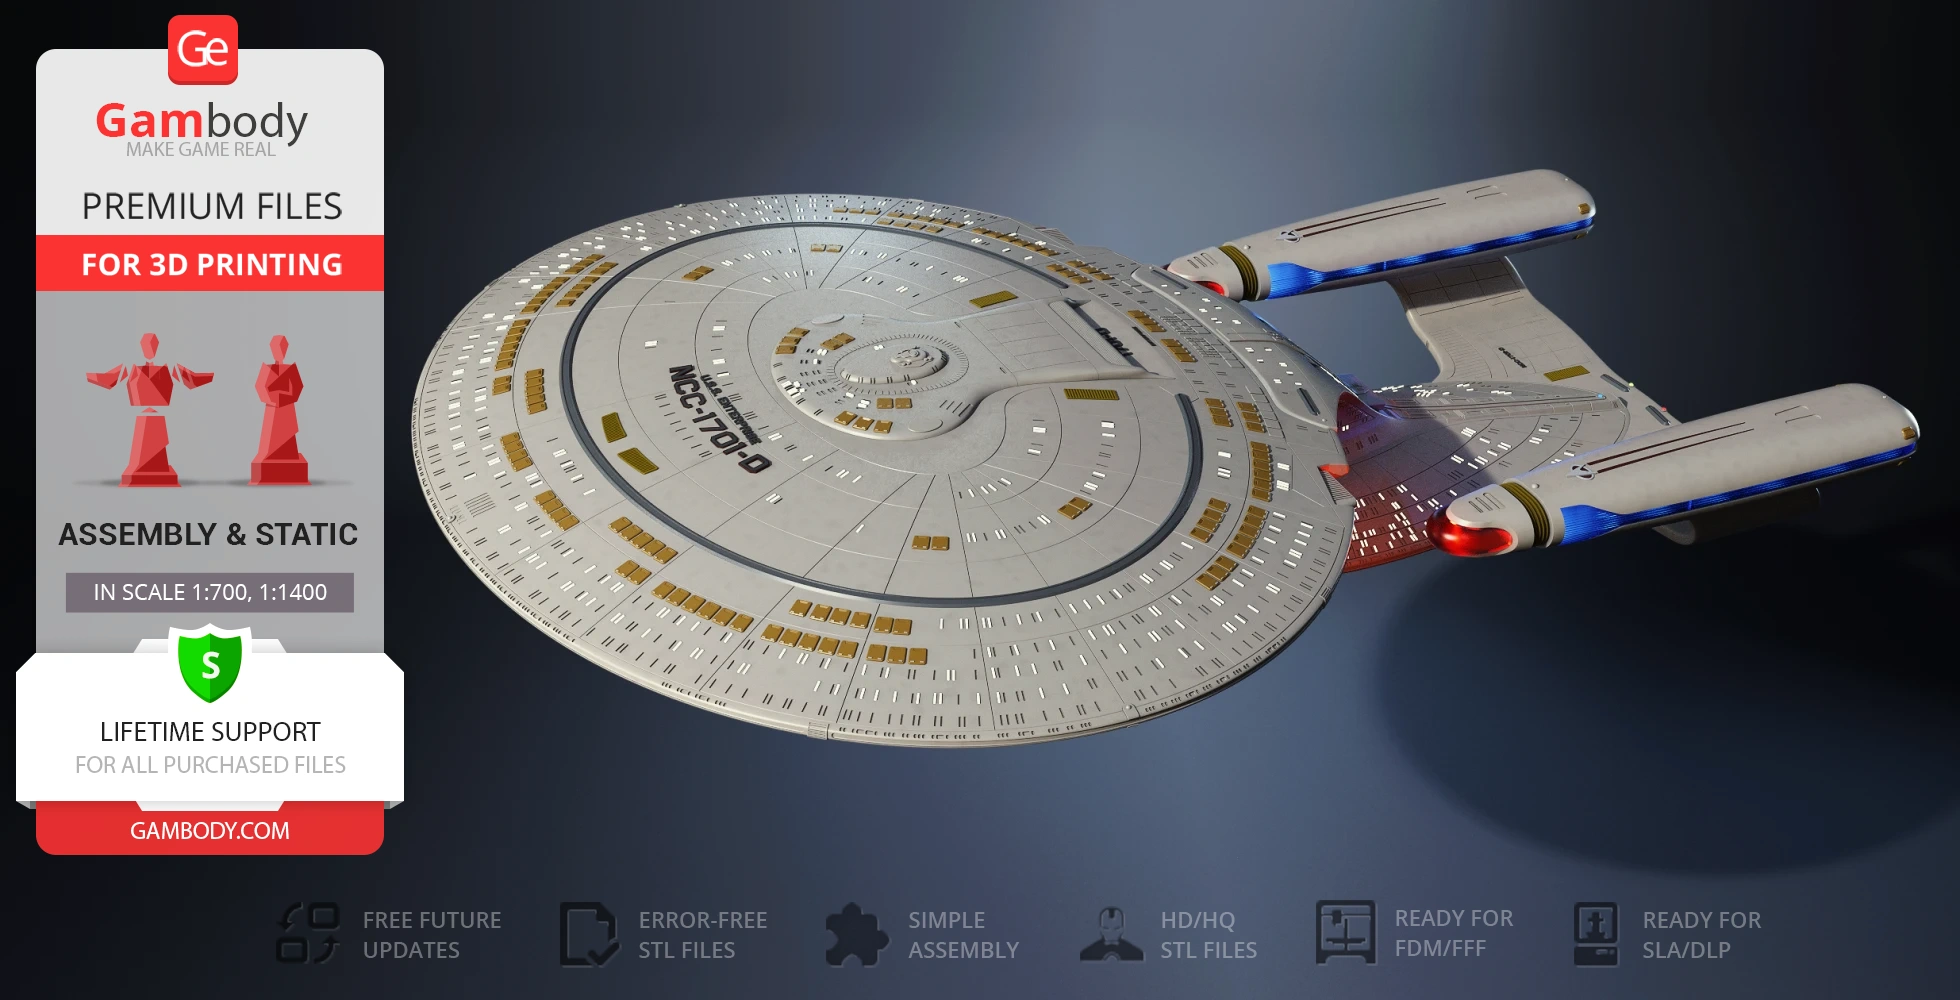
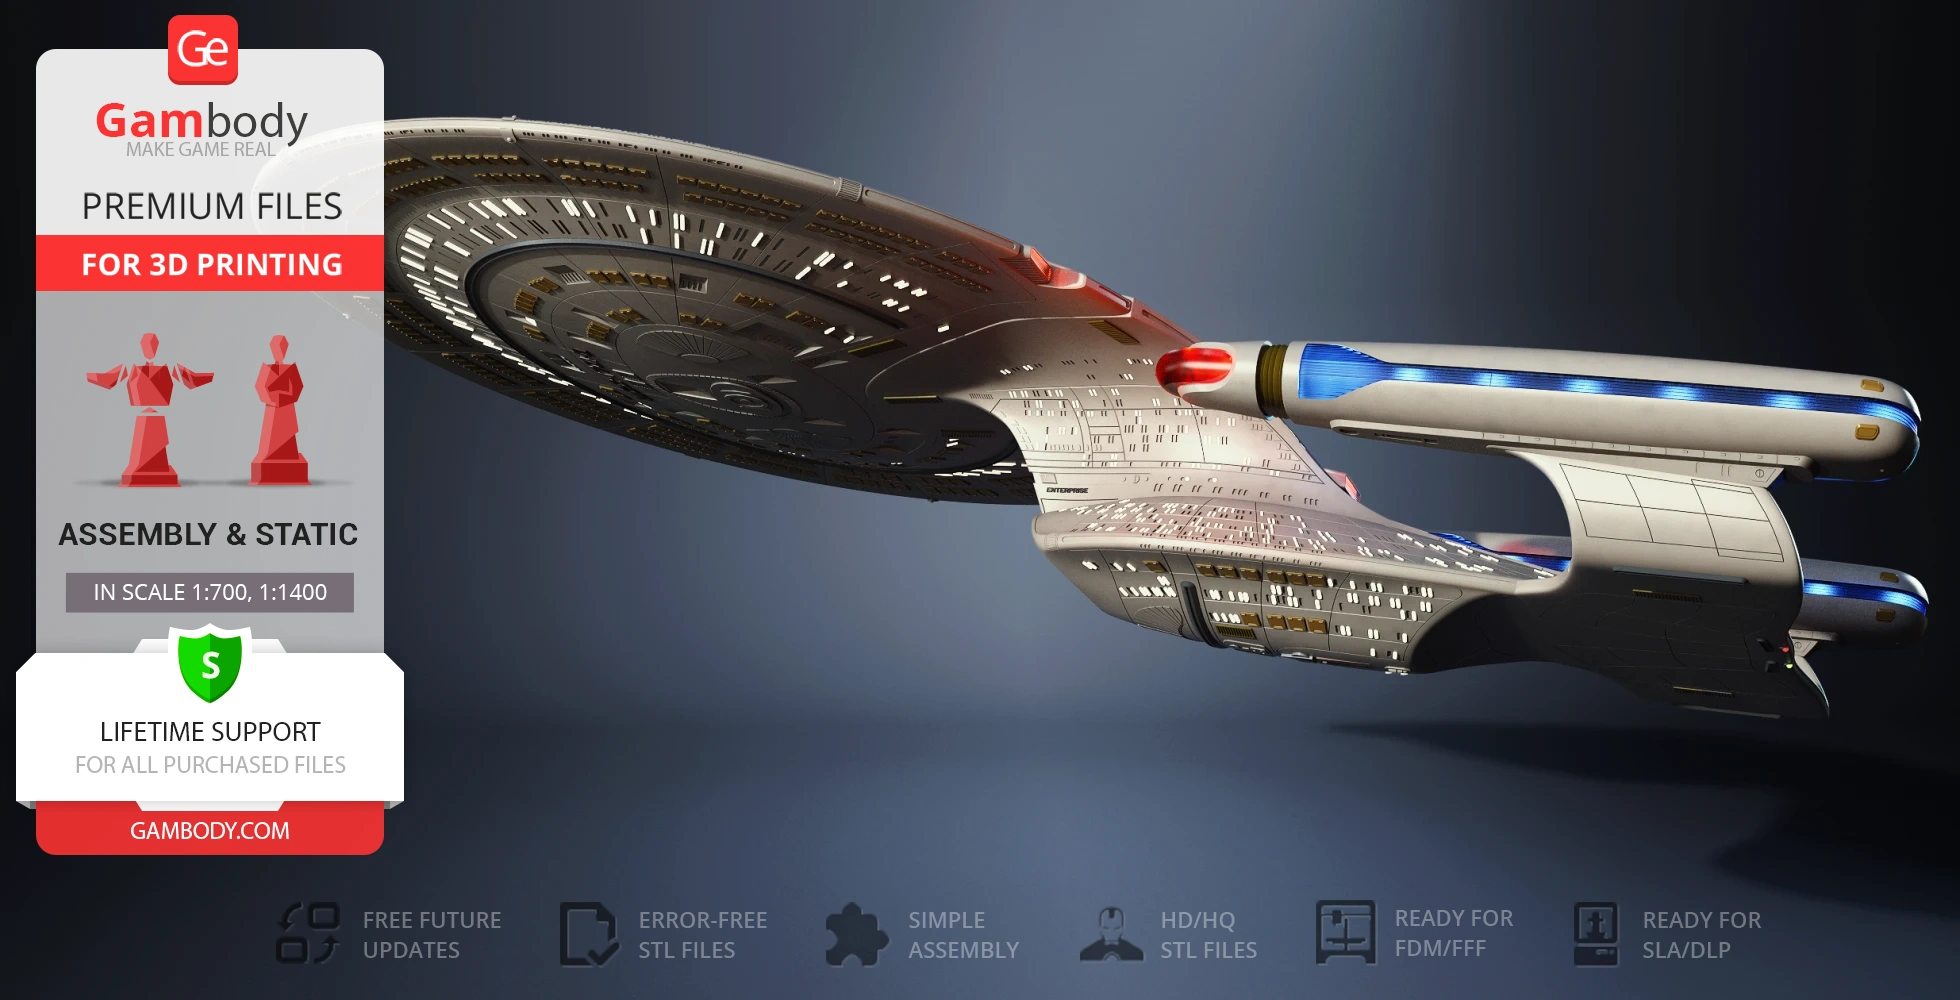
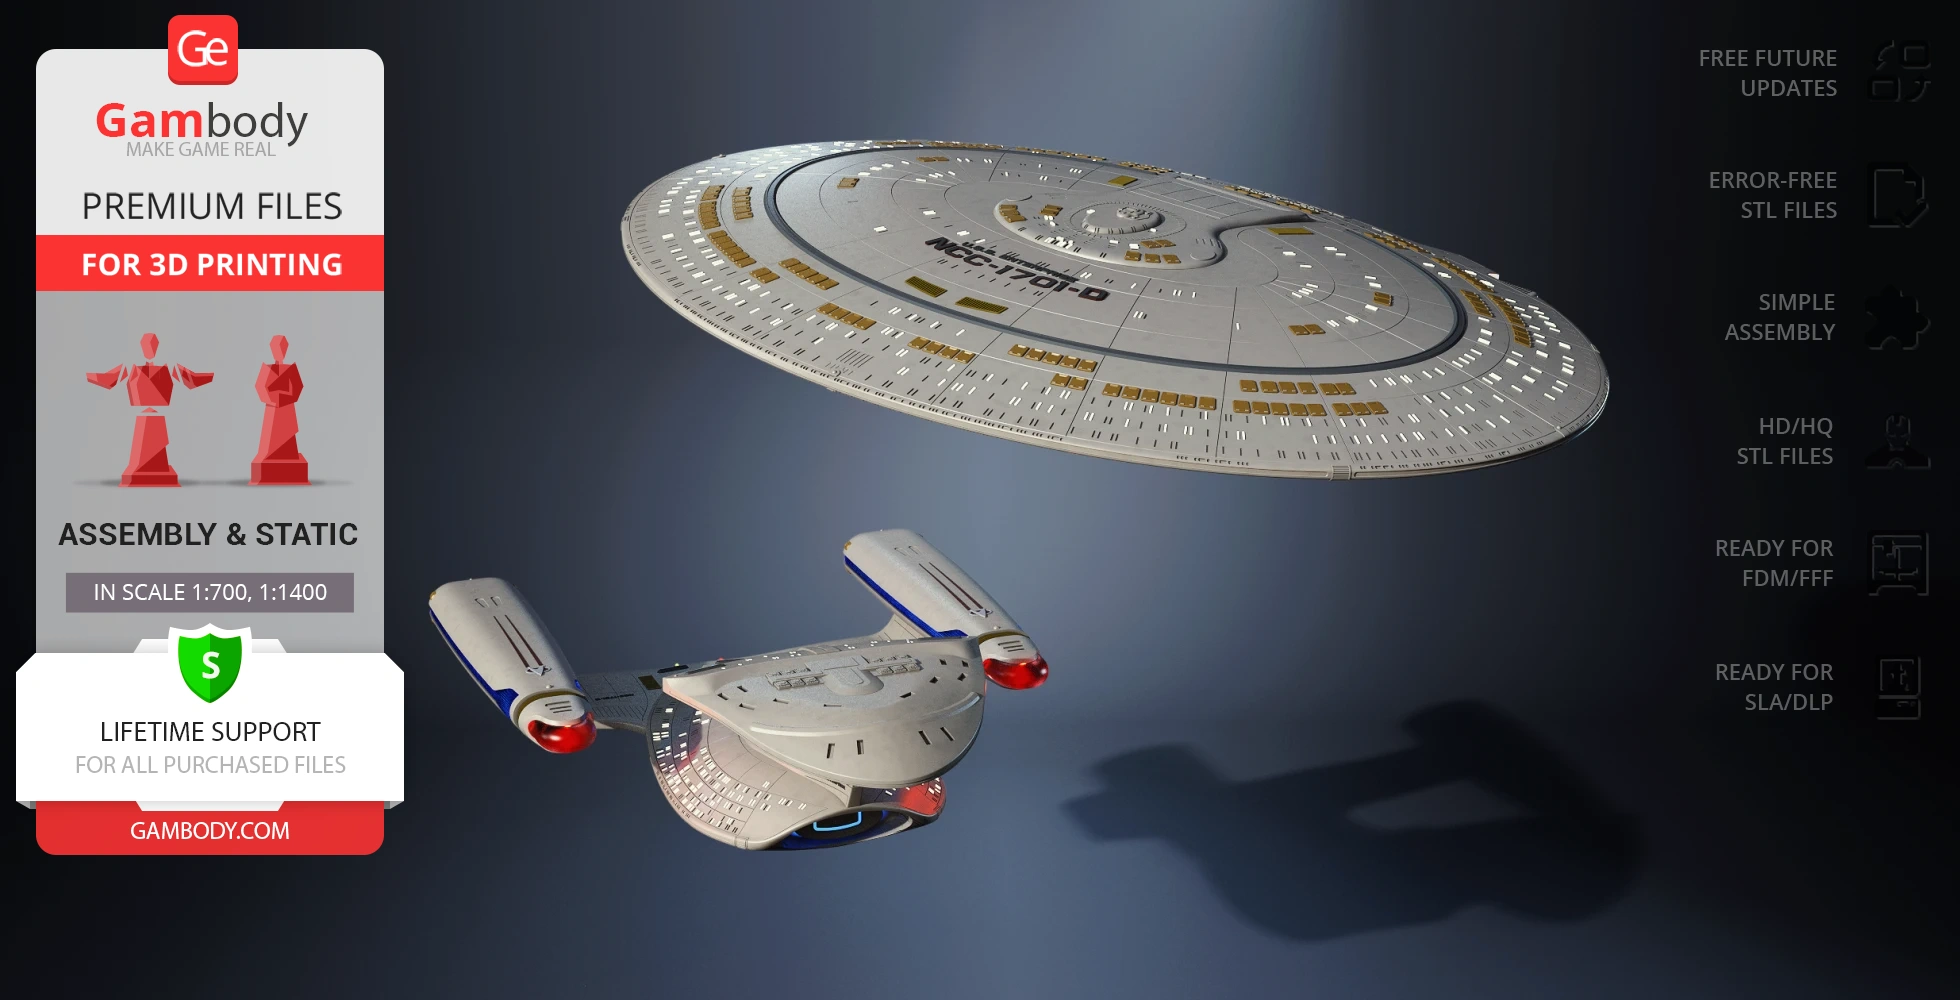
USS Enterprise NCC-1701-D capital ship, which appeared in numerous films, books, and spinoffs, is well-known and loved by all fans of the Star Trek sci-fi franchise. Star Trek: The Next Generation television series follows the mission of the crew of the Starfleet starship Enterprise-D and is set in the 24th century. Under the command of Captain Jean-Luc Picard, the new generation of officers travels out to distant planets to seek out new life and to go where no one has gone before and the famous vessel is the main setting of the drama.
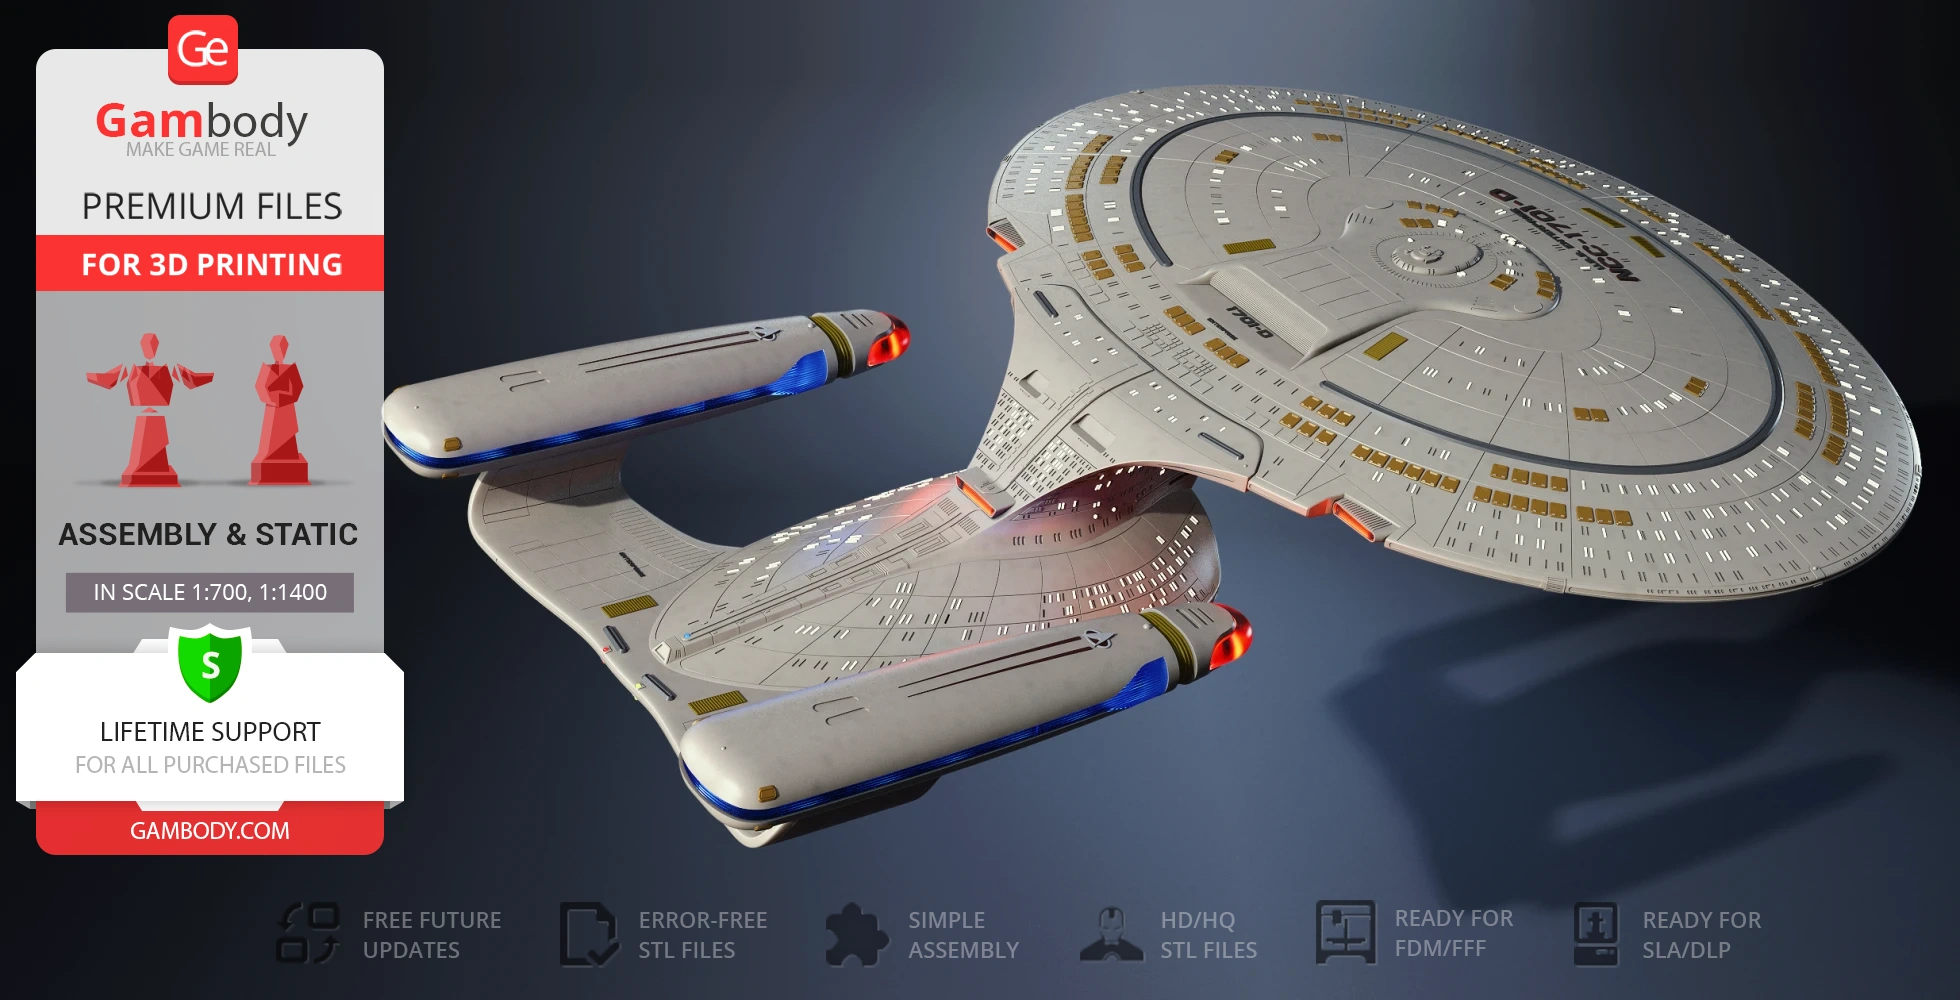
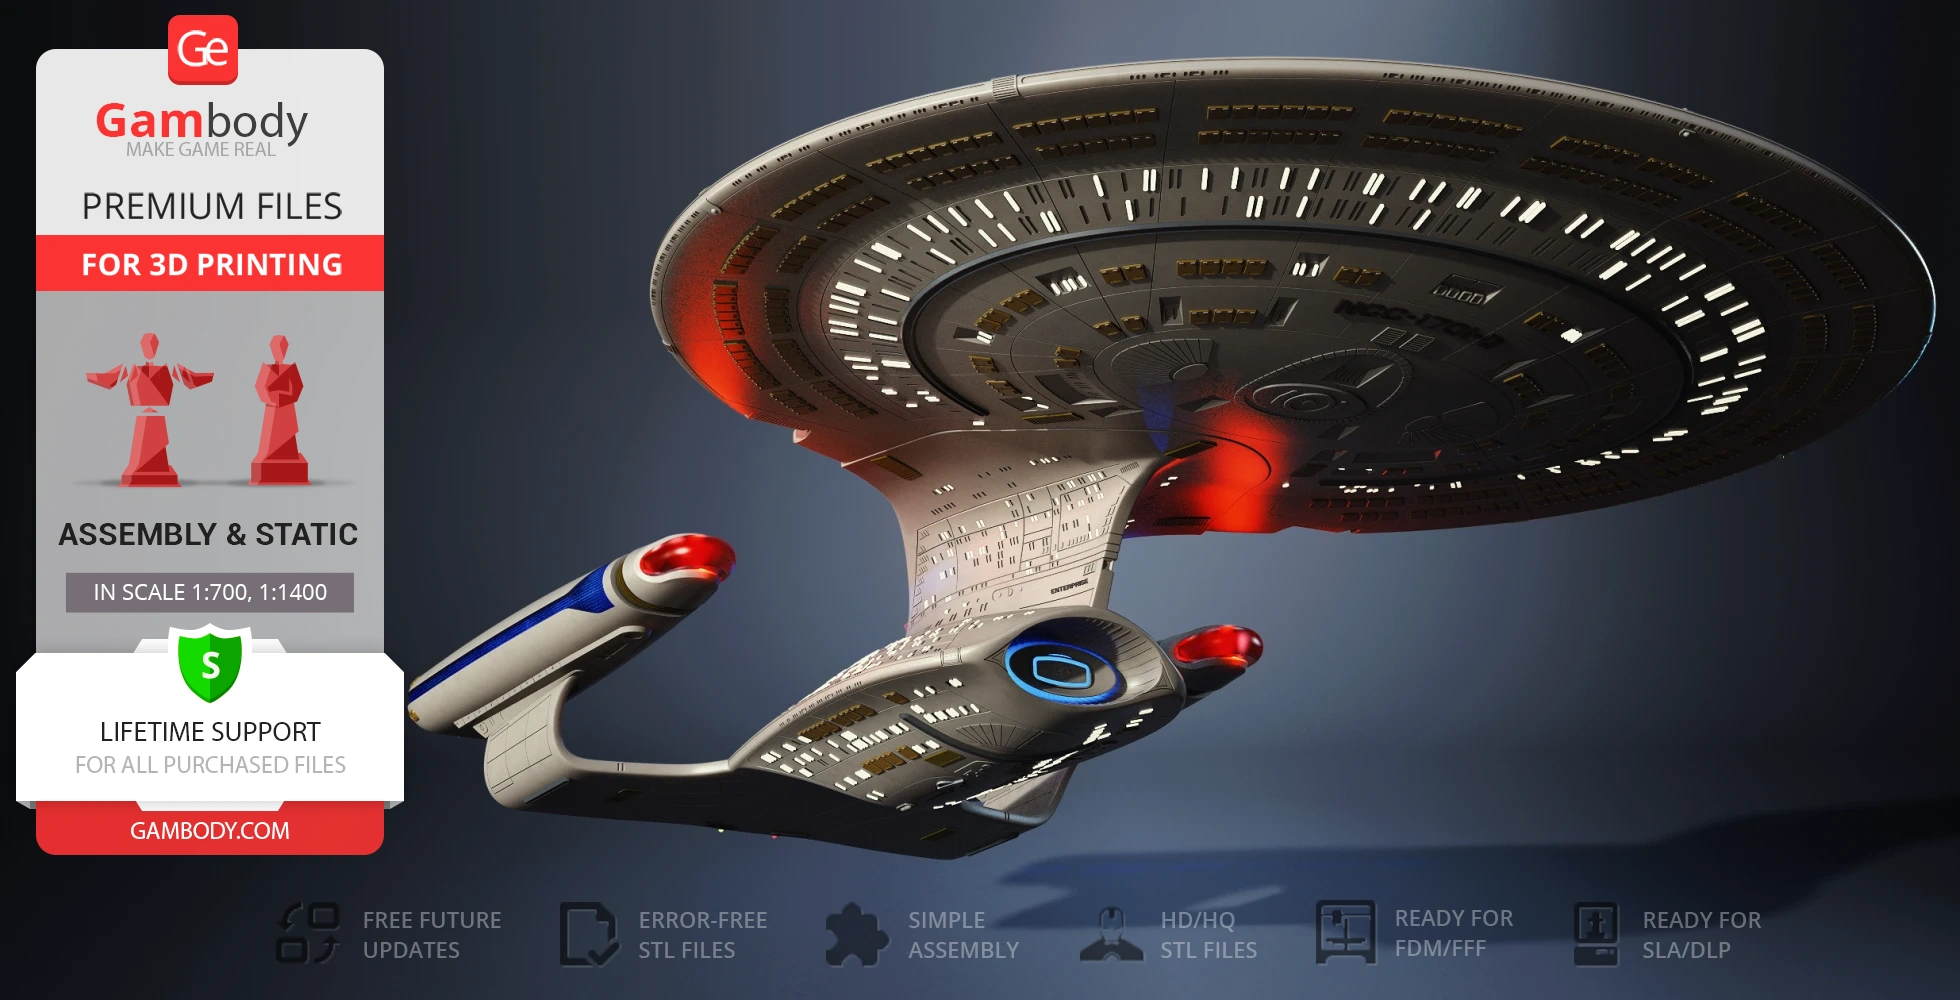
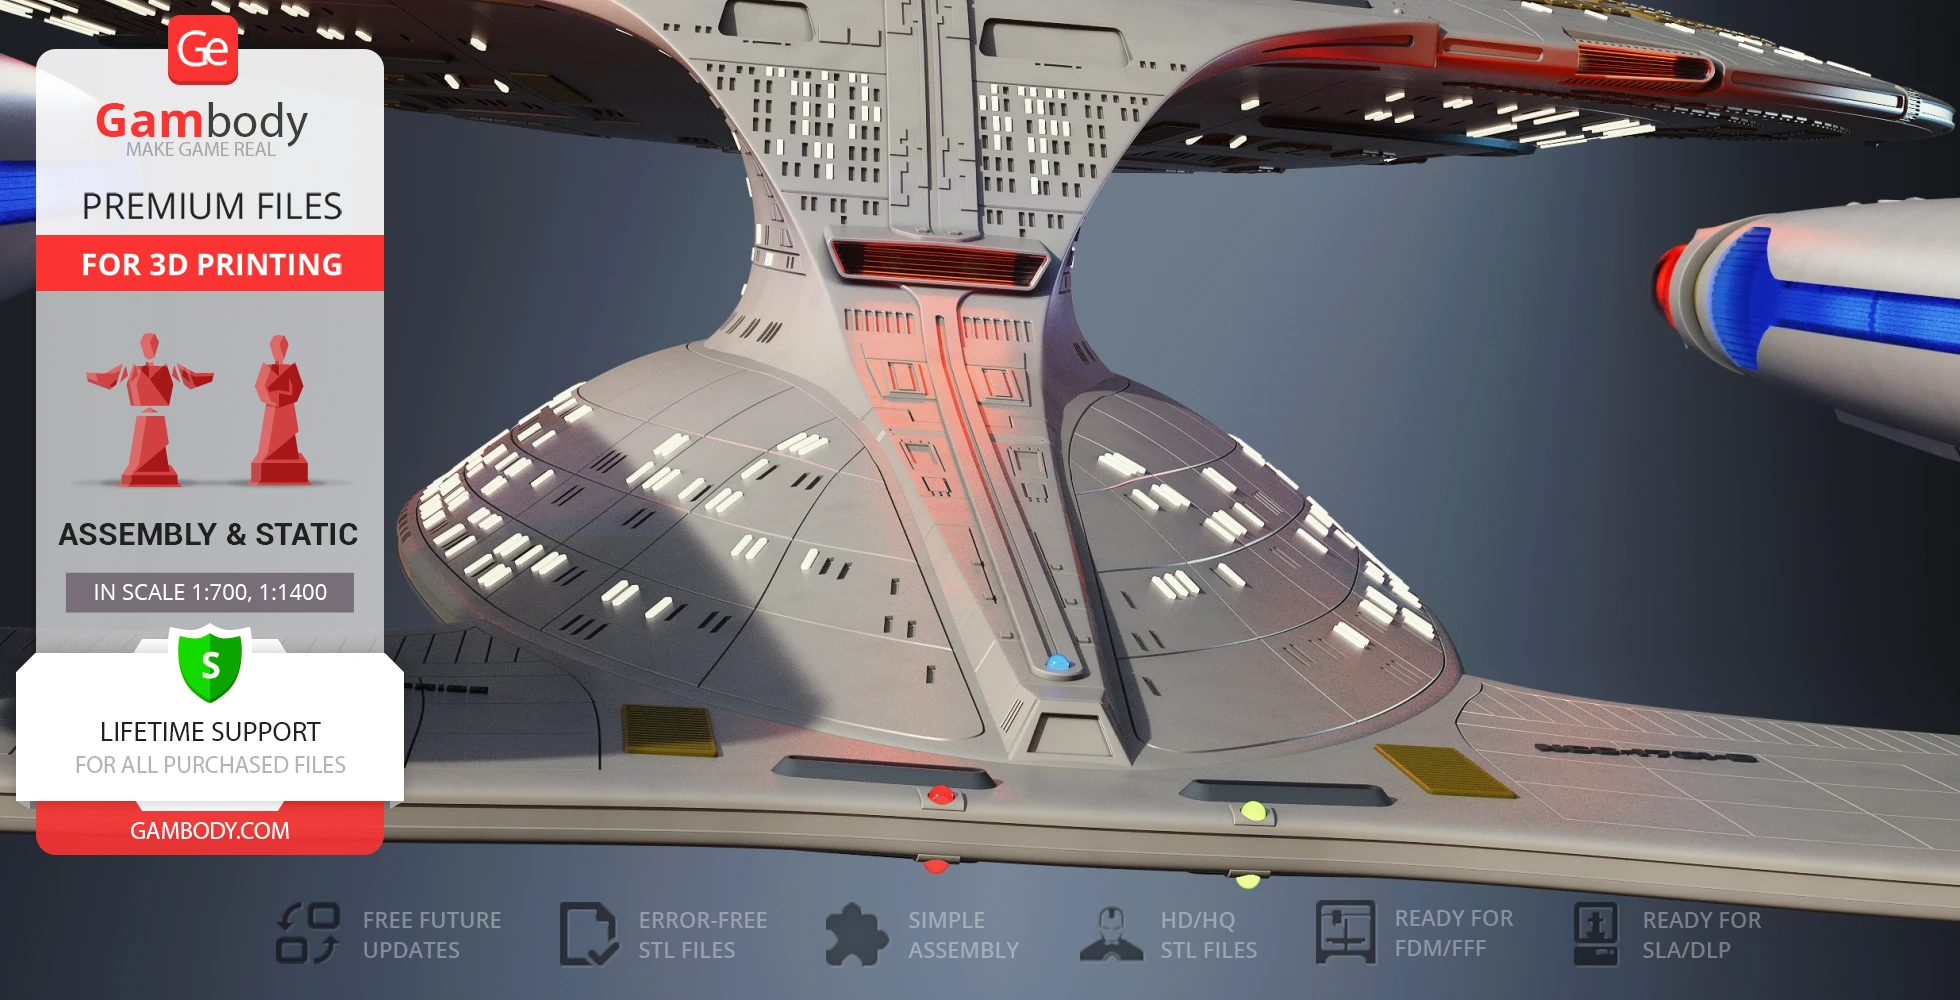
The long-awaited USS Enterprise NCC-1701-D model for 3D printing is now available on Gambody thanks to the great effort of our contributing 3D artist who created the starship inspired by its canonical design. The model features rounded contours, and the texture of the saucer section deserves special attention: the surface of the primary hull contains rows of tiny windows, both transparent and not, as depicted in the television series. The author of the model even considered the saucer separation feature of USS Enterprise NCC-1701-D incorporating this aspect into the model and with the platform-transformer, you have various opportunities for the presentation of the printed ship. Moreover, the tunnels for LED lighting allow you to light up the warp engines, warp nacelles, and the interior adding special charm to the vessel. USS Enterprise NCC-1701-D for 3D printing has it all, starting from the authentic design and ending with the thematic movable platform, to brighten your Star Trek collection!
ADAPTATION FOR 3D PRINTING
USS Enterprise NCC-1701-D model for 3D printing is a static assembly model and its moderation and adaptation for different types of 3D printers took the Gambody team 98 hours in total.
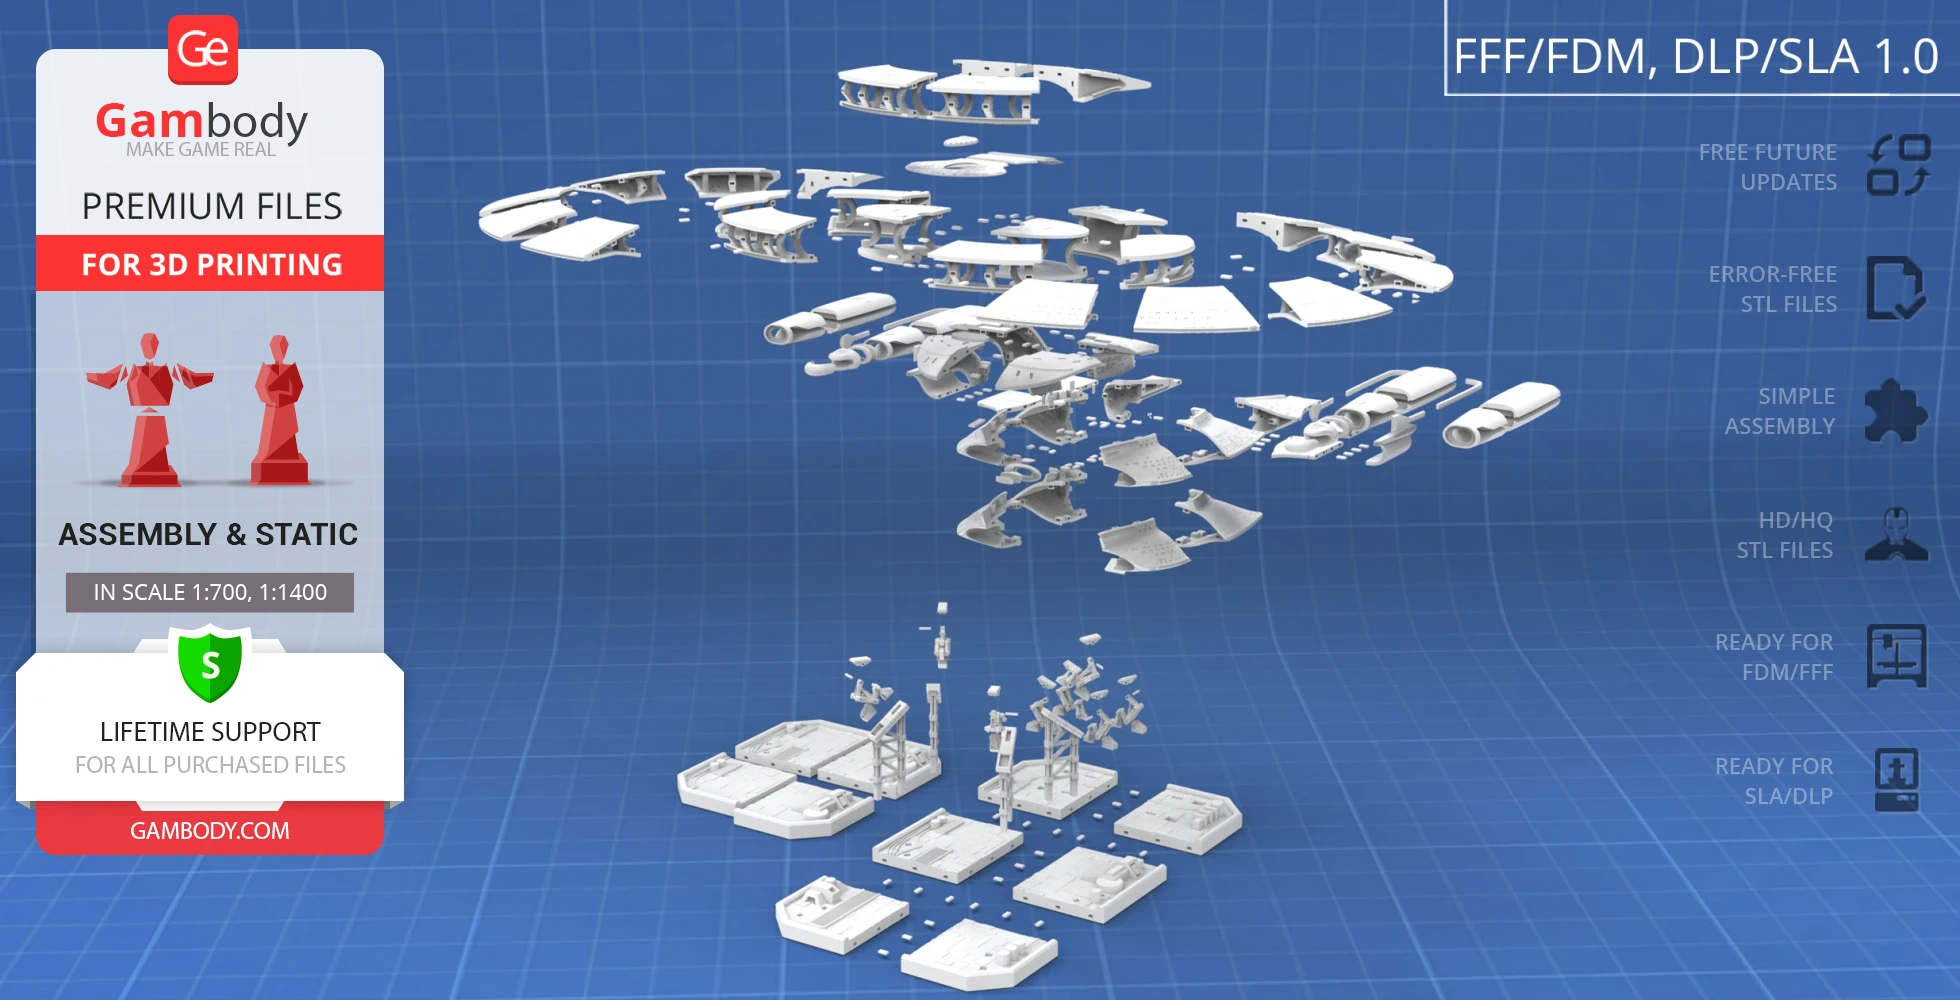
For you to receive the cleanest 3D printing result possible, minimize the amount of filament needed for generated support, and make use of the active elements designed by Gambody Engineers, the starship was divided into convenient assembly parts.
All assembly parts in the FFF/FDM 1.0 version are provided in STL files in recommended positions that were worked out in order to ensure the smoothness of the details’ surfaces after printing and that the 3D printing beginners won’t face difficulties when placing the parts on a build plate. When downloading any model’s file you will also receive “Assembly Manual” for FFF/FDM 1.0 and DLP/SLA 1.0 versions in PDF and video formats. We highly recommend that you get acquainted with the “Assembly Video” and “Assembly Manual” before getting down to the USS Enterprise NCC-1701-D 3D printing model.
The model is saved in STL files, a format supported by most 3D printers. All STL files for 3D printing have been checked in Netfabb and no errors were shown.
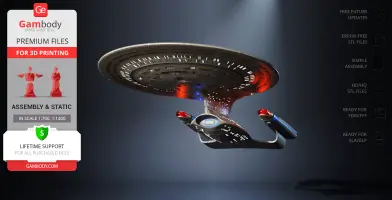
The model’s scale was calculated from the length of the starship which is 642500. The 3D printing model’s chosen scales are 1:700 for the FFF/FDM version and 1:1400 for the DLP/SLA version.
VERSIONS’ SPECIFICATIONS
FFF/FDM 1.0 version features:
- Contains 98 parts;
- A printed model is 261 mm tall, 671 mm wide, 919 mm deep;
- 2 variants of the hull - with and without the lettering;
- The saucer section is removable;
- The platform is designed as a service station;
- The platform can be divided to hold the saucer and secondary hull;
- The manipulators are movable and allow adjusting the tilt angle of the starship on the platform;
- There are tunnels for LED wiring to light up the warp engine, nacelles, and interior;
- All parts are divided in such a way that you will print them with the smallest number of support structures.
DLP/SLA 1.0 version features:
- Contains 90 parts;
- A printed model is 130 mm tall, 335 mm wide, 460 mm deep;
- 2 variants of the hull - with and without the lettering;
- The saucer section is removable;
- The platform is designed as a service station;
- The platform can be divided to hold the saucer and secondary hull;
- The manipulators are movable and allow adjusting the tilt angle of the starship on the platform;
- There are tunnels for LED wiring to light up the warp engine, nacelles, and interior;
- All parts are divided in such a way to fit the build plates and to ensure that support structures are generated where needed.
You can get the USS Enterprise NCC-1701-D model for 3D printing immediately after the purchase! Just click the green Buy button in the top-right corner of the model’s page. You can pay with PayPal or your credit card.
Watch the tutorial on how to assemble a USS Enterprise NCC-1701-D 3D Printing Model onGambody YouTube channel.
Also, you may like Star Trek3D Printing Models.
________
FAQ:
- Where can I print a model if I have no printer?
- How to get started with 3D printing?
- How to set up my 3D printer?
- How to choose right 3D model print bed positioning?
- How to paint printed figurine?
Average customer rating (29 reviews)
4.7
Ratings breakdown
Click a star rating to filter reviews
Overall experience
Level of detail in the model
4.6
Model cut quality and assembly guide
4.5
Clarity and accuracy of the model page
4.6
Level of detail in the model
4.9
Model cut quality and assembly guide
4.5
Clarity and accuracy of the model page
4.7
I went with a 5v 20a power supply built into a custom base.
I also reinforced the engineering section and permanently attached the saucer, this allowed me to have one dedicated power/lighting solution
the ship is controlled by an arduino that controls a custom start up sequence, the lighitng, and the strobe effects
The paint is pretty close to the studio model, and I custom printed water slide decals for the aztec patterns based off the starship modeler files available on their site,
The pennants, lifeboats, and registries are all waterslide decals that I designed myself
In terms of improvements, the ship provides more than enough space for lighting, however I had to alter the files to include the anti-collision lights on the belly, nacelles, and bridge, I also had to add in wire channels for the formation lights on the saucer. Making saucer separation optional would be great, I would much prefer a solid connection between the two halves of the ship rather than a feature that was rarely used on the show. Also I get the mission statement of a complete model with no extra parts, but my ship is reinforced with an aluminum rod connected to an internal bracket that I made, that takes the weight of the ship.This ship could really use some heavy duty reinforcement, give that epic size of it. But those are small critiques, this model was amazing, and I love everything about the way this came out. The build is challenging, and took about 2 months from the start of printing until it was finished, but it was very much worth it.
I love that you've mounted it at a single point... I have concerns about the structural integrity of the whole thing but wanted to do something similar.
I am already trying to address some sag in the pylons holding the nacelles with some 4mm hollow aluminum tubing.. but have concerns about the large saucer and how it will hold up to sag over time even if glued to the drive section.
Can you provide some detail on how you "reinforced the engineering section" ? Is there something structural sitting on the other side of where you have it mounted to take those forces off the plastic and into a more rigid core?
Level of detail in the model
5
Model cut quality and assembly guide
4.9
Clarity and accuracy of the model page
4.7
The Enterprise-D is definitely one of those projects that really rewards patience, careful planning, and attention to detail, and your final result turned out absolutely fantastic. We truly appreciate you taking the time to share your experience and showcase such an impressive build with the community!
As for the issue with joining the saucer to the drive section, please kindly email us at support@gambody.com, and we will be happy to assist you further.
Just a reminder, with the purchase of the premium STL files, you also receive lifetime technical support from our team, so if you ever need help with printing, slicing, assembly, or fitting issues, you can always get back to us, and we’ll be glad to help and advise.
Thank you once again for your support and for showcasing such an impressive build!
Level of detail in the model
5
Model cut quality and assembly guide
1.6
Clarity and accuracy of the model page
5
To access the PDF assembly manual, please re-download any file from the Source Files tab on the model page. The assembly instructions are included inside the ZIP archive together with the STL files.
In addition, a full video assembly guide, prepared by the Gambody Moderation Team, is available directly on the model page under Video → Assembly Guide, or you can view it here: https://www.youtube.com/watch?v=9w6VO6-UjQI
Should you require any further assistance, please do not hesitate to contact us. We will be happy to help.
Level of detail in the model
3.6
Model cut quality and assembly guide
4.5
Clarity and accuracy of the model page
5
Additionally, separating and hollowing the phaser strip would require significant structural changes to the model, including reinforcing both the upper and lower hull sections. This would involve a substantial rework and could also complicate assembly for users who do not plan to integrate lighting.
That said, your suggestion has been carefully documented. If similar requests are received in the future, the possibility of creating an alternative version of the model with integrated lighting support may be reconsidered. In such a case, it would be made available to all existing owners of the model.
Thank you for your understanding and for helping improve the models through your feedback. Please don’t hesitate to reach out if you have any further questions!
Level of detail in the model
4.5
Model cut quality and assembly guide
3.8
Clarity and accuracy of the model page
3.9
1. Is there any way to light up the navigation beacons on the back of the warp nacelles? See parts 1 & 71.
2. From my studies of the original 6 foot model constructed by Industrial Light & Magic, the escape pod hatches should be flush with the hull. Would it be possible to get a version that reflects this?
3. The exterior shape of the Battle Bridge is wrong - Please check out the model kit released by AMT/Polar Lights for reference. You can also check this link:
https://memory-alpha.fandom.com/wiki/Galaxy_class_model#The_%22Battle_Head%22_model
Any help with this would be greatly appreciated!
-Tom
Regarding the navigation beacons on the warp nacelles, lighting them is definitely possible. The corresponding parts are hollow, so there is space for wiring or small LEDs. While there are no pre-made holes for lighting, you can carefully drill them yourself. Alternatively, if you let us know the exact placement you prefer, we can look into adding dedicated openings.
As for the escape pod hatches, you’re absolutely right – on the original studio miniature, they were flush with the hull. In the Danny Lee version, they are slightly raised to preserve visibility of the detailing at this scale and to ensure it translates well in 3D printing. This was an intentional artistic and technical choice by the author. Since the model is an artistic interpretation adapted specifically for 3D printing, adjustments to this feature are not currently planned.
Concerning the Battle Bridge shape, it does differ somewhat from certain studio models and kit versions. This was a conscious balance between screen accuracy and assembly, particularly to ensure reliable connection points and printability. That said, we highly value your feedback and will pass your observation to the author for consideration in potential future refinements.
Thank you again for your detailed input. If you have any additional questions, we’ll be happy to assist!
Level of detail in the model
4.9
Model cut quality and assembly guide
4.8
Clarity and accuracy of the model page
4.9
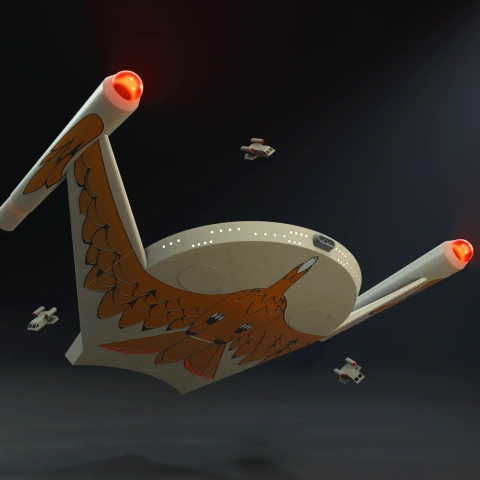
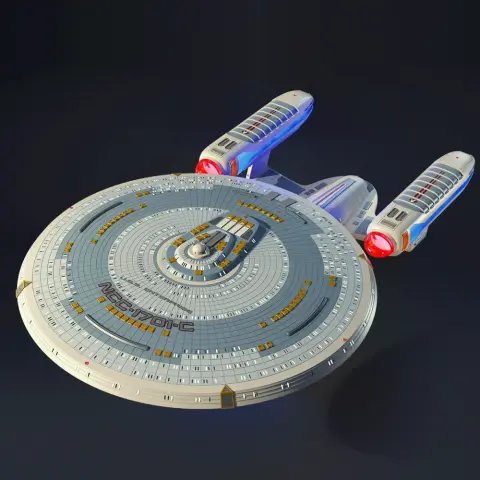
Hey Danny Lee - we desperately need an Enterprise C with this level of quality!
Level of detail in the model
3.7
Model cut quality and assembly guide
3.7
Clarity and accuracy of the model page
4.5
You've chosen quite a challenging combination due to the significant difference in scales between the two models. The Deep Space 9 3D model is provided at 1:2800 for FFF/FDM and 1:5600 for DLP/SLA, while the USS Enterprise NCC-1701-D is provided at 1:700 for FFF/FDM and 1:1400 for DLP/SLA.
Please keep in mind that all files on the model pages are prepared in their recommended scales and optimized cuts for the intended printing technology. Downscaling, or using the resin (DLP/SLA) version on an FFF/FDM printer, is not recommended. Such changes can lead to detail loss, print inaccuracies, shrinkage, and assembly challenges, and therefore, we cannot guarantee successful results.
If you still wish to match the scales, you have two possible ways:
1. Recommended:
Downscale the DLP/SLA version of the USS Enterprise NCC-1701-D from 1:1400 to 1:2800 and print it on a resin printer. Resin printing handles small-scale details much more accurately and reliably than filament printing.
2. More difficult:
Downscale the FFF/FDM version from 1:700 to 1:2800 and print it on a filament printer. Please note that this will inevitably result in noticeable detail loss and a more challenging assembly process.
However, if you would like to proceed with this idea, the only way to achieve a successful print is to switch to a 0.2 mm nozzle for higher accuracy, use a much finer layer height to preserve detail, and perform test prints of calibration elements and the smallest parts of your project.
You can find calibration elements here: https://www.gambody.com/premium/calibration-elements-3d-printer.
Just remember to adjust your settings — lower the printing speed and fine-tune retraction for the smaller nozzle.
If you'd like, feel free to share test print photos with us, and we'll be happy to advise on any tweaks for the best results.
Level of detail in the model
5
Model cut quality and assembly guide
5
Clarity and accuracy of the model page
5
Level of detail in the model
5
Model cut quality and assembly guide
5
Clarity and accuracy of the model page
5
Level of detail in the model
5
Model cut quality and assembly guide
5
Clarity and accuracy of the model page
5
Level of detail in the model
5
Model cut quality and assembly guide
5
Clarity and accuracy of the model page
5
Level of detail in the model
3
Model cut quality and assembly guide
3
Clarity and accuracy of the model page
3
Level of detail in the model
5
Model cut quality and assembly guide
5
Clarity and accuracy of the model page
5
Level of detail in the model
5
Model cut quality and assembly guide
5
Clarity and accuracy of the model page
5
Level of detail in the model
5
Model cut quality and assembly guide
5
Clarity and accuracy of the model page
5
Level of detail in the model
1
Model cut quality and assembly guide
1
Clarity and accuracy of the model page
1
Level of detail in the model
5
Model cut quality and assembly guide
5
Clarity and accuracy of the model page
5
Level of detail in the model
5
Model cut quality and assembly guide
5
Clarity and accuracy of the model page
5
Level of detail in the model
5
Model cut quality and assembly guide
5
Clarity and accuracy of the model page
5
Level of detail in the model
4
Model cut quality and assembly guide
4
Clarity and accuracy of the model page
4
Below you'll find detailed slicing settings for Bambu Studio 2.0+, Orca Slicer 2.0+, UltiMaker Cura 5.0+, PrusaSlicer 2.0+, Slic3r 1.3+, Simplify3D 5.0+ to help you get the best results when printing this model. These settings are optimized specifically for this 3D model, but please note they may need slight adjustments depending on your printer or filament. When in doubt, refer to your printer's user manual.
To avoid printing issues and achieve the best quality, we highly recommend applying the following settings:
For better quality use 0.12 mm layer height, for fast printing use 0.2 mm layer height. For pins and the Ge connectors, use 0.2 layer height.
120-150% of your Layer Height
But you can paint the seam if you want.
You have to calibrate this parameter
You have to calibrate this parameter
You have to calibrate this parameter
For pins and power elements of the structure, such as the vehicle frame, use 3 loop
Disabled for vehicles and enabled for characters
For 0,2 Layer Height
The parameters in this tab vary greatly, it all depends on the quality of your printer. For example, if you have a classic Ender3, stick to the minimum parameters, but if you have a newer printer, for example Anycubic cobra 3 v2, you can select the maximum recommended values
Settings for advanced users, change these parameters only if you have sufficient 3D printing expertise
Enable this parameter if your model requires supports
We also recommend placing and removing supports manually in some places using special button
1-2 loops for more thick support
Top Z distance = 1-1.3 layer Height. If the supports are hard to remove, try increasing this setting by 0.1-0,4 mm
Bottom Z distance = 1-1.3 layer Height. If the supports are hard to remove, try increasing this setting by 0.1-0,4 mm
You have to calibrate this parameter which one is better for your filament
Increase this parameter if the supports are hard to remove from walls
For PLA and PETG filament types
5-8 mm is optional for small prints that have bad adhesion to the build plate
You have to calibrate this parameter
Read the description on your filament roll
Read the description on your filament roll and increase this parameter for fast printers
Read the description on your filament roll and increase this parameter for fast printers
For better quality use 0.12 mm layer height, for fast printing use 0.2 mm layer height. For pins and the Ge connectors, use 0.2 layer height.
120-150% of your Layer Height
But you can paint the seam if you want.
0.01-0.05 You have to calibrate this parameter
0.01-0.05 You have to calibrate this parameter
0.1-0.2 You have to calibrate this parameter
For pins and power elements of the structure, such as the vehicle frame, use 3 loop
Disabled for vehicles and ships, enabled for characters
For 0,2 Layer Height
For 0,2 Layer Height
The parameters in this tab vary greatly, it all depends on the quality of your printer. For example, if you have a classic Ender3, stick to the minimum parameters, but if you have a newer printer, for example, Anycubic Kobra 3 Or Bambulab A1, you can select the maximum recommended values.
Settings for advanced users, change these parameters only if you have sufficient 3D printing expertise
Enable this parameter if your model requires supports
We also recommend placing and removing supports manually in some places using special button
Top Z distance = 1-1.3 layer Height. If the supports are hard to remove, try increasing this setting by 0.1-0,4 mm
Bottom Z distance = 1-1.3 layer Height. If the supports are hard to remove, try increasing this setting by 0.1-0,4 mm
Increase this parameter if the supports are hard to remove from walls
For PLA and PETG filament types
5-8 mm is optional for small prints that have bad adhesion to the build plate
Read the description on your filament roll
Read the description on your filament roll and increase this parameter for fast printers
You have to calibrate this parameter
Read the description on your filament roll and increase this parameter for fast printers
Read the description on your filament roll
This field is filled in according to your printer specifications when you add it to the slicer.
You can add custom G-code here for the start and end of the print. However, be careful - this is for advanced users only!
You have to calibrate your printer using Ge retraction test models
Retraction Length: For direct-drive setups use 0.5 mm to 2.5 mm; for Bowden extruders use 5 to 7 mm
This is how fast the filament is pulled back—40-60 mm/s for direct drive and 30-50 mm/s for Bowden setups.
You have to calibrate this parameter: Reduce it until the printer starts to hit the parts with the nozzle during printing, then increase it by 0.2.
For better quality use 0.12 mm layer height, for fast printing use 0.2 mm layer height. For pins and the Ge connectors, use 0.2 layer height.
120-150% of your Layer Height
To increase the strength of the print parts, use wall line count: 3
For pins and connectors use 50% Infill
These parameters are for standard PLA plastic. If you are using a different type of plastic, check the printing temperature recommended by the manufacturer. Also, read the description on your filament spool. For fast printers, add +30 °C to the current parameters.
The parameters in this tab vary greatly, it all depends on the quality of your printer. For example, if you have a classic Ender3, stick to the minimum parameters, but if you have a newer printer, for example Anycubic cobra 3 v3, you can select the maximum recommended values
Settings for advanced users, change these parameters only if you have sufficient 3D printing expertise.
You need to calibrate this parameter using Gambody test models. These values are average values for a Direct Drive extruder; for a Bowden extruder, the values should be increased.
You need to calibrate this parameter using Gambody test models. These values are average values for a Direct Drive extruder; for a Bowden extruder, the values should be increased.
Use this value other than 0 if your nozzle catches on the internal infill during travel moves. Try to keep this value as low as possible in height.
Use normal supports to support large, straight surfaces (most mechanical or technical parts).
You have to calibrate this parameter according to the capabilities of your printer and your filament, using a Gambody test models.
Use 1 instead of 0 if your supports are thin and tall. They will be harder to remove, but much stronger.
Top Z distance = 1-1.3 layer Height. If the supports are hard to remove, try increasing this setting by 0.1-0,4 mm
Increase this parameter if the supports are hard to remove from walls
Use tree supports to support complex objects, such as characters.
You have to calibrate this parameter according to the capabilities of your printer and your filament, using a Gambody test models.
Top Z distance = 1-1.3 layer Height. If the supports are hard to remove, try increasing this setting by 0.1-0,4 mm
Increase this parameter if the supports are hard to remove from walls
Use a skirt for all parts when printing on outdated printers.
Use a brim when printing thin but tall parts, as well as parts with a small bed adhesion area.
For better quality use 0.12 mm layer height, for fast printing use 0.2 mm layer height. For pins and the Ge connectors, use 0.2 layer height.
120-150% of your Layer Height
for 0.2 Layer Height
But you can paint the seam if you want.
(for PLA and PETG)
(5-8 mm is optional for small prints that have bad adhesion to the build plate)
Enable this parameter if your model requires supports
(45-50 degree)You have to calibrate this parameter according to the capabilities of your printer
and your filament, using a Gambody test models.
Top contact Z distance = 1-1.3 layer Height. If the supports are hard to remove, try
increasing this setting by 0.1-0,4 mm
Top contact Z distance = 1-1.3 layer Height. If the supports are hard to remove, try
increasing this setting by 0.1-0,4 mm
Increase this parameter if the supports are hard to remove from walls
The parameters in this tab vary greatly, it all depends on the quality of your printer. For example, if you have a classic Ender3, stick to the minimum parameters, but if you have a newer printer, for example Anycubic cobra 3 v3, you can select the maximum recommended values
Settings for advanced users, change these parameters only if you have sufficient 3D printing expertise. Use the minimum value for outdated printers without acceleration calibration, and the maximum value for modern printers if you need it.
These settings only work for 3D printers with multiple extruders
You can try setting all parameters in this section, except the First layer, to values between 0.75% of your nozzle diameter and 1.25% of your nozzle diameter. Adjusting them will help you work out the optimal parameters for the best quality for your print. As for the First layer, you can set it to 150% of the diameter of your nozzle for better adhesion to the build plate (for a nozzle with a diameter of 0.4 mm, the First layer extrusion width can be from 0.3 mm to 0.5 mm)
For better printing quality you have to calibrate this parameter using Gambody test model.
Check your filament manufacturer's temperature recommendations on the spool.
Cooling parameters depends on the material you use for printing.
*for PLA
For better quality use 0.12 mm layer height, for fast printing use 0.2 mm layer height. For pins and the Ge connectors, use 0.2 layer height.
120-150% of your Layer Height
For 0.12 Layer Height
For 0.12 Layer Height
For pins and connectors use 50% Infill
Use skirt for outdated 3d printers
(5-8 mm is optional for small prints that have bad adhesion to the build plate)
Enable this parameter if your model requires supports
(45-60 degree)You have to calibrate this parameter according to the capabilities of your printer and your filament, using a Gambody test models
Contact Z distance = 1-1.3 layer Height. If the supports are hard to remove, try increasing this setting by 0.1-0,4 mm
The parameters in this tab vary greatly, it all depends on the quality of your printer. For example, if you have a classic Ender3, stick to the minimum parameters, but if you have a newer printer, for example Anycubic cobra 3 v3, you can select the maximum recommended values
Settings for advanced users, change these parameters only if you have sufficient 3D printing expertise. Use the minimum value for outdated printers without acceleration calibration, and the maximum value for modern printers if you need it.
You have to calibrate this parameter from 0.9 to 1.1 according to the capabilities of your printer and your filament, using a Gambody test models.
Check your filament manufacturer's temperature recommendations on the spool.
Cooling parameters depends on the material you use for printing.
Calibrate this value if you need to reduce or improve the adhesion between the plastic and the heat bed
Your current nozzle diameter
You need to calibrate this parameter using Gambody test models. These values are average values for a Direct Drive extruder; for a Bowden extruder, the values should be increased.
Your current nozzle diameter
You have to calibrate this parameter using Gambody test models.
You need to calibrate this parameter using Gambody test models. These values are average values for a Direct Drive extruder; for a Bowden extruder, the values should be increased.
For better quality use 0.12 mm layer height, for fast printing use 0.2 mm layer height. For pins and the Ge connectors, use 0.2 layer height.
For 0,2 Layer Height
For 0,2 Layer Height
To increase the strength of the print parts, use Outline Perimeters: 3
You can enable this parameter to print rounded or spherical models, as well as character models.
Use this option only if your parts are too tight. but better calibrate your printer extrusion
Use this option only if your parts are too tight. but better calibrate your printer extrusion
Use 2 and more if you want to create skirt instead brim
1-2 for skirt and 10-20 for brim
Use for wipe nozzle if you need
Use For ABS filament
For pins and connectors use 50% Infill
Top Z distance = 1-1.3 layer Height. If the supports are hard to remove, try increasing this setting by 0.1-0,4 mm
Calibrate your filament and detect optimal temperature for it
Average temperature for PLA filament
The parameters in this tab vary greatly, it all depends on the quality of your printer. For example, if you have a classic Ender3, stick to the minimum parameters, but if you have a newer printer, for example Anycubic cobra 3 v3, you can select the maximum recommended values
Settings for advanced users, change these parameters only if you have sufficient 3D printing expertise.
DLP/SLA
- 2 variants of the hull - with and without the lettering;
- The saucer section is removable;
- The platform is designed as a service station;
- The platform can be divided to hold the saucer and secondary hull;
- The manipulators are movable and allow adjusting the tilt angle of the starship on the platform;
- There are tunnels for LED wiring to light up the warp engine, nacelles, and interior;
FFF/FDM
- 2 variants of the hull - with and without the lettering;
- The saucer section is removable;
- The platform is designed as a service station;
- The platform can be divided to hold the saucer and secondary hull;
- The manipulators are movable and allow adjusting the tilt angle of the starship on the platform;
- There are tunnels for LED wiring to light up the warp engine, nacelles, and interior;