


Files
3D model format
Stereolithography (.stl)
Total files
Slicer settings
Mesh error check
Netfabb
Support
Lifetime support from Gambody team
Update requests
Available to verified buyers
Model complexity
Standard: balanced printing difficulty and moderate part count with assembly steps.
Advanced: may require tuning print settings or support placement, plus precise fitting, gluing, or sanding.
Model versions
SLS
Assembly method
Connectors
Features
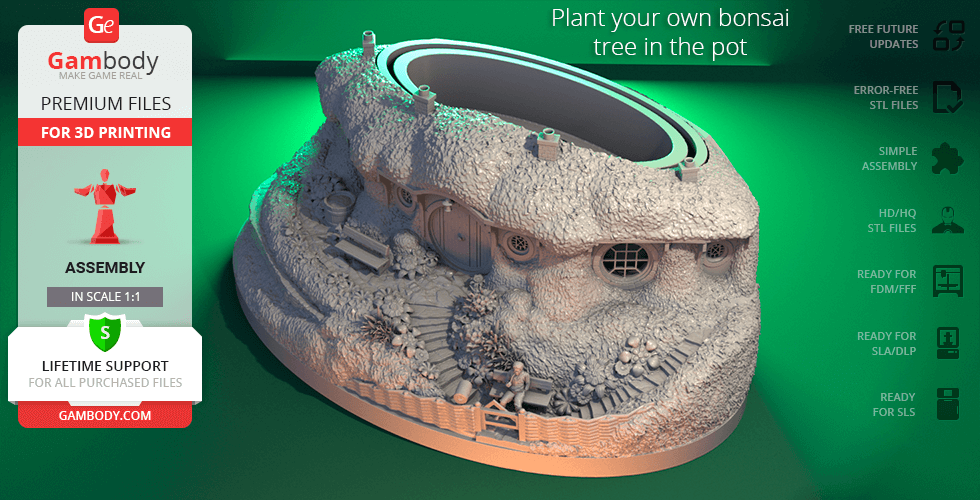
Comes with a specialized bowl and pot designed for planting a real bonsai tree;
Can be assembled with a traditional roof and a modelled tree if a live bonsai is not desired;
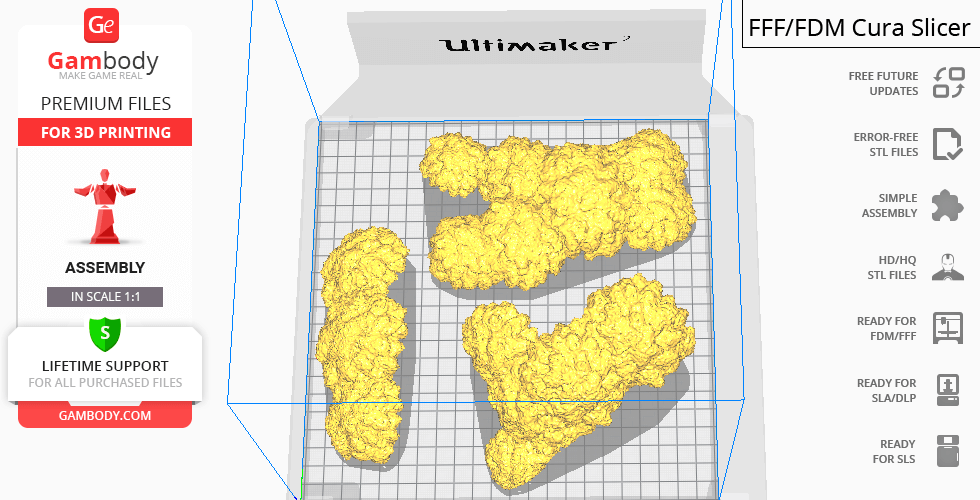
Parts division is optimized for larger build plates with fewer assembly parts and to ensure support structures are generated where needed;
The assembly parts are connected using specially designed integrated connectors that fit securely into the corresponding slots. Optionally, for added strength and rigidity, the static assembly joints can be glued together;
FFF/FDM
Assembly method
Connectors
Features
Comes with a specialized bowl and pot designed for planting a real bonsai tree;
Can be assembled with a traditional roof and a modelled tree if a live bonsai is not desired;
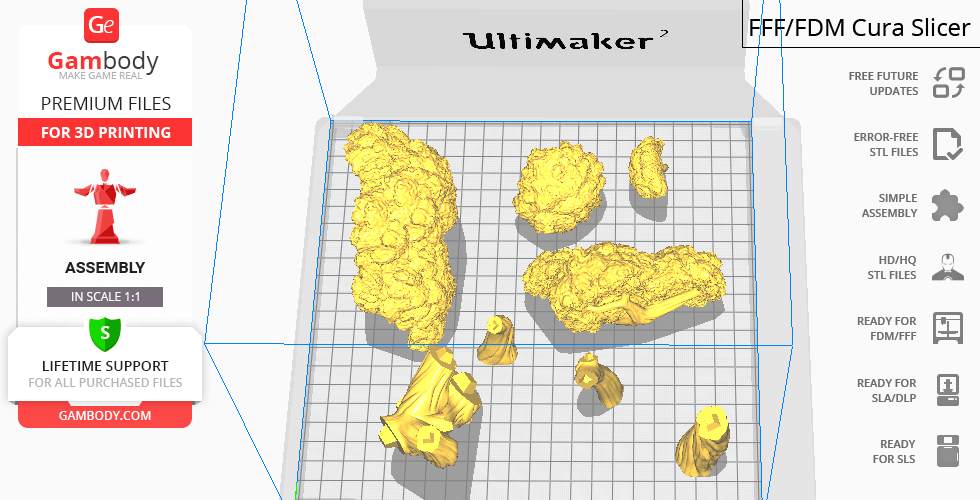
Windows are provided as separate parts, optimized for printing with transparent filament;
The assembly parts are connected using specially designed integrated connectors that fit securely into the corresponding slots. Some model parts use separate connectors (part "43_ge_lock_10H(x82)", requires 82 copies);
Additional details
Part of diorama
No
Special pack included
No
You can get the STL files of Hobbiton Bonsai Pot for 3D Printing immediately after the purchase! Just click the green Buy button in the top-right corner of the model’s page. You can pay with PayPal or your credit card.
Watch the tutorial on how to assemble Hobbiton Bonsai Pot 3D Printer Model at Gambody YouTube channel.
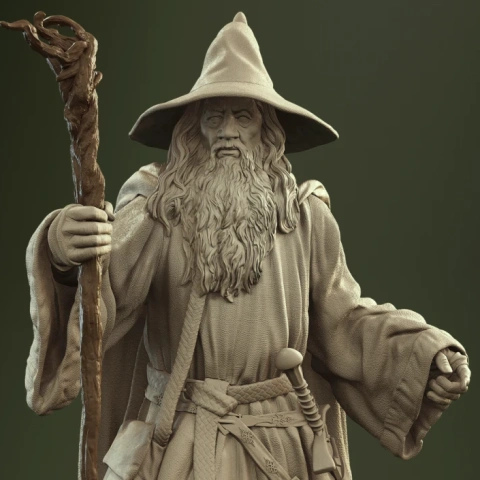
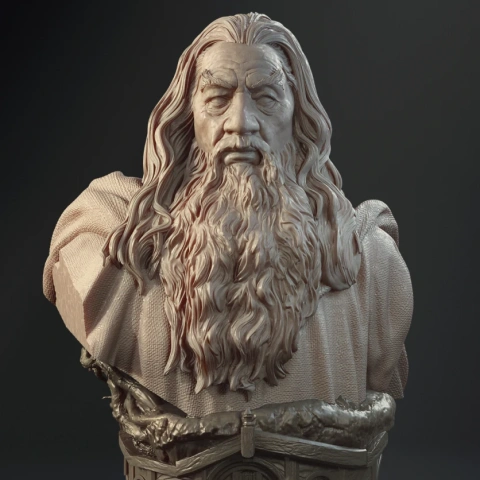
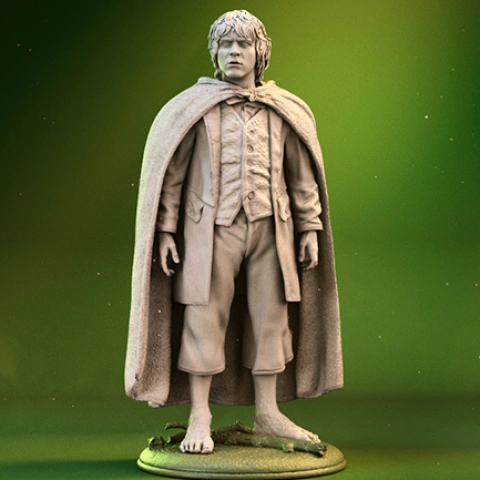
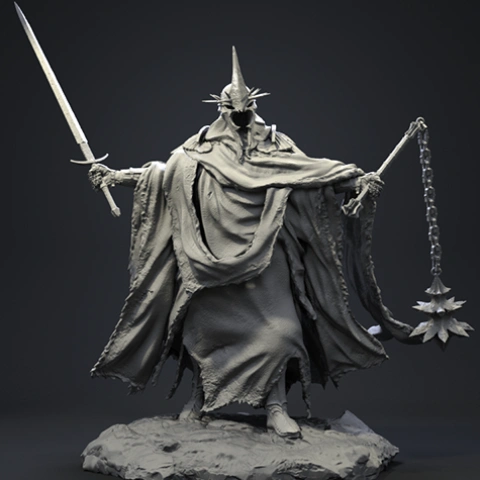
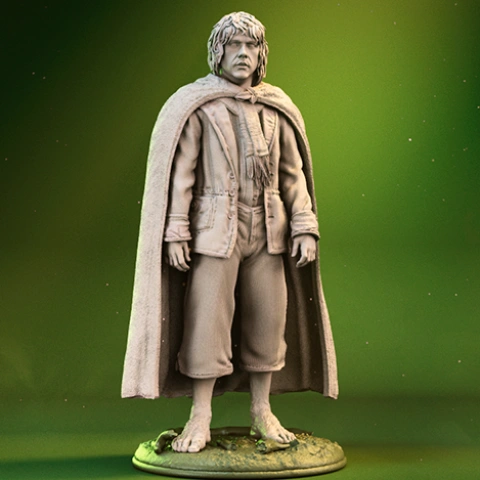
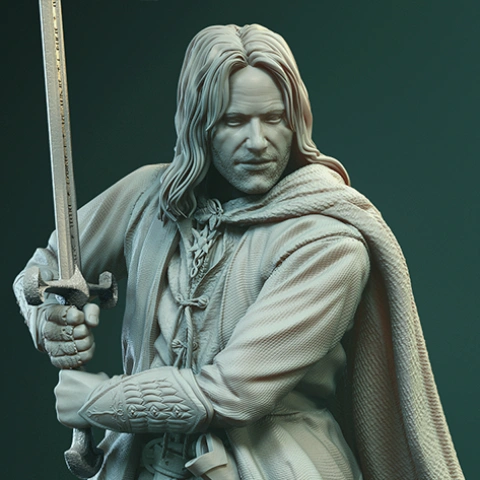
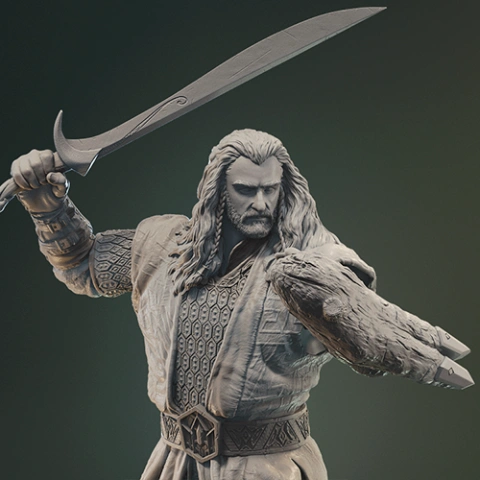
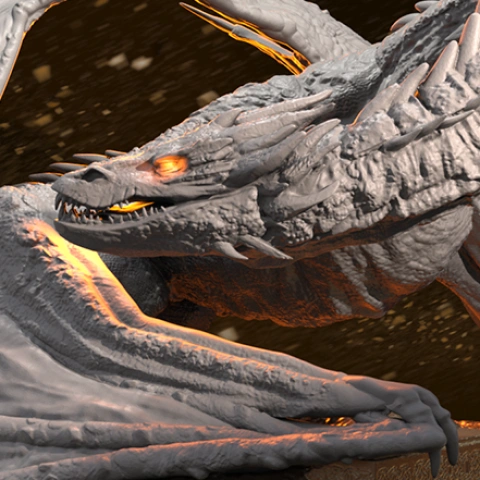
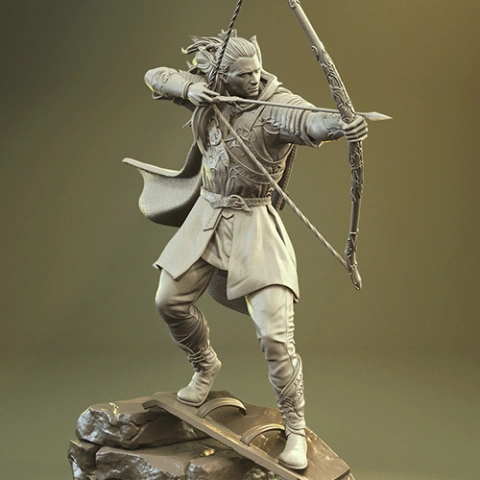
Also, you may like the other LOTR 3D Printing Designs.
_______
FAQ:
This 3D model comes with StereoLithography (.STL) files optimized for 3D printing. You'll get digital files, not a physical product
Before printing, take a look at Printing Details for recommended settings and tips to achieve better results.
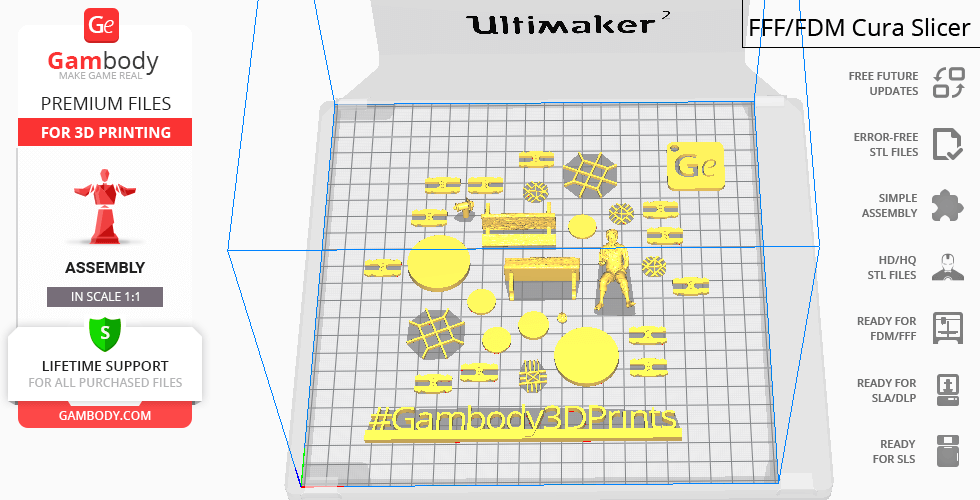
Hobbiton Bonsai Pot 3D Printer Files | Assembly includes 2 version(s) for the supported 3D printer type(s): SLS, FFF/FDM. Files are available for download after purchase.
See the Description and Specifications sections for more details about this model.
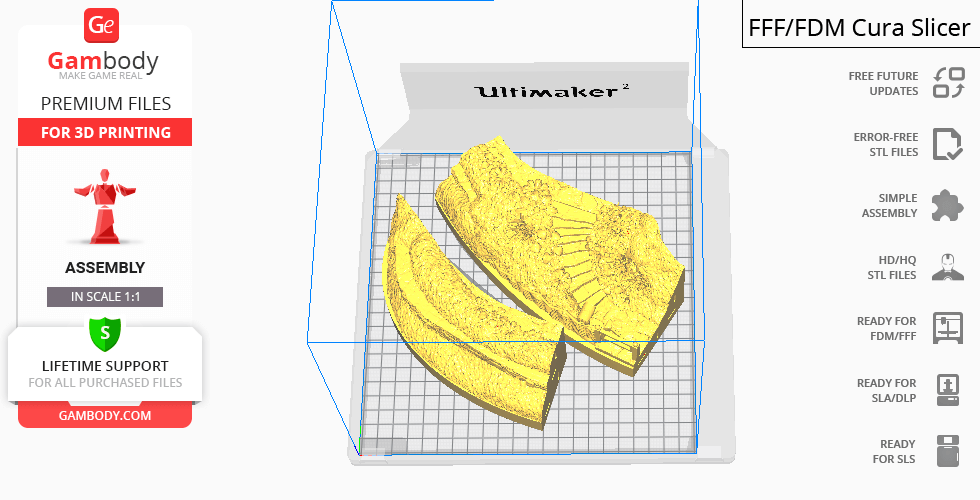
| File name | Size (mm | in) | Size(mb) | Printing Time / Powder | |||
|---|---|---|---|---|---|---|
Tag (repaired).stl 150 x 18 x 5 mm | 5.91 x 0.71 x 0.2 in | Size: 150 x 18 x 5 mm | 5.91 x 0.71 x 0.2 in | File size: 1.78 mb | Printing Time / Powder: — / — | |||
Keychain (repaired).stl 30 x 30 x 2 mm | 1.18 x 1.18 x 0.08 in | Size: 30 x 30 x 2 mm | 1.18 x 1.18 x 0.08 in | File size: 0.37 mb | Printing Time / Powder: — / — | |||
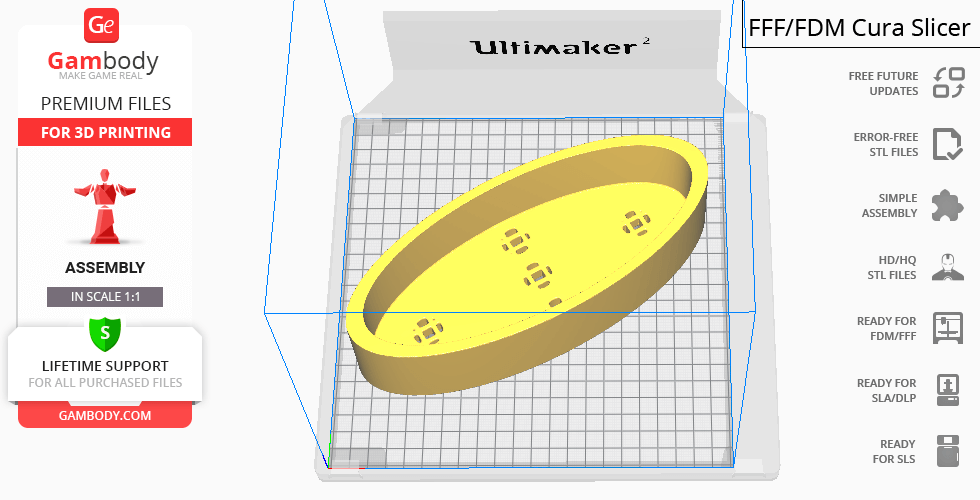
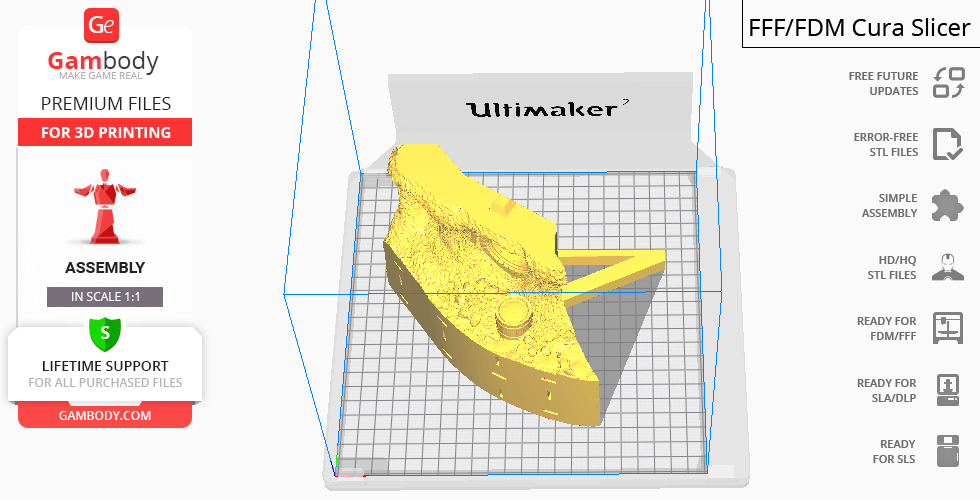
6_pot_2_SLA_SLS(repaired).stl 249 x 107 x 130 mm | 9.8 x 4.21 x 5.12 in | Size: 249 x 107 x 130 mm | 9.8 x 4.21 x 5.12 in | File size: 15.60 mb | Printing Time / Powder: — / — | |||
5_pot_1_SLA_SLS(repaired).stl 223 x 93 x 54 mm | 8.78 x 3.66 x 2.13 in | Size: 223 x 93 x 54 mm | 8.78 x 3.66 x 2.13 in | File size: 19.87 mb | Printing Time / Powder: — / — | |||
4_Bilbo_Baggins_SLA_SLS(repaired).stl 23 x 26 x 36 mm | 0.91 x 1.02 x 1.42 in | Size: 23 x 26 x 36 mm | 0.91 x 1.02 x 1.42 in | File size: 28.88 mb | Printing Time / Powder: — / — | |||
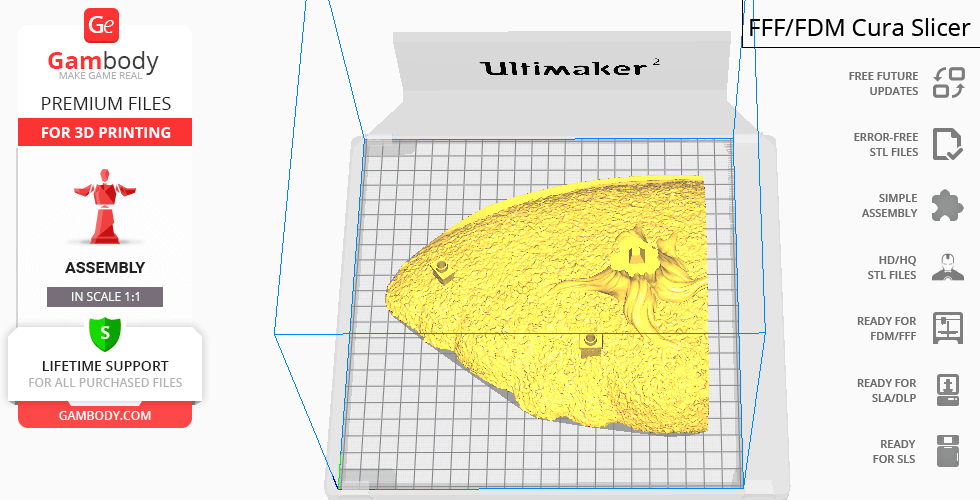
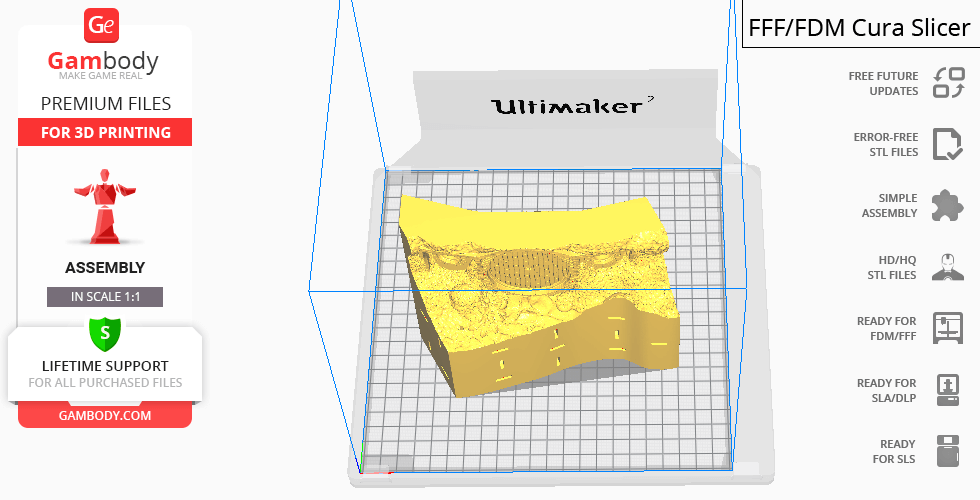
3_house_SLA_SLS(repaired).stl 390 x 248.19 x 131.47 mm | 15.35 x 9.77 x 5.18 in | Size: 390 x 248.19 x 131.47 mm | 15.35 x 9.77 x 5.18 in | File size: 85.29 mb | Printing Time / Powder: — / — | |||
2_cap_SLA_SLS(repaired).stl 330 x 162 x 43 mm | 12.99 x 6.38 x 1.69 in | Size: 330 x 162 x 43 mm | 12.99 x 6.38 x 1.69 in | File size: 44.24 mb | Printing Time / Powder: — / — | |||
1_tree_with_cap_SLA_SLS(repaired).stl 330 x 213 x 173 mm | 12.99 x 8.39 x 6.81 in | Size: 330 x 213 x 173 mm | 12.99 x 8.39 x 6.81 in | File size: 61.03 mb | Printing Time / Powder: — / — | |||
3D model history
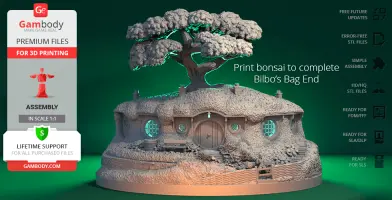
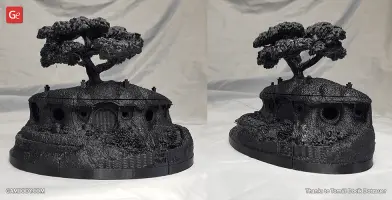
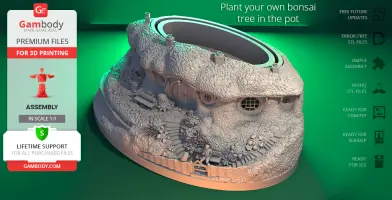
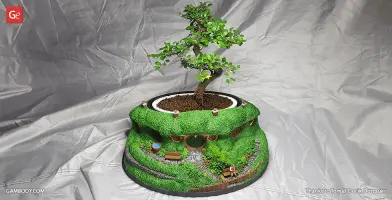
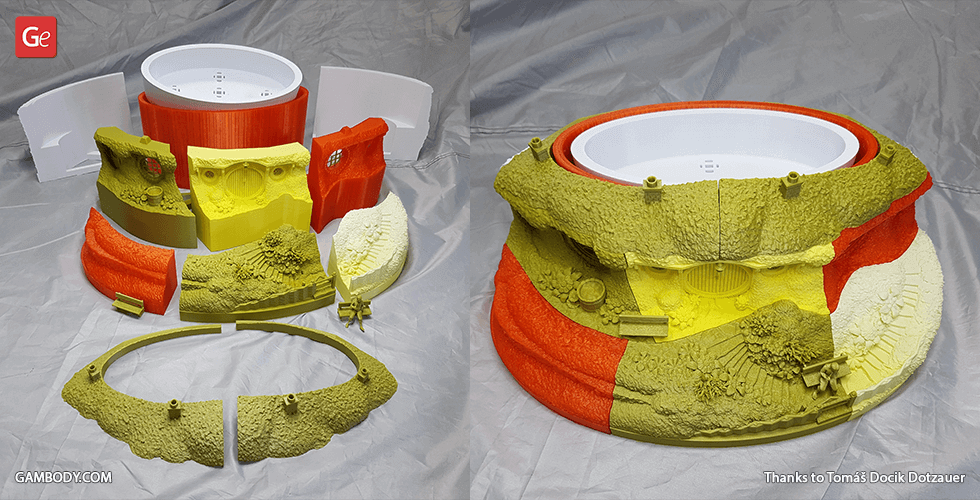
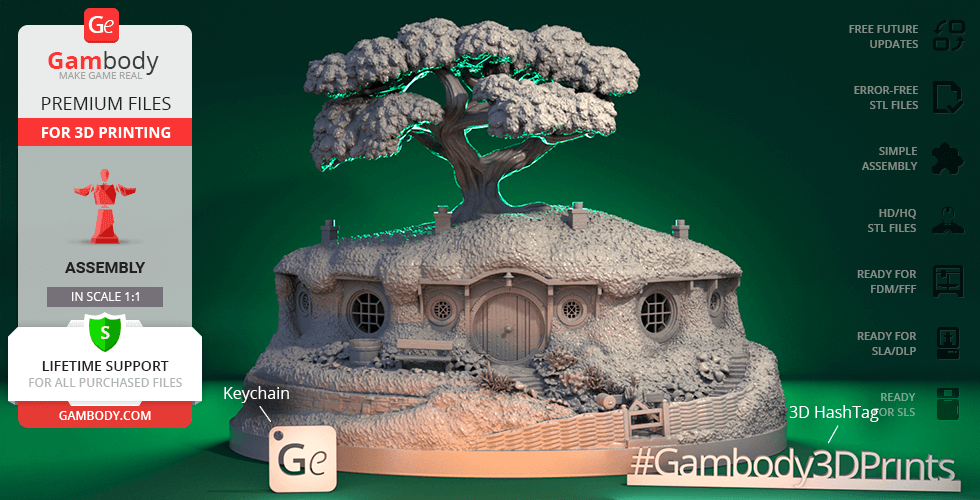
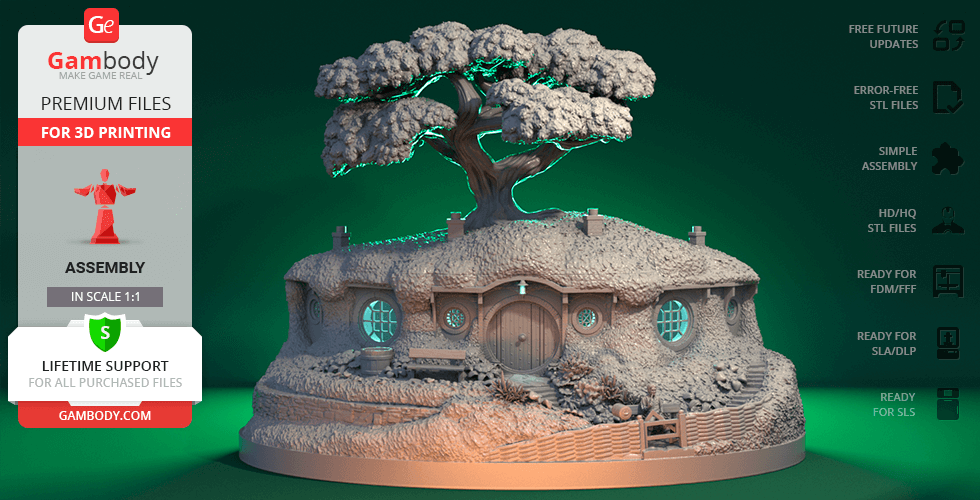
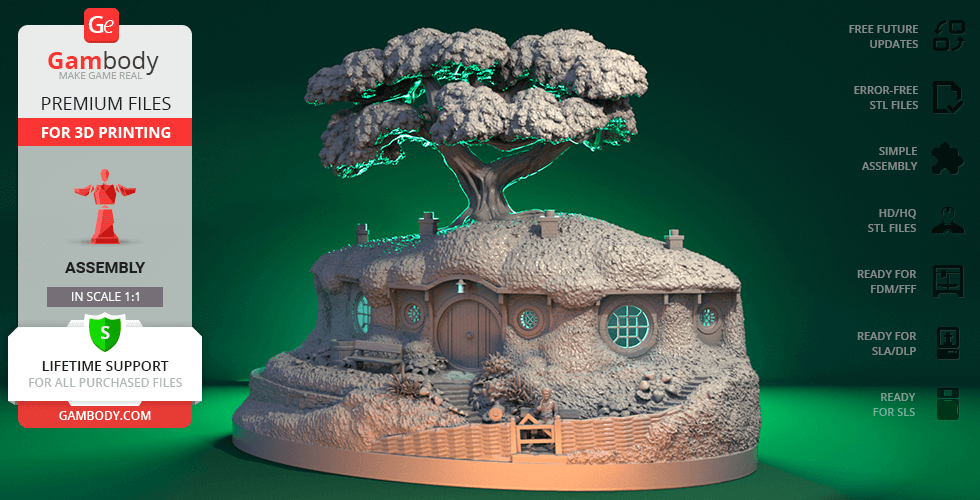
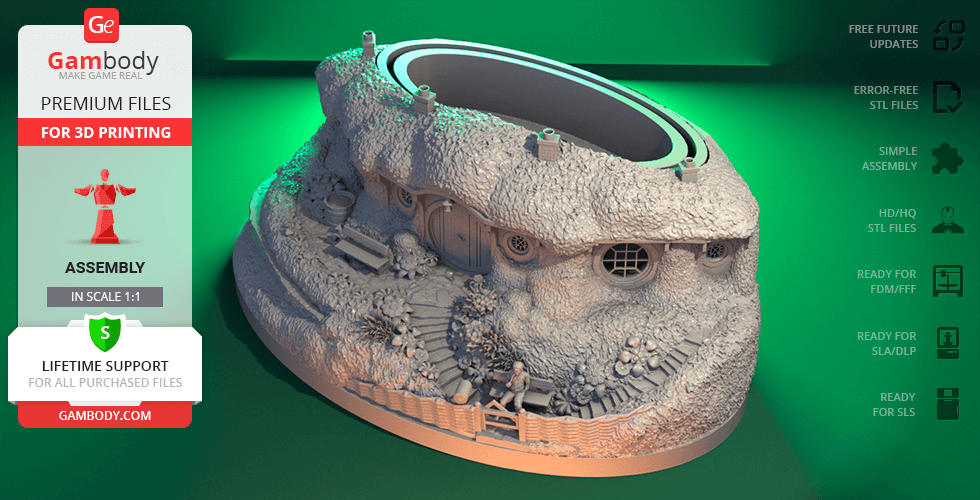
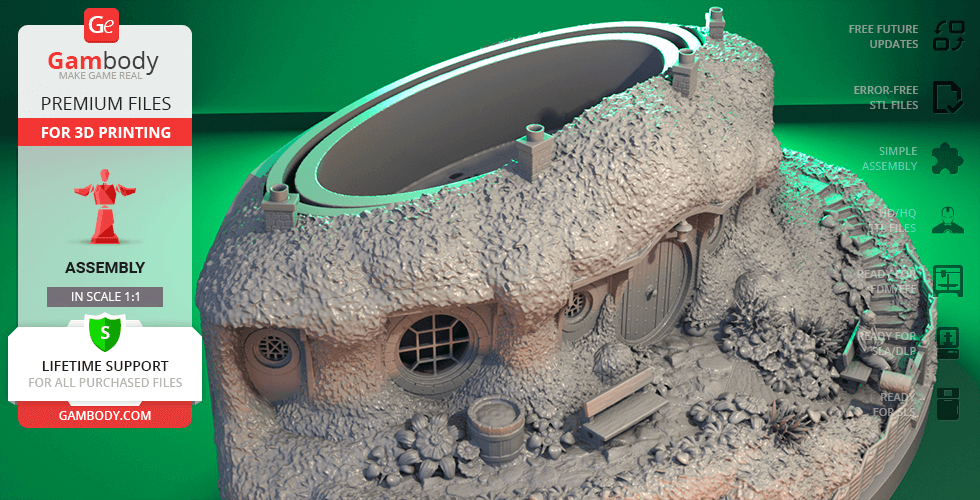
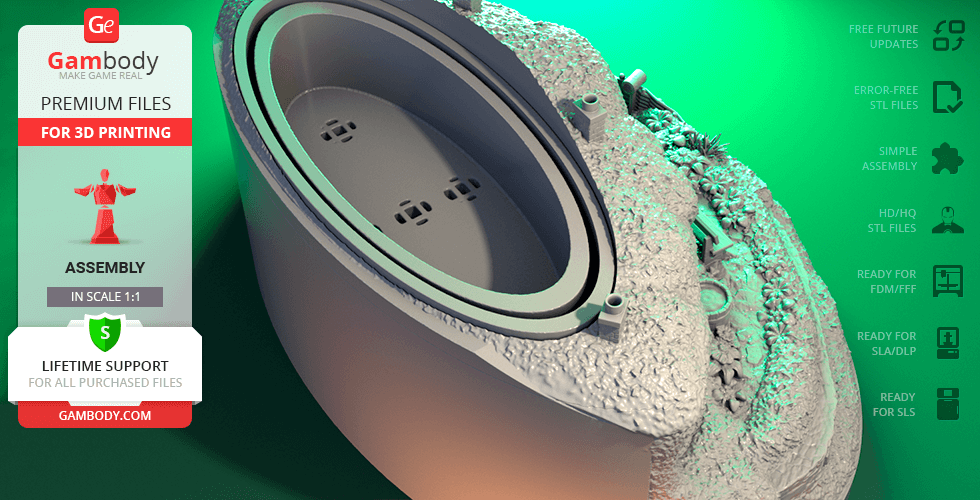
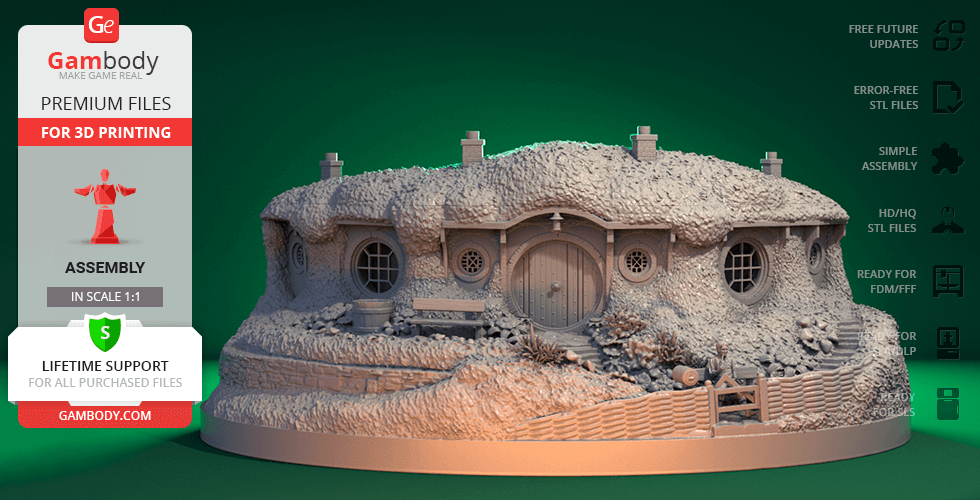
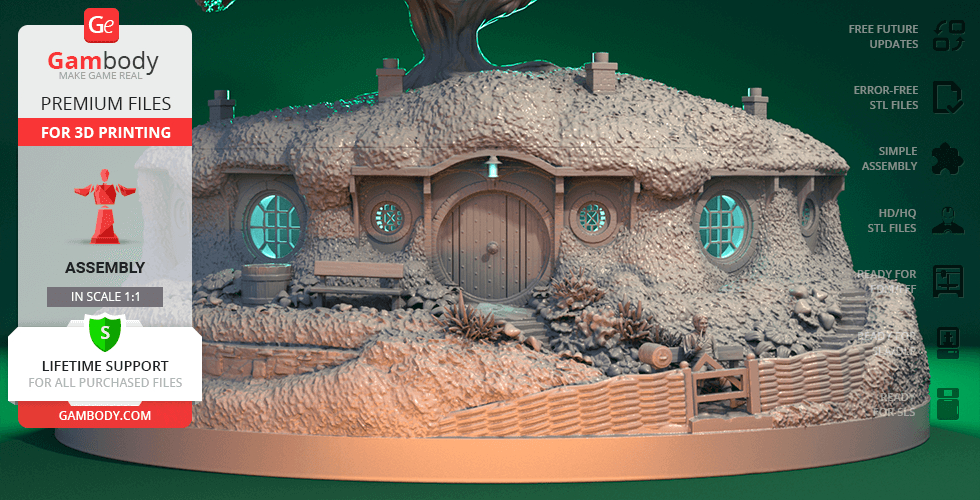
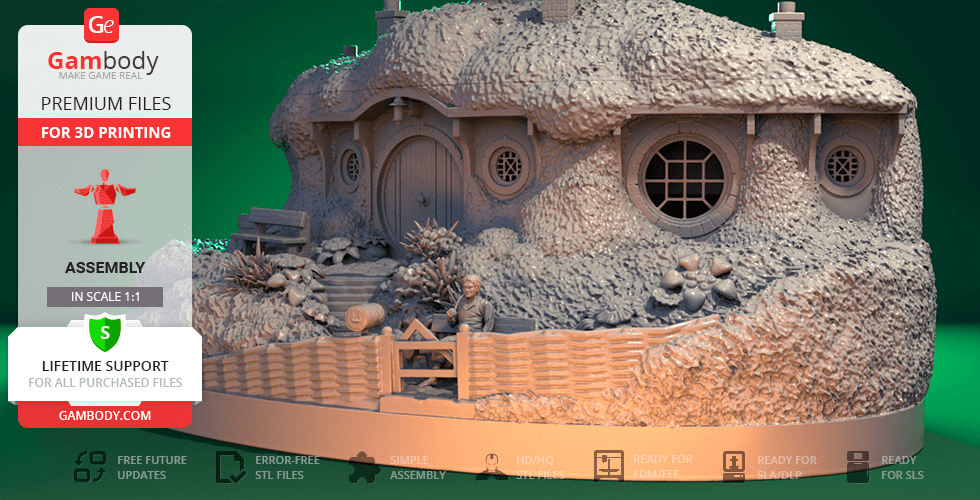
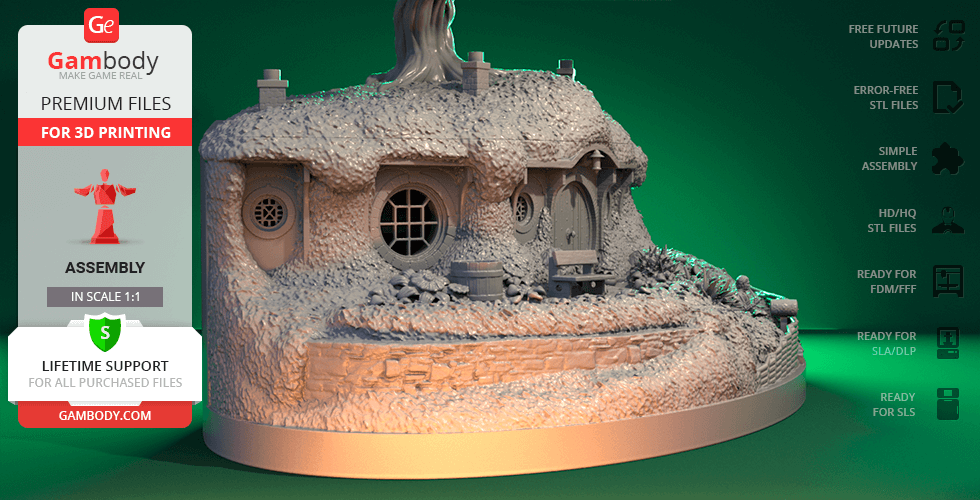
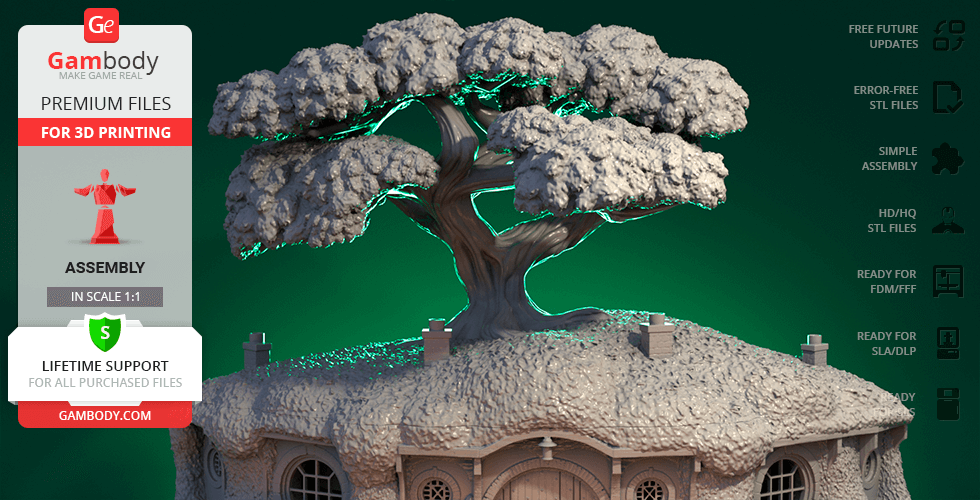
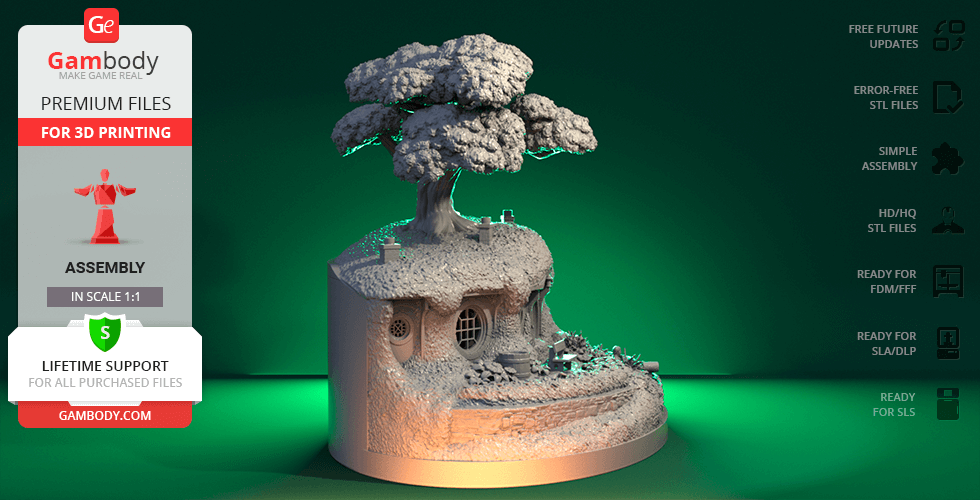
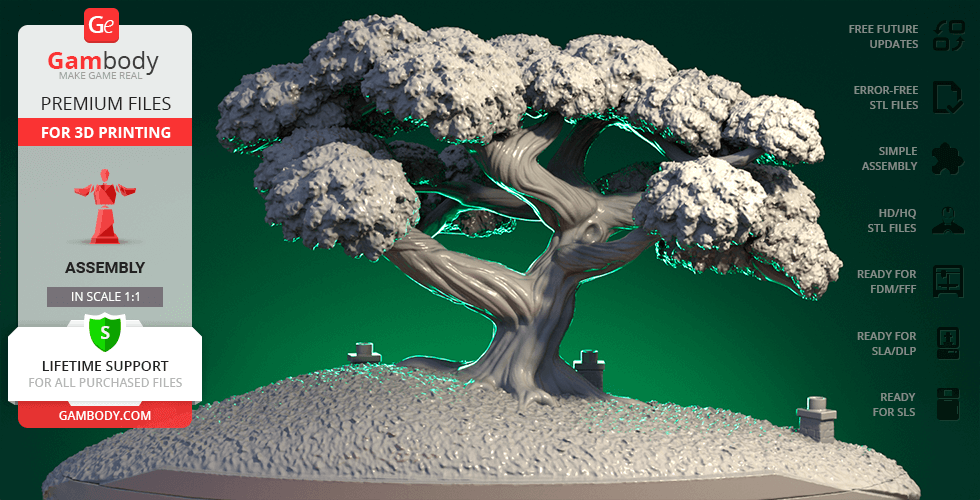
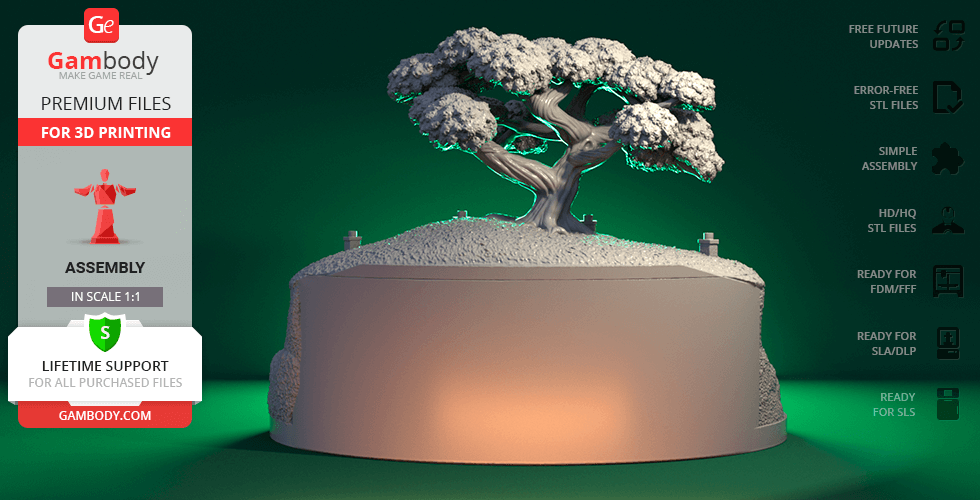
At the end of Bagshot Row in Hobbiton, a village in the centre of the Shire, there is a cosy smial with a perfectly round green door, a shiny brass knob in the exact middle and round windows that lead to countless rooms. Just above the Hobbit-hole, there is an old huge tree overlooking “the most luxurious hobbit-hole in the local area”. And if you happen to pay a visit on the owner’s birthday, you may be welcomed by the sign “no admittance, except on party business”. While many of Tolkien’s fans have already travelled all the way to New Zealand to visit a 12-acre movie set “Hobbiton”, the author of this 3D printer model gives any willing enthusiast a chance to create a very own replica of Bilbo Baggins’ home! The 3D artist spent 240 hours to design the Baggins’ Bag End that comes with a trick! You can either print the whole Bag End model including its roof with the tree mounted on top of it or you can choose the other variant without the roof to plant a real bonsai tree inside of the hobbit-hole! This 3D printer model comes with everything you need - there is an extra 3D STL files for printing the pot with holes to wire the bonsai to it. Once the bonsai is planted you can put it into the bowl that also can be 3D printed and filled with expanded clay to aggregate for drainage and aeration. Your bonsai project is ready to be fixed into the hobbit-hole! Both bowl and pot can be taken out any time you need to replant the tree or when you want to rotate the pot given that the bonsai grows in the direction of the light. We are sure any Lord of the Rings fans would be stunned to have such a unique flowerpot at home! By the way, have you noticed Bilbo Baggins sitting on the bench?
3D printing model features
Model-specific features:
- Designed to house a real bonsai tree, with extra STL files for a specialized pot with a bowl for drainage;
- For optimal fit, get your bonsai tree first, then adjust the model's print scale, The pot's depth should equal the trunk's diameter. For oval pots, the length should be 2/3 the tree's height;
- Can be assembled with its traditional roof and a modelled tree on top, or with an open roof to accommodate a live bonsai;
- Windows are provided as separate parts, allowing them to be printed in transparent material for LED integration to light up the Hobbit-hole;
- The bonsai pot and bowl are designed to be easily removed for convenient tree maintenance or rotation.
Printing & assembly details:
- Provided as error-free STL files compatible with most 3D printers;
- Optimized part division minimizes support material and ensures smooth surface detail;
- The assembly parts in the FFF/FDM version come in the recommended print orientations for easy bed placement;
- Assembly manual in video format is included for both FFF/FDM and DLP/SLA versions;
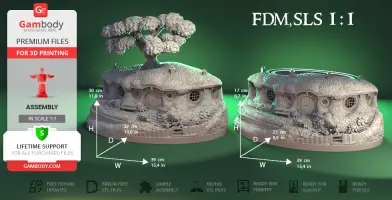
- The model is available in recommended scales of 1:1 for both FFF/FDM and DLP/SLA versions.
What will you get after purchase?
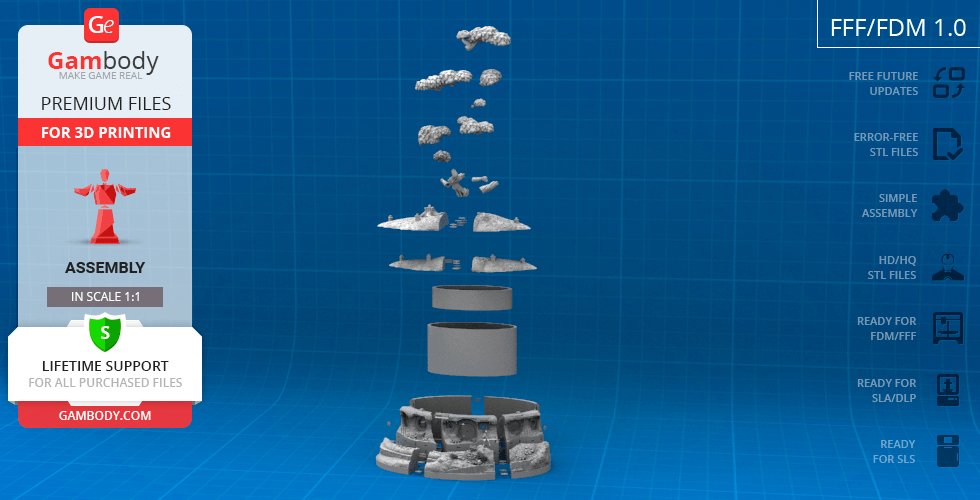
- 2 versions of Hobbiton Bonsai Pot STL files for FFF/FDM and SLS - files for each version are available for download after the purchase;
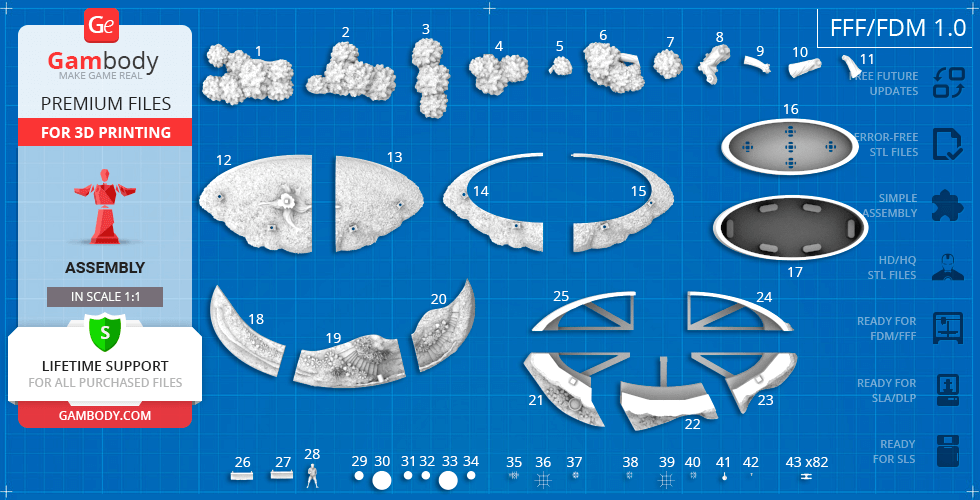
- STL files of high-poly Hobbiton Bonsai Pot 3D printer model consist of 49 parts;
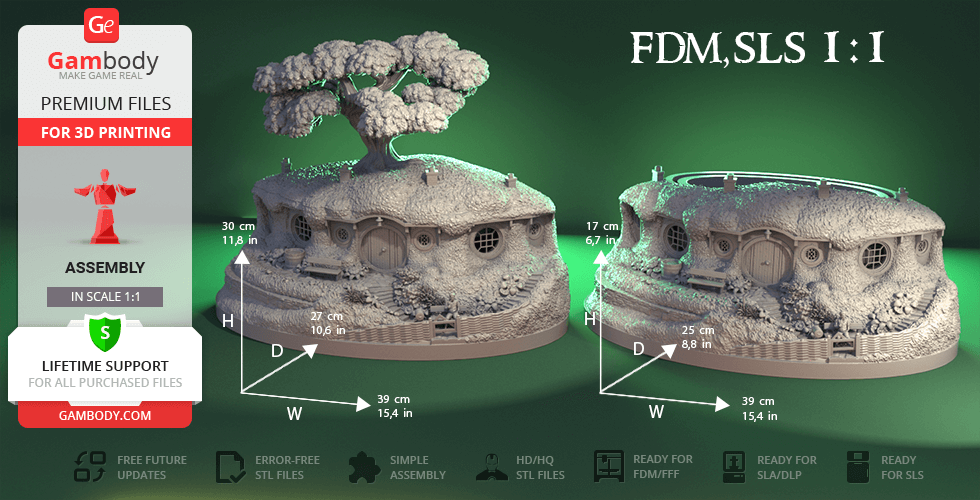
- Sizes:
- FFF/FDM: 390 mm wide, 300 mm high, 270 mm deep;
- SLS: 390 mm wide, 300 mm high, 270 mm deep;
- Detailed settings that we provide as a recommendation for Bambu Studio, Cura, Orca Slicer, PrusaSlicer, Simplify3D, and Slic3r for the best print;
- Full technical support from the Gambody Support Team.
Average customer rating (21 reviews)
4.6
Ratings breakdown
Click a star rating to filter reviews
Overall experience
Level of detail in the model
4.6
Model cut quality and assembly guide
4.6
Clarity and accuracy of the model page
4.6
Level of detail in the model
5
Model cut quality and assembly guide
3.7
Clarity and accuracy of the model page
5
That said, I ran into a few practical printing and assembly considerations worth noting for other makers:
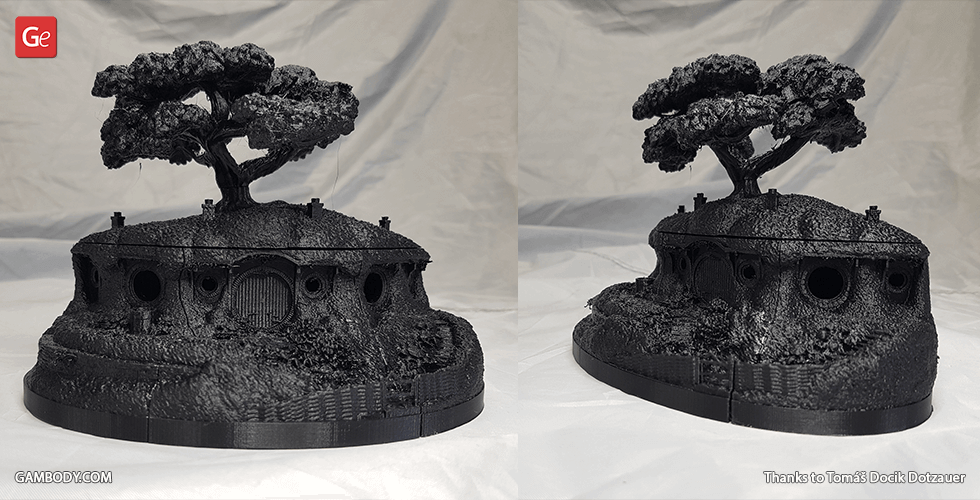
-The bottom surfaces of the two cap pieces (parts 12 and 13) are not completely flat. I had to add a bit of volume in Blender to get part 12 to print cleanly without corner droop, even at a 0.16 mm layer height.
Some of the part segmentation could be improved:
- The main tree branches could reasonably be a single mesh. After merging them in Blender, I ended up with a cleaner result and fewer seams to manage.
- The cuts suggest the model was intended for single-color printing and painting. However, it prints very nicely using multicolor printing. In that context, the cuts on parts 24 and 25 include small portions of the grass texture, which leads to a very high number of filament swaps for a tiny amount of green on an otherwise base-colored part.
- The curved cut lines between the wall and lawn pieces make sanding and seam cleanup more difficult. Flat cut planes would make post-processing and assembly much easier while still preserving detail.
- The clusters of flowers and foliage on the lawn pieces — especially part 19 — would benefit from being separate meshes. This would help significantly with multicolor printing, and even in single-color prints the current geometry creates very steep overhangs. In many areas this forces supports to be generated directly from the model surface, leading to excessive cleanup. Even with aggressive tree support settings, there isn’t enough vertical space for supports to properly form and support the finer leaves and details.
Overall, this is a beautiful and well-designed model — these notes are simply meant to help set expectations and potentially improve an already excellent design.
Level of detail in the model
2
Model cut quality and assembly guide
2
Clarity and accuracy of the model page
2
Level of detail in the model
3
Model cut quality and assembly guide
3
Clarity and accuracy of the model page
3
Level of detail in the model
5
Model cut quality and assembly guide
5
Clarity and accuracy of the model page
5
Level of detail in the model
5
Model cut quality and assembly guide
5
Clarity and accuracy of the model page
5
Level of detail in the model
5
Model cut quality and assembly guide
5
Clarity and accuracy of the model page
5
Level of detail in the model
4
Model cut quality and assembly guide
4
Clarity and accuracy of the model page
4
Level of detail in the model
4
Model cut quality and assembly guide
4
Clarity and accuracy of the model page
4
Level of detail in the model
5
Model cut quality and assembly guide
5
Clarity and accuracy of the model page
5
Level of detail in the model
4
Model cut quality and assembly guide
4
Clarity and accuracy of the model page
4
Level of detail in the model
5
Model cut quality and assembly guide
5
Clarity and accuracy of the model page
5
Level of detail in the model
5
Model cut quality and assembly guide
5
Clarity and accuracy of the model page
5
Level of detail in the model
5
Model cut quality and assembly guide
5
Clarity and accuracy of the model page
5
Level of detail in the model
5
Model cut quality and assembly guide
5
Clarity and accuracy of the model page
5
Level of detail in the model
5
Model cut quality and assembly guide
5
Clarity and accuracy of the model page
5
Level of detail in the model
5
Model cut quality and assembly guide
5
Clarity and accuracy of the model page
5
Level of detail in the model
5
Model cut quality and assembly guide
5
Clarity and accuracy of the model page
5
Level of detail in the model
5
Model cut quality and assembly guide
5
Clarity and accuracy of the model page
5
Level of detail in the model
5
Model cut quality and assembly guide
5
Clarity and accuracy of the model page
5
Level of detail in the model
5
Model cut quality and assembly guide
5
Clarity and accuracy of the model page
5
Below you'll find detailed slicing settings for Bambu Studio 2.0+, Orca Slicer 2.0+, UltiMaker Cura 5.0+, PrusaSlicer 2.0+, Slic3r 1.3+, Simplify3D 5.0+ to help you get the best results when printing this model. These settings are optimized specifically for this 3D model, but please note they may need slight adjustments depending on your printer or filament. When in doubt, refer to your printer's user manual.
To avoid printing issues and achieve the best quality, we highly recommend applying the following settings:
For better quality use 0.12 mm layer height, for fast printing use 0.2 mm layer height. For pins and the Ge connectors, use 0.2 layer height.
120-150% of your Layer Height
But you can paint the seam if you want.
You have to calibrate this parameter
You have to calibrate this parameter
You have to calibrate this parameter
For pins and power elements of the structure, such as the vehicle frame, use 3 loop
Disabled for vehicles and enabled for characters
For 0,2 Layer Height
The parameters in this tab vary greatly, it all depends on the quality of your printer. For example, if you have a classic Ender3, stick to the minimum parameters, but if you have a newer printer, for example Anycubic cobra 3 v2, you can select the maximum recommended values
Settings for advanced users, change these parameters only if you have sufficient 3D printing expertise
Enable this parameter if your model requires supports
We also recommend placing and removing supports manually in some places using special button
1-2 loops for more thick support
Top Z distance = 1-1.3 layer Height. If the supports are hard to remove, try increasing this setting by 0.1-0,4 mm
Bottom Z distance = 1-1.3 layer Height. If the supports are hard to remove, try increasing this setting by 0.1-0,4 mm
You have to calibrate this parameter which one is better for your filament
Increase this parameter if the supports are hard to remove from walls
For PLA and PETG filament types
5-8 mm is optional for small prints that have bad adhesion to the build plate
You have to calibrate this parameter
Read the description on your filament roll
Read the description on your filament roll and increase this parameter for fast printers
Read the description on your filament roll and increase this parameter for fast printers
For better quality use 0.12 mm layer height, for fast printing use 0.2 mm layer height. For pins and the Ge connectors, use 0.2 layer height.
120-150% of your Layer Height
But you can paint the seam if you want.
0.01-0.05 You have to calibrate this parameter
0.01-0.05 You have to calibrate this parameter
0.1-0.2 You have to calibrate this parameter
For pins and power elements of the structure, such as the vehicle frame, use 3 loop
Disabled for vehicles and ships, enabled for characters
For 0,2 Layer Height
For 0,2 Layer Height
The parameters in this tab vary greatly, it all depends on the quality of your printer. For example, if you have a classic Ender3, stick to the minimum parameters, but if you have a newer printer, for example, Anycubic Kobra 3 Or Bambulab A1, you can select the maximum recommended values.
Settings for advanced users, change these parameters only if you have sufficient 3D printing expertise
Enable this parameter if your model requires supports
We also recommend placing and removing supports manually in some places using special button
Top Z distance = 1-1.3 layer Height. If the supports are hard to remove, try increasing this setting by 0.1-0,4 mm
Bottom Z distance = 1-1.3 layer Height. If the supports are hard to remove, try increasing this setting by 0.1-0,4 mm
Increase this parameter if the supports are hard to remove from walls
For PLA and PETG filament types
5-8 mm is optional for small prints that have bad adhesion to the build plate
Read the description on your filament roll
Read the description on your filament roll and increase this parameter for fast printers
You have to calibrate this parameter
Read the description on your filament roll and increase this parameter for fast printers
Read the description on your filament roll
This field is filled in according to your printer specifications when you add it to the slicer.
You can add custom G-code here for the start and end of the print. However, be careful - this is for advanced users only!
You have to calibrate your printer using Ge retraction test models
Retraction Length: For direct-drive setups use 0.5 mm to 2.5 mm; for Bowden extruders use 5 to 7 mm
This is how fast the filament is pulled back—40-60 mm/s for direct drive and 30-50 mm/s for Bowden setups.
You have to calibrate this parameter: Reduce it until the printer starts to hit the parts with the nozzle during printing, then increase it by 0.2.
For better quality use 0.12 mm layer height, for fast printing use 0.2 mm layer height. For pins and the Ge connectors, use 0.2 layer height.
120-150% of your Layer Height
To increase the strength of the print parts, use wall line count: 3
For pins and connectors use 50% Infill
These parameters are for standard PLA plastic. If you are using a different type of plastic, check the printing temperature recommended by the manufacturer. Also, read the description on your filament spool. For fast printers, add +30 °C to the current parameters.
The parameters in this tab vary greatly, it all depends on the quality of your printer. For example, if you have a classic Ender3, stick to the minimum parameters, but if you have a newer printer, for example Anycubic cobra 3 v3, you can select the maximum recommended values
Settings for advanced users, change these parameters only if you have sufficient 3D printing expertise.
You need to calibrate this parameter using Gambody test models. These values are average values for a Direct Drive extruder; for a Bowden extruder, the values should be increased.
You need to calibrate this parameter using Gambody test models. These values are average values for a Direct Drive extruder; for a Bowden extruder, the values should be increased.
Use this value other than 0 if your nozzle catches on the internal infill during travel moves. Try to keep this value as low as possible in height.
Use normal supports to support large, straight surfaces (most mechanical or technical parts).
You have to calibrate this parameter according to the capabilities of your printer and your filament, using a Gambody test models.
Use 1 instead of 0 if your supports are thin and tall. They will be harder to remove, but much stronger.
Top Z distance = 1-1.3 layer Height. If the supports are hard to remove, try increasing this setting by 0.1-0,4 mm
Increase this parameter if the supports are hard to remove from walls
Use tree supports to support complex objects, such as characters.
You have to calibrate this parameter according to the capabilities of your printer and your filament, using a Gambody test models.
Top Z distance = 1-1.3 layer Height. If the supports are hard to remove, try increasing this setting by 0.1-0,4 mm
Increase this parameter if the supports are hard to remove from walls
Use a skirt for all parts when printing on outdated printers.
Use a brim when printing thin but tall parts, as well as parts with a small bed adhesion area.
For better quality use 0.12 mm layer height, for fast printing use 0.2 mm layer height. For pins and the Ge connectors, use 0.2 layer height.
120-150% of your Layer Height
for 0.2 Layer Height
But you can paint the seam if you want.
(for PLA and PETG)
(5-8 mm is optional for small prints that have bad adhesion to the build plate)
Enable this parameter if your model requires supports
(45-50 degree)You have to calibrate this parameter according to the capabilities of your printer
and your filament, using a Gambody test models.
Top contact Z distance = 1-1.3 layer Height. If the supports are hard to remove, try
increasing this setting by 0.1-0,4 mm
Top contact Z distance = 1-1.3 layer Height. If the supports are hard to remove, try
increasing this setting by 0.1-0,4 mm
Increase this parameter if the supports are hard to remove from walls
The parameters in this tab vary greatly, it all depends on the quality of your printer. For example, if you have a classic Ender3, stick to the minimum parameters, but if you have a newer printer, for example Anycubic cobra 3 v3, you can select the maximum recommended values
Settings for advanced users, change these parameters only if you have sufficient 3D printing expertise. Use the minimum value for outdated printers without acceleration calibration, and the maximum value for modern printers if you need it.
These settings only work for 3D printers with multiple extruders
You can try setting all parameters in this section, except the First layer, to values between 0.75% of your nozzle diameter and 1.25% of your nozzle diameter. Adjusting them will help you work out the optimal parameters for the best quality for your print. As for the First layer, you can set it to 150% of the diameter of your nozzle for better adhesion to the build plate (for a nozzle with a diameter of 0.4 mm, the First layer extrusion width can be from 0.3 mm to 0.5 mm)
For better printing quality you have to calibrate this parameter using Gambody test model.
Check your filament manufacturer's temperature recommendations on the spool.
Cooling parameters depends on the material you use for printing.
*for PLA
For better quality use 0.12 mm layer height, for fast printing use 0.2 mm layer height. For pins and the Ge connectors, use 0.2 layer height.
120-150% of your Layer Height
For 0.12 Layer Height
For 0.12 Layer Height
For pins and connectors use 50% Infill
Use skirt for outdated 3d printers
(5-8 mm is optional for small prints that have bad adhesion to the build plate)
Enable this parameter if your model requires supports
(45-60 degree)You have to calibrate this parameter according to the capabilities of your printer and your filament, using a Gambody test models
Contact Z distance = 1-1.3 layer Height. If the supports are hard to remove, try increasing this setting by 0.1-0,4 mm
The parameters in this tab vary greatly, it all depends on the quality of your printer. For example, if you have a classic Ender3, stick to the minimum parameters, but if you have a newer printer, for example Anycubic cobra 3 v3, you can select the maximum recommended values
Settings for advanced users, change these parameters only if you have sufficient 3D printing expertise. Use the minimum value for outdated printers without acceleration calibration, and the maximum value for modern printers if you need it.
You have to calibrate this parameter from 0.9 to 1.1 according to the capabilities of your printer and your filament, using a Gambody test models.
Check your filament manufacturer's temperature recommendations on the spool.
Cooling parameters depends on the material you use for printing.
Calibrate this value if you need to reduce or improve the adhesion between the plastic and the heat bed
Your current nozzle diameter
You need to calibrate this parameter using Gambody test models. These values are average values for a Direct Drive extruder; for a Bowden extruder, the values should be increased.
Your current nozzle diameter
You have to calibrate this parameter using Gambody test models.
You need to calibrate this parameter using Gambody test models. These values are average values for a Direct Drive extruder; for a Bowden extruder, the values should be increased.
For better quality use 0.12 mm layer height, for fast printing use 0.2 mm layer height. For pins and the Ge connectors, use 0.2 layer height.
For 0,2 Layer Height
For 0,2 Layer Height
To increase the strength of the print parts, use Outline Perimeters: 3
You can enable this parameter to print rounded or spherical models, as well as character models.
Use this option only if your parts are too tight. but better calibrate your printer extrusion
Use this option only if your parts are too tight. but better calibrate your printer extrusion
Use 2 and more if you want to create skirt instead brim
1-2 for skirt and 10-20 for brim
Use for wipe nozzle if you need
Use For ABS filament
For pins and connectors use 50% Infill
Top Z distance = 1-1.3 layer Height. If the supports are hard to remove, try increasing this setting by 0.1-0,4 mm
Calibrate your filament and detect optimal temperature for it
Average temperature for PLA filament
The parameters in this tab vary greatly, it all depends on the quality of your printer. For example, if you have a classic Ender3, stick to the minimum parameters, but if you have a newer printer, for example Anycubic cobra 3 v3, you can select the maximum recommended values
Settings for advanced users, change these parameters only if you have sufficient 3D printing expertise.
FFF/FDM
Comes with a specialized bowl and pot designed for planting a real bonsai tree;
Can be assembled with a traditional roof and a modelled tree if a live bonsai is not desired;
Windows are provided as separate parts, optimized for printing with transparent filament;
The assembly parts are connected using specially designed integrated connectors that fit securely into the corresponding slots. Some model parts use separate connectors (part "43_ge_lock_10H(x82)", requires 82 copies);
SLS
Comes with a specialized bowl and pot designed for planting a real bonsai tree;
Can be assembled with a traditional roof and a modelled tree if a live bonsai is not desired;
Parts division is optimized for larger build plates with fewer assembly parts and to ensure support structures are generated where needed;
The assembly parts are connected using specially designed integrated connectors that fit securely into the corresponding slots. Optionally, for added strength and rigidity, the static assembly joints can be glued together;