


Files
3D model format
Stereolithography (.stl)
Total files
Slicer settings
not available
Mesh error check
not specified
Support
Lifetime support from Gambody team
Update requests
not specified
Model versions
FFF/FDM
Assembly method
not specified
Features
DLP/SLA
Assembly method
not specified
Features
Additional details
Part of diorama
No
Special pack included
No
You will get instant access to the STL files of M-O WALL-E 3D Printing Model | Assembly + Action after completing your purchase. Simply add the model to your cart and check out using PayPal, credit or debit card, Apple Pay, Google Pay, Alipay, or other available payment methods.
Watch the assembly video for M-O WALL-E 3D Printing Model | Assembly + Action, and explore more tutorials, behind-the-scenes content, 3D printing timelapses, and painting guides on the official Gambody YouTube channel.
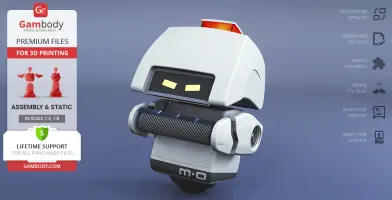
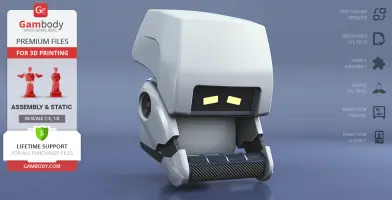
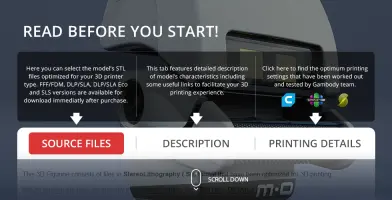
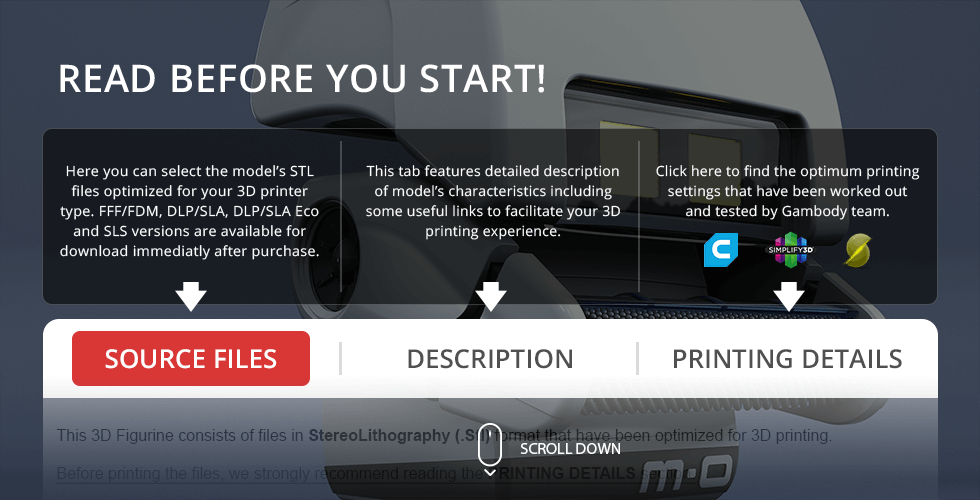
This 3D Model of the M-O WALL-E consists of files in StereoLithography (.Stl) format that is optimized for 3D printing.
Before printing the files, we strongly recommend reading the PRINTING DETAILS section.
WHAT WILL YOU GET AFTER PURCHASE?
- 2 versions of M-O WALL-E STL files for FFF/FDM and DLP/SLA - files for all versions are available for download after the purchase;
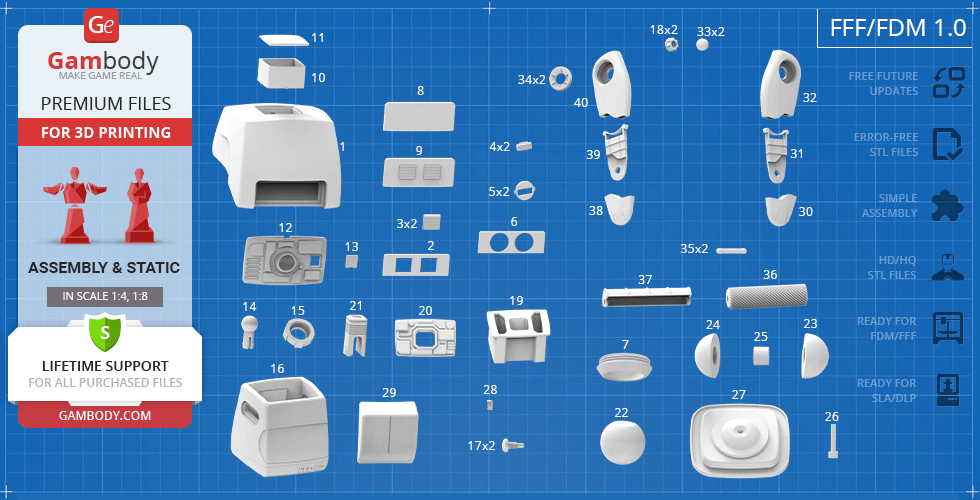
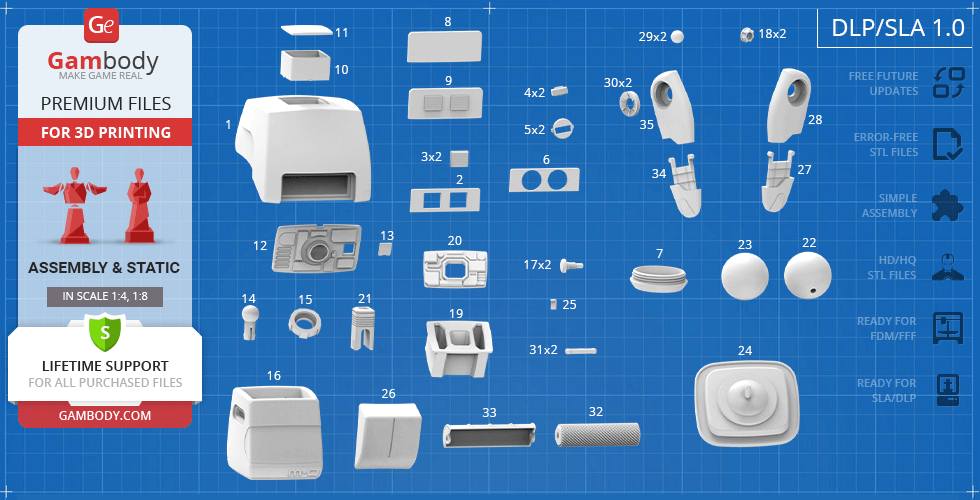
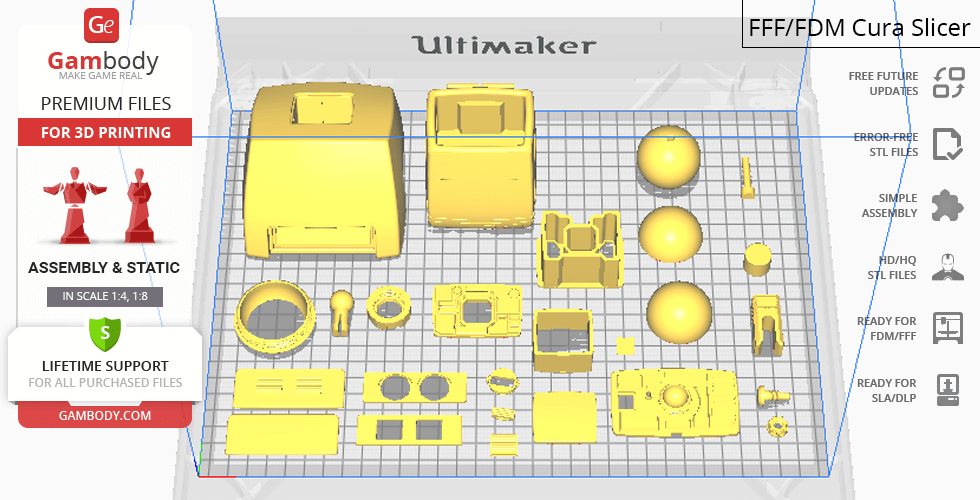
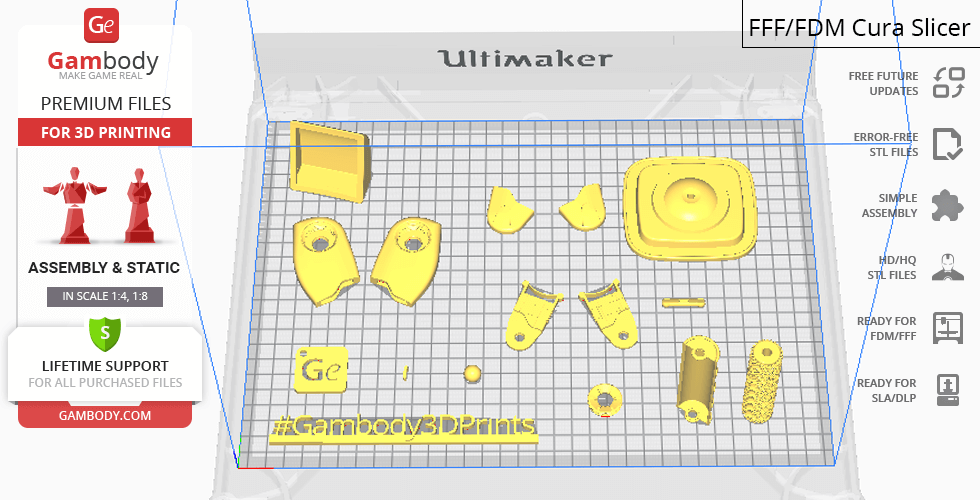
- STL files of high-poly M-O WALL-E Model for 3D printing consist of 75 parts;
- Sizes:
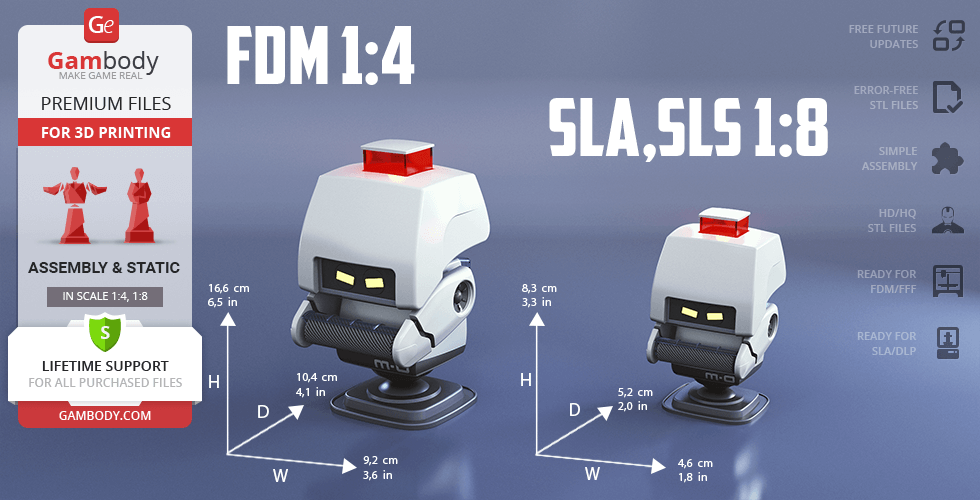
- FFF/FDM: 166 mm tall, 92 mm wide, 104 mm deep;
- DLP/SLA: 83 mm tall, 46 mm wide, 52 mm deep;
- Assembly Manual for FFF/FDM 1.0 and DLP/SLA 1.0 versions in PDF and video formats;
- Detailed settings that we provide as a recommendation for Cura, Simplify3D, Slic3r and PrusaSlicer for the best print;
- Full technical support from the Gambody Support Team.
Detailed information about this 3D printing model is available in the DESCRIPTION section.
Before printing, take a look at Printing Details for recommended settings and tips to achieve better results.
ABOUT THIS 3D MODEL
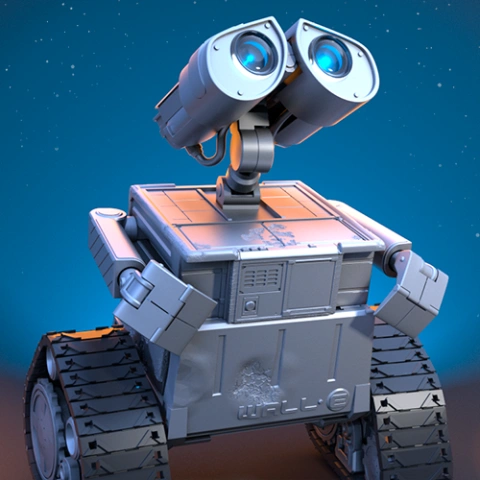
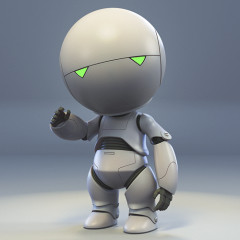
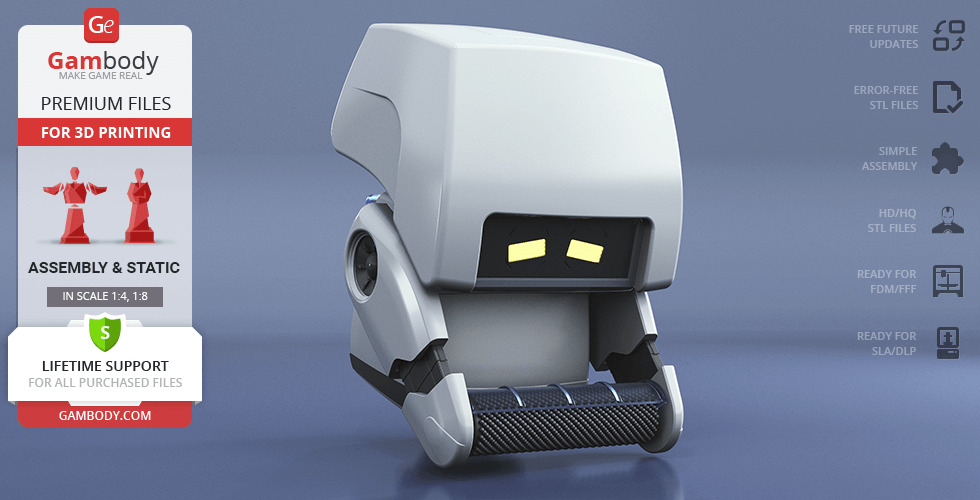
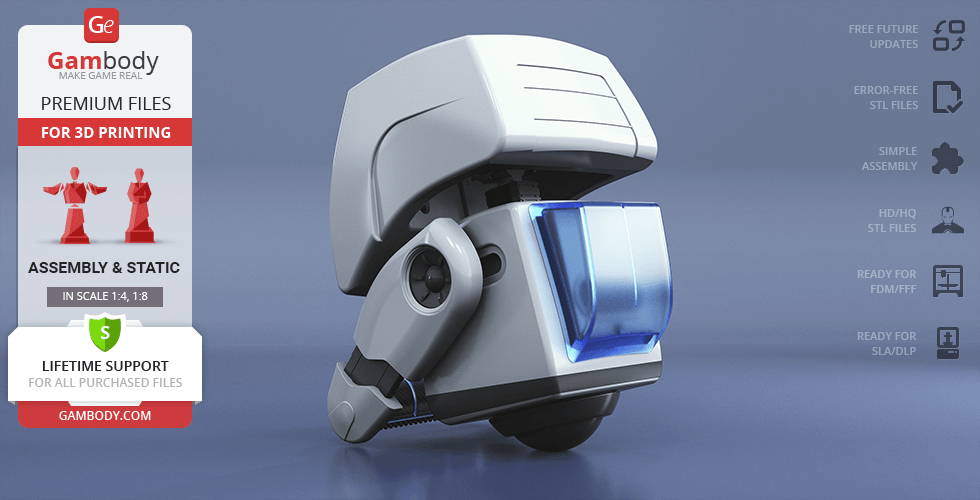
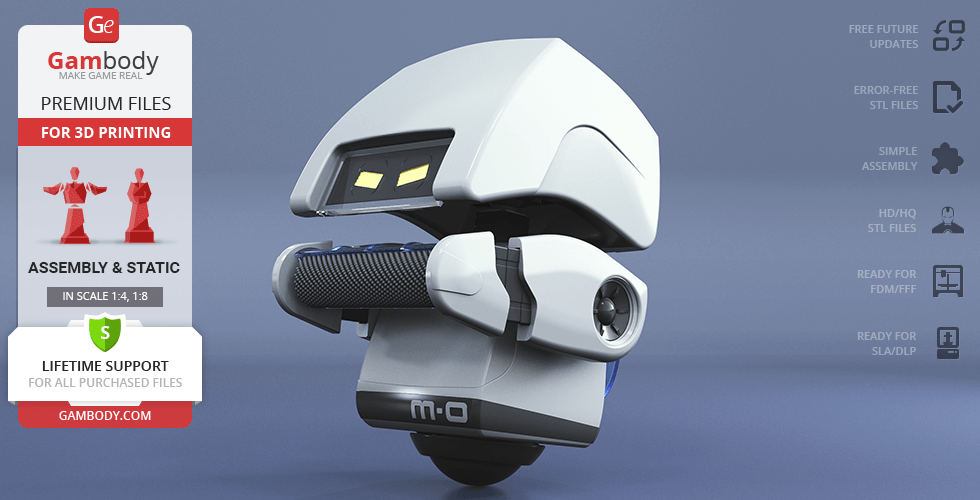
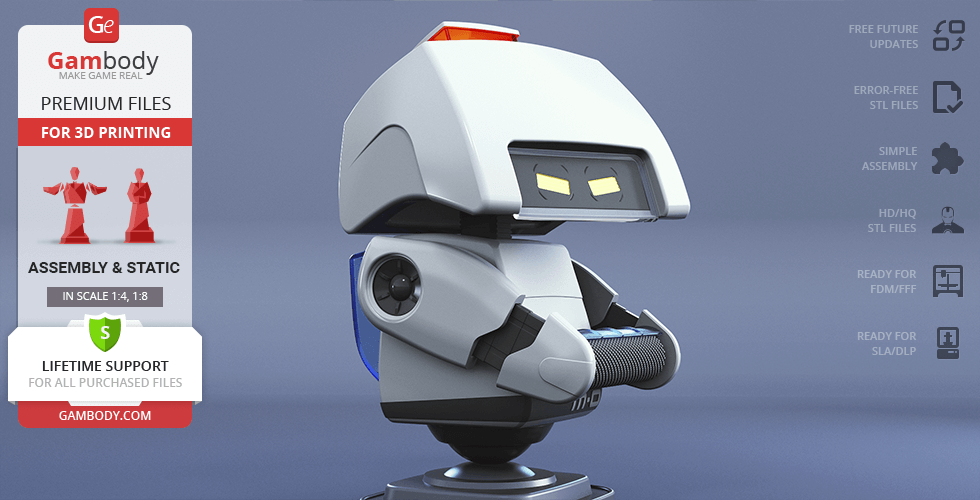
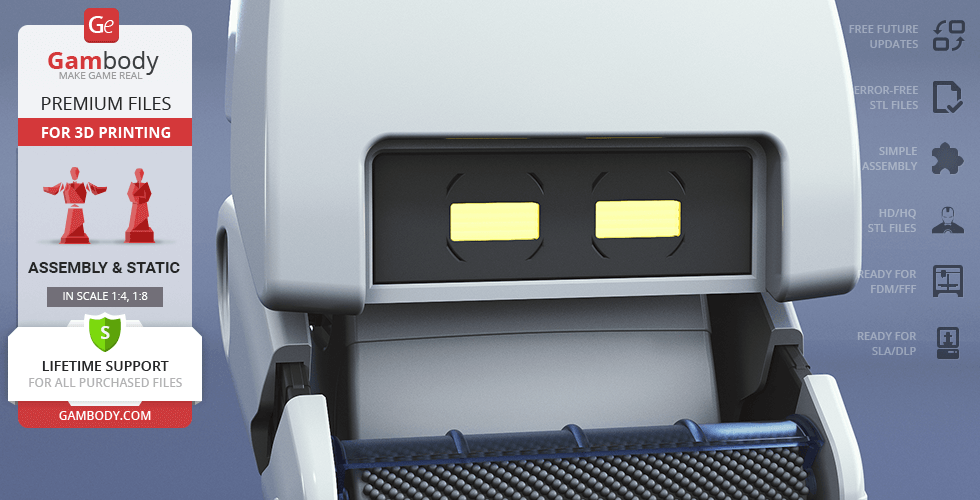
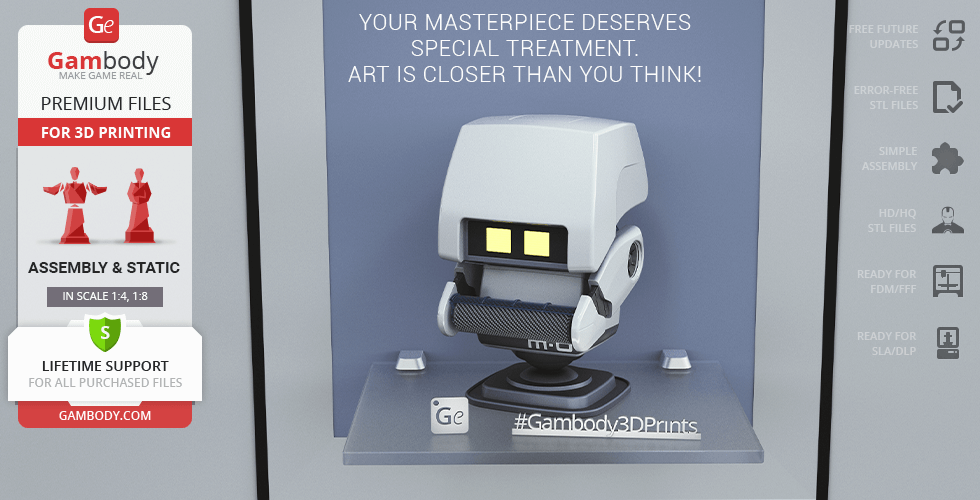
M-O (Microbe Obliterator) cleaning robot from the animated feature film WALL-E is focused on cleaning and maintaining order. This little janitor, equipped with cleaning tools, is a persistent neat freak. It is difficult to follow M-O while he is rolling from side to side sweeping and cleaning up everything in its way. Dirty and rusty WALL-E shocks M-O and the cleaner does its best to make the robotic trash compactor neat and shining. M-O saves EVE and WALL-E from being thrown out into space and becomes a friend to this couple of robots.
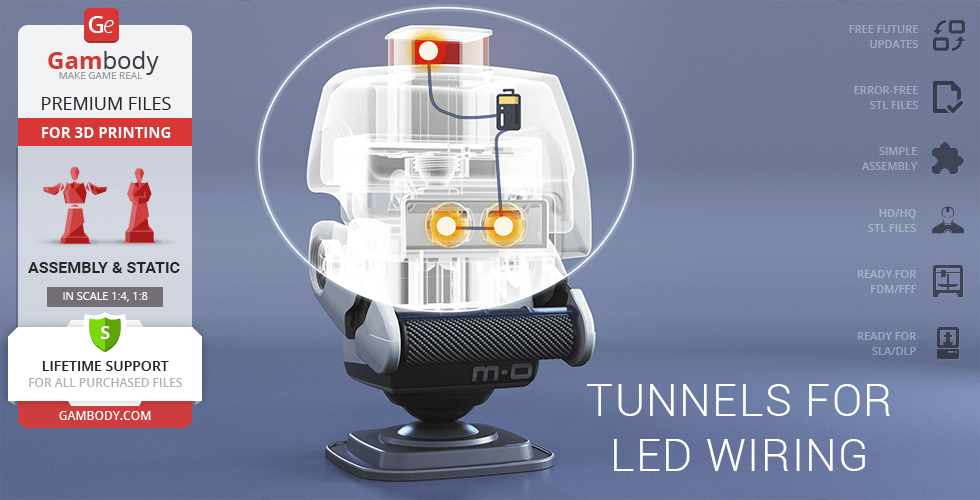
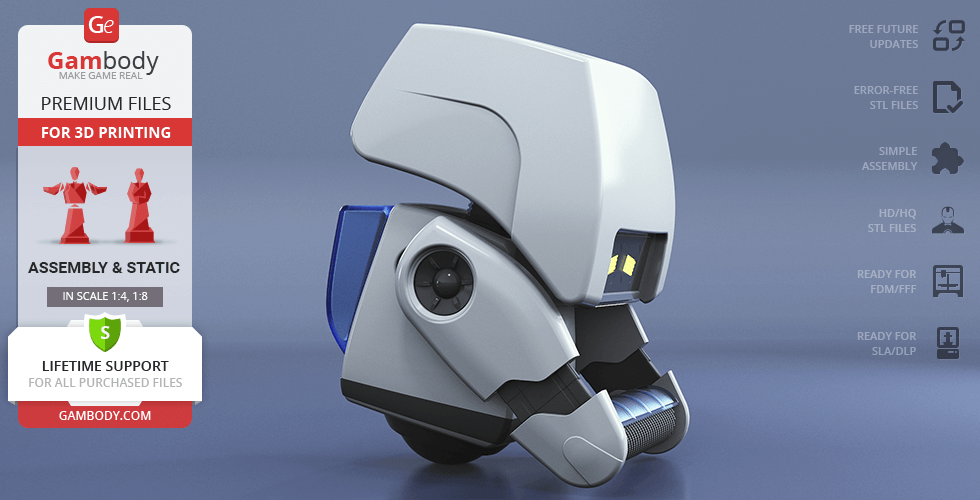
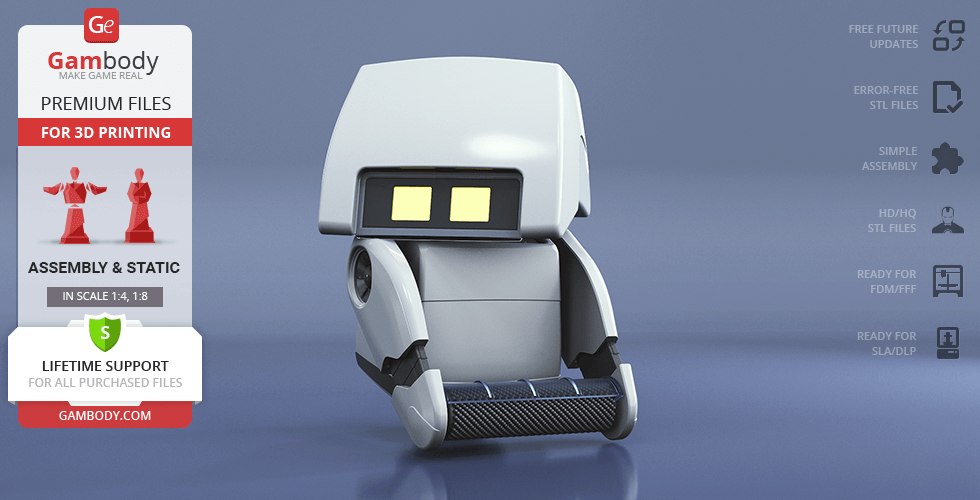
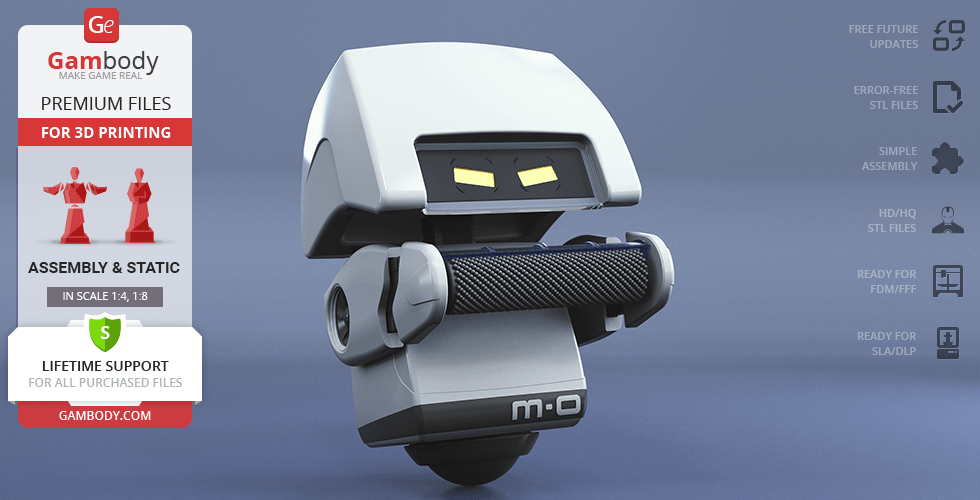
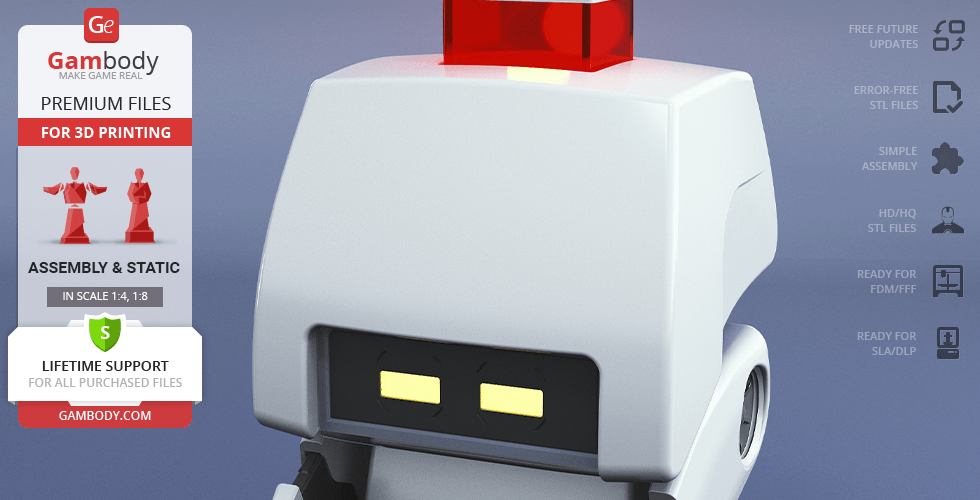
The enthusiasm and diligence of M-O adore everyone who sees this beloved character. Inspired by one of the two tritagonists of the WALL-E science fiction romance film, our contributing 3D artist created this amazing figurine for 3D printing. The model has a range of articulated elements: the head of M-O has several display options, the arms of the robot stretch, and its shoulders move forward and backward. The cleaner robot features an alarm light that can be printed with a transparent filament, there is an option to introduce the lighting inside the model. M-O model will bring a lot of joy to all 3D printing fans, especially to those who love the story of a solitary robot and his new friends!
ADAPTATION FOR 3D PRINTING
The M-O WALL-E model for 3D printing is an active assembly model and its moderation and adaptation for different types of 3D printers took the Gambody team 97 hours in total.
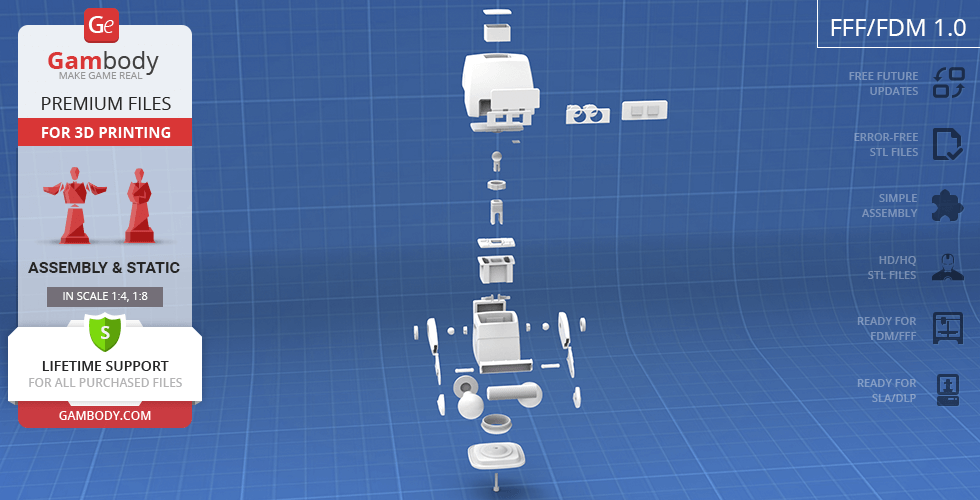
For you to receive the cleanest 3D printing result possible, minimize the amount of filament needed for generated support, and make use of the active elements designed by Gambody Engineers, the robot was divided into convenient assembly parts.
All assembly parts in the FFF/FDM 1.0 version are provided in STL files in recommended positions that were worked out in order to ensure the smoothness of the details’ surfaces after printing and that the 3D printing beginners won’t face difficulties when placing the parts on a build plate. When downloading any model’s file you will also receive “Assembly Manual” for FFF/FDM 1.0 and DLP/SLA 1.0 versions in PDF and video formats. We highly recommend that you get acquainted with the “Assembly Video” and “Assembly Manual” before getting down to the M-O WALL-E 3D printing model.
The model is saved in STL files, a format supported by most 3D printers. All STL files for 3D printing have been checked in Netfabb and no errors were shown.
The model’s scale was calculated from the height of the M-O robot. The 3D printing model’s chosen scales are 1:4 for the FFF/FDM version and 1:8 for the DLP/SLA version.
VERSIONS’ SPECIFICATIONS
FFF/FDM 1.0 version features:
- Contains 40 parts;
- A printed model is 166 mm tall, 92 mm wide, 104 mm deep;
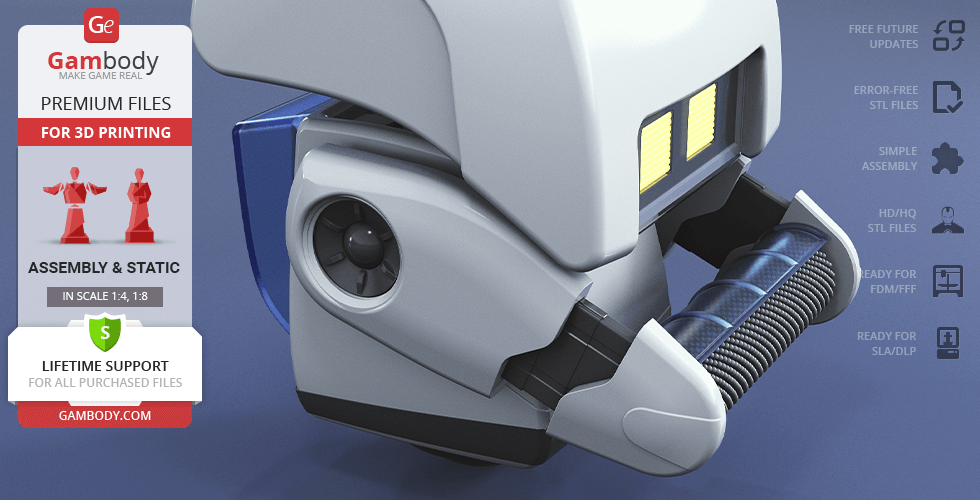
- The arms of M-O can stretch;
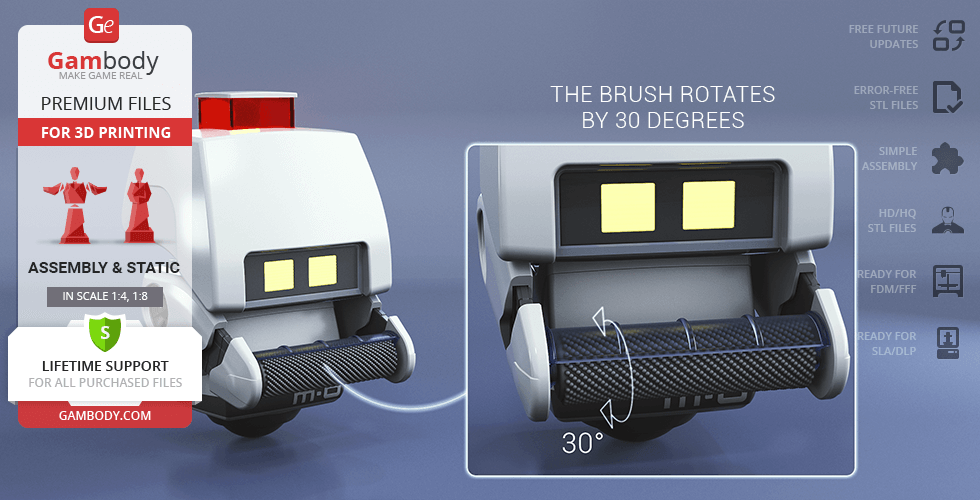
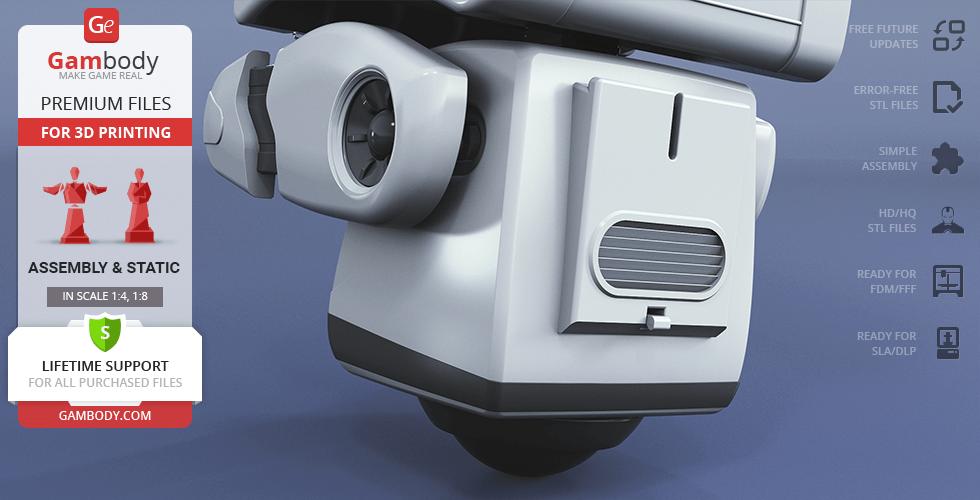
- The brush rotates by 30 degrees;
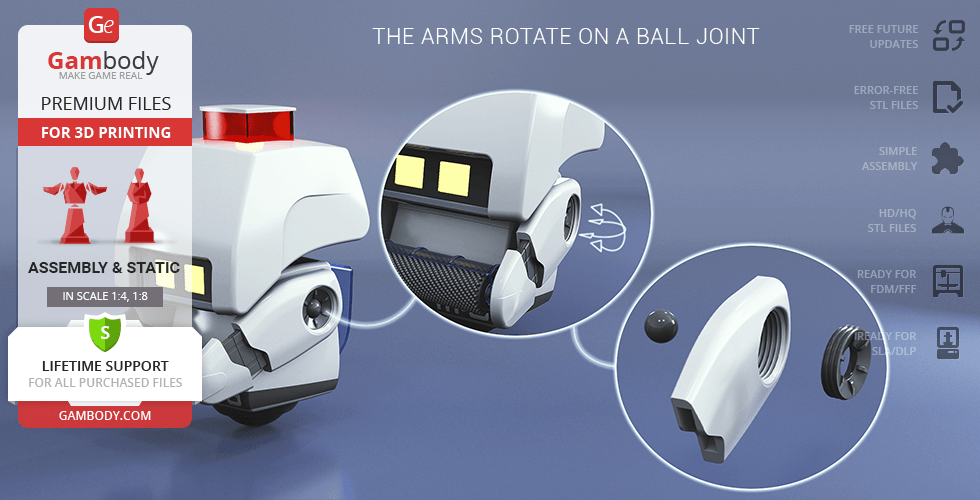
- The arms rotate on a ball joint;
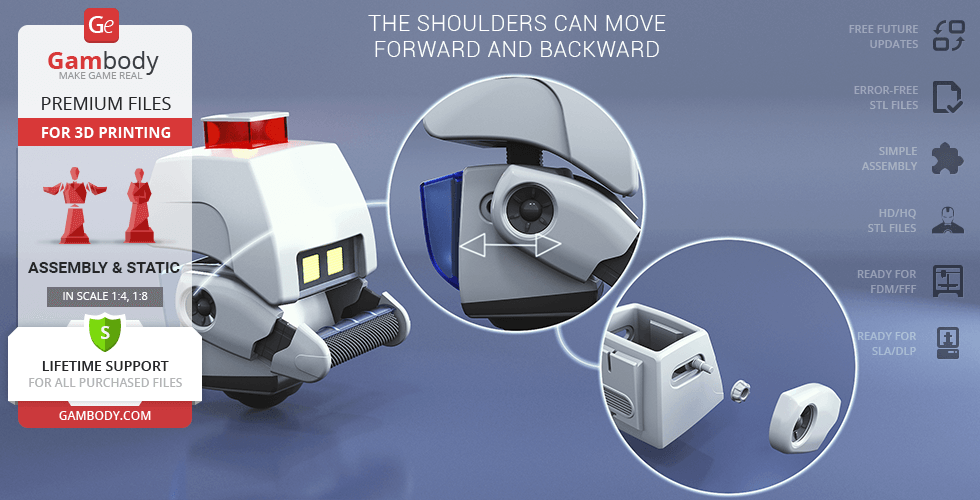
- The shoulders can move forward and backward;
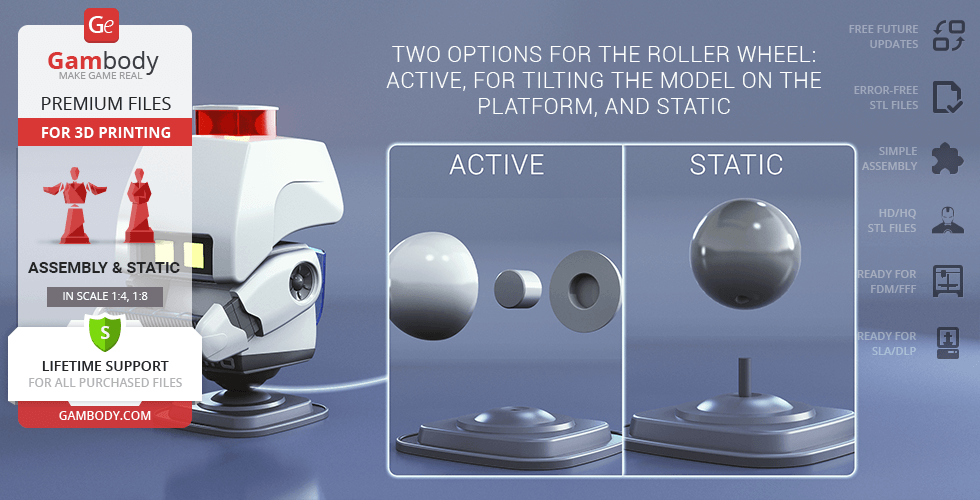
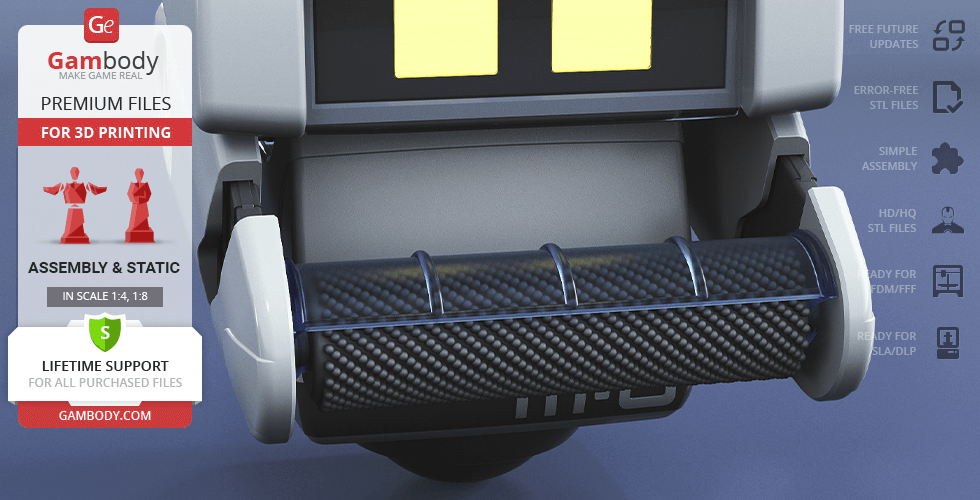
- Two options for the roller wheel: active, for tilting the model on the platform, and static;
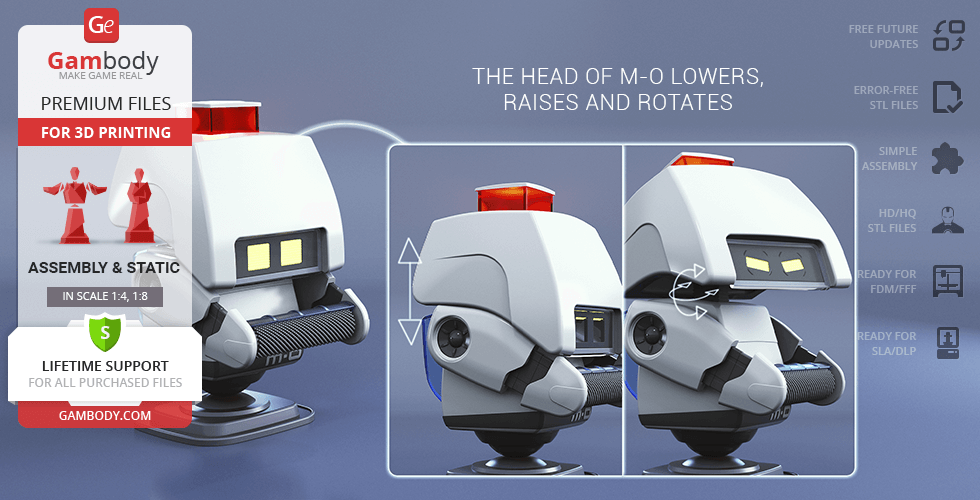
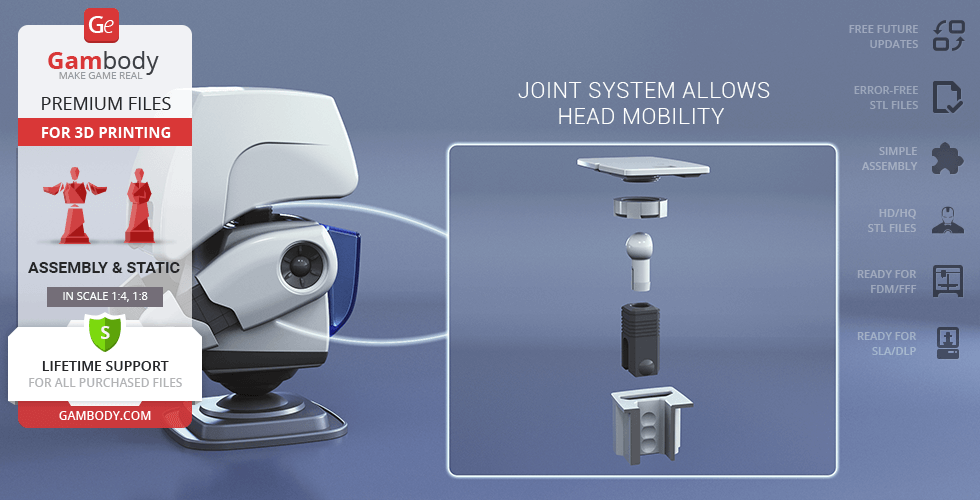
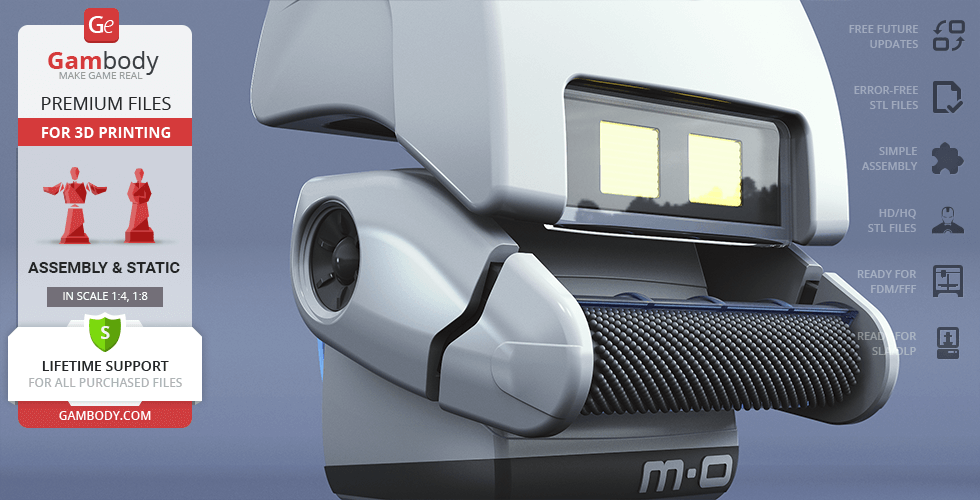
- The head of M-O lowers, raises and rotates;
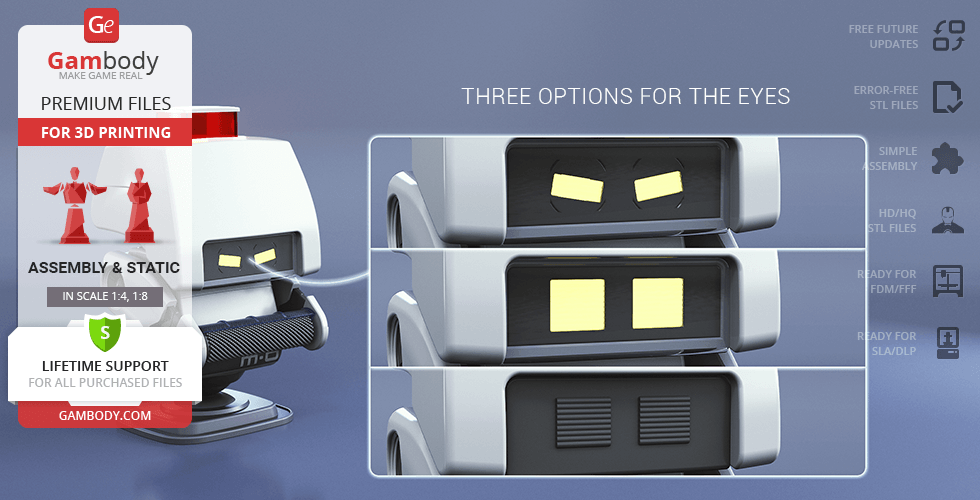
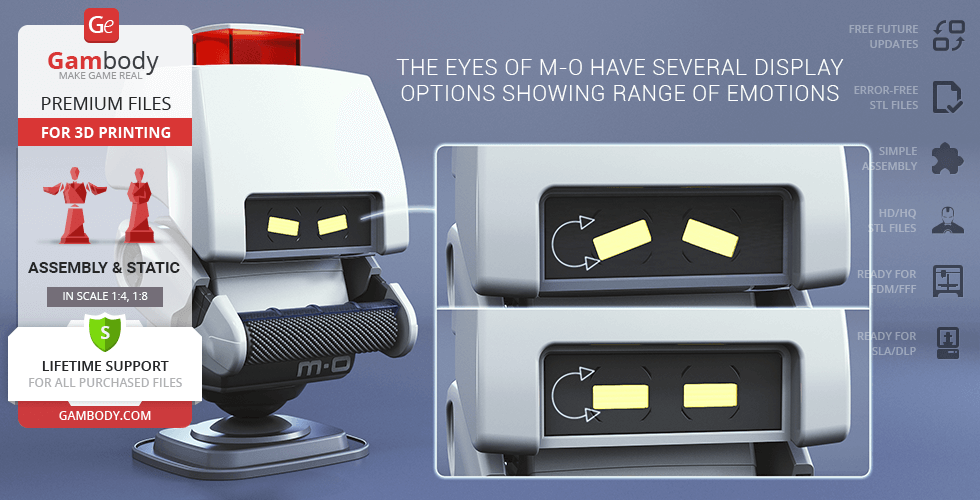
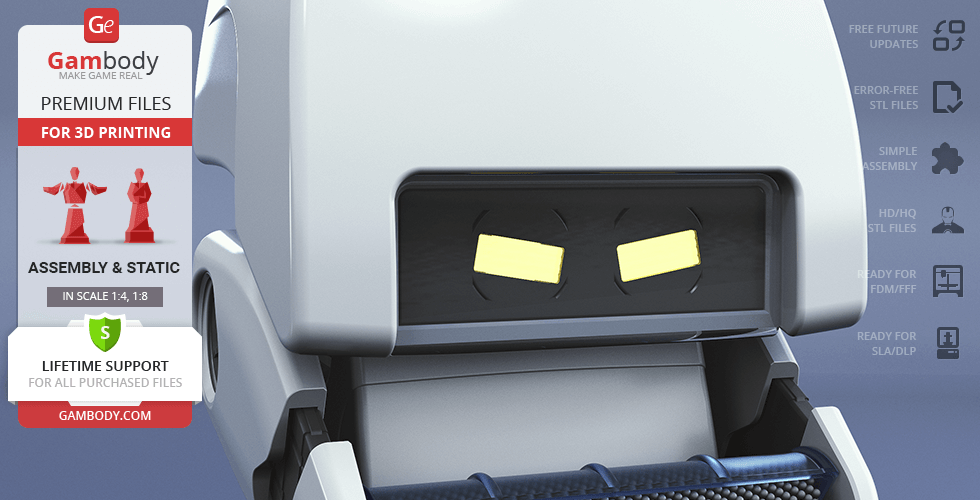
- Three options for the eyes;
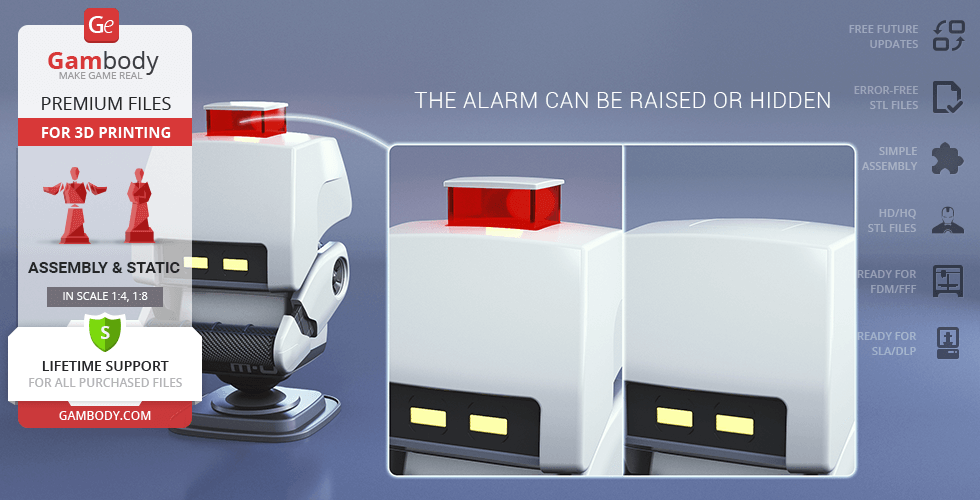
- The alarm can be raised or hidden;
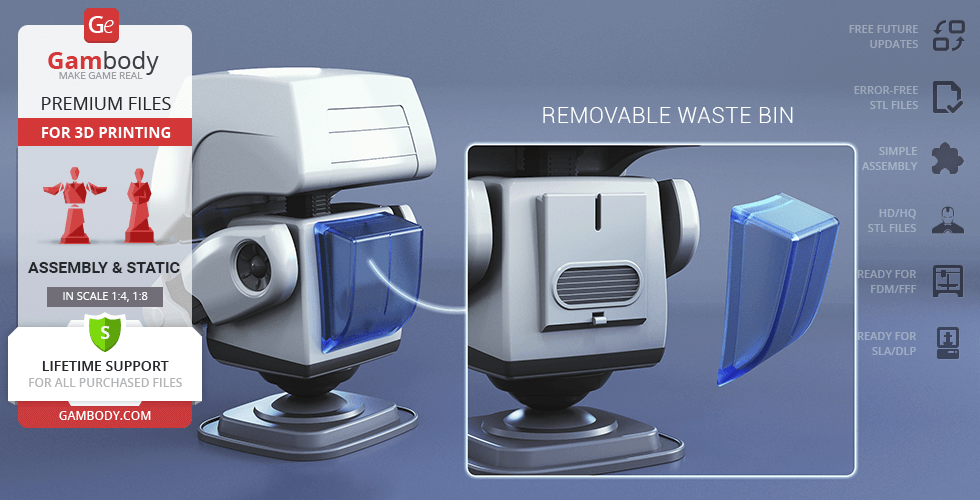
- Removable waste bin;
- Head mobility mechanism;
- The eyes of M-O have several display options showing range of emotions;
- Possibility to introduce lighting inside the model;
- All parts are divided in such a way that you will print them with the smallest number of support structures.
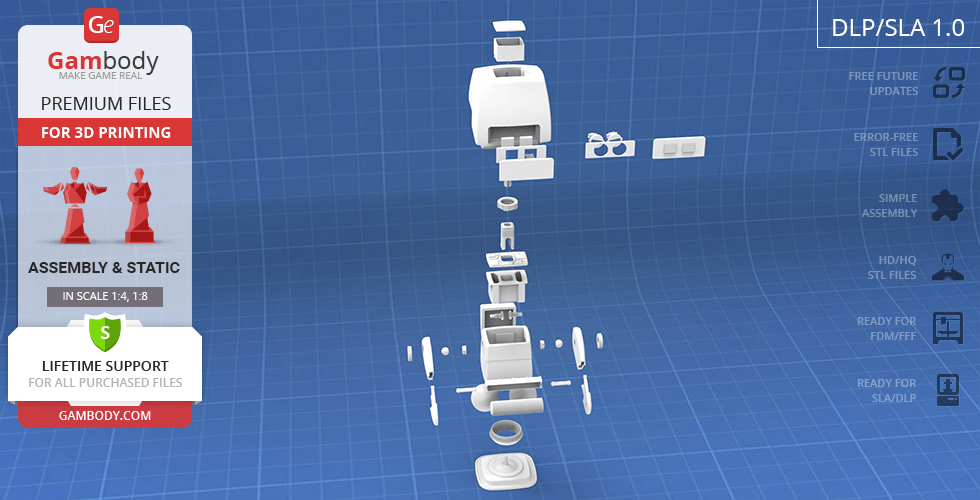
DLP/SLA 1.0 version features:
- Contains 35 parts;
- A printed model is 83 mm tall, 46 mm wide, 52 mm deep;
- The arms of M-O can stretch;
- The brush rotates by 30 degrees;
- The arms rotate on a ball joint;
- The shoulders can move forward and backward;
- Two options for the roller wheel: active, for tilting the model on the platform, and static;
- The head of M-O lowers, raises and rotates;
- Three options for the eyes;
- The alarm can be raised or hidden;
- Removable waste bin;
- Head mobility mechanism;
- The eyes of M-O have several display options showing range of emotions;
- Possibility to introduce lighting inside the model;
- All parts are divided in such a way to fit the build plates and to ensure that support structures are generated where needed.
You can get the M-O WALL-E model for 3D Printing immediately after the purchase! Just click the green Buy button in the top-right corner of the model’s page. You can pay with PayPal or your credit card.
Watch the tutorial on how to assemble a M-O WALL-E 3D Printing Model onGambody YouTube channel.
Also, you may like theWALL-E andEVE 3D Printing Models, and other Robot models for 3D printing.
________
FAQ:
Average customer rating (2 reviews)
4.5
Ratings breakdown
Click a star rating to filter reviews
Overall experience
Level of detail in the model
4.5
Model cut quality and assembly guide
4.5
Clarity and accuracy of the model page
4.5
Level of detail in the model
4
Model cut quality and assembly guide
4
Clarity and accuracy of the model page
4
Level of detail in the model
5
Model cut quality and assembly guide
5
Clarity and accuracy of the model page
5
To avoid printing issues and achieve the best quality, we highly recommend applying the following settings:
Generic
Below you can find printing recommendations for Cura, Simplify3D, Slic3r and PrusaSlicer software.
Disclaimer: The following printing settings are a recommendation, not an obligation. The parameters can vary depending on the peculiarities of your 3D printer, the material you use, and especially the particular assembly part you are working with. Each part that any model comprises often needs preliminary review, and you are free to tweak the settings the way you find suitable.
Note:
- You can scale up the model (downscaling for FFF/FDM 3D printers is not recommended!);
- All connectors should be printed at 100% Infill.
Cura printing recommendations:
These are averaged settings which were tested in the Cura 5.2.1 slicer. Test models were printed on Anycubic Vyper, Creality Ender 3 Pro with PLA filament.
To avoid printing problems, we recommend the following settings: download
Simplify3D printing recommendations:
These are averaged settings which were tested in the Simplify3D 5.0.0 slicer. Test models were printed on Anycubic Vyper, FLSUN v400, Ender3 S1 with PLA filament.
To avoid printing problems, we recommend the following settings: download
Slic3r printing recommendations:
These basic 3D printing settings recommendations for beginners were tested in Slic3r 1.3.0 software. Test models were printed on Ultimaker 2, Creality Ender 3, Creality Cr-10S pro v2, Anycubic I3 Mega, Anycubic I3 MegaS, Anycubic Vyper with PLA and PetG filaments.
To avoid printing problems, we recommend the following settings: download
PrusaSlicer printing recommendations:
These basic 3D printing settings recommendations for beginners were tested in PrusaSlicer 2.3.1. Test models were printed on Ultimaker 2, Creality Ender 3, Creality Cr-10S pro v2, Anycubic I3 Mega, Anycubic I3 MegaS, Anycubic Vyper with PLA and PETG filaments.
To avoid printing problems, we recommend the following settings: download